Pussycat669
Liturgist
Welcome to this very special (meaning first and probably last) Let's Play Thread about Temple of Elemental Evil : A Classic Greyhawk Adventure.
Index:
Part 0 - Intro & Basics (read below)
Part 1 - Visiting Hommlet: A snake pit survival guide
Chapter 1
Chapter 2
Chapter 3
Part 2 - On Emridy Meadows: Walking with the undead
Part 3 - In the moathouse: About the duality of doing things 'the smart way'
Part 4 - The guard tower: Boss Battle Time
Part 5 - Nulb: Living amongst the bold and the beautiful
Part 6 - The Temple: Getting to the bottom of things (Upper levels)
Chapter 1
Chapter 2
Chapter 3
Part 7 - The inner sanctum: Meeting the boss
Part 8 - Dungeons & Kindergartens: When the big kids collide
Part 9 - The nodes: Going elemental
Air
Water
Earth
Fire
Part 10 - Revisiting Hommlet: The great homecoming
Part 11 - Down in the Basement: How you give your place that 'final touch'
Part 12 - Wrapping things up
Potentional points of interest:
Spazmo's review on RPG Codex
Other stuff on RPG Codex
Co8 community forum for all your modding needs
RPG Vault's interview with Tim Cain (Part 1, Part 2)
Desslock's interview with Tim Cain
Brief Introducing
If you've never tried this masterpiece either because of innocent ignorance or because the long winded title sounded terrifying to you: Temple of Elemental Evil (short ToEE) is one, if not the, best D&D (Edition 3.5) combat simulator to this very day (and counting).
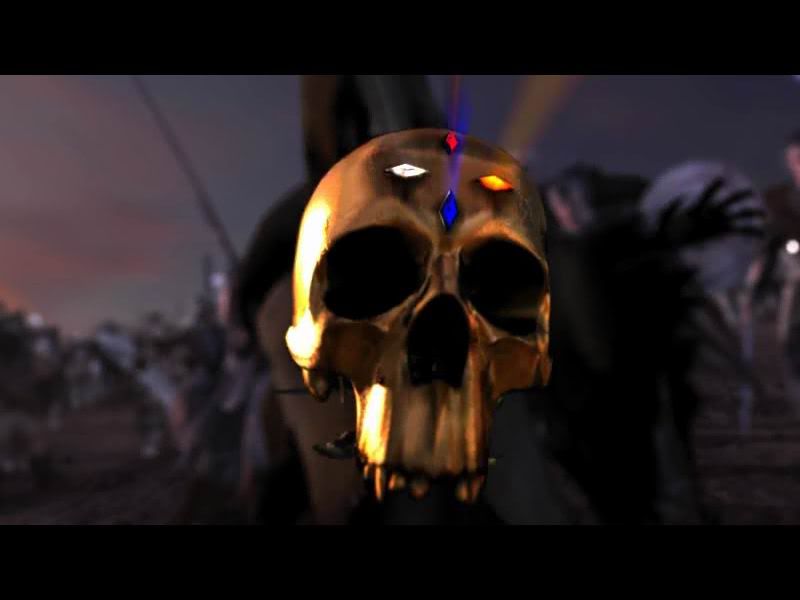
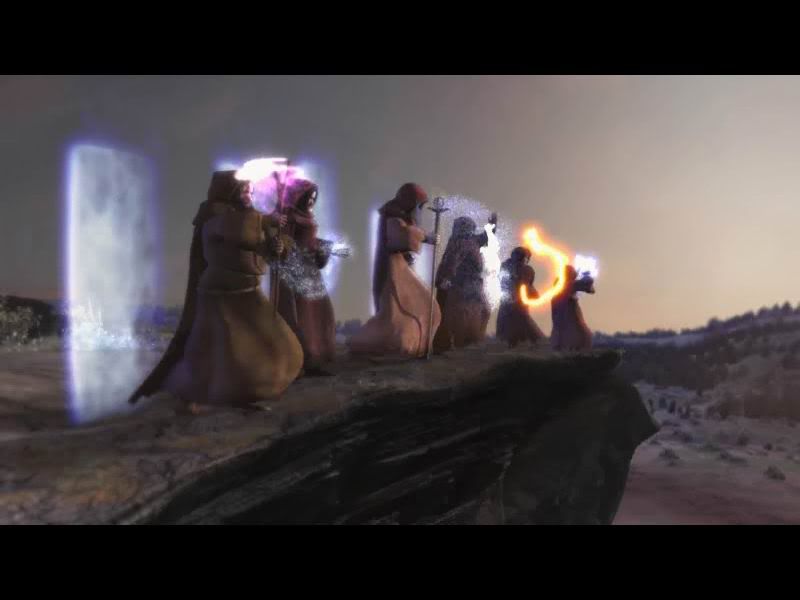
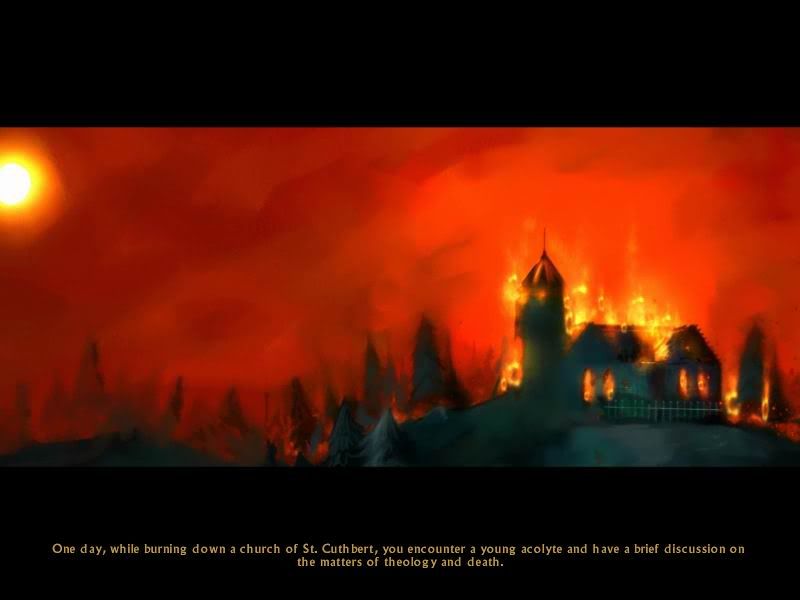
Why the 'classic' you ask? It is because this game spawns from an old P&P module created in 1985 by Gary Gygax and Frank Mentzer. Typical for RPG material of this era the campaign includes a lot of story exposition plus a very deep philosophical and thought provoking narrative way too complex for me to describe in full sentences. Luckily, the intro of the game provides enough strong visual messages so this tale of epic proportions can be summed up briefly.
Skull!
Wizards!
Evil Slut (+ an army of darkness)!
Good guy in shiny armor with big sword (mandatory) and an army of the righteous (expendable)!
Disclaimer: This sword actually plays an important role for lawful evil parties as their very first goal would be to find and destroy it.
Good Guy pwns Evil Slut. Final Fantasy Style!
Good Guy about to pwn some more (with his big sword)...fails!
Wizards seal the temple (Evil Slut inside)!
And that's pretty much everything you got to know about the backstory (if even that). Like its P&P predecessor ToEE has the wonderful luxury that you can mostly ignore the plot and hack & slash all the way through. So let's make our start by creating a suitable party of butc... I mean adventurers.
Before we can actually do that however we will have to choose one of many so called 'party alignments'. Your choice will determine the opening vignette, which alignment your potential party members must be (a paladin will never join any evil party for example), how the party will interact with NPCs and maybe even offer some special quests (like the quest that involves the sword mentioned above).
While I was pondering about which alignment to take, I realized that I've never actually beaten the game with an evil party. It's neutral evil then.
The actual character creation remains faithful to the D&D rule system and can be broken down into two steps (three if you pick a magic user like wizards and clerics).
1. Roll up your stats (they may range from around 6 = poor to 18 = uebermensch. You can re-roll them as often as you like (except if you play in 'Ironman' -> no saves mode where re-rolls are not allowed) which will give you bonus modifiers for several skills and saving throws, choose your race which may also affect your stats and various other things and finally choose your profession.
2. Choose so called Feats which will give your character additional bonuses and can sometimes expand his repertoire of combat maneuvers. To round up the whole thing, you'll spread skill points (number depends on your character intelligence) on the various skills available. It should be considered that improving skills outside of the character's current profession will cost him more points though. Every character can learn to pick a lock but a fighter will have to spend more points to be as efficient as professional thief and so forth.
3. (Optional) Choose your spells.
I'll graciously skip the parts where you decide hair color and the like.
Edit: One thing I forgot to mention here is the alternative point buy system. Instead of rolling up a character, you can also click on the 'advanced' tab in the lower right corner on the initial character creation screen. You will then get 25 points that you can freely distribute amongst the different attributes. Rule thereby is: the higher the stat the higher the amount of points you have to spent to raise it.
For this playthrough, I will make the daring attempt to beat the game with first roll characters. No re-rolls. The game will actually show how many re-rolls were made for a character on his character sheet. See the upper right corner in the below examples. Kinda like a mark of shame. You can avoid this by quitting the character creation screen and retry. But this is timid and boring so I never did it and won't start here.
Naturally, my first roll is an utter failure. I decide on the spot that this will become my party leader.
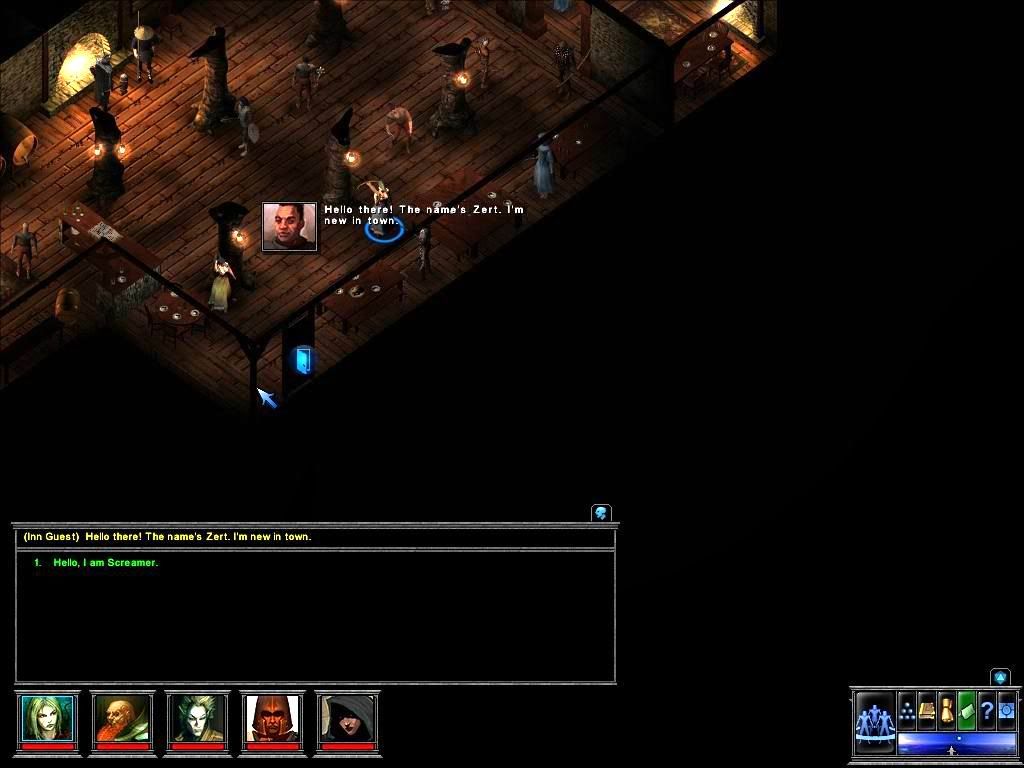
Say hello to Screamer
Truly one of those 'probably is going to die first in..like..every encounter / turn?’ kind of characters. The only positive thing to say is that she's the only person in my party with a charisma above 10. Then again this is D&D, the RPG brand for men, not some weird larping crap.
Disclaimer: Funny enough I actually forget to invest any skill points into 'perform' meaning that she can't even use her more or more than less useful songs! Oh well, until the next level up, I guess.
Next in line is Screamer's (debatably) faithful bodyguard: Johnny Legcutter. A dwarf who knows where it hurts!
Now that's more like it baby! Too bad that he's also as dumb as one can be meaning that he'll only get 4 skill points per level. (Edit: Only one actually) That's just enough to fill all the skills he's specialized in but it is something.
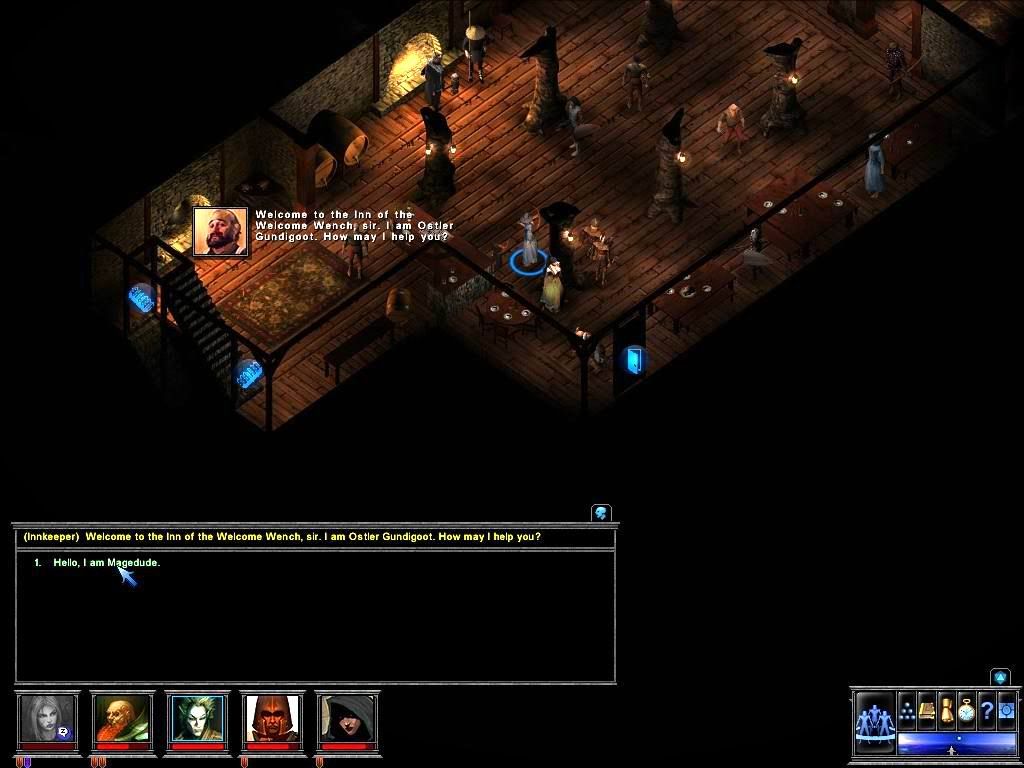
Where is the magic you wonder? It is right here! Say hello to Magedude! (and yes, giving the smartest guy in the party the stupidest name of 'em all struck me as kind of funny)
Again a pretty good roll (except the 9 maybe).
I'm just wondering if my luck will last when Punkaid hits the stage.
This cleric (who earned his name simply due to his blue Mohawk) is pretty much average on every level imaginable. That's too bad since I wanted him to become my second melee focused character. We shall see how he'll do on the field.
Last but not least there comes the vital Rogue/Halfling combo. A party without a rogue is only half complete, especially because ToEE, like many other D&D games, comes with a lot of traps hidden inside. Rogues will ease your pain a great deal in these regards. I dub thee Tumblefingers.
Since we hit the party cap now, let's take a last look before pressing on. We got a least three decent characters one so-so character and one who completely sucks. That sounds about right. Let's get started!
About being 'Evil': The Basics
To make sure that we follow the proper procedures whenever we perform 'Evil' acts we must first grasp the concept of 'Evil' as it is understood within the game.
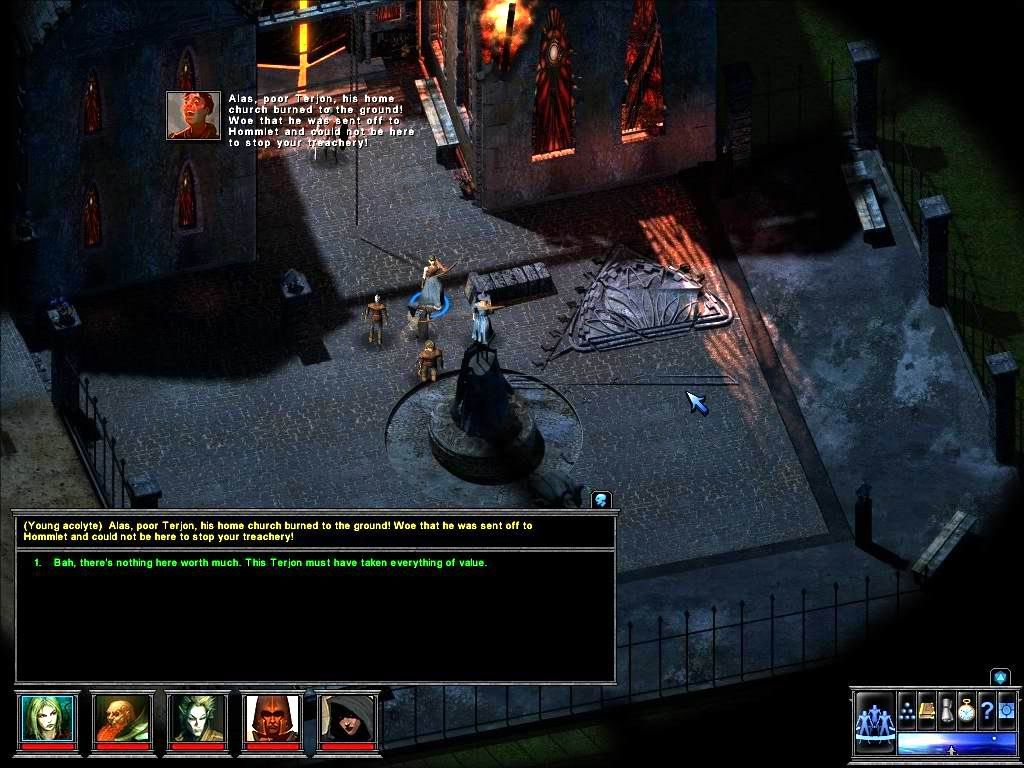
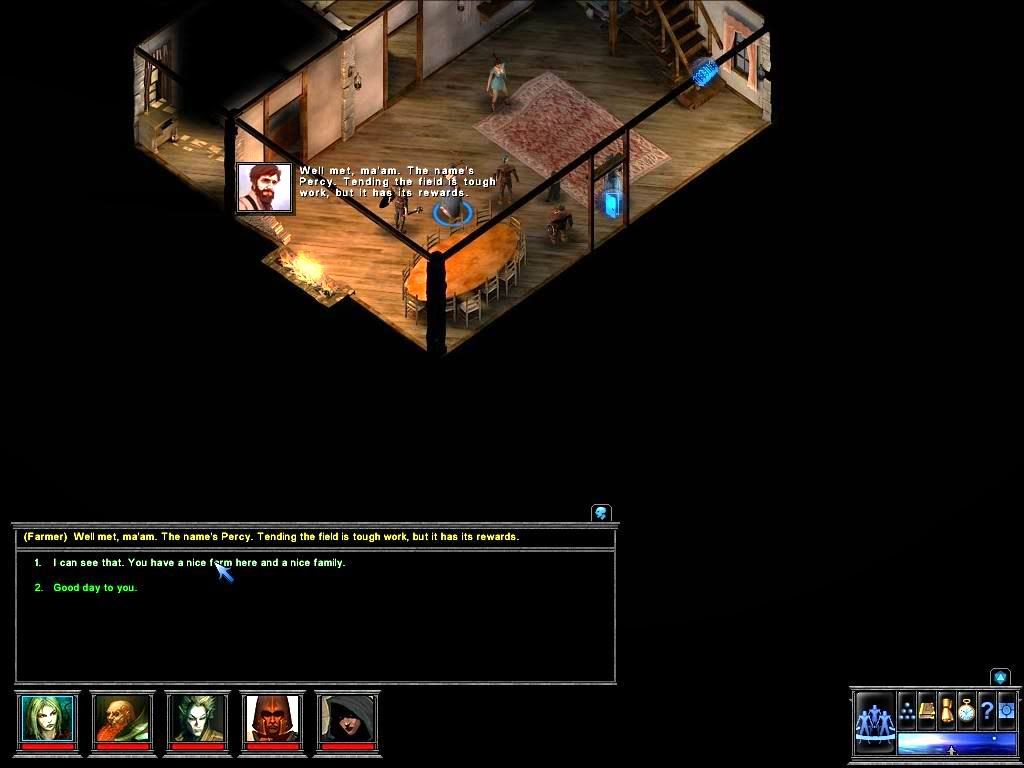
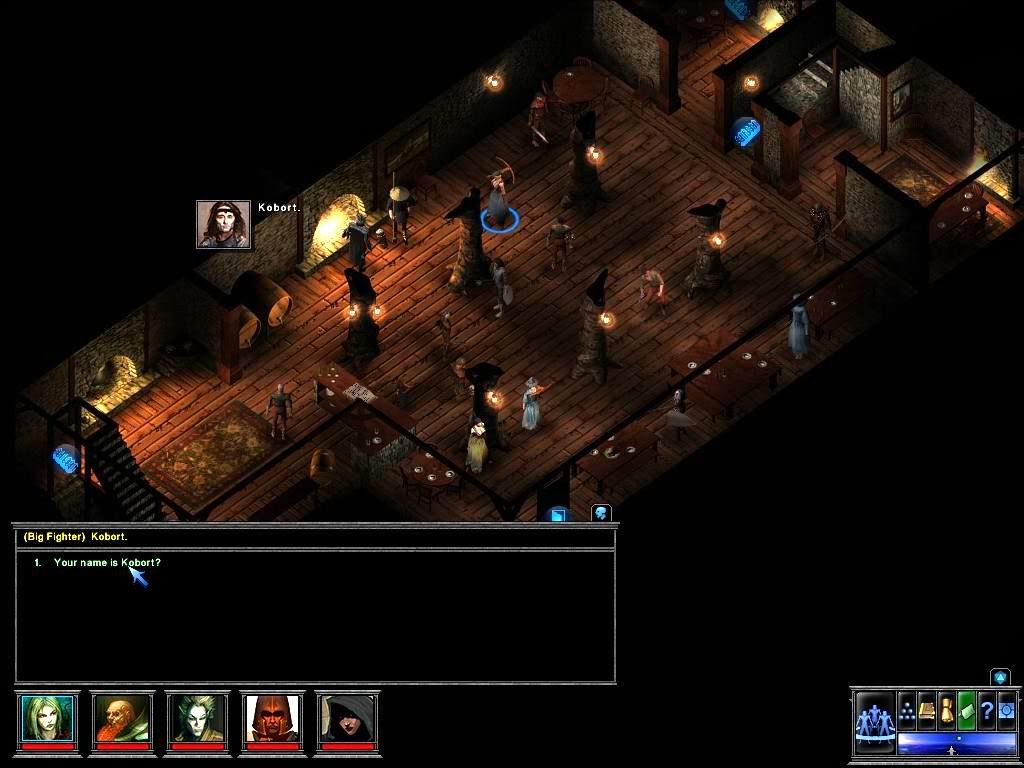
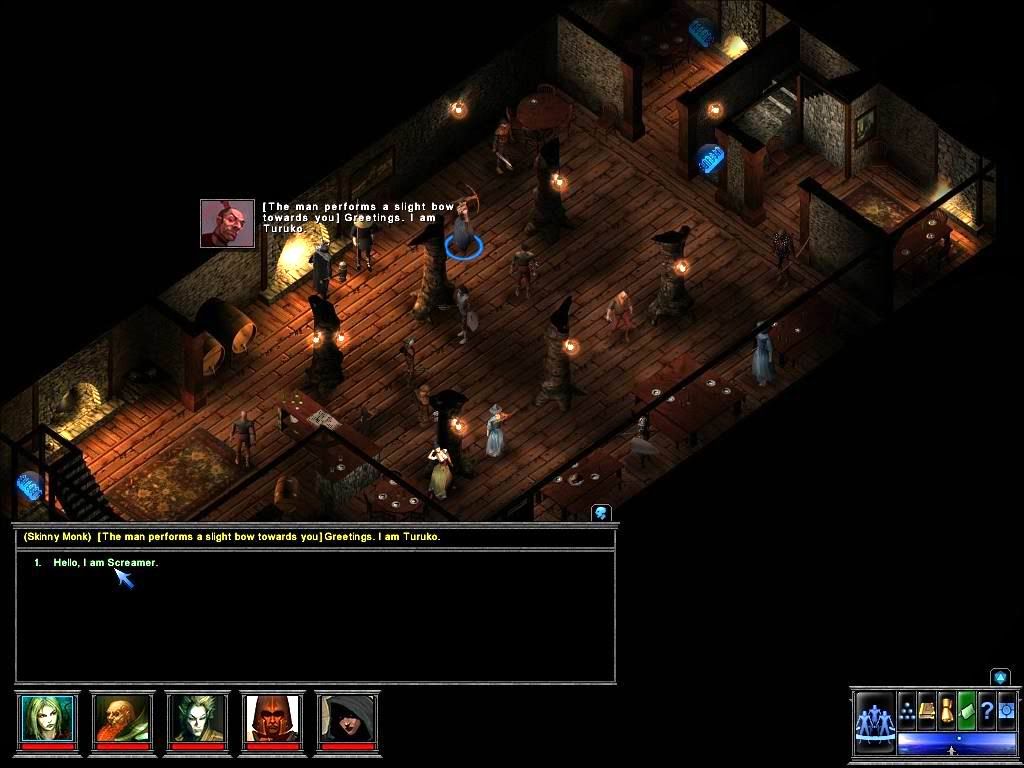
Alright, it's pretty much the dull kind of evil. You probably are going to guess what's going to happen. Screamer will laugh naughty and spit some taunts. The Acolyte gets angry and attacks. While this setup is not terribly exiting, at least I get the chance to explain the combat system in detail.
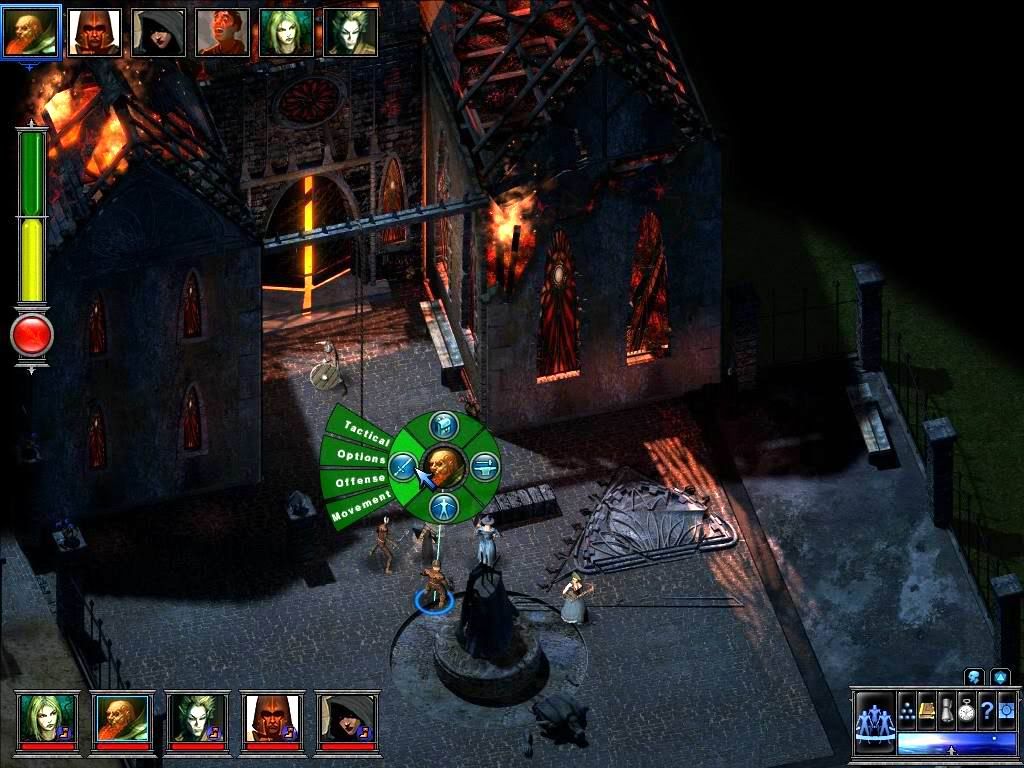
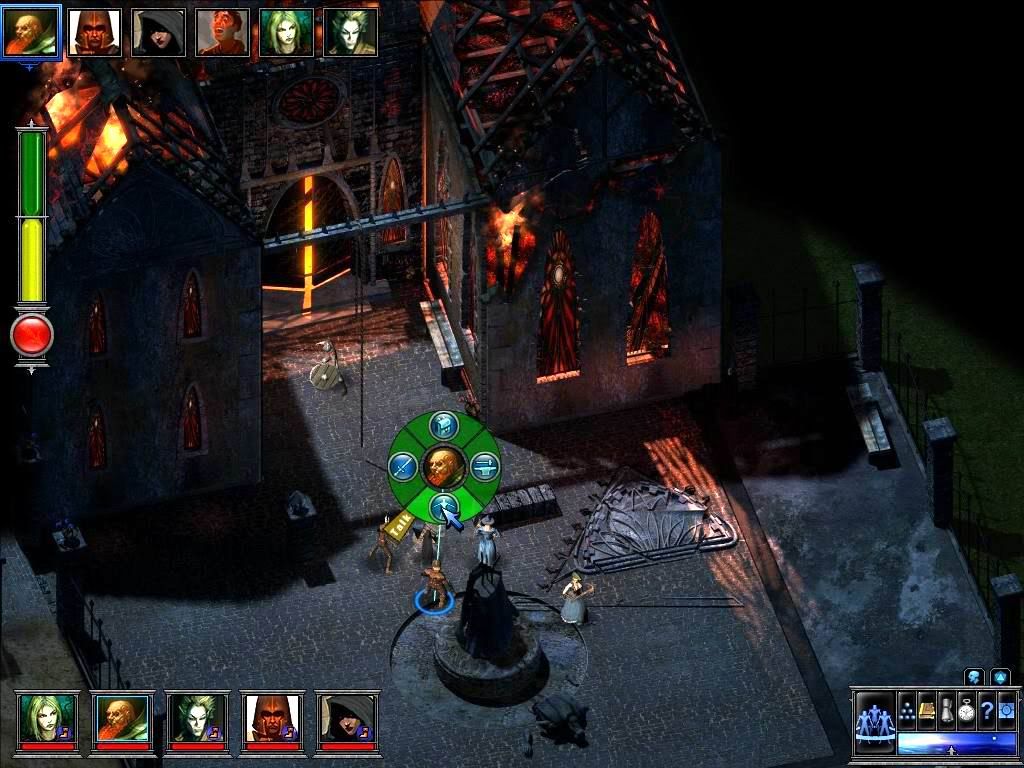
ToEE, despite modern trends, more tends to the P&P roots in the way combat is executed. Combat is organized in so called turns (with a roughly estimated time span of a couple of seconds). First, the game rolls for initiative. The idea is that the one with the highest dexterity is probably going to act first which often gives him the advantage to plan things ahead before the other combatants can prepare (better hit first than bleed first). This is especially important in the first round. If you look at the small character icons on the bottom of the above picture you may notice the little boot symbols. That means that the character is 'flat footed', meaning that, as long as he doesn't do anything within the first turn, he will not be able to rely on any AC (armor) bonuses granted to him (like the bonus for a high dexterity value) when being attacked. Especially for 1st level characters being or being not caught flat footed can make the difference between life and death.
Once the initiative is determined by the game, the pictures of the combatants are lined up in the upper left corner with the leftmost character being first to act when a new turn starts and from there it slowly works its way down the calculated hierarchy (the portrait of the currently active character is thereby enclosed by a blue frame). I get lucky and three of my characters roll a higher initiative than the poor Acolyte who, still flat footed like the rest, doesn't really stand a chance anymore. Notice that because it's Johnny's turn he lost the flat footed status. His AC bonuses will not be ignored anymore should he be attacked.
Shift your attention now to the hourglass below Johnny's portrait. This is the 'action time' for your active character so to speak and comparable with the better known 'action points' when it comes to functionality. Pretty much any action you take during combat will sap some sand from the hourglass. In case that all the sand is depleted the turn of the active character ends. You can alternatively end your character's turn either by using up all his attacks or by pressing that provocative big red button at the bottom of the hourglass. As long as you haven't depleted any of the yellow sand your character will be able to perform at least one melee attack on any enemy in range (firing a crossbow in comparison requires both a full yellow as well as a full green bar). So the rule of thumb says: move your character as long as you are in the green area, do something else when you’re not. To make things simpler when estimating if you got enough action time left to hit somebody while walking somewhere, the walking cursor will change in color depending on how much time it will cost the character to reach the pointed out position. So, if your cursor points on an area to walk and it turns yellow, that means that you'll spend up more time than the one you get from the green bar. Red means that it won't be possible to reach the spot with the current character during this turn. Green is safe.
By right clicking anywhere on the main screen you open a radial menu like the one seen close to the middle of the screen above. This plain menu may be called the heart and soul of the whole experience.
In Johnny's case the radial menu lacks a bunch of categories (like the spell segment) because of him being a warrior and all but we shall see as we dwell further that there is actually quiet a lot to of options even for a simple level 1 fighter.
Let's start off by examining the hottest candidate in this case: the combat category.
Tactical
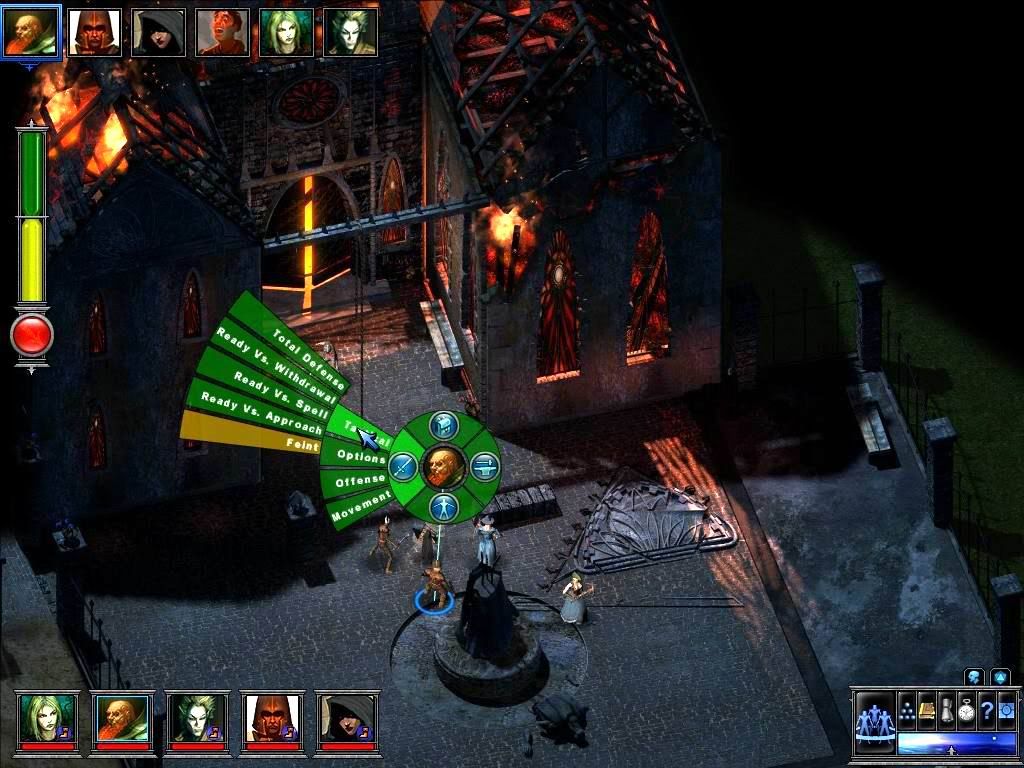
Tactical, at this stage, covers mostly defensive actions only.
Total defense will boost the character’s AC during the rest of the round. If he can still move after this action (indicated by the green color) this bonus will also count for attacks of opportunity. He is not able to make attacks of opportunity himself (or start any attacks at all for that matter) while in total defense. More on attacks of opportunity later.
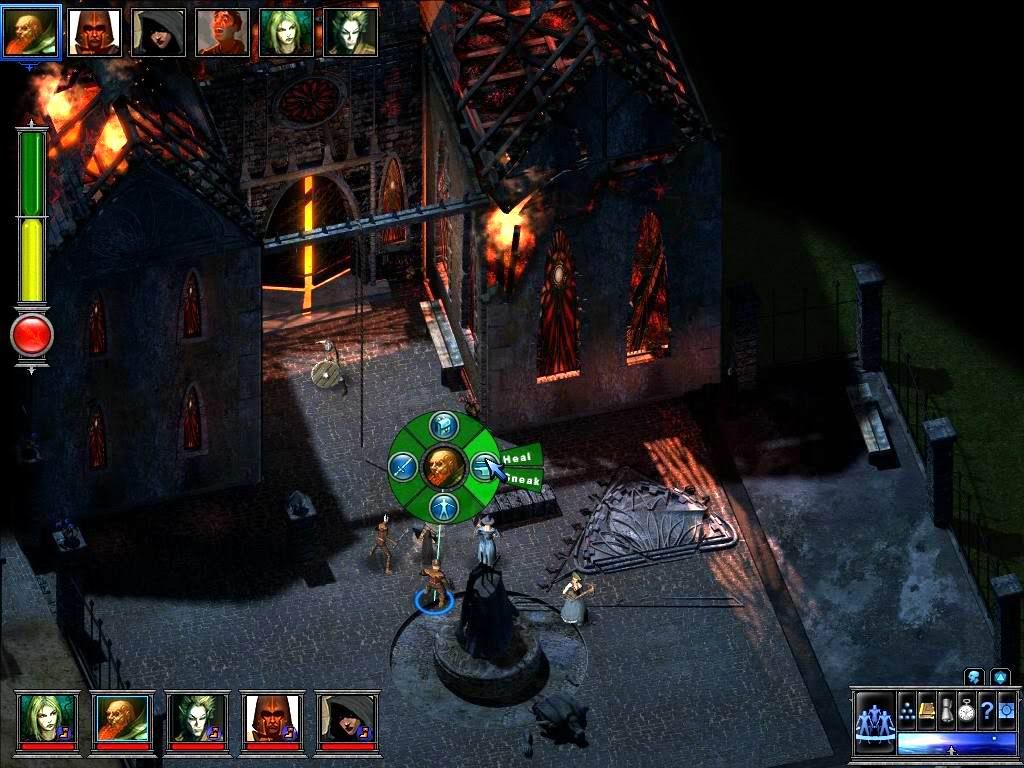
Ready vs. X will grant the character to attack an opponent in range if he performs X. I mostly had to use Ready vs. approach since this is going to happen most of the time (although Ready vs. Spell is the real life saver here from my point of view).
Feint is a fighter thing. If Johnny tries a feint and makes a successful bluff check he can ignore the AC bonus for high dexterity of his opponent. Occasionally useful but sucks up all the time the character got (indicated by the yellow color. Those are so called 'full round actions').
Options
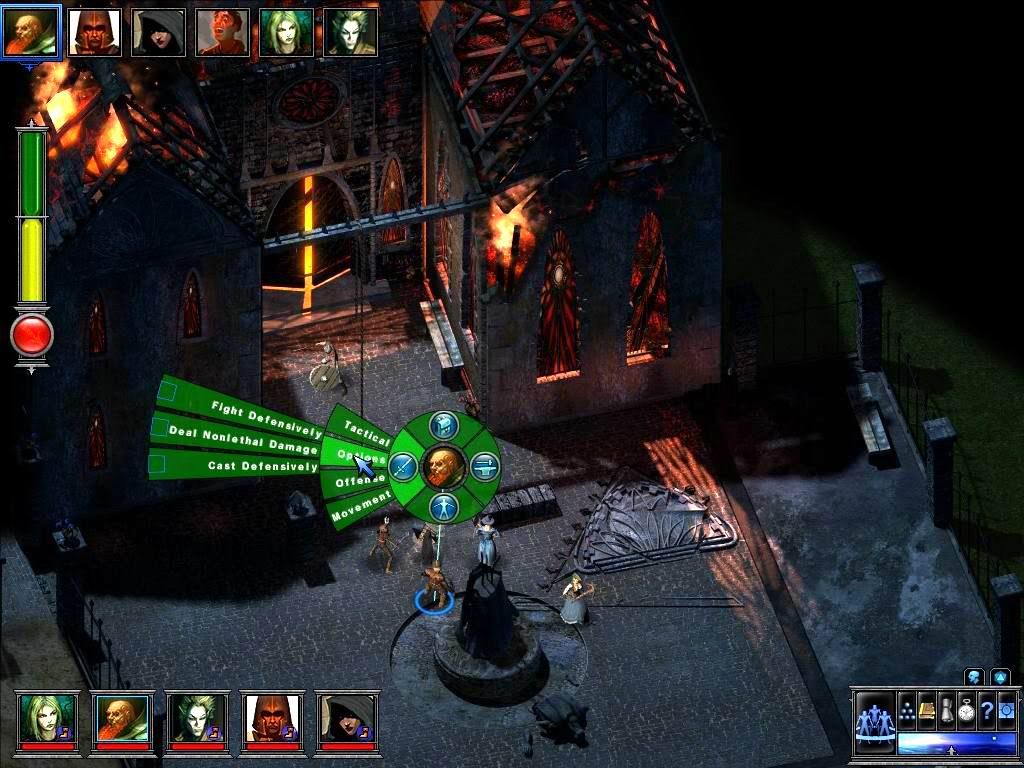
Fight defensively means that, while activated, every attack of the active character will have a strong penalty but also cause a slightly increased AC bonus. Mostly worthless in my experience except if you use your fighter as a door blocker while the casters prepare spells.
Deal nonlethal damage does what it says. It doesn't work with every weapon. I can't recall using this option except for once (there is no real reason anyways).
Cast defensively will make a spellcaster with this option activated less likely to provoke an attack of opportunity. Should he fail a concentration check though his spell will fizzle.
Offense

Trip attack is an unarmed attack that, when successful, will make the opponent fall and therefore vulnerable for the rest of the turn. Just enough to coup de grace his ass (Edit: Wrong. Coup de grace doesn’t work in this case). Sadly, this option seldom worked for me. We'll see how it will turn out this time around.
Single Attack & Full Attack are basically the same at this stage since no one in the party gets more than one attack per round otherwise you could either decide to use one attack or release a fury of blow on the hapless opponent. If the defender gets killed during a full attack all the remaining attacks the attackers would have left will be lost. (Edit:Actually, they're not the same. Single attacks grant you to move after you've struck your opponent so you can remain mobile even after an attack either by walking or using the 5-foot step move. Don't ask me how I was able to finish the game without knowing that)
Coup De Grace is the satisfying finishing move on defenseless opponents (pretty much anything with legs that is lying on the floor). This attack is almost always lethal. Too bad that the AI knows this too.
A Charge Attack is the only attack that requires the character to move a few steps (in a straight line) before taking effect. He will get a bonus on his attack roll but also a penalty on defenses for the rest of the turn. As long as you don’t try this on someone who stands in the middle of a large group this attack can be quiet useful as it will be demonstrate on the poor Acolyte later. (Edit: Won't trigger any attack of opportunity as pointed out by Nightjed)
Movement
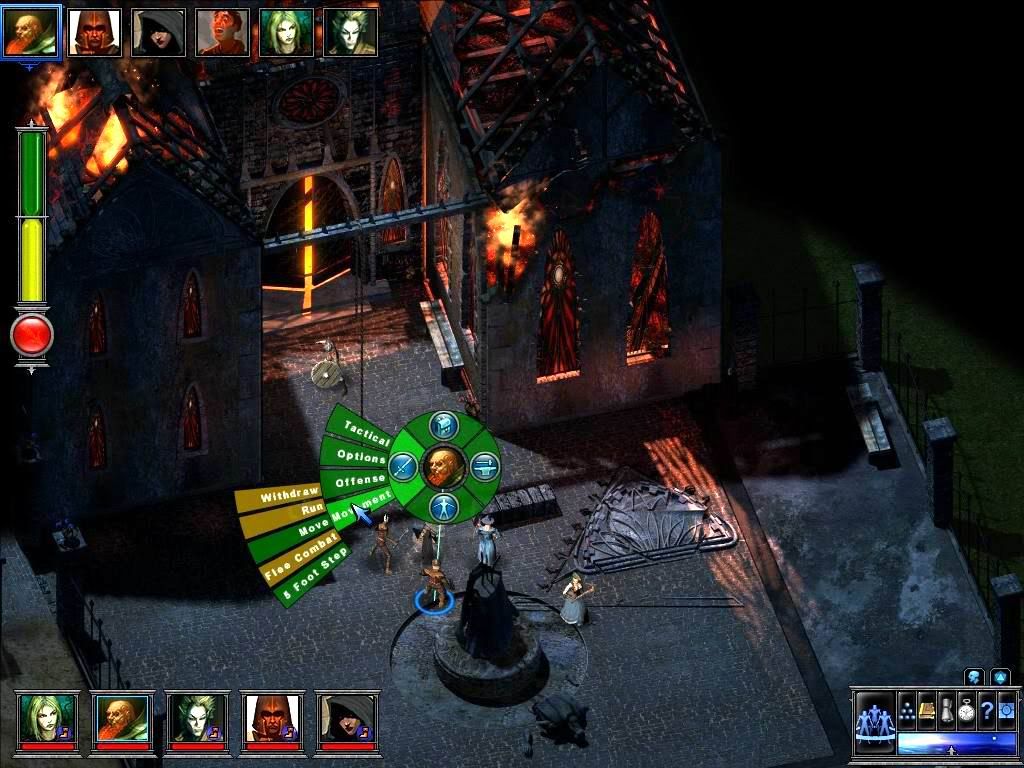
Withdraw is the best bet when you want to escape in style. It's not as fast as running but also less likely to provoke an attack of opportunity.
Run the less subtle approach. The characters runs in a straight line while moving 4 times faster than his normal speed. That's quiet a distance that can be covered at this rate but there is seldom enough room to move really far.
Move is self explanatory, I hope.
What 'Flee combat' stands for I got no clue. I didn't find anything in the help menu (the question mark located in the lower right corner which provides many detailed information about gameplay mechanics and the D&D rule system in general btw. Wholeheartedly recommended to everyone) and this post already took me too long to be bothered to look in the manual now (Edit: It actually could be called an emergency button. Once pressed the whole party will try to escape the current level. Doesn’t work in some of the more unique encounters).
I'm not sure what the purpose of the 5 Foot Step thing is. The only time that move is useful is if you find yourself in a large group of enemies. The premise is that you can walk a very short distance without provoking an attack of opportunity and still be able to attack afterwards.
Special Abilities
This is the bard's turf. All his songs are stored here. Magic users can call their familiars in this category. Then there are some special moves like turn undead or smite for clerics.
Skills
Most of a character's not combat focused skills are stored here. This section is mostly used by rogues.
Inventory
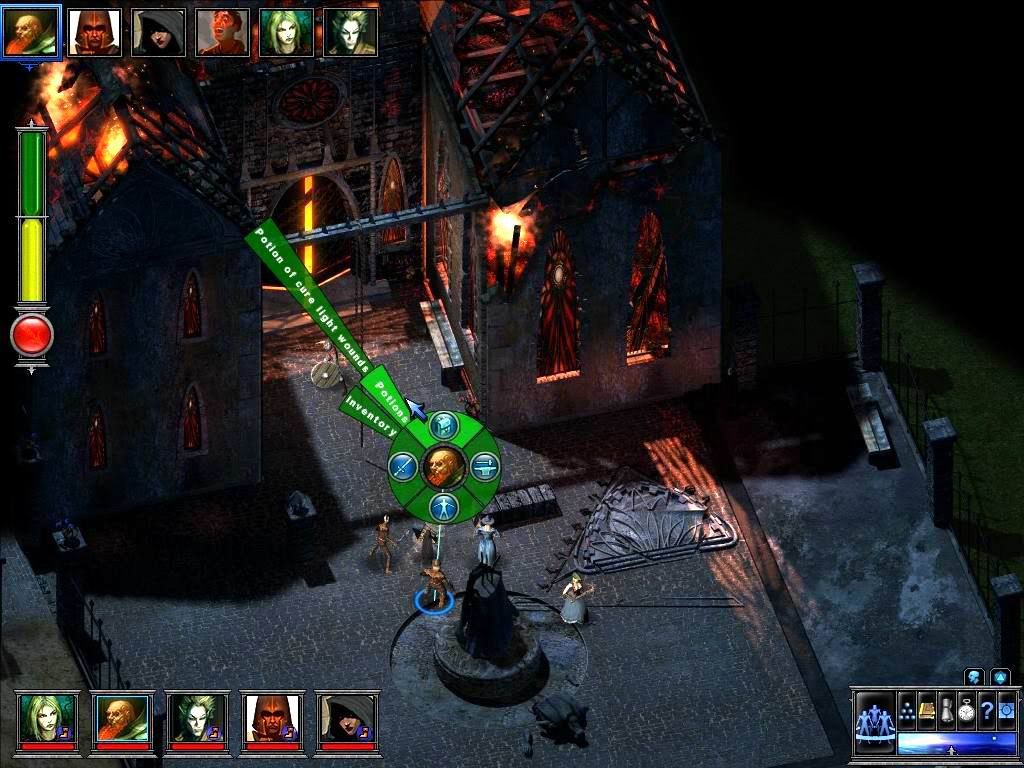
What would an adventurer do without his entrusted backpack? ToEE keeps the inventory management very minimalist. You seldom got to open the big inventory screen since there are handy shortcuts for potions (like above), scrolls and magical devices.
Finally, it's over! Johnny celebrates end of school by trying a charged attack on the rather helpless Acolyte with results too gruesome to be shown in public.
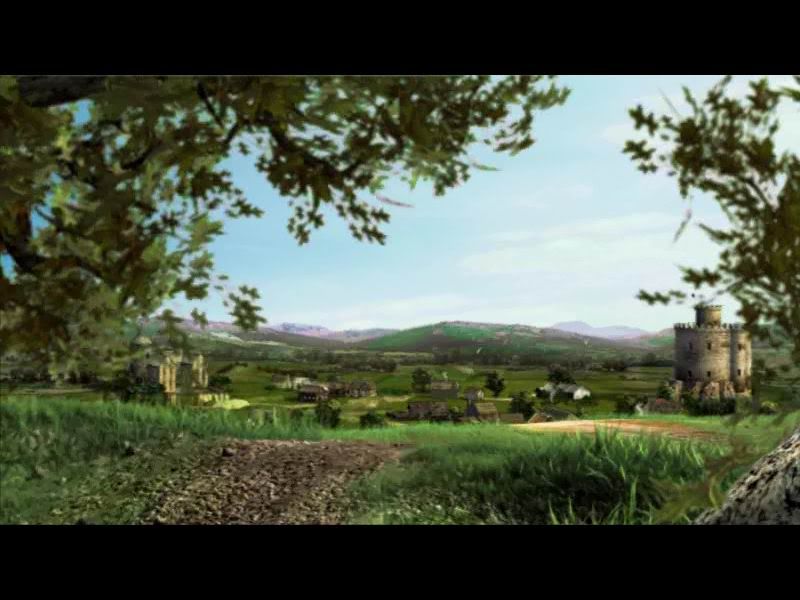
Since there is nothing of value to be found the party departs towards Hommlet, the new seat of the mysterious Terjon mentioned by the Acolyte. Maybe he'll make it worth their while.
Index:
Part 0 - Intro & Basics (read below)
Part 1 - Visiting Hommlet: A snake pit survival guide
Chapter 1
Chapter 2
Chapter 3
Part 2 - On Emridy Meadows: Walking with the undead
Part 3 - In the moathouse: About the duality of doing things 'the smart way'
Part 4 - The guard tower: Boss Battle Time
Part 5 - Nulb: Living amongst the bold and the beautiful
Part 6 - The Temple: Getting to the bottom of things (Upper levels)
Chapter 1
Chapter 2
Chapter 3
Part 7 - The inner sanctum: Meeting the boss
Part 8 - Dungeons & Kindergartens: When the big kids collide
Part 9 - The nodes: Going elemental
Air
Water
Earth
Fire
Part 10 - Revisiting Hommlet: The great homecoming
Part 11 - Down in the Basement: How you give your place that 'final touch'
Part 12 - Wrapping things up
Potentional points of interest:
Spazmo's review on RPG Codex
Other stuff on RPG Codex
Co8 community forum for all your modding needs
RPG Vault's interview with Tim Cain (Part 1, Part 2)
Desslock's interview with Tim Cain
Brief Introducing
If you've never tried this masterpiece either because of innocent ignorance or because the long winded title sounded terrifying to you: Temple of Elemental Evil (short ToEE) is one, if not the, best D&D (Edition 3.5) combat simulator to this very day (and counting).
Why the 'classic' you ask? It is because this game spawns from an old P&P module created in 1985 by Gary Gygax and Frank Mentzer. Typical for RPG material of this era the campaign includes a lot of story exposition plus a very deep philosophical and thought provoking narrative way too complex for me to describe in full sentences. Luckily, the intro of the game provides enough strong visual messages so this tale of epic proportions can be summed up briefly.
Skull!
Wizards!
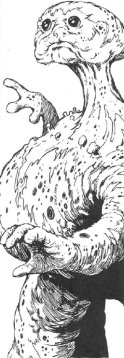
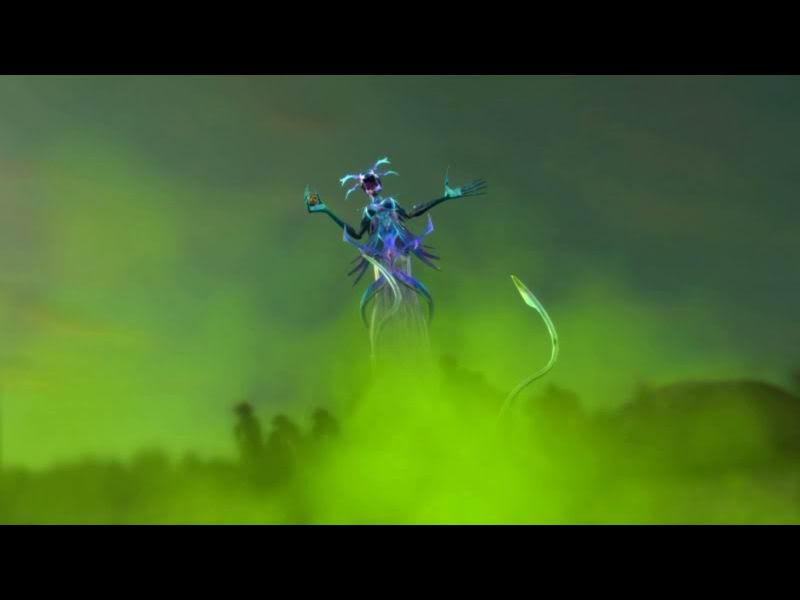
Evil Slut (+ an army of darkness)!
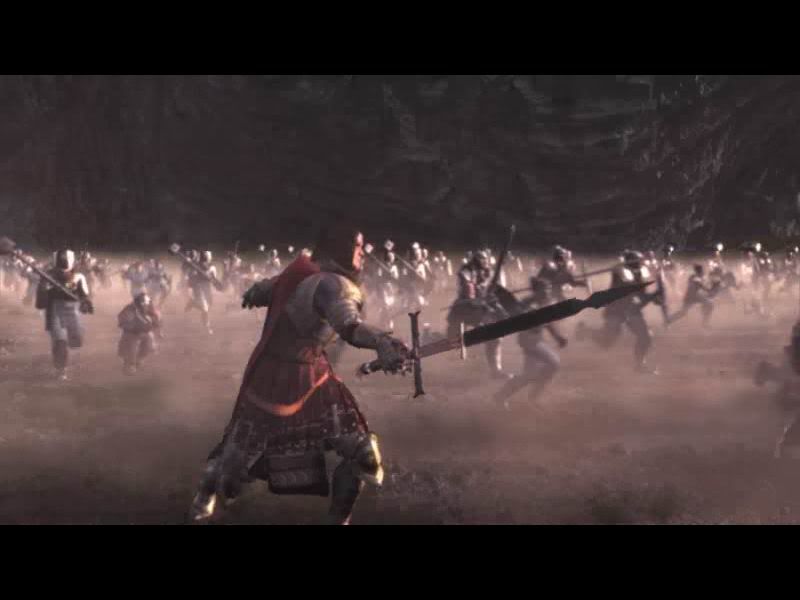
Good guy in shiny armor with big sword (mandatory) and an army of the righteous (expendable)!
Disclaimer: This sword actually plays an important role for lawful evil parties as their very first goal would be to find and destroy it.
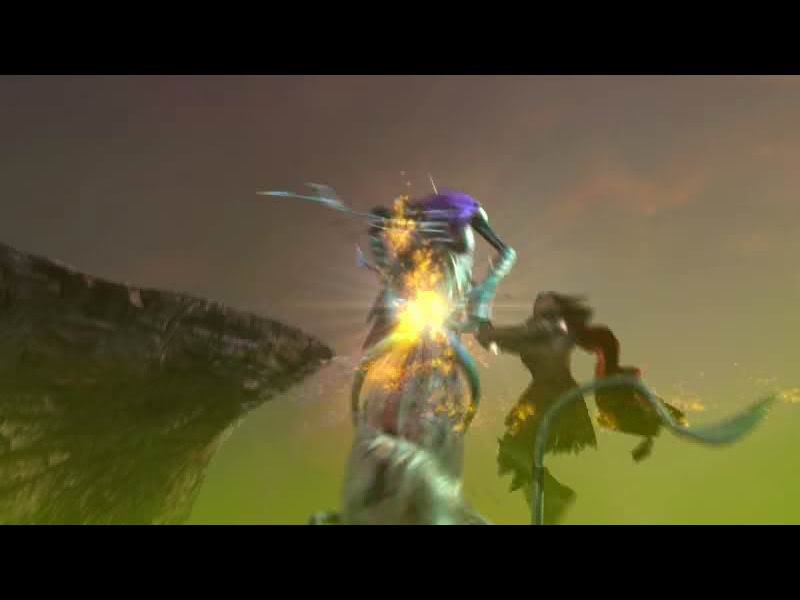
Good Guy pwns Evil Slut. Final Fantasy Style!
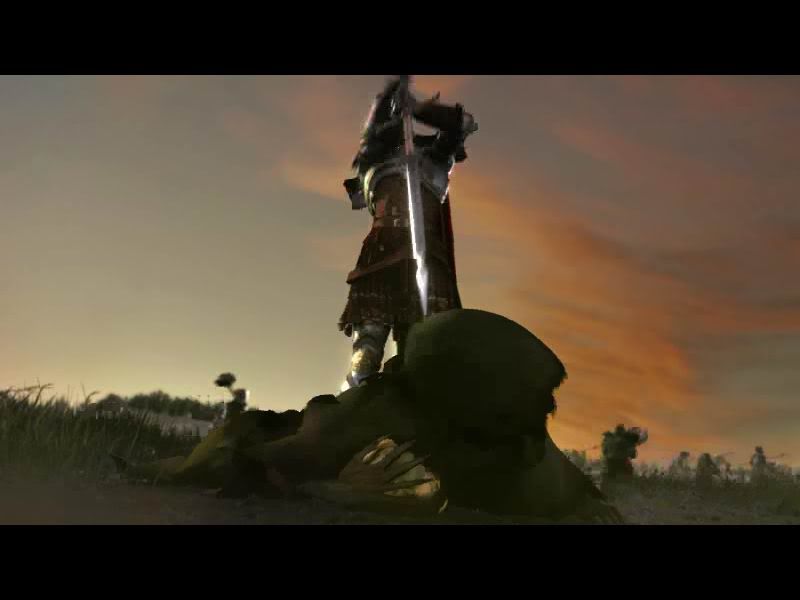
Good Guy about to pwn some more (with his big sword)...fails!
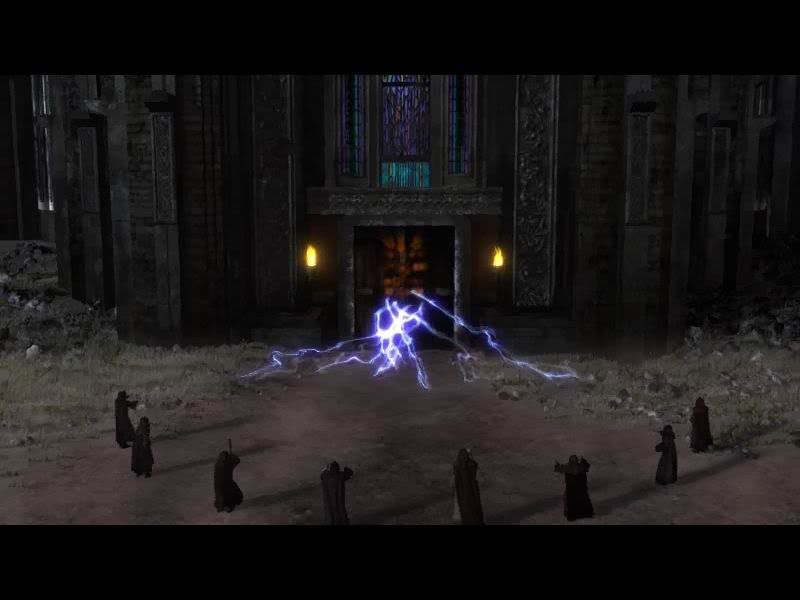
Wizards seal the temple (Evil Slut inside)!
And that's pretty much everything you got to know about the backstory (if even that). Like its P&P predecessor ToEE has the wonderful luxury that you can mostly ignore the plot and hack & slash all the way through. So let's make our start by creating a suitable party of butc... I mean adventurers.
Before we can actually do that however we will have to choose one of many so called 'party alignments'. Your choice will determine the opening vignette, which alignment your potential party members must be (a paladin will never join any evil party for example), how the party will interact with NPCs and maybe even offer some special quests (like the quest that involves the sword mentioned above).
While I was pondering about which alignment to take, I realized that I've never actually beaten the game with an evil party. It's neutral evil then.
The actual character creation remains faithful to the D&D rule system and can be broken down into two steps (three if you pick a magic user like wizards and clerics).
1. Roll up your stats (they may range from around 6 = poor to 18 = uebermensch. You can re-roll them as often as you like (except if you play in 'Ironman' -> no saves mode where re-rolls are not allowed) which will give you bonus modifiers for several skills and saving throws, choose your race which may also affect your stats and various other things and finally choose your profession.
2. Choose so called Feats which will give your character additional bonuses and can sometimes expand his repertoire of combat maneuvers. To round up the whole thing, you'll spread skill points (number depends on your character intelligence) on the various skills available. It should be considered that improving skills outside of the character's current profession will cost him more points though. Every character can learn to pick a lock but a fighter will have to spend more points to be as efficient as professional thief and so forth.
3. (Optional) Choose your spells.
I'll graciously skip the parts where you decide hair color and the like.
Edit: One thing I forgot to mention here is the alternative point buy system. Instead of rolling up a character, you can also click on the 'advanced' tab in the lower right corner on the initial character creation screen. You will then get 25 points that you can freely distribute amongst the different attributes. Rule thereby is: the higher the stat the higher the amount of points you have to spent to raise it.
For this playthrough, I will make the daring attempt to beat the game with first roll characters. No re-rolls. The game will actually show how many re-rolls were made for a character on his character sheet. See the upper right corner in the below examples. Kinda like a mark of shame. You can avoid this by quitting the character creation screen and retry. But this is timid and boring so I never did it and won't start here.
Naturally, my first roll is an utter failure. I decide on the spot that this will become my party leader.
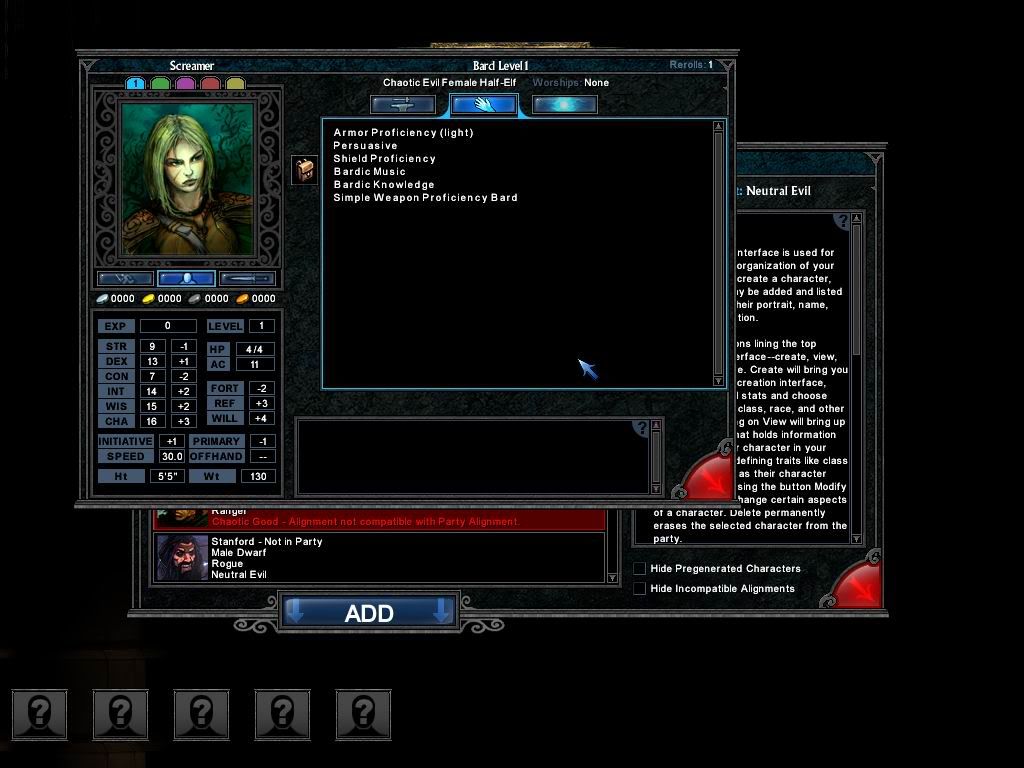
Say hello to Screamer
Truly one of those 'probably is going to die first in..like..every encounter / turn?’ kind of characters. The only positive thing to say is that she's the only person in my party with a charisma above 10. Then again this is D&D, the RPG brand for men, not some weird larping crap.
Disclaimer: Funny enough I actually forget to invest any skill points into 'perform' meaning that she can't even use her more or more than less useful songs! Oh well, until the next level up, I guess.
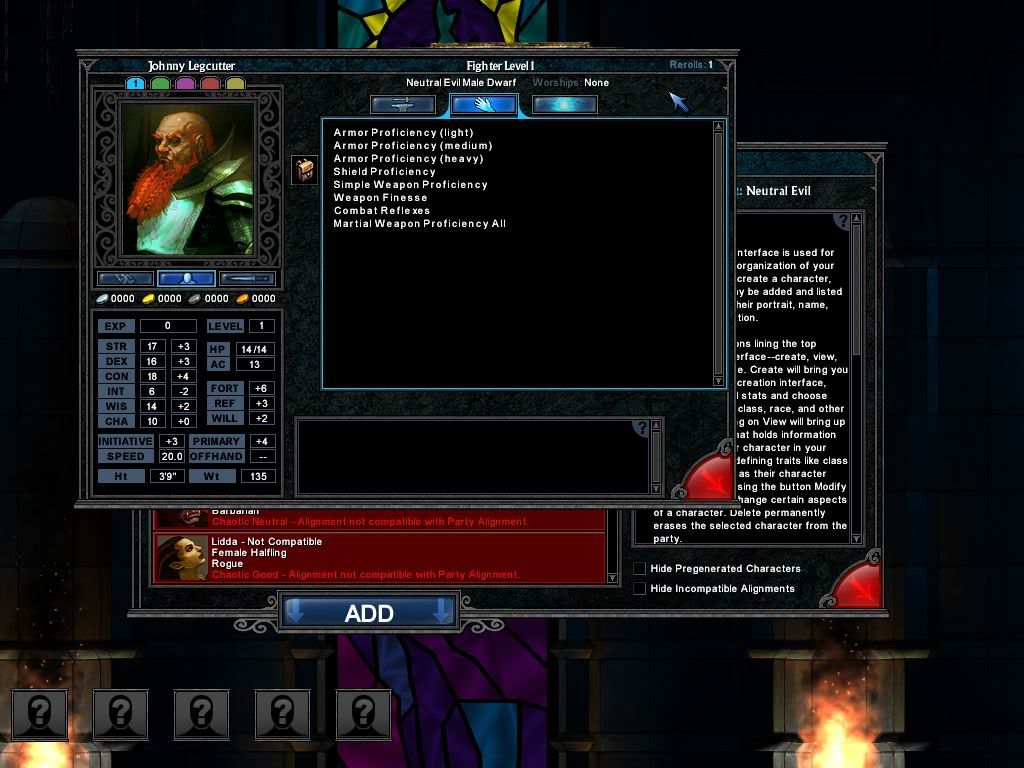
Next in line is Screamer's (debatably) faithful bodyguard: Johnny Legcutter. A dwarf who knows where it hurts!
Now that's more like it baby! Too bad that he's also as dumb as one can be meaning that he'll only get 4 skill points per level. (Edit: Only one actually) That's just enough to fill all the skills he's specialized in but it is something.
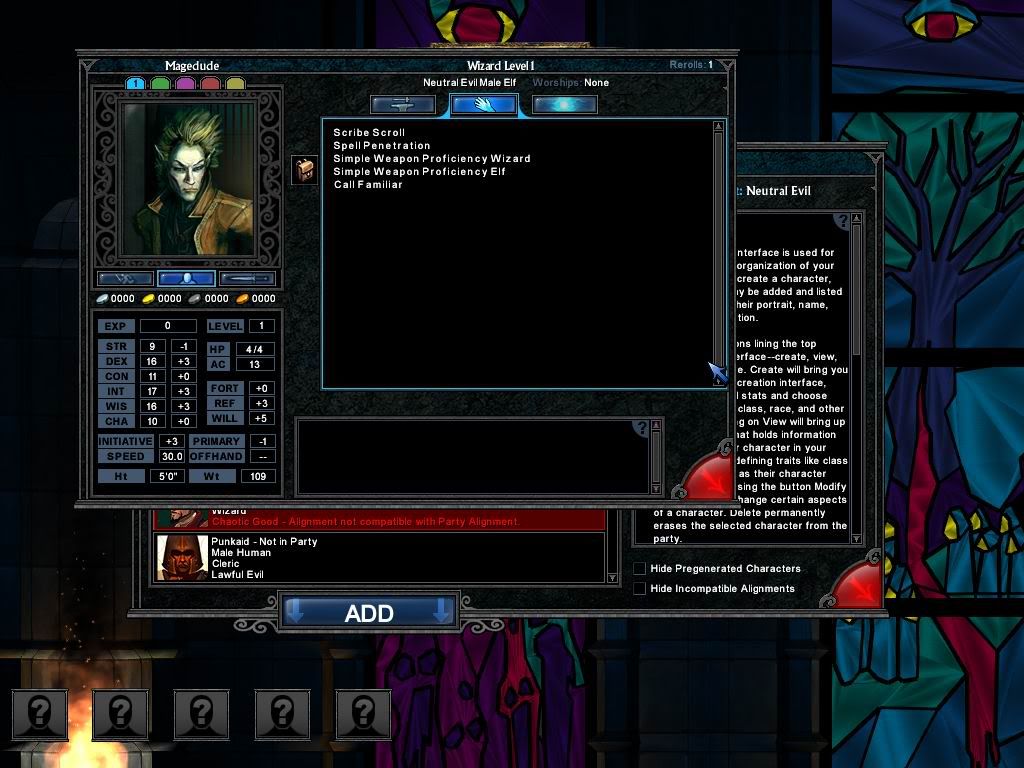
Where is the magic you wonder? It is right here! Say hello to Magedude! (and yes, giving the smartest guy in the party the stupidest name of 'em all struck me as kind of funny)
Again a pretty good roll (except the 9 maybe).
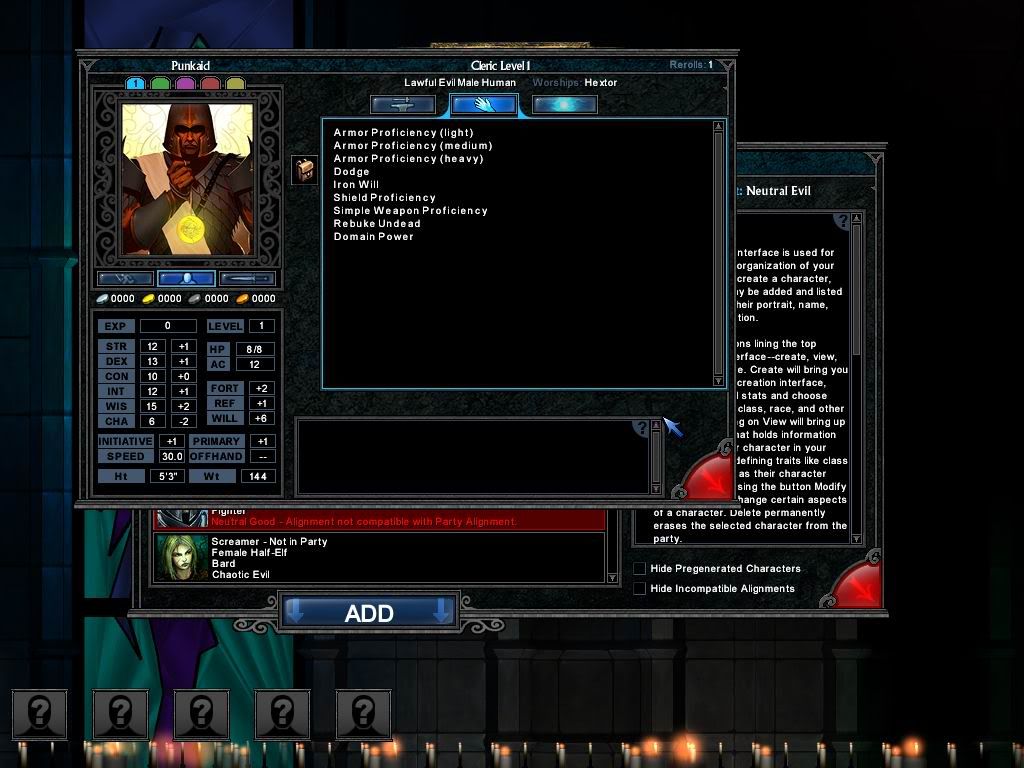
I'm just wondering if my luck will last when Punkaid hits the stage.
This cleric (who earned his name simply due to his blue Mohawk) is pretty much average on every level imaginable. That's too bad since I wanted him to become my second melee focused character. We shall see how he'll do on the field.
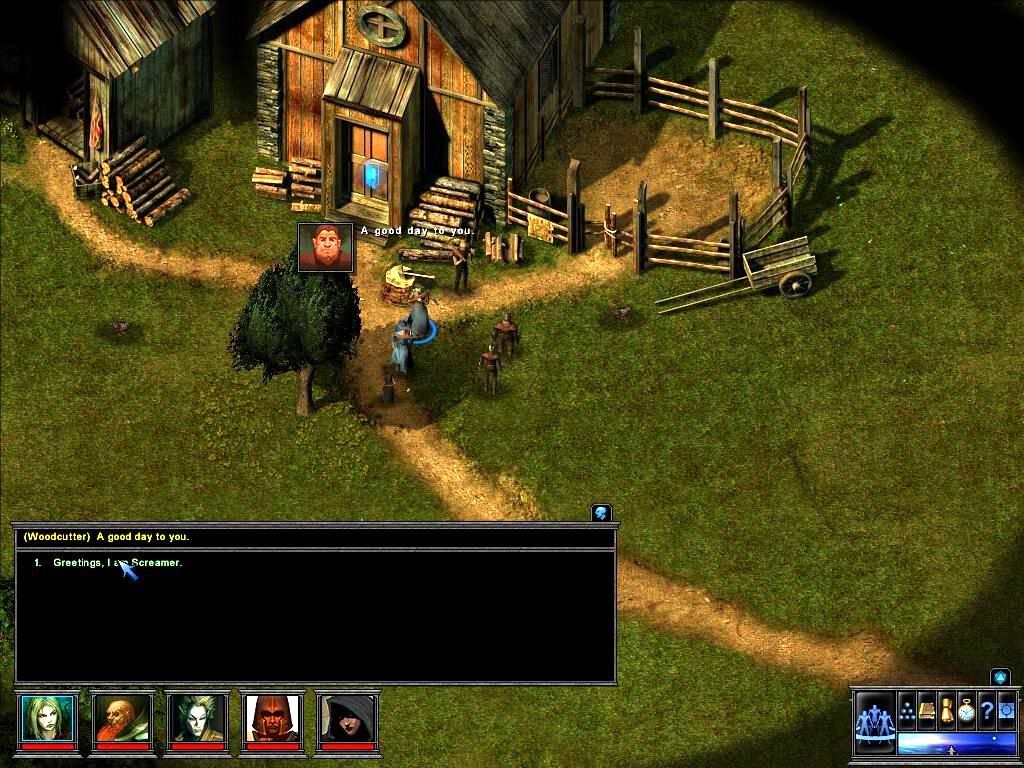
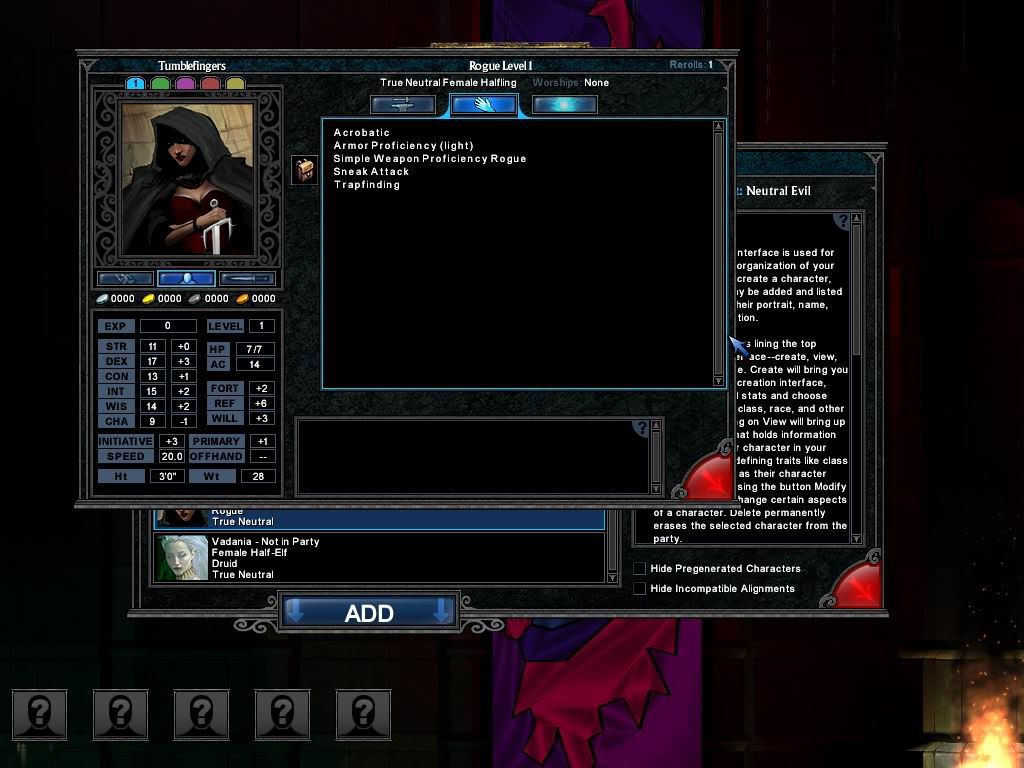
Last but not least there comes the vital Rogue/Halfling combo. A party without a rogue is only half complete, especially because ToEE, like many other D&D games, comes with a lot of traps hidden inside. Rogues will ease your pain a great deal in these regards. I dub thee Tumblefingers.
Since we hit the party cap now, let's take a last look before pressing on. We got a least three decent characters one so-so character and one who completely sucks. That sounds about right. Let's get started!
About being 'Evil': The Basics
To make sure that we follow the proper procedures whenever we perform 'Evil' acts we must first grasp the concept of 'Evil' as it is understood within the game.
Alright, it's pretty much the dull kind of evil. You probably are going to guess what's going to happen. Screamer will laugh naughty and spit some taunts. The Acolyte gets angry and attacks. While this setup is not terribly exiting, at least I get the chance to explain the combat system in detail.
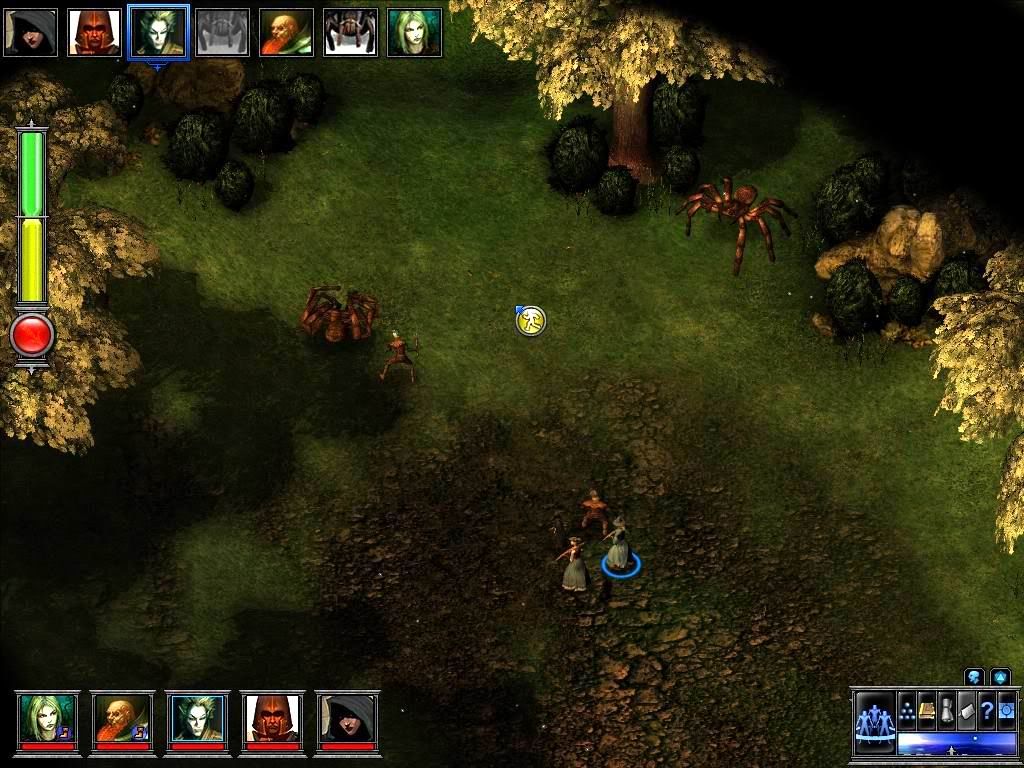
ToEE, despite modern trends, more tends to the P&P roots in the way combat is executed. Combat is organized in so called turns (with a roughly estimated time span of a couple of seconds). First, the game rolls for initiative. The idea is that the one with the highest dexterity is probably going to act first which often gives him the advantage to plan things ahead before the other combatants can prepare (better hit first than bleed first). This is especially important in the first round. If you look at the small character icons on the bottom of the above picture you may notice the little boot symbols. That means that the character is 'flat footed', meaning that, as long as he doesn't do anything within the first turn, he will not be able to rely on any AC (armor) bonuses granted to him (like the bonus for a high dexterity value) when being attacked. Especially for 1st level characters being or being not caught flat footed can make the difference between life and death.
Once the initiative is determined by the game, the pictures of the combatants are lined up in the upper left corner with the leftmost character being first to act when a new turn starts and from there it slowly works its way down the calculated hierarchy (the portrait of the currently active character is thereby enclosed by a blue frame). I get lucky and three of my characters roll a higher initiative than the poor Acolyte who, still flat footed like the rest, doesn't really stand a chance anymore. Notice that because it's Johnny's turn he lost the flat footed status. His AC bonuses will not be ignored anymore should he be attacked.
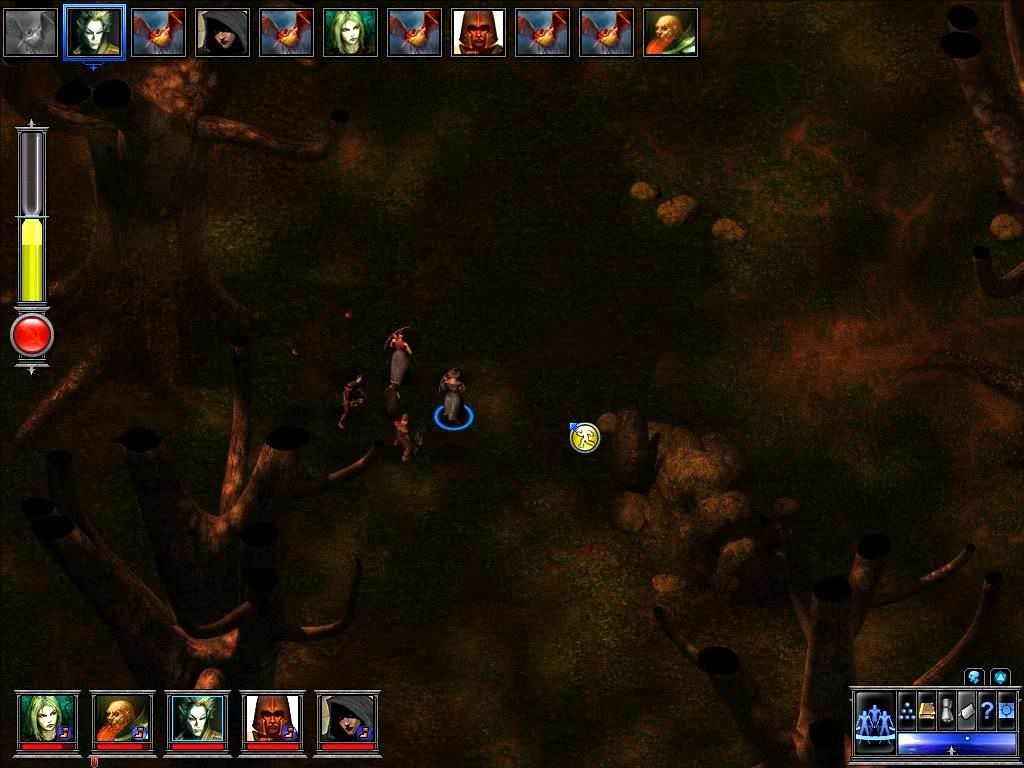
Shift your attention now to the hourglass below Johnny's portrait. This is the 'action time' for your active character so to speak and comparable with the better known 'action points' when it comes to functionality. Pretty much any action you take during combat will sap some sand from the hourglass. In case that all the sand is depleted the turn of the active character ends. You can alternatively end your character's turn either by using up all his attacks or by pressing that provocative big red button at the bottom of the hourglass. As long as you haven't depleted any of the yellow sand your character will be able to perform at least one melee attack on any enemy in range (firing a crossbow in comparison requires both a full yellow as well as a full green bar). So the rule of thumb says: move your character as long as you are in the green area, do something else when you’re not. To make things simpler when estimating if you got enough action time left to hit somebody while walking somewhere, the walking cursor will change in color depending on how much time it will cost the character to reach the pointed out position. So, if your cursor points on an area to walk and it turns yellow, that means that you'll spend up more time than the one you get from the green bar. Red means that it won't be possible to reach the spot with the current character during this turn. Green is safe.
By right clicking anywhere on the main screen you open a radial menu like the one seen close to the middle of the screen above. This plain menu may be called the heart and soul of the whole experience.
In Johnny's case the radial menu lacks a bunch of categories (like the spell segment) because of him being a warrior and all but we shall see as we dwell further that there is actually quiet a lot to of options even for a simple level 1 fighter.
Let's start off by examining the hottest candidate in this case: the combat category.
Tactical
Tactical, at this stage, covers mostly defensive actions only.
Total defense will boost the character’s AC during the rest of the round. If he can still move after this action (indicated by the green color) this bonus will also count for attacks of opportunity. He is not able to make attacks of opportunity himself (or start any attacks at all for that matter) while in total defense. More on attacks of opportunity later.
Ready vs. X will grant the character to attack an opponent in range if he performs X. I mostly had to use Ready vs. approach since this is going to happen most of the time (although Ready vs. Spell is the real life saver here from my point of view).
Feint is a fighter thing. If Johnny tries a feint and makes a successful bluff check he can ignore the AC bonus for high dexterity of his opponent. Occasionally useful but sucks up all the time the character got (indicated by the yellow color. Those are so called 'full round actions').
Options
Fight defensively means that, while activated, every attack of the active character will have a strong penalty but also cause a slightly increased AC bonus. Mostly worthless in my experience except if you use your fighter as a door blocker while the casters prepare spells.
Deal nonlethal damage does what it says. It doesn't work with every weapon. I can't recall using this option except for once (there is no real reason anyways).
Cast defensively will make a spellcaster with this option activated less likely to provoke an attack of opportunity. Should he fail a concentration check though his spell will fizzle.
Offense
Trip attack is an unarmed attack that, when successful, will make the opponent fall and therefore vulnerable for the rest of the turn. Just enough to coup de grace his ass (Edit: Wrong. Coup de grace doesn’t work in this case). Sadly, this option seldom worked for me. We'll see how it will turn out this time around.
Single Attack & Full Attack are basically the same at this stage since no one in the party gets more than one attack per round otherwise you could either decide to use one attack or release a fury of blow on the hapless opponent. If the defender gets killed during a full attack all the remaining attacks the attackers would have left will be lost. (Edit:Actually, they're not the same. Single attacks grant you to move after you've struck your opponent so you can remain mobile even after an attack either by walking or using the 5-foot step move. Don't ask me how I was able to finish the game without knowing that)
Coup De Grace is the satisfying finishing move on defenseless opponents (pretty much anything with legs that is lying on the floor). This attack is almost always lethal. Too bad that the AI knows this too.
A Charge Attack is the only attack that requires the character to move a few steps (in a straight line) before taking effect. He will get a bonus on his attack roll but also a penalty on defenses for the rest of the turn. As long as you don’t try this on someone who stands in the middle of a large group this attack can be quiet useful as it will be demonstrate on the poor Acolyte later. (Edit: Won't trigger any attack of opportunity as pointed out by Nightjed)
Movement
Withdraw is the best bet when you want to escape in style. It's not as fast as running but also less likely to provoke an attack of opportunity.
Run the less subtle approach. The characters runs in a straight line while moving 4 times faster than his normal speed. That's quiet a distance that can be covered at this rate but there is seldom enough room to move really far.
Move is self explanatory, I hope.
What 'Flee combat' stands for I got no clue. I didn't find anything in the help menu (the question mark located in the lower right corner which provides many detailed information about gameplay mechanics and the D&D rule system in general btw. Wholeheartedly recommended to everyone) and this post already took me too long to be bothered to look in the manual now (Edit: It actually could be called an emergency button. Once pressed the whole party will try to escape the current level. Doesn’t work in some of the more unique encounters).
I'm not sure what the purpose of the 5 Foot Step thing is. The only time that move is useful is if you find yourself in a large group of enemies. The premise is that you can walk a very short distance without provoking an attack of opportunity and still be able to attack afterwards.
Special Abilities
This is the bard's turf. All his songs are stored here. Magic users can call their familiars in this category. Then there are some special moves like turn undead or smite for clerics.
Skills
Most of a character's not combat focused skills are stored here. This section is mostly used by rogues.
Inventory
What would an adventurer do without his entrusted backpack? ToEE keeps the inventory management very minimalist. You seldom got to open the big inventory screen since there are handy shortcuts for potions (like above), scrolls and magical devices.
Finally, it's over! Johnny celebrates end of school by trying a charged attack on the rather helpless Acolyte with results too gruesome to be shown in public.
Since there is nothing of value to be found the party departs towards Hommlet, the new seat of the mysterious Terjon mentioned by the Acolyte. Maybe he'll make it worth their while.