zool
Arcane
- Joined
- Oct 26, 2009
- Messages
- 897
Fall Gelb - The Battle for the Low Countries 1940 is a user-created scenario for the wonderful Battles in Italy game, made by Aussie wargame developer Strategic Studies Group. It is the third game in the Decisive Battles of World War II series, after Korsun Pocket and Battles in Normandy.
While the stock game comes with three scenarios (Sicily, Salerno and Anzio), the community has crafted a number of user-created scenarios. Fall Gelb is probably the most ambitious and polished one, with a beautiful map and a great attention to detail. For more information about this scenario, see here (RECOMMENDED READ).
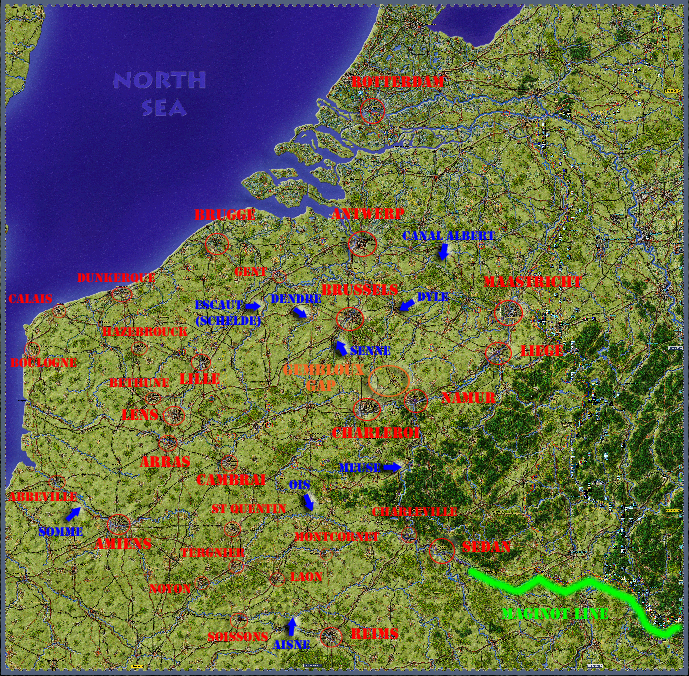
The scenario is huge - not Barbarossa-huge but still, there are a lot of units as it covers the whole action from Holland to Luxembourg. Because of this, I'm not gonna try to cover the whole campaign but rather to focus on the more interesting parts, which will provide occasions for me to explain the game mechanics.
There may be a game-stopping bug at some point, something about the Belgian supply dumps which would stop working at some point but we'll see if that happens in our game. Also, I'm using TinyPic/Photobucket as image host - here's hoping they don't go Imageshack on us.
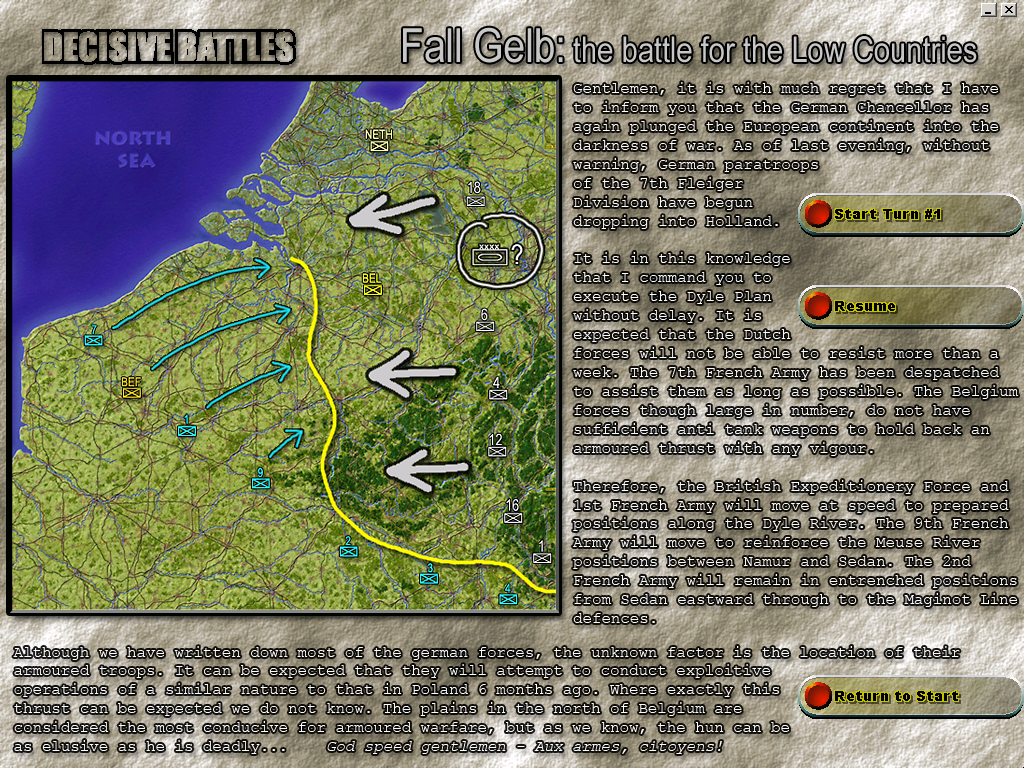
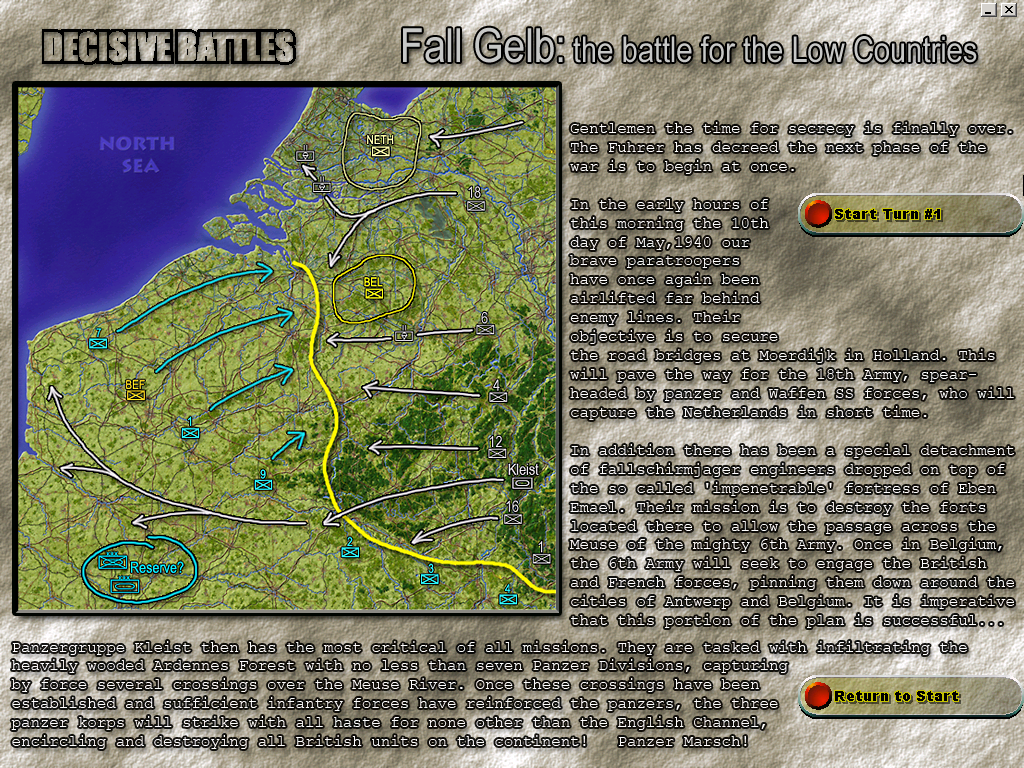
But let's start by taking a look at the briefing:
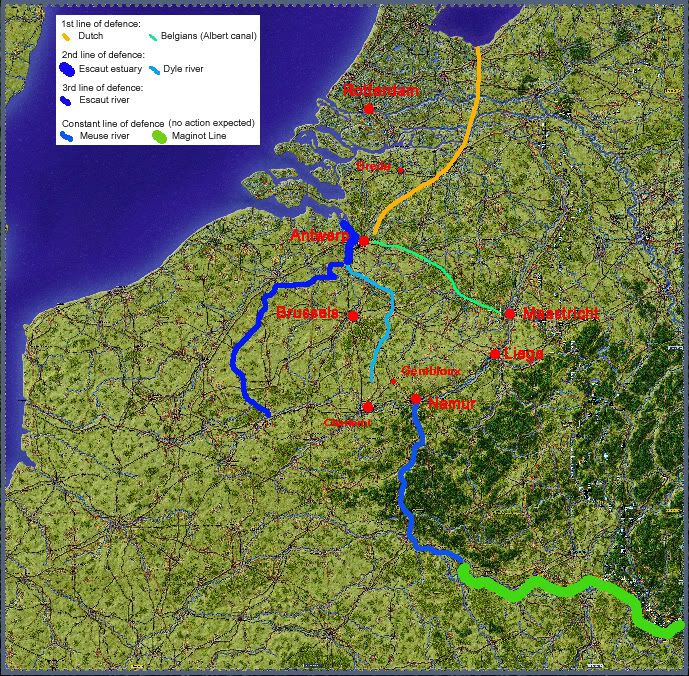
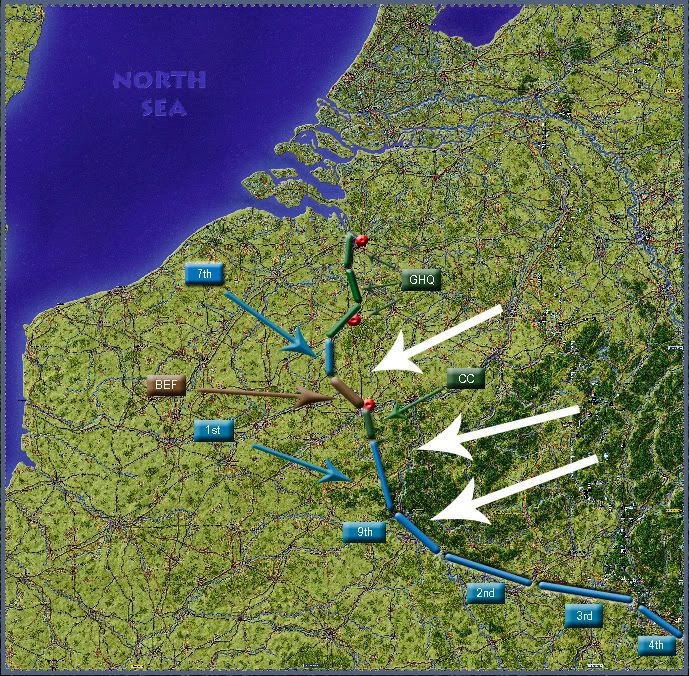
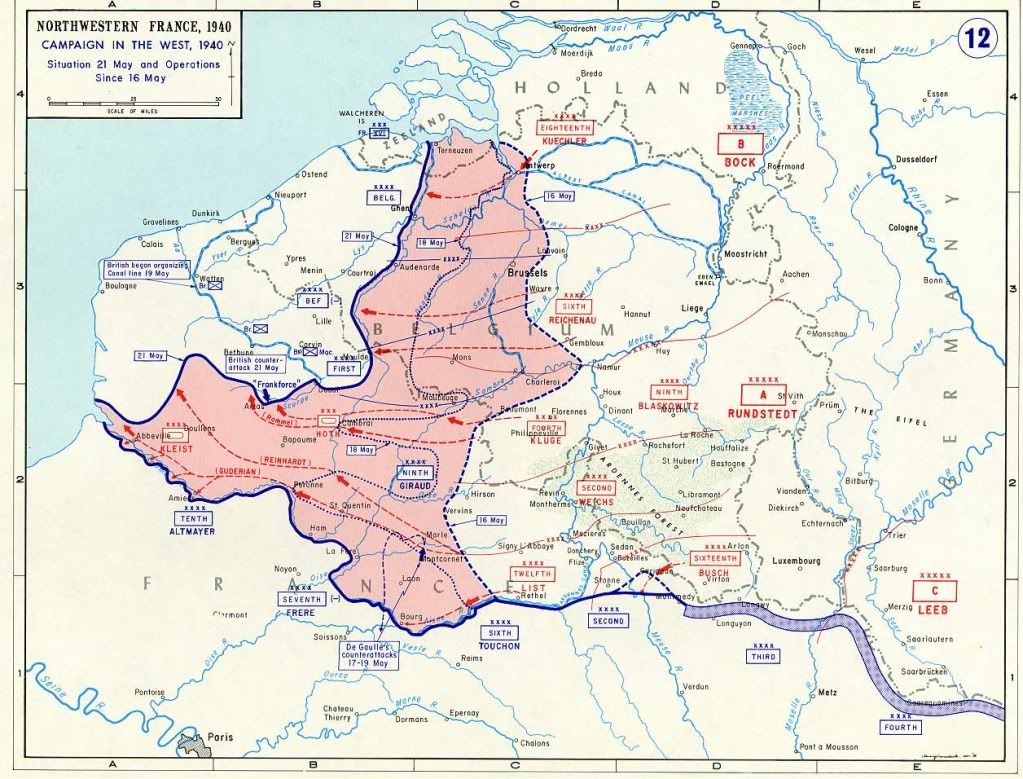
Thanks to historical hindsight, we know where the German main thrust in going to be (the Ardennes forest), and we know the Dyle Plan was a mistake - or at the very least its northernmost component, which sent the French 7th Army to the Breda area. We're going to use that knowledge to try to come up with a better plan, although the game has some mechanics which prevent the Allied player from being completely advantaged by historical hindisght.
Be aware that I'm playing against a very experienced opponent who I managed to beat in our last game (Normandy scenario). So he's gonna be out for blood, and the scenario still heavily favors the Axis (especially because of the incredibly high movement rate of their units). Moreover, and altough I know the engine well, I've only played this particular scenario once as the Axis, and against a much weaker opponent. Thankfully, my opponent also has a limited experience with this scenario, so we shoudl be more or less on equal grounds there.
I'll try to update this thread with the first turn before the end of the week.
Chapters
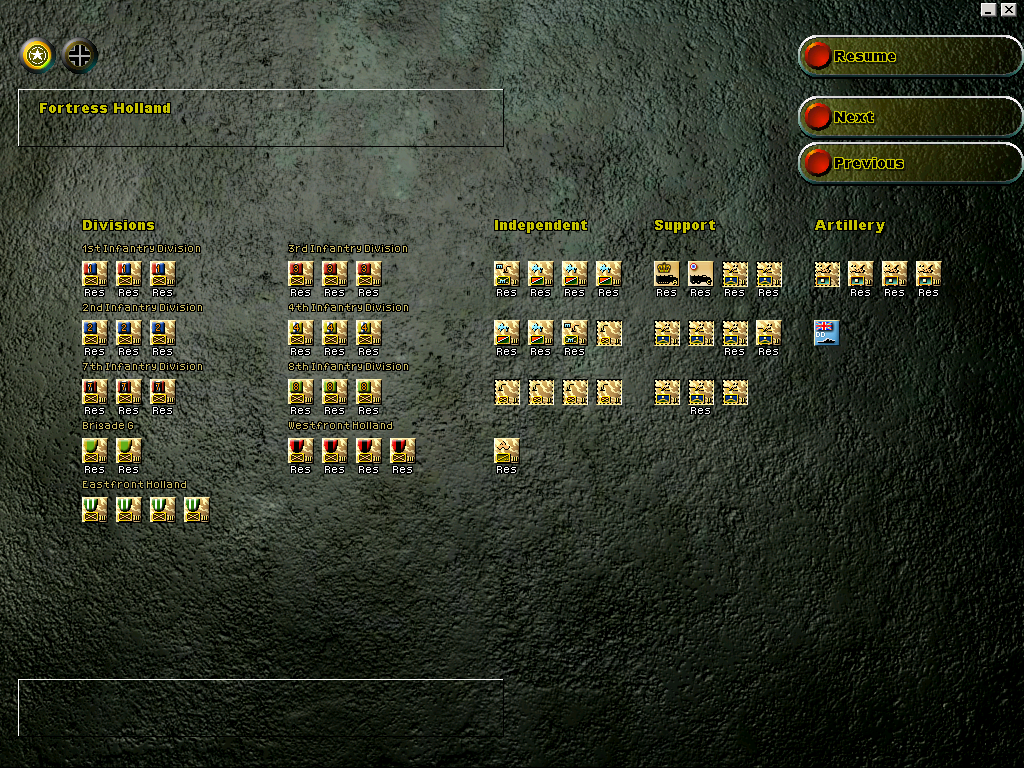
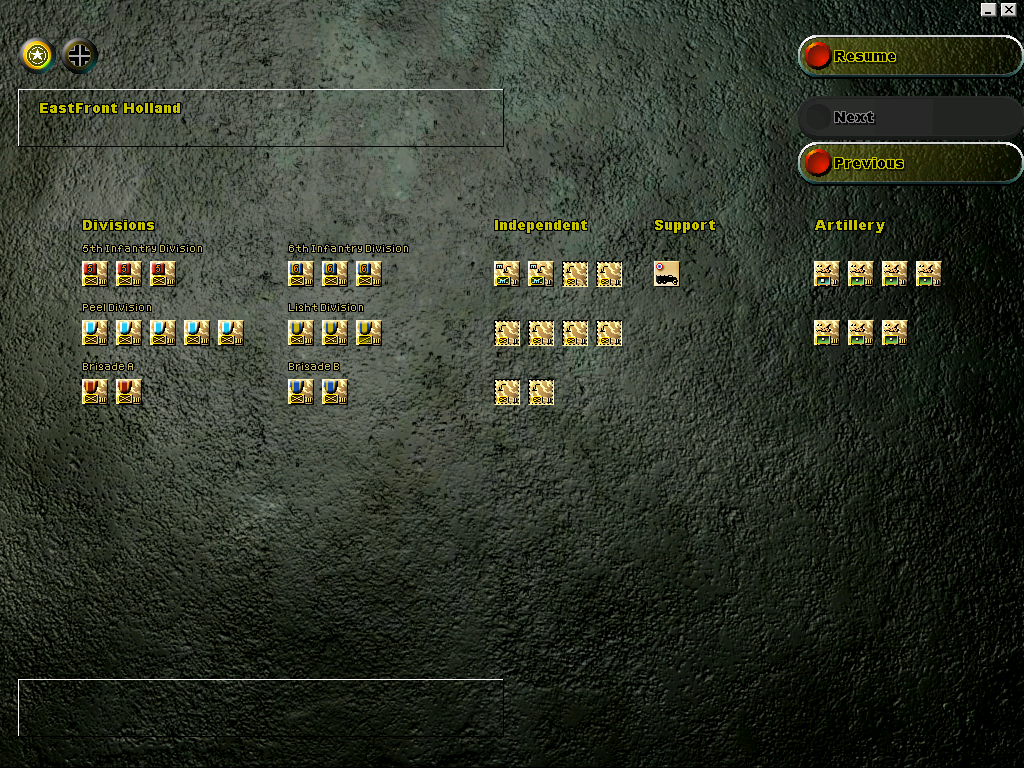
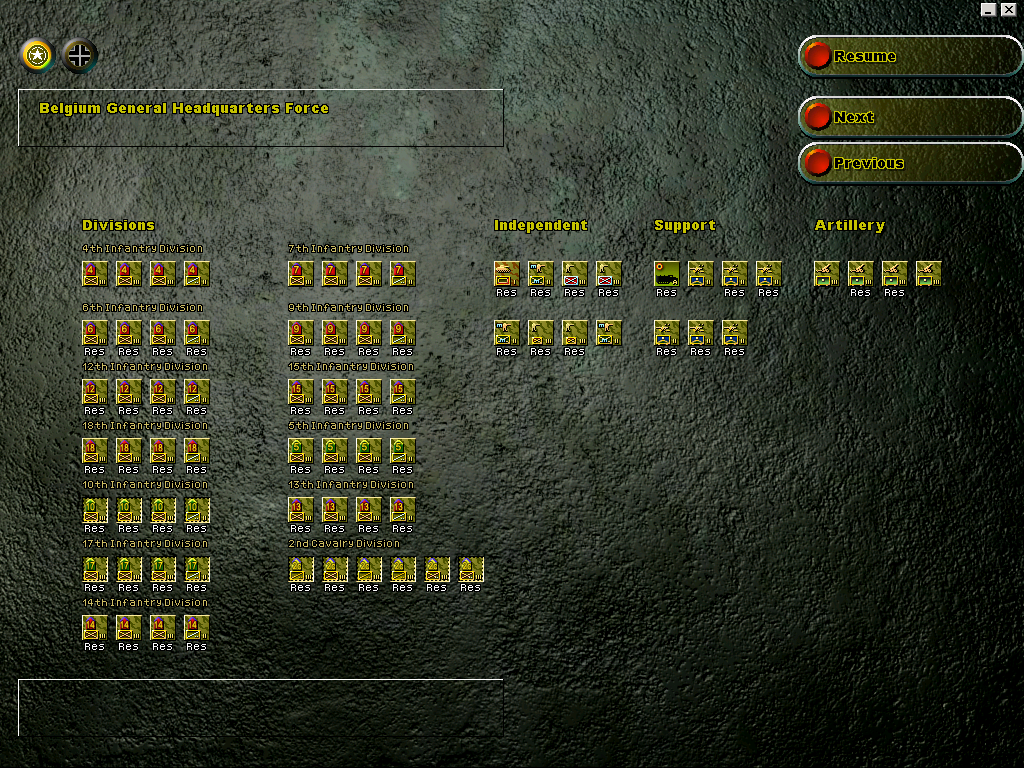
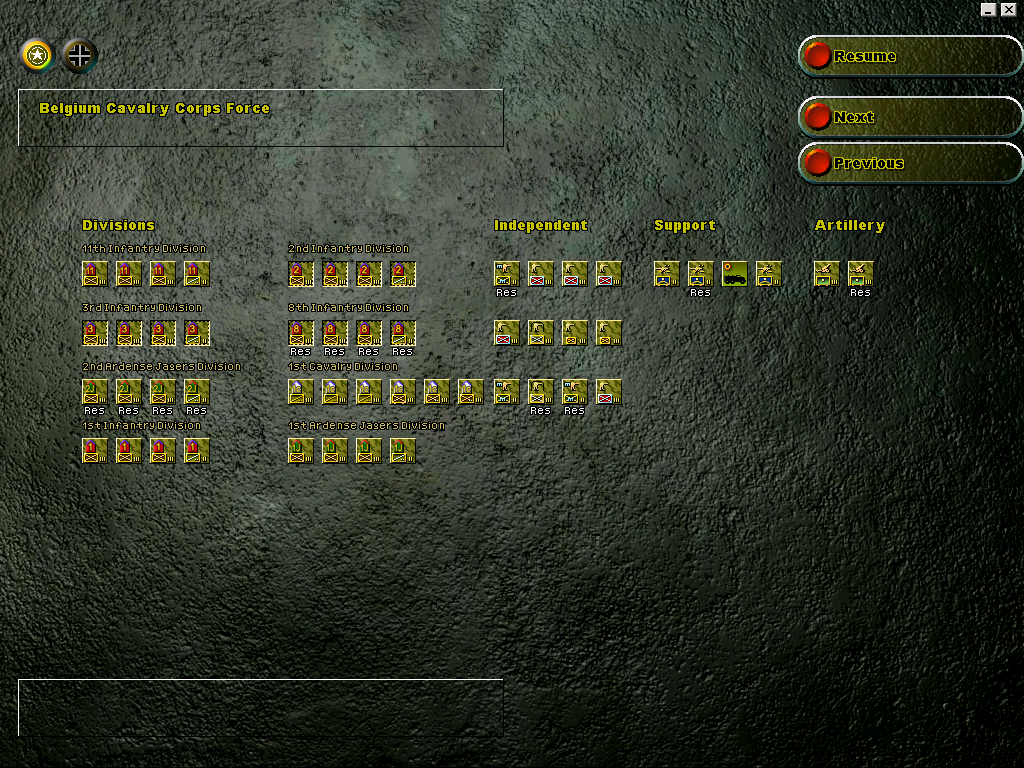
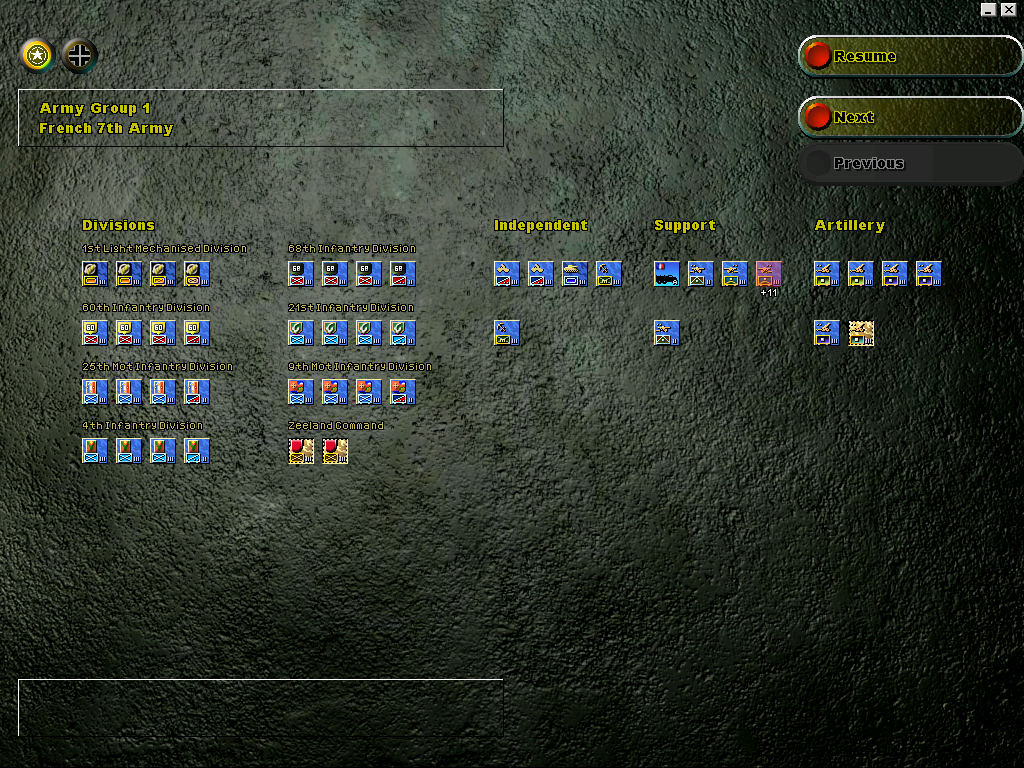
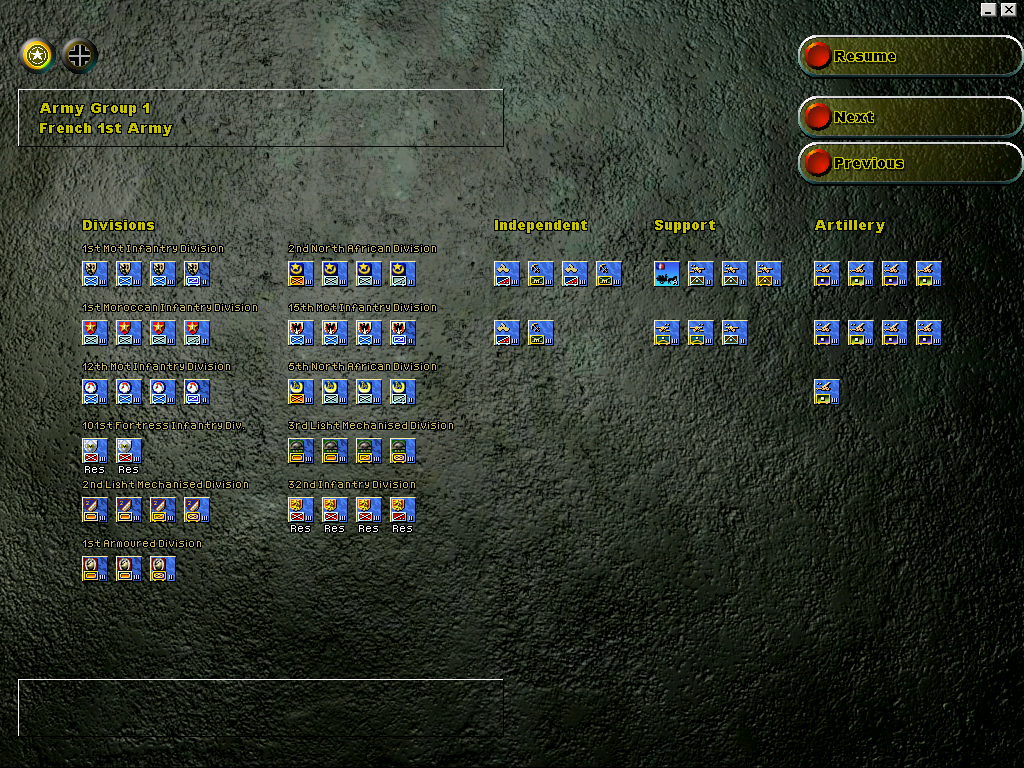
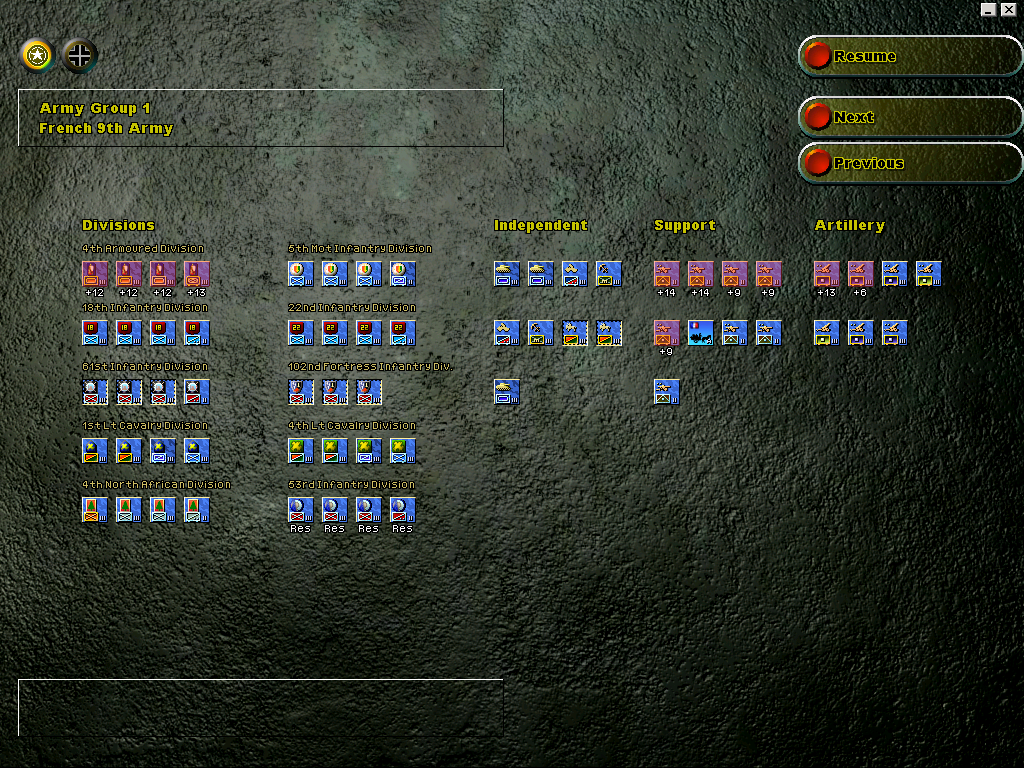
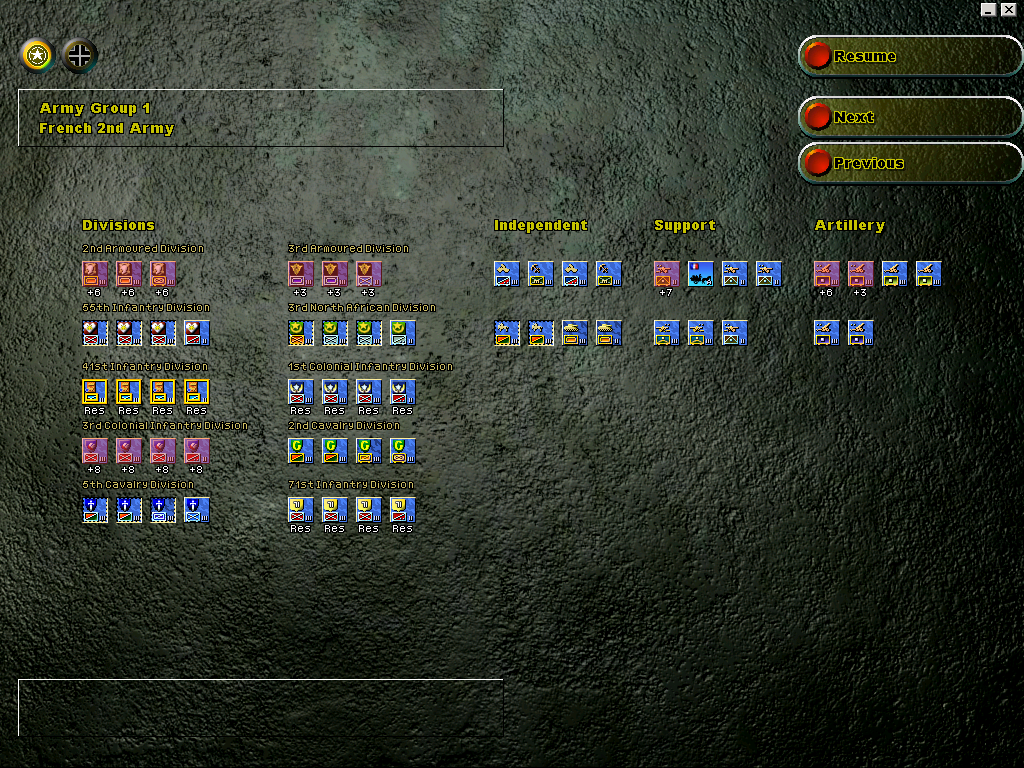
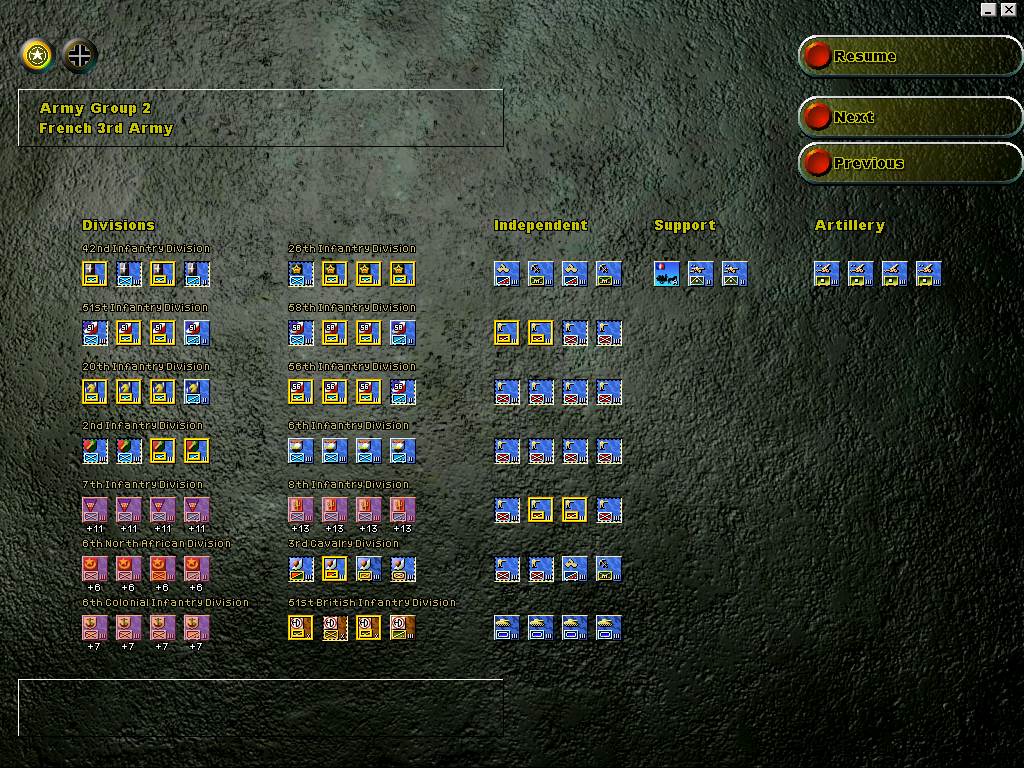
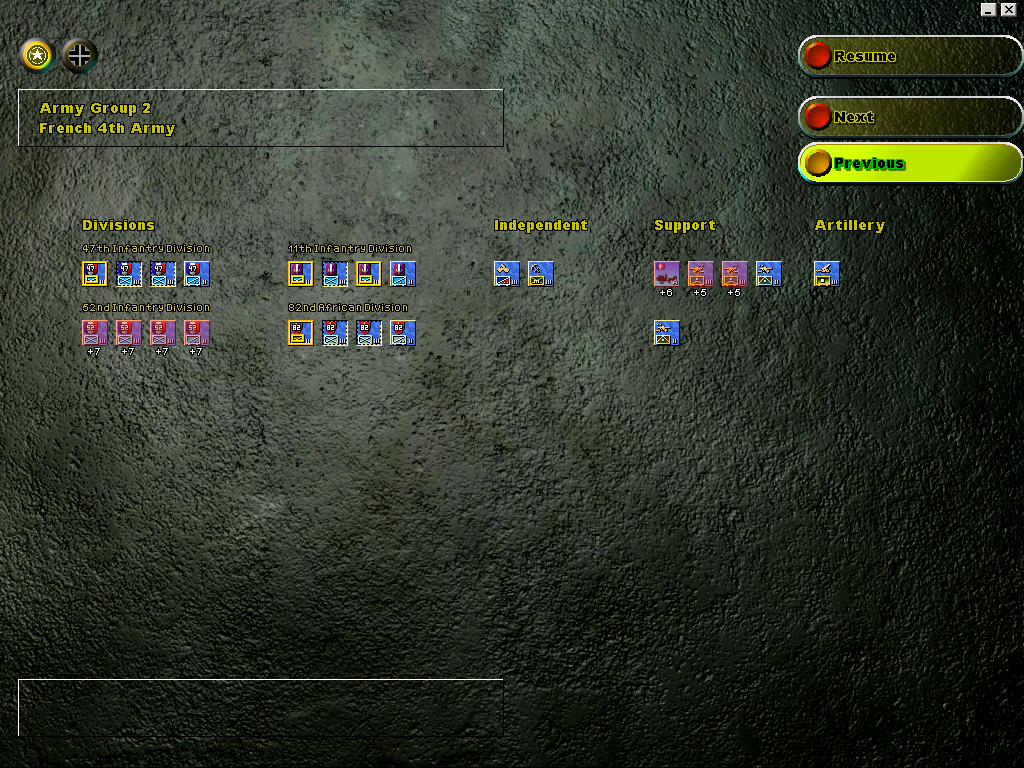
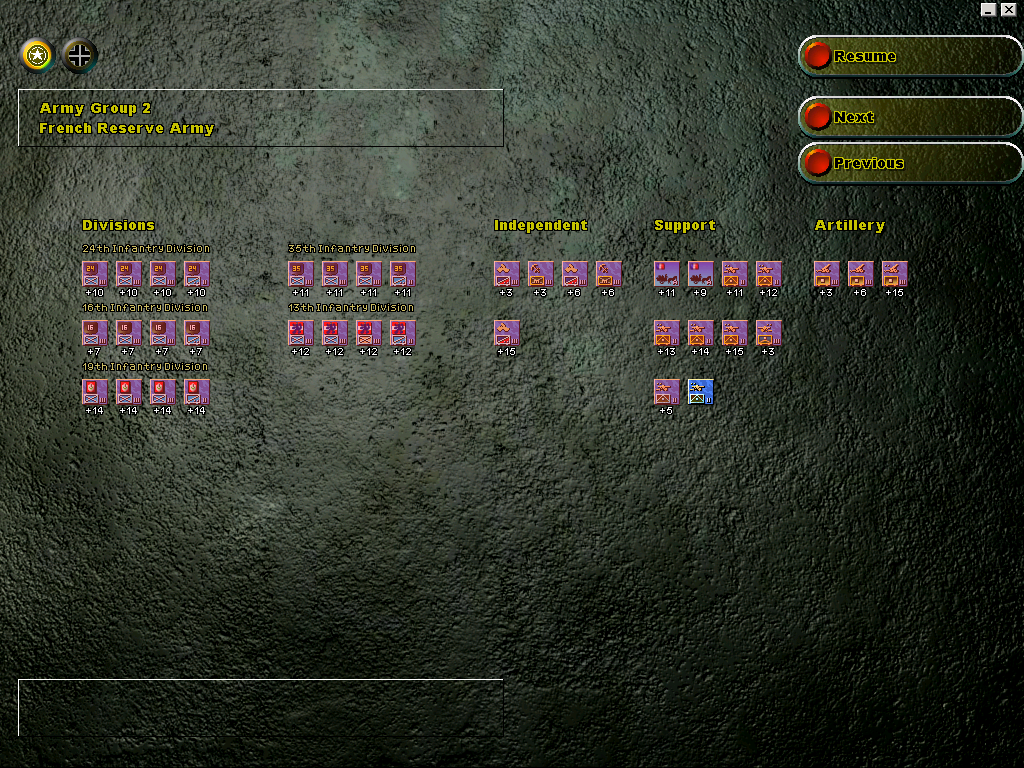
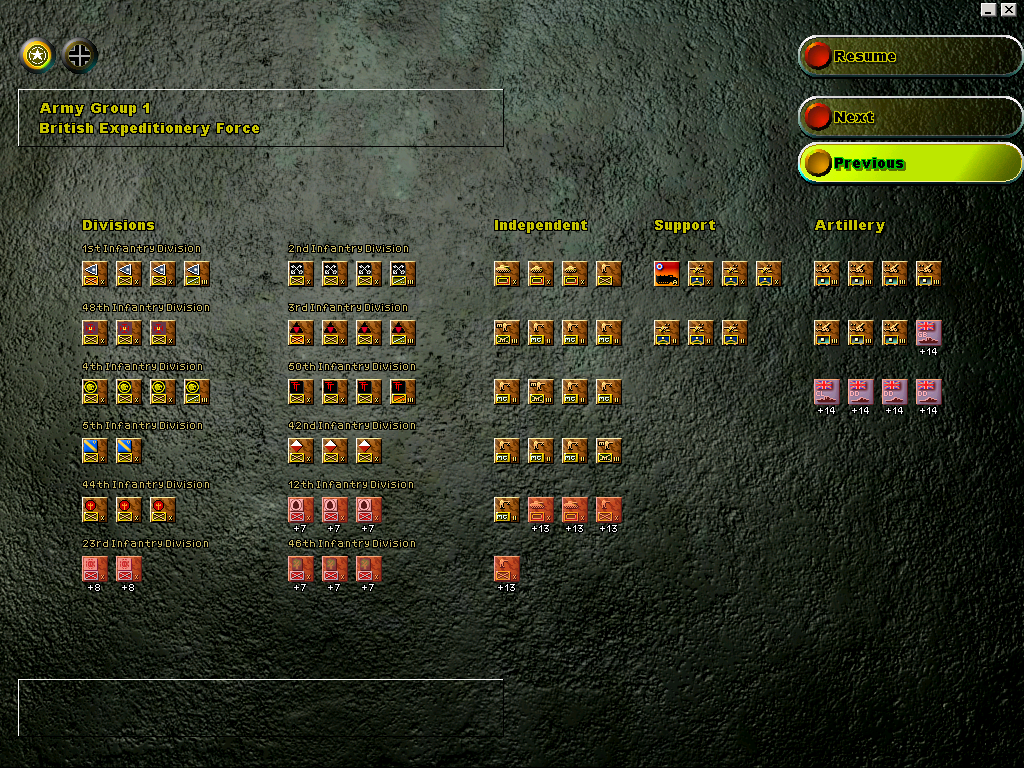
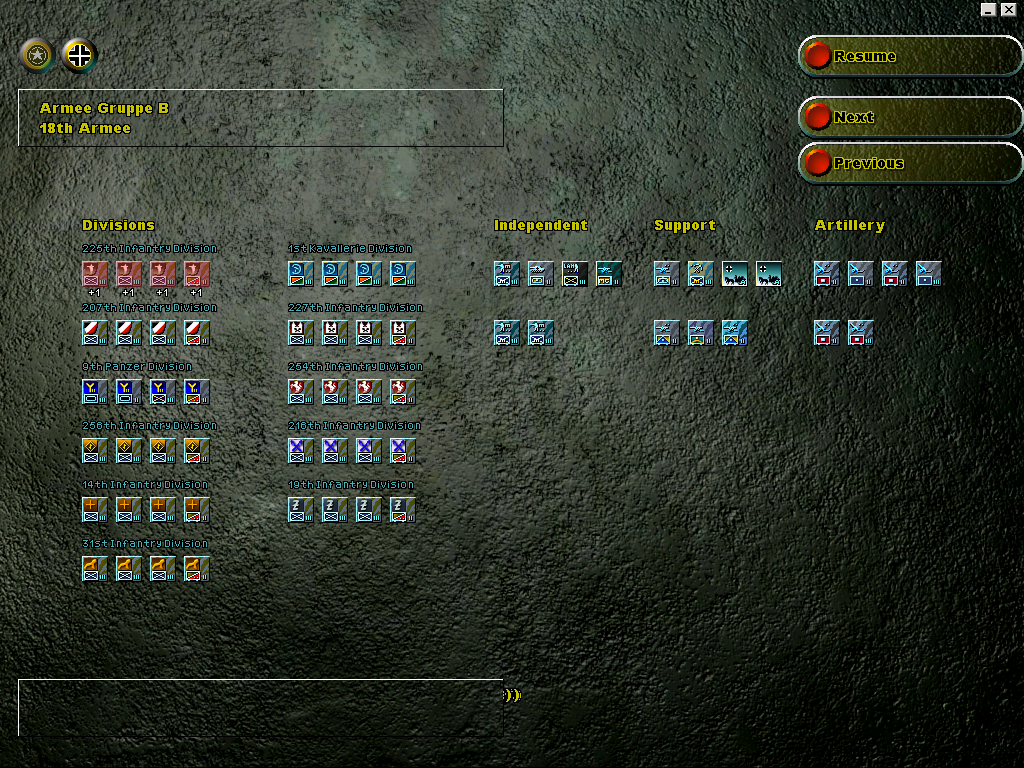
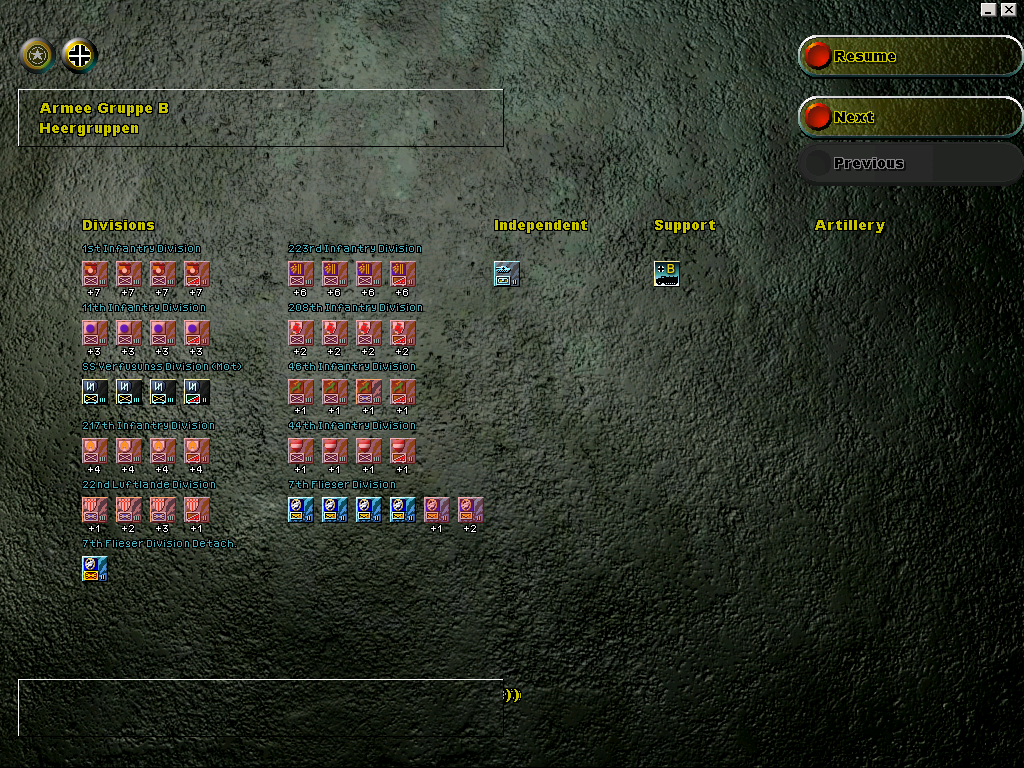
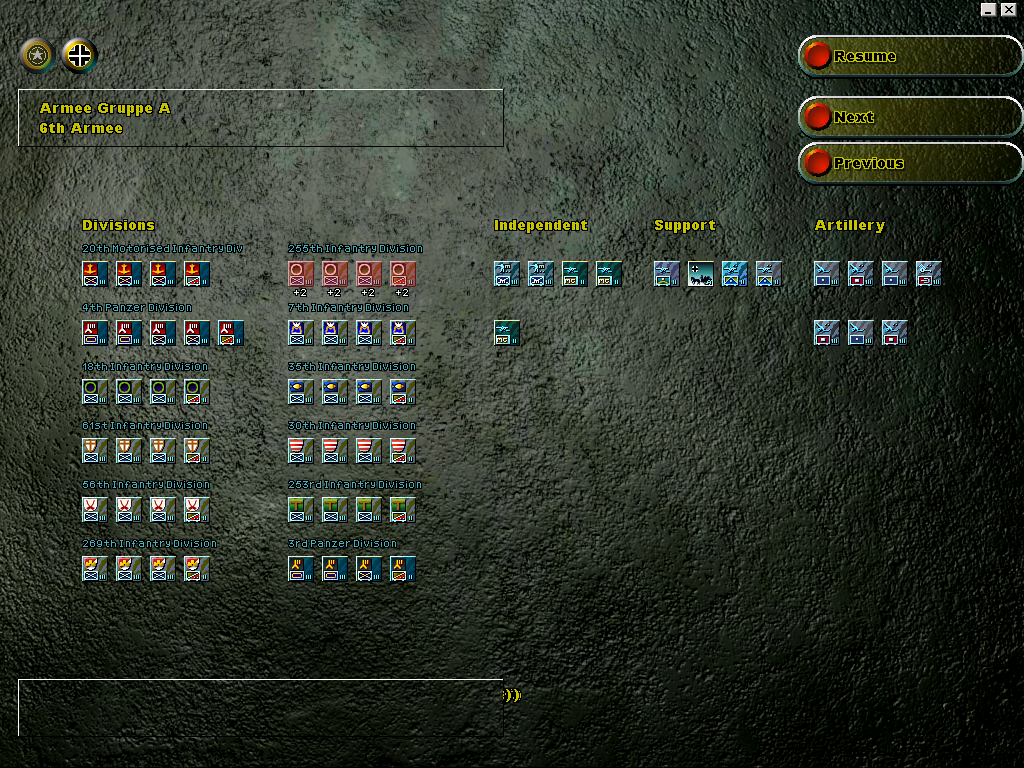
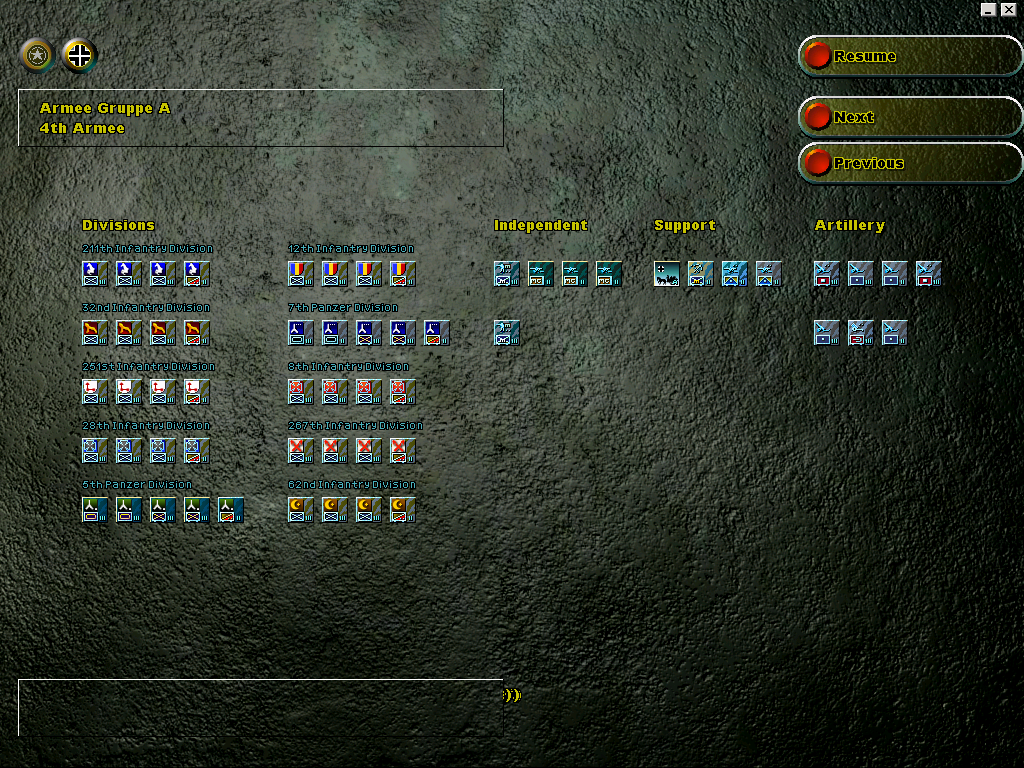
OOB Allies
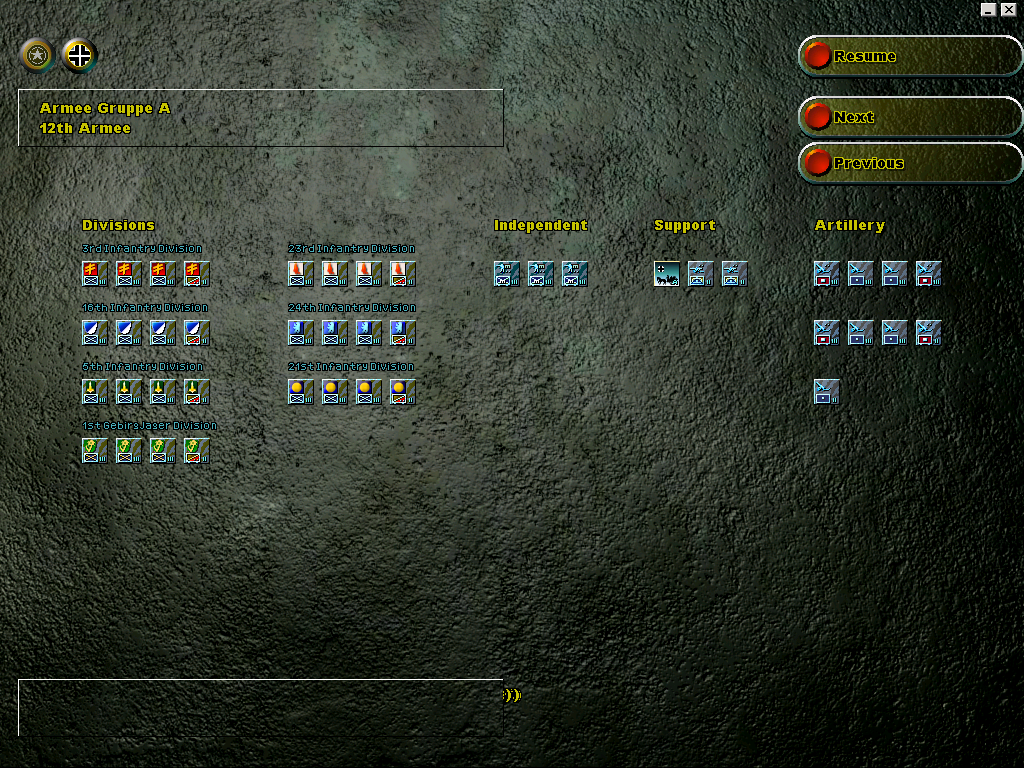
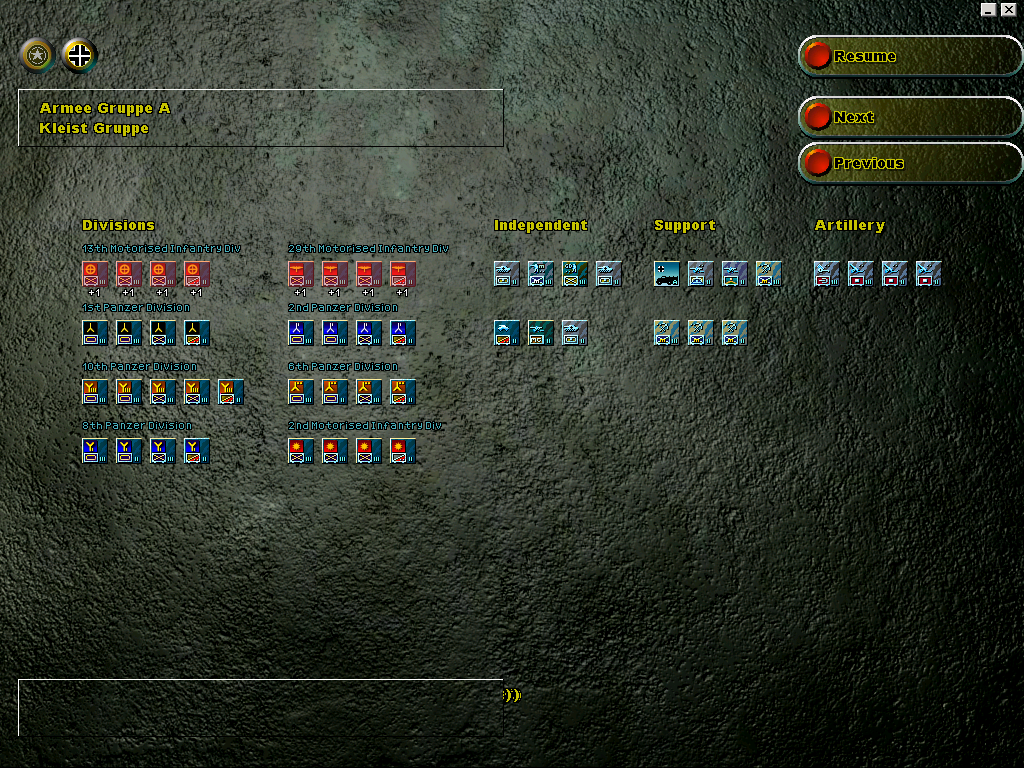
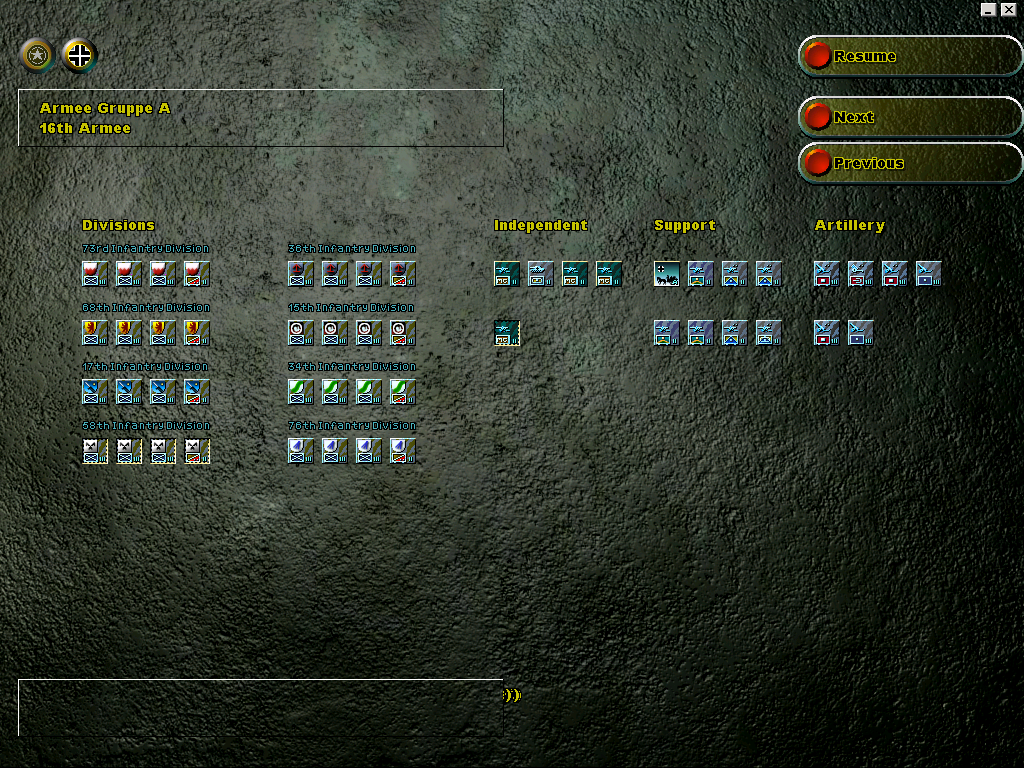
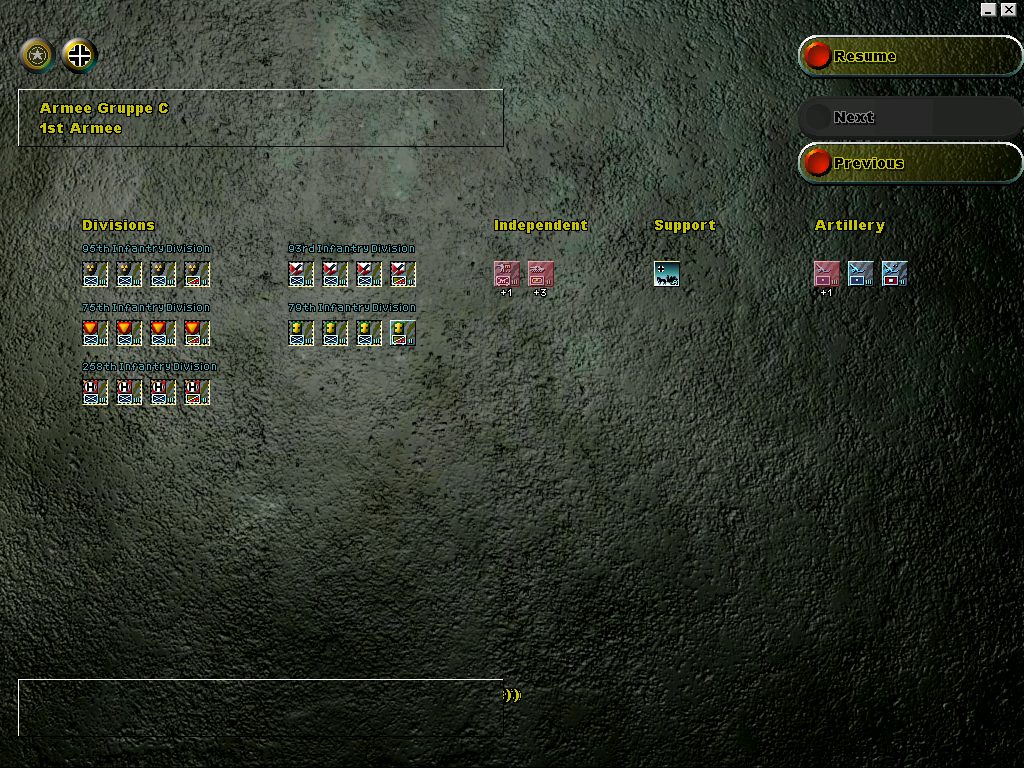
OOB Axis
Game mechanics - Interface, units, movement and supply
Game mechanics - Combat
Turn 1 (Axis) - Let the Blitzkrieg begin!
Turn 1 (Allied) - Race to the Meuse
Turn 2 (Axis) - The fog starts to lift
Turn 2 (Allied) - Waiting for the shock
Turn 3 (Axis) - Encounter on the Meuse
Turn 3 (Allied) - Bracing for impact
While the stock game comes with three scenarios (Sicily, Salerno and Anzio), the community has crafted a number of user-created scenarios. Fall Gelb is probably the most ambitious and polished one, with a beautiful map and a great attention to detail. For more information about this scenario, see here (RECOMMENDED READ).
The scenario is huge - not Barbarossa-huge but still, there are a lot of units as it covers the whole action from Holland to Luxembourg. Because of this, I'm not gonna try to cover the whole campaign but rather to focus on the more interesting parts, which will provide occasions for me to explain the game mechanics.
There may be a game-stopping bug at some point, something about the Belgian supply dumps which would stop working at some point but we'll see if that happens in our game. Also, I'm using TinyPic/Photobucket as image host - here's hoping they don't go Imageshack on us.
But let's start by taking a look at the briefing:
Thanks to historical hindsight, we know where the German main thrust in going to be (the Ardennes forest), and we know the Dyle Plan was a mistake - or at the very least its northernmost component, which sent the French 7th Army to the Breda area. We're going to use that knowledge to try to come up with a better plan, although the game has some mechanics which prevent the Allied player from being completely advantaged by historical hindisght.
Be aware that I'm playing against a very experienced opponent who I managed to beat in our last game (Normandy scenario). So he's gonna be out for blood, and the scenario still heavily favors the Axis (especially because of the incredibly high movement rate of their units). Moreover, and altough I know the engine well, I've only played this particular scenario once as the Axis, and against a much weaker opponent. Thankfully, my opponent also has a limited experience with this scenario, so we shoudl be more or less on equal grounds there.
I'll try to update this thread with the first turn before the end of the week.
Chapters
OOB Allies
OOB Axis
Game mechanics - Interface, units, movement and supply
Game mechanics - Combat
Turn 1 (Axis) - Let the Blitzkrieg begin!
Turn 1 (Allied) - Race to the Meuse
Turn 2 (Axis) - The fog starts to lift
Turn 2 (Allied) - Waiting for the shock
Turn 3 (Axis) - Encounter on the Meuse
Turn 3 (Allied) - Bracing for impact


 .
. Between all the DA2 crap and JRPG faggotry, I figured the 'Dex could use some incline with real games for real men™.