QUICK NOTE BEFORE DIVING INTO GAMEPLAY MECHANICS THAT I FORGOT TO MENTION IN THE EARLIER POST!!!!!!!! IF YOU ARE COMING FROM SENGOKU RANCE BACKGROUND, WHERE YOU COULD ONLY HOLD 30 COMMANDERS AT ANY POINT IN TIME AT TOPS AND THE FACT THAT YOU HAD TO DEAL WITH NATIONAL POWER/NATIONAL COST CRAP, DO NOT WORRY ABOUT THAT HERE, CUZ THERE AINT ANY!!!!!!! YEAAAAAAAAAAAAAAAAAAAAAH!
Now time for the shit that we all want (besides the CG's, you dirty little children! :D):
The GAMEPLAY MECHANICS! (

)
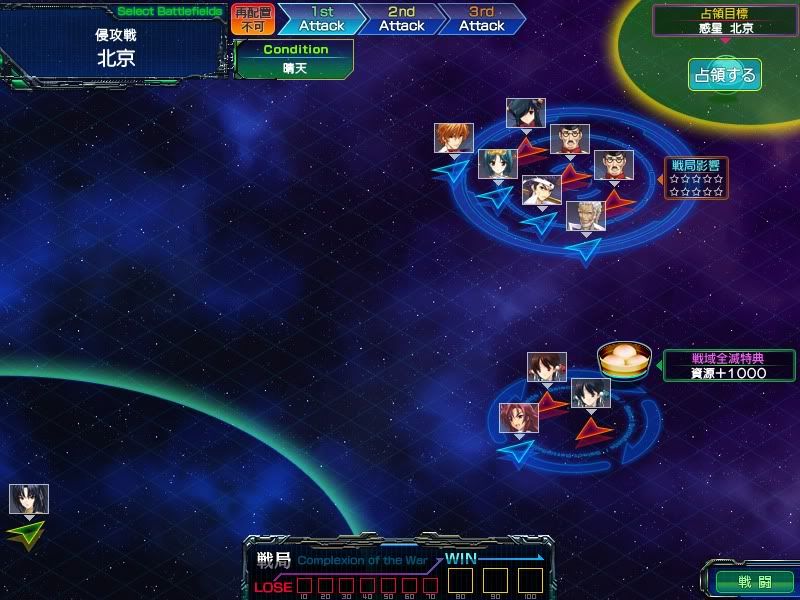
The Battle mode is called the "Tactics Phase". In my very first post, I know I mentioned that Strategy Phase leads to Event Phase; I apologize for this mistake, the order is Strategy --> Tactics --> Event --> Enemy. (Just wanted to clear this up.) In the Tactics Phase, it's quite simple: You attack the regions that you want to attack. To initiate the Tactics Phase, you must first relocate fleets into the enemy regions that you wish to attack in the Strategy Phase. Once you hit the End Turn button, it will take you to the Tactics screen, where you will be able to plan your attacks and invade.
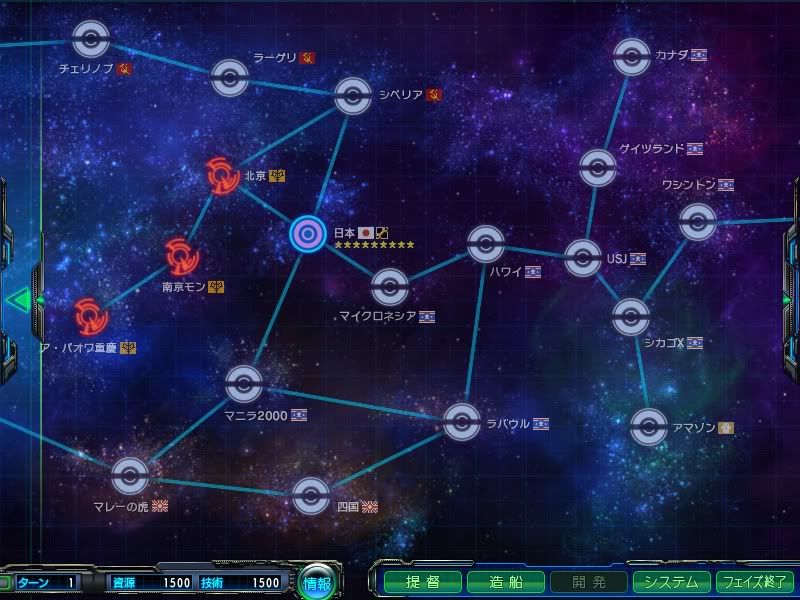
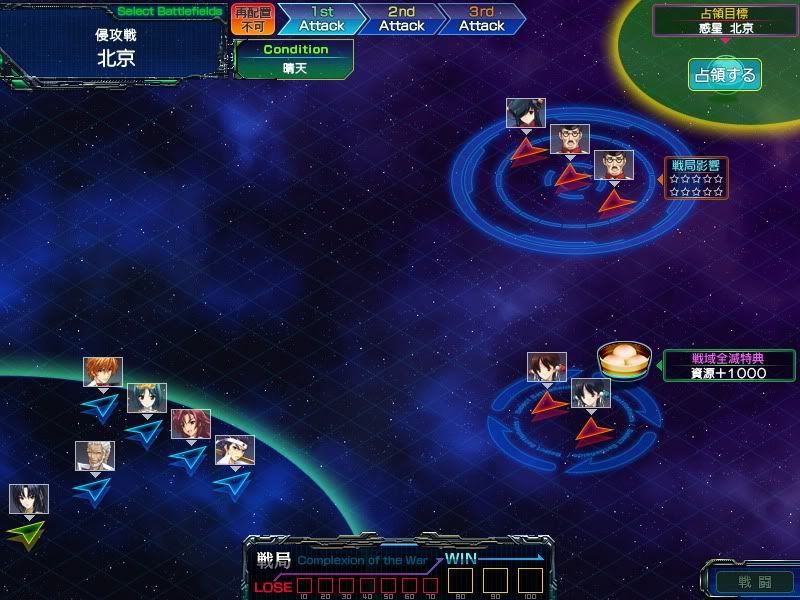
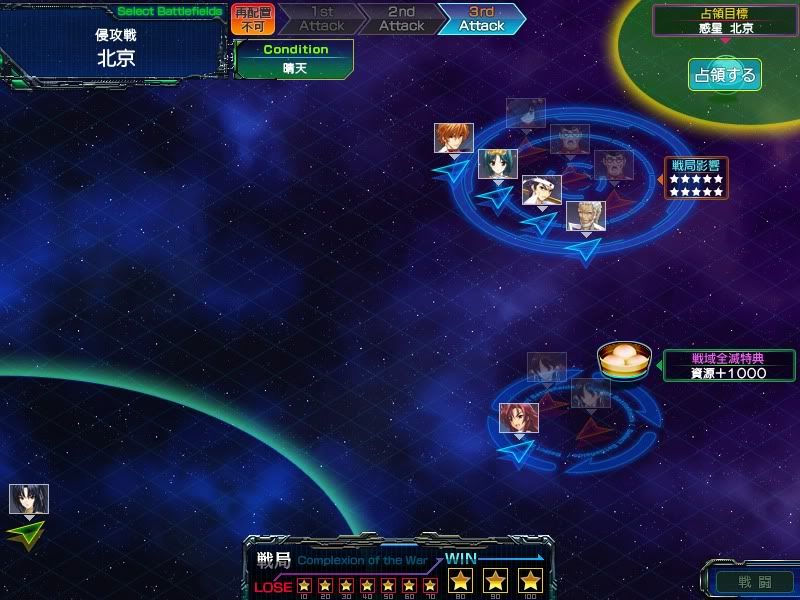
Here is what your first battle should look like:
By the way, the soundtracks for this game are amazing. SHADE definitely came back on this one.
So as you can see above, the blue triangles on the map are your units, while the red triangles are enemy units. The circles surrounding some of the units, like the group of 3 at top and the two below, denote a "battlezone", into which you must send fleets to battle the units in that zone only.
KEEP THE FOLLOWING IN MIND, THIS IS VERY IMPORTANT!
You are able to relocate AS MANY FLEETS as you like to a star region, but if you send more than 8, you will not be able to use them all. Just like in Sengoku Rance, the unit cap per battle was a 6v6 system, here it is an 8 vs. (put number here) zone. By this I mean that the enemy can have more than 8, but you cannot. The advantage of putting more units than you can send out is to juxtapose stats from your units with theirs in order to figure out what the best battle strategy is.
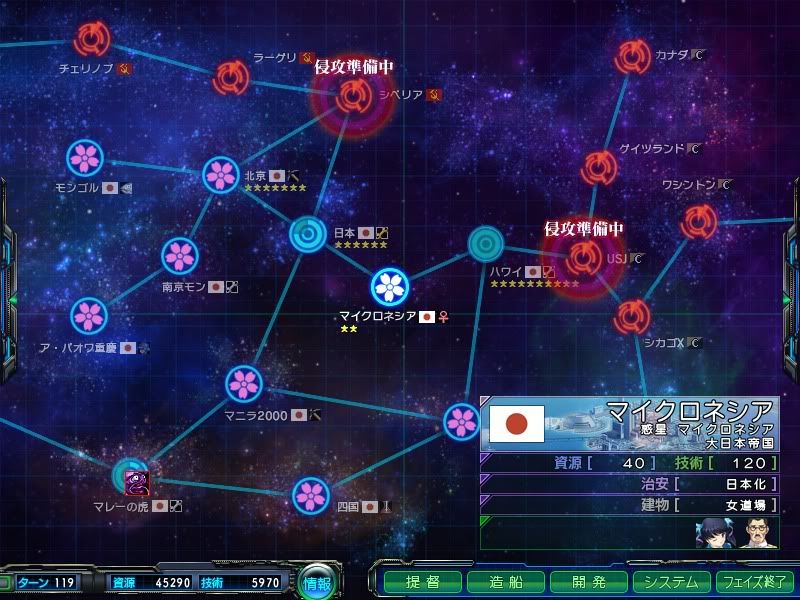
At the bottom of the screen, there is a lose/win counter. It basically tells you how much, in percentage, you are winning the battle in the form of 10 stars. You must receive at least 8 stars in order to successfully invade; if you invade without garnering enough stars, you will suffer a game over, as your ground force, led by the black-haired girl with the katana (damit, forgot her name), will get raped (non-sexually).
If you are attacking, you have three attempts to gather enough stars to successfully invade; that is denoted at the top of the screen. Immediately below that shows the space weather conditions for that battle. (I know, weather in space? What the fuck has the world come to?) You must attack zones that have stars next to them, for they are regions that will award you stars based on your performance. There may be side battles, such as the battlezone to the bottom right, that you award you with different items, like resources. I'm pretty sure the one in the pic above means you will capture 1000 resources if you annihilate the defensive force (you must wipe out ALL the opposition in order to secure your prize).
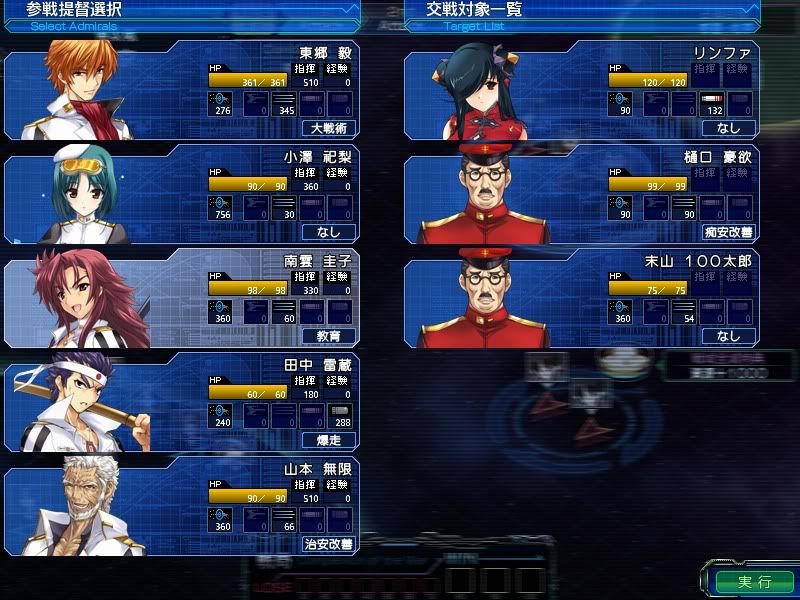
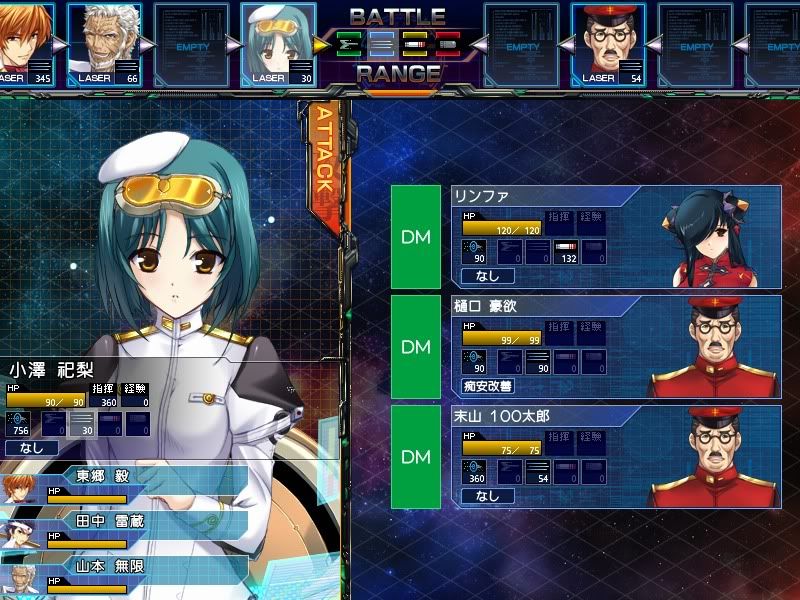
To attack, click on the battlezone that you are at least fairly certain you are able to win. When you click on a battlezone, this is what it looks like:
You can select up to 4 units to fight in a battlezone, as you can see here. The selected admirals are highlighted for you bright orange.
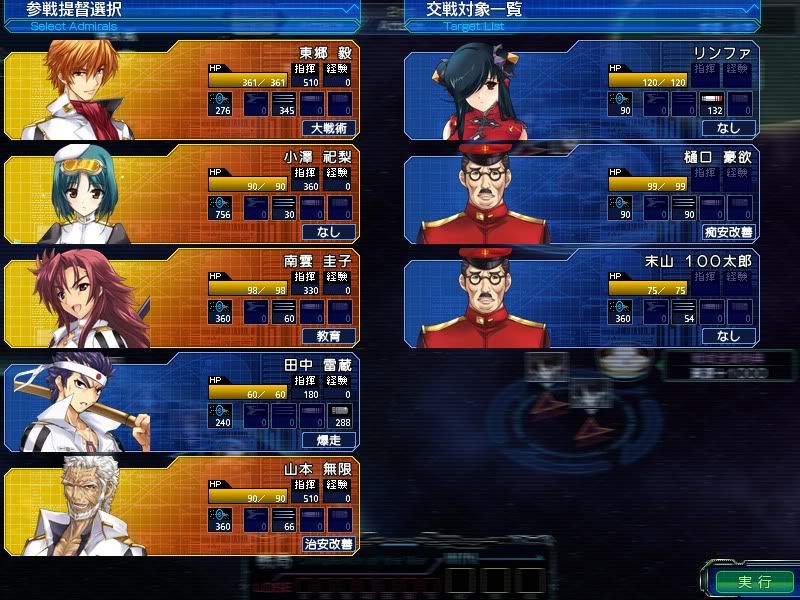
In this battlezone preview, you should compare the enemies' stats to your admirals': who should you send so that you know you will win? In Daiteikoku, THERE IS NO DEFENSE STAT, ONLY EXTERNAL CONDITIONS/RESTRICTIONS. Such conditions/restrictions will be discussed later, but for now, just know that the damage that is stated on an admiral's stat is the damage they will inflict. Therefore, Daiteikoku's battle priority lies within the "First Strike" policy: destroy your enemies without letting them unleash their own attacks on you. If you do not have v1.02, you will find that if any of your fleets take a hit and are not fully repaired by the next turn, they will not be able to participate in the next invasion, although they are still able to defend territories, so think through battles wisely. To confirm your final battle layout for that battlezone, click on the lower right button to send your fleets to that zone.
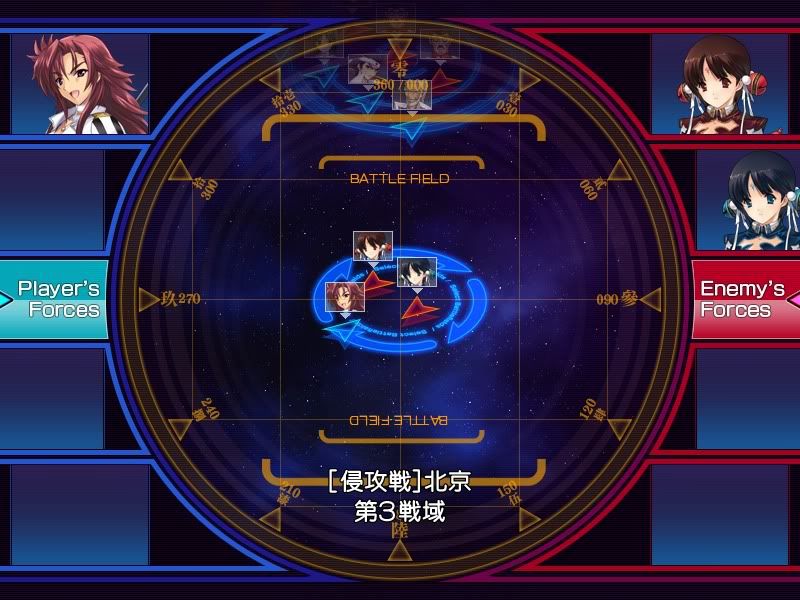
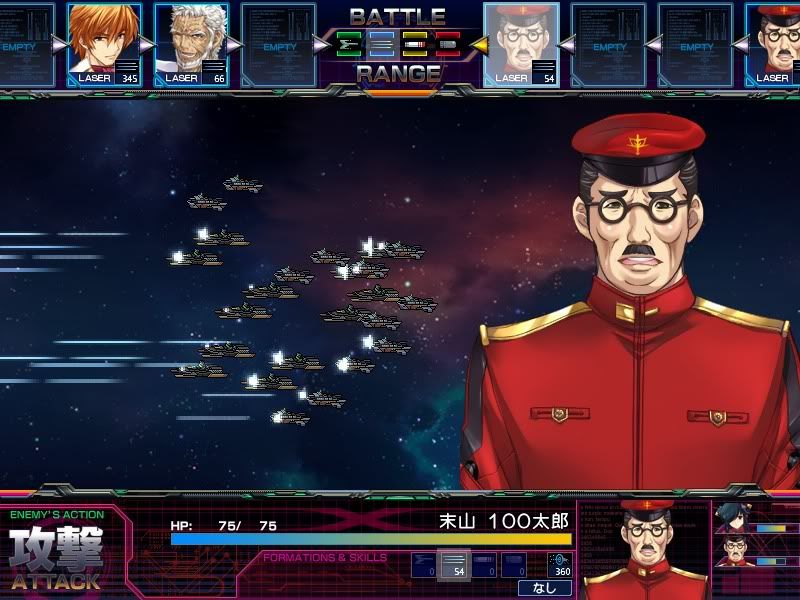
Once you have selected your battle layout, your blue triangles should be within proximity of enemy triangles, as shown here:
If you feel like you need to rearrange your battle layout once you've already selected admirals, you can click on each battlezone and de-select the admirals that you wish and rearrange them. Make sure your battle layout is the most optimal as you can get it, because once you've fought one round and you are sure that you cannot win if you fought again, you cannot go back and change your battle layout.
To begin the battle, click on the same lower right button to initiate (Again, take care not to accidentally double-click when in the admiral select screen, you will prematurely start your battle if you have not completed finishing your battle layout or thought it through well enough). Oh, and don't worry about that last green triangle in your starting location, she's always supposed to be there as the leader of the Japanese Marine Corps that takes over the planet for you once you've won the battle. (Why the Empire of Japan only has one such Marine Corps, do not even ask.

)
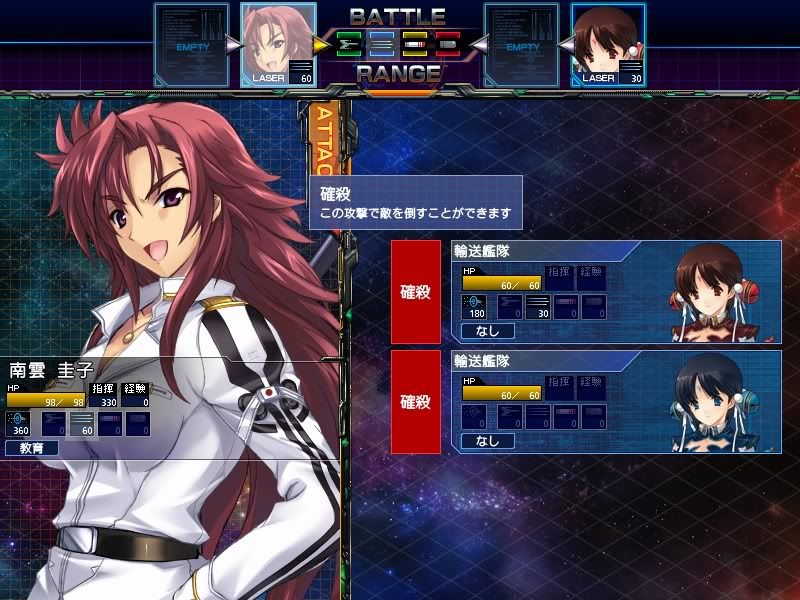
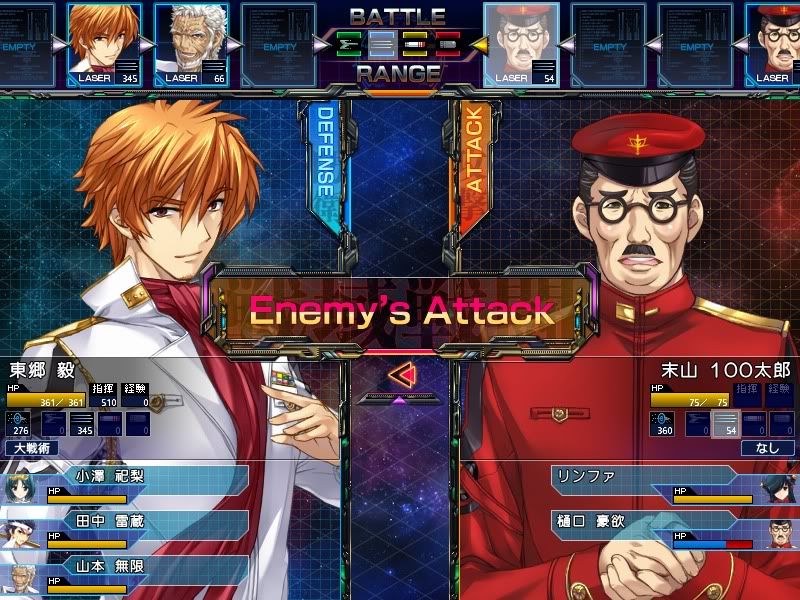
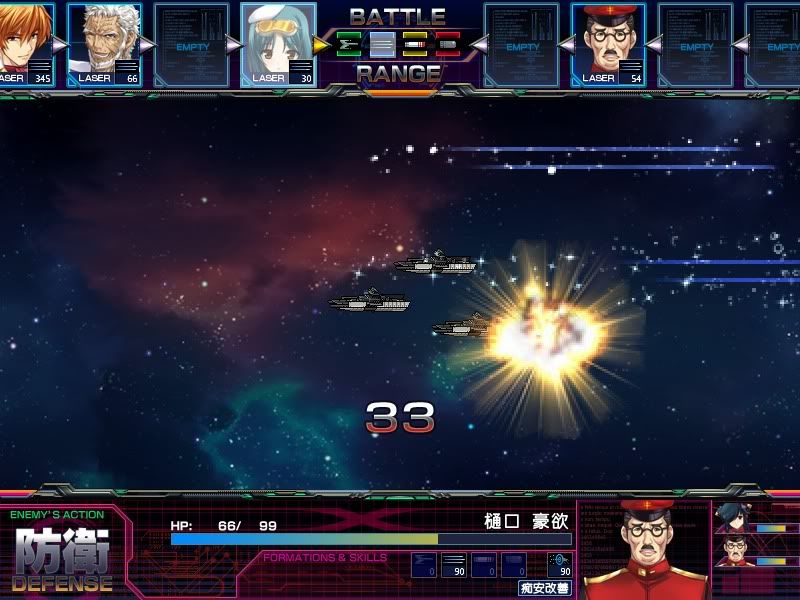
Battlezone fight preview:
This is where the fun begins.
In this screen you must select who to target; in Patch v1.02 (which I am using and that this picture is showing), the game will actually tell you what units you can 1-shot-kill, damage, or not damage at all; this comes in handy when planning who exactly to fire at first. BE CAREFUL WHEN YOU SELECT YOUR TARGET, TO THE BEST OF MY KNOWLEDGE YOU CANNOT UNDO YOUR TARGET SELECTION ONCE YOU'VE CLICKED ON AN ENEMY ADMIRAL! (I could be wrong, but I couldn't find anything that allowed me to undo such an action.)
1Hit-KO: The red button that is seen in the above pic. DO NOT CONFUSE WITH ANOTHER RED BUTTON THAT SAYS " ??? " THAT MEANS THAT THE GAME DOES NOT KNOW EXACTLY HOW MUCH DAMAGE A UNIT WILL INFLICT ON AN ENEMY DUE TO A PASSIVE SKILL OR RANDOM WEATHER CONDITION (example: Lala from Manila 2000, she has the Passive Skill "Fluke" that has a 10% chance to give her a 10% ATK boost when she attacks. Kinda useless, but that's when the "???" sign will appear next to the enemy admirals in this screen.)
DAMAGE: It will be a green tab with the English letters "DM". If you are wondering why sometimes the tab says "DM" instead of "1HKO" (the Japanese kanji for it, rather) when you are certain that your admirals have much more damage than the enemies' HP, it's usually because of some damned weather condition.
NO DAMAGE: It will be a yellow tab with the English letters "ND". This is the bitchiest, caused by weather conditions, planetary conditions, or enemy shields (some admirals have shields). This "ND" tab usually appears with Lasers and a few times with carriers, but Missiles and Cannons usually don't have this problem.
In battle mode, there is one MAJOR element that you must consider when choosing who to hit: the battle order. Just like in Sengoku Rance but more similar to Daibanchou (Big Bang Age), the order follows the kind of weaponry the fleets participating in the battle are equipped with, and the game system will project that on the top part of the screen (bottom part if you are in the middle of an attack sequence). The battle order goes as following:
FIGHTERS (I like to call them Carriers, a reference to WWII's aircraft carriers, cuz they look like aircraft carriers)
LASERS (your main type of weaponry for most of the game, definitely in early game)
MISSILES
STEEL BULLETS (CANNONS)
This sequence, if you forget, is always listed at the top middle of the screen, from left to right in that order.
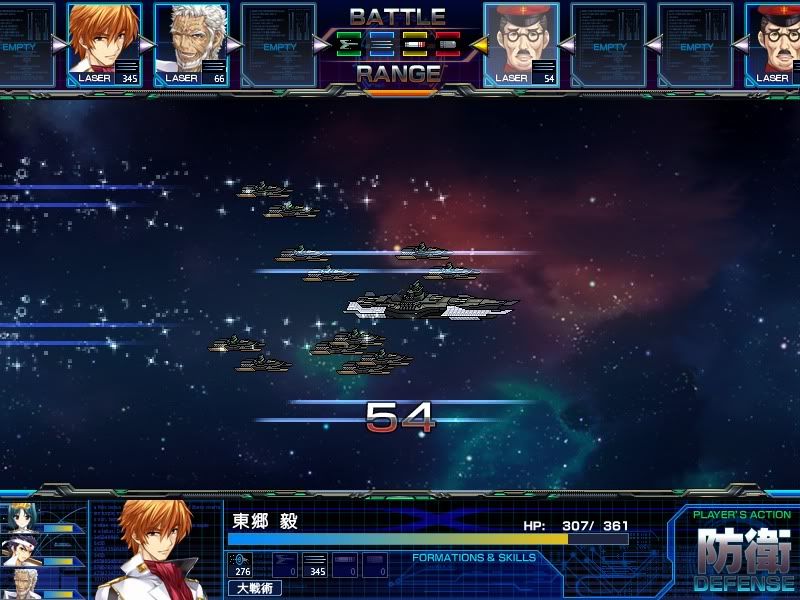
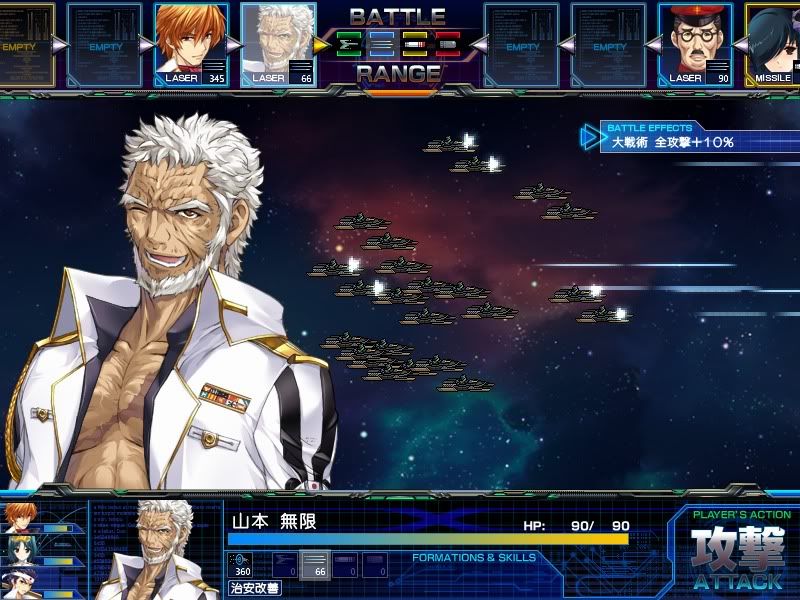
In-battle scenes:
Once you have completed the battle and have acquired at least 8 stars, all you need to do now to secure your victory is to click on the upper right button in the shape of a planet to send the Japanese Marine Corps to secure the planet and ensure your victory.
Brief cut scene depicting the invasion of the Marine Corps:
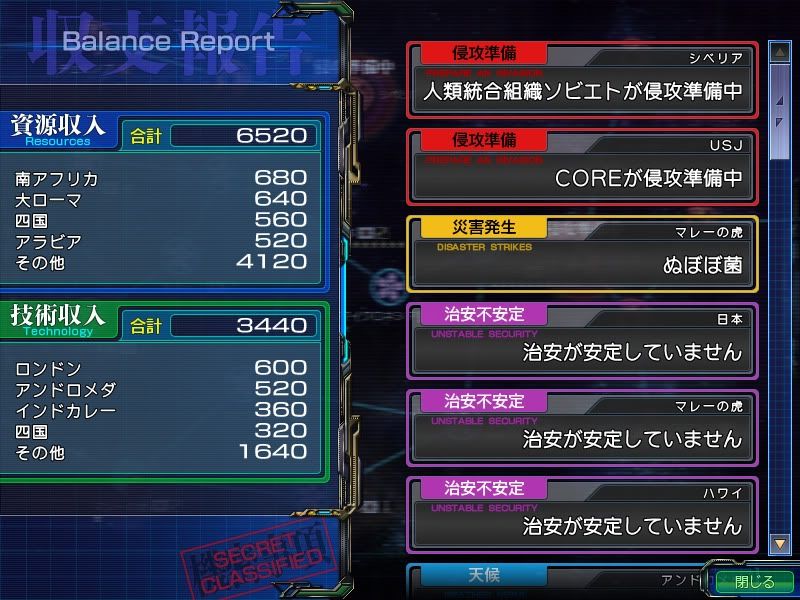
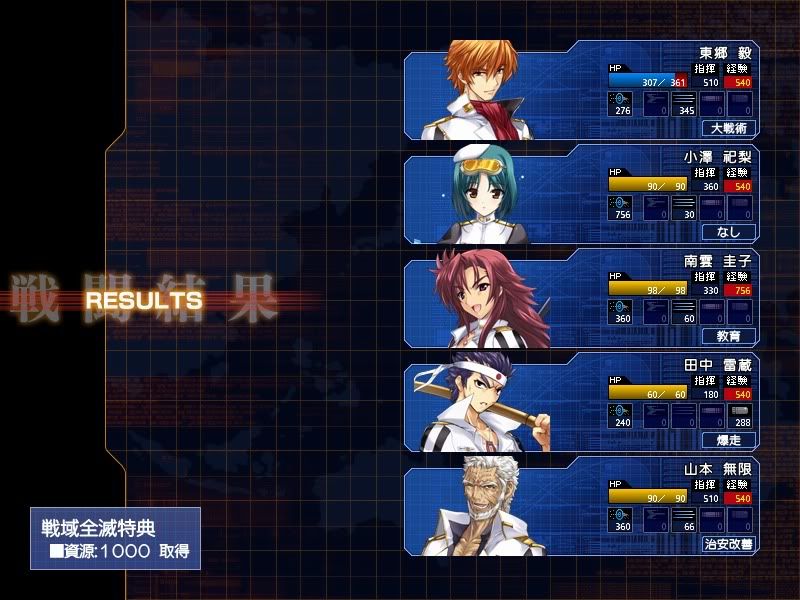
This is your post-battle report. This shows all your admirals who have participated in attacks in battlezones and, most importantly, their experience points. Daiteikoku follows a simple system of leveling that is very effective later in the game: All admirals have a level cap of 10, so most start out at 1, but the more they fight in battles and win, the higher levels they become. Higher levels means higher bonus percentages for admirals, which I will explain later (because I neglected to explain this in the "Strategy Phase" post, damn it!

) To exit, simply click anywhere on your screen.
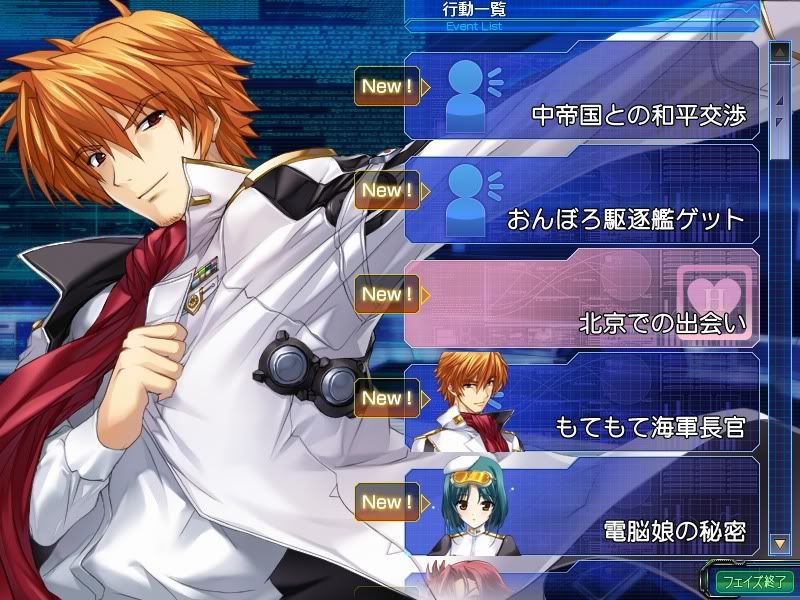
After the Tactics Phase is the Event Phase that I mentioned earlier. All new events will have the "new" tag labeled on them; if you do not select it one turn, the "new" tag will disappear the next Event Phase, but the actual event will still be there (unless there is a condition). Any H-Scene will be highlighted pink...self-explanatory.
In this particular Event Phase, I highly recommend you click on the first H-Scene event. I won't spoil what it is (I don't know to make spoiler tabs, fuck!), because it will eventually lead you to recruit the girl in the event who is statistically downright shit but useful because she has the Passive Skill "Public Peace Boost", which is always helpful.
That should conclude the Tactics and battle gameplay; again, any corrections/suggestions are always welcome. Questions too :D