Putting the 'role' back in role-playing games since 2002.
Donate to Codex
Good Old Games
  • Welcome to rpgcodex.net, a site dedicated to discussing computer based role-playing games in a free and open fashion. We're less strict than other forums, but please refer to the rules.

    "This message is awaiting moderator approval": All new users must pass through our moderation queue before they will be able to post normally. Until your account has "passed" your posts will only be visible to yourself (and moderators) until they are approved. Give us a week to get around to approving / deleting / ignoring your mundane opinion on crap before hassling us about it. Once you have passed the moderation period (think of it as a test), you will be able to post normally, just like all the other retards.

Let's Play NetStorm!

catfood

AGAIN
Joined
Aug 28, 2008
Messages
9,345
Location
Nirvana for mice
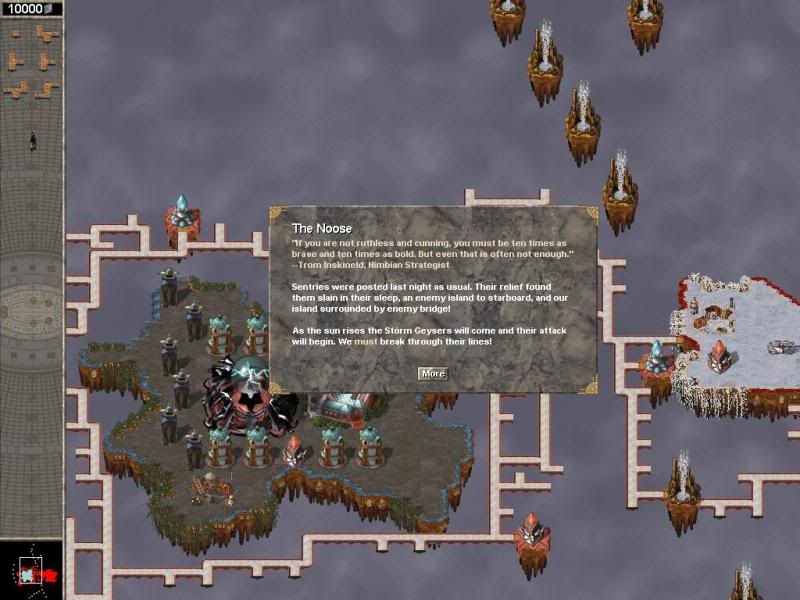
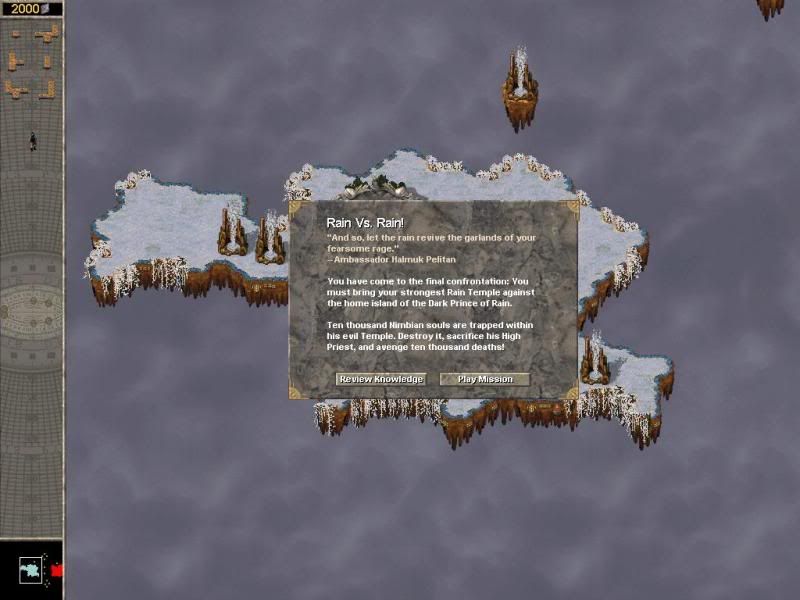
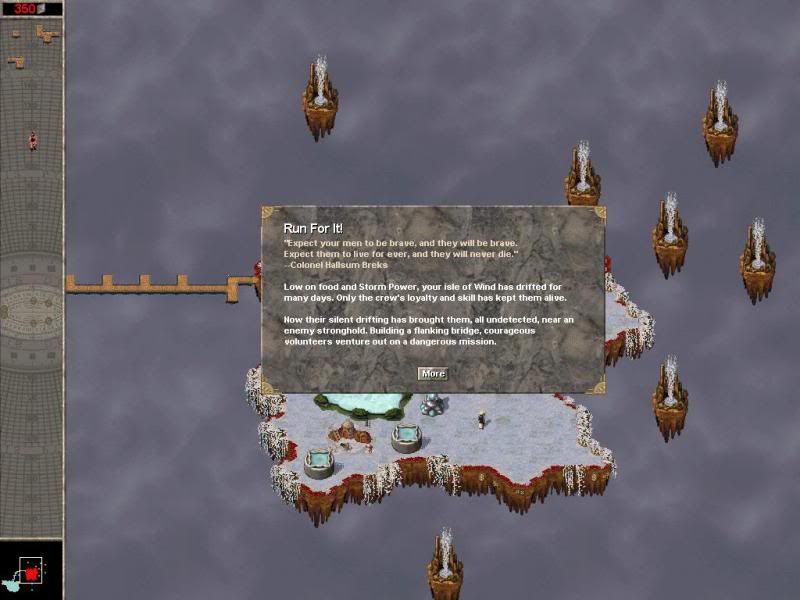
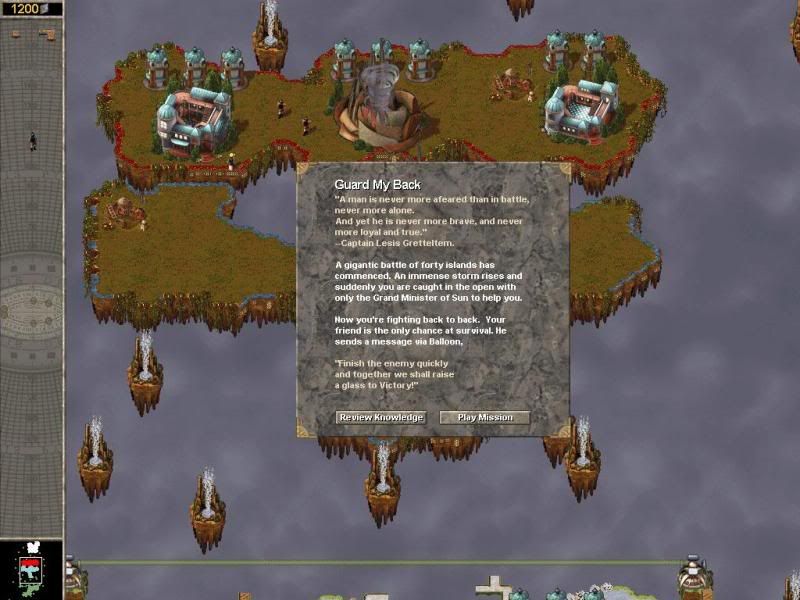
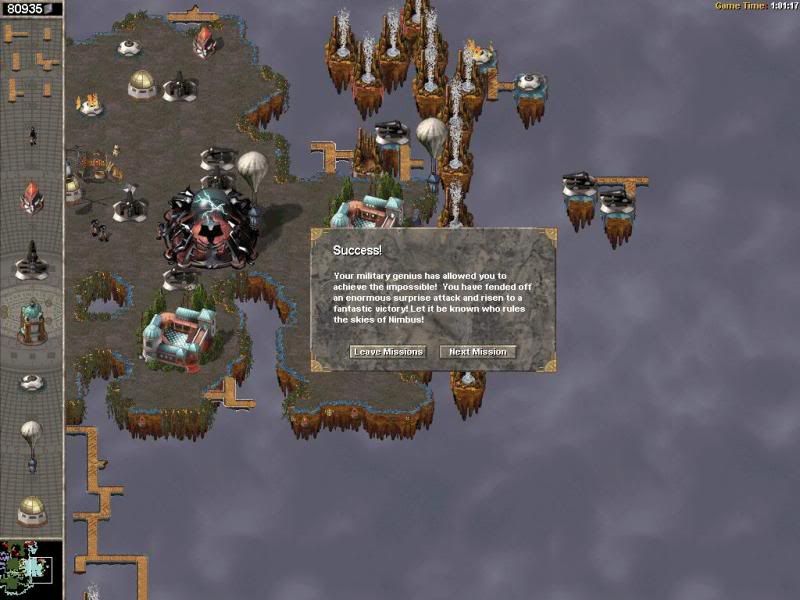
Time for a late update. As I mentioned before this mission took many tries before I figured it out, so many that I have lost track of them, but I believe the number is somewhere in the 20s. That is including those 30 second tries where I hit alt-F4 out of frustration because I misclicked something.

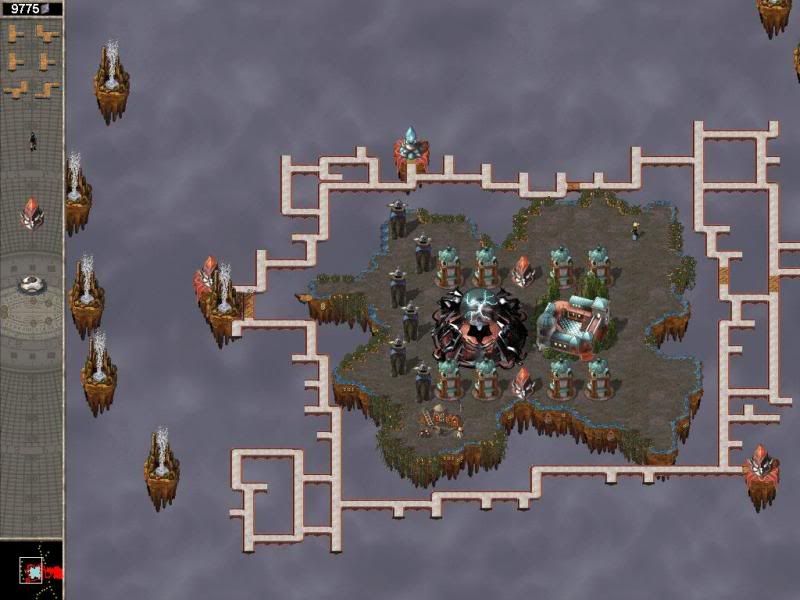
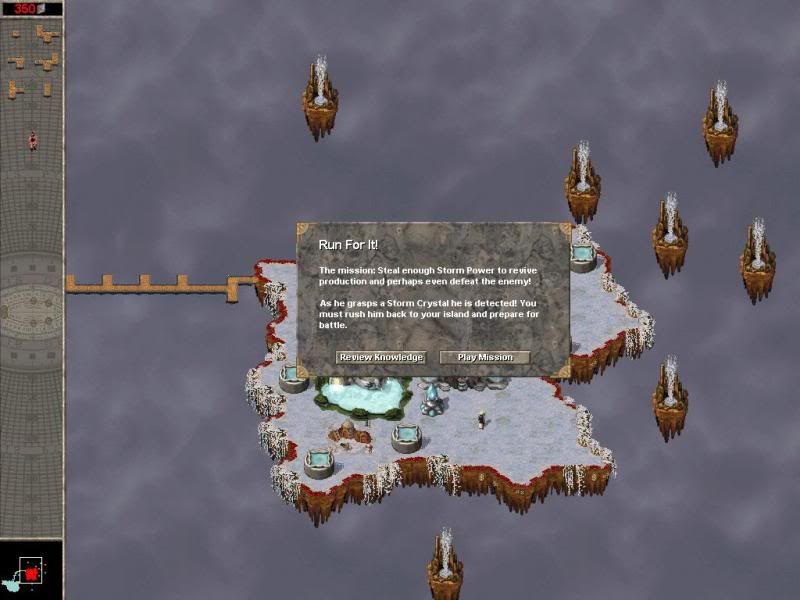
Anyway let's fire this baby up.

mis6pic1.jpg


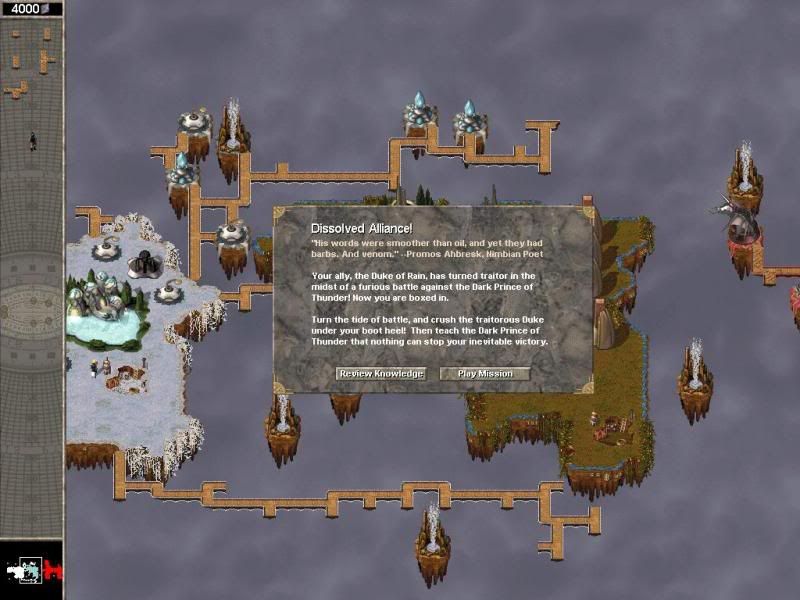
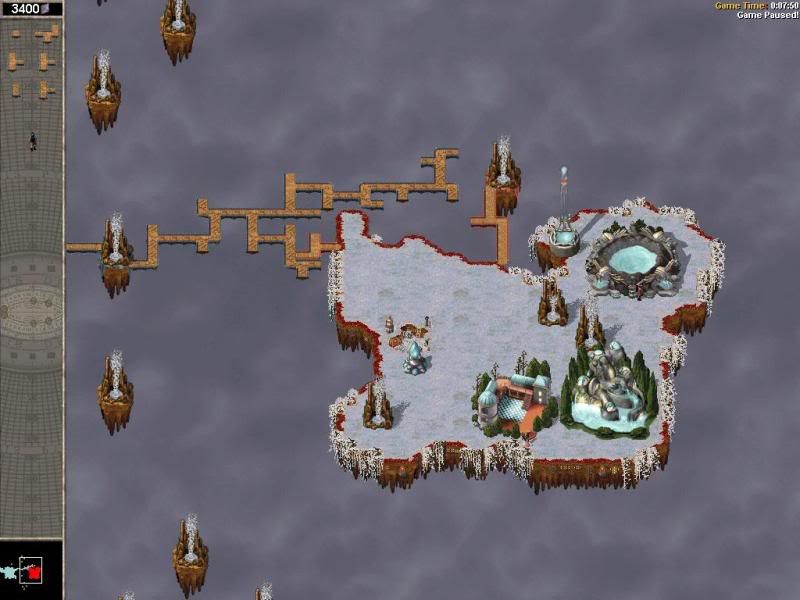
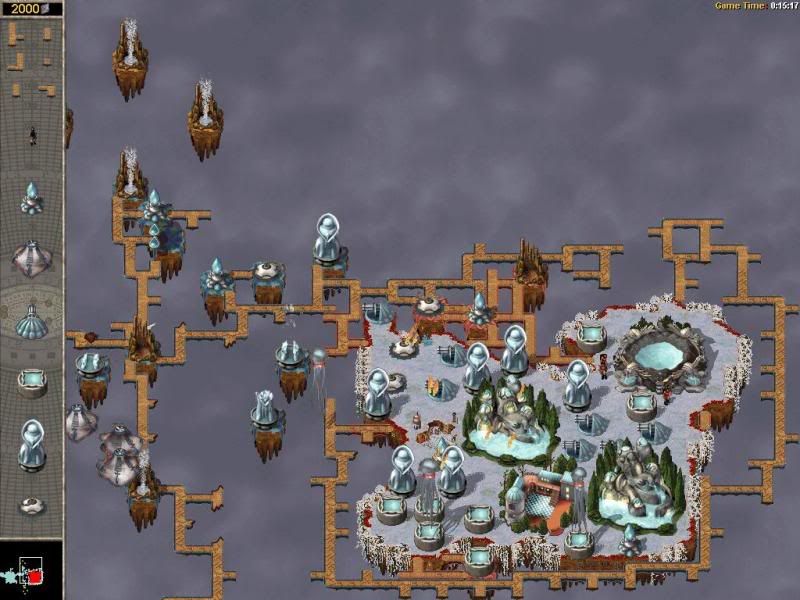
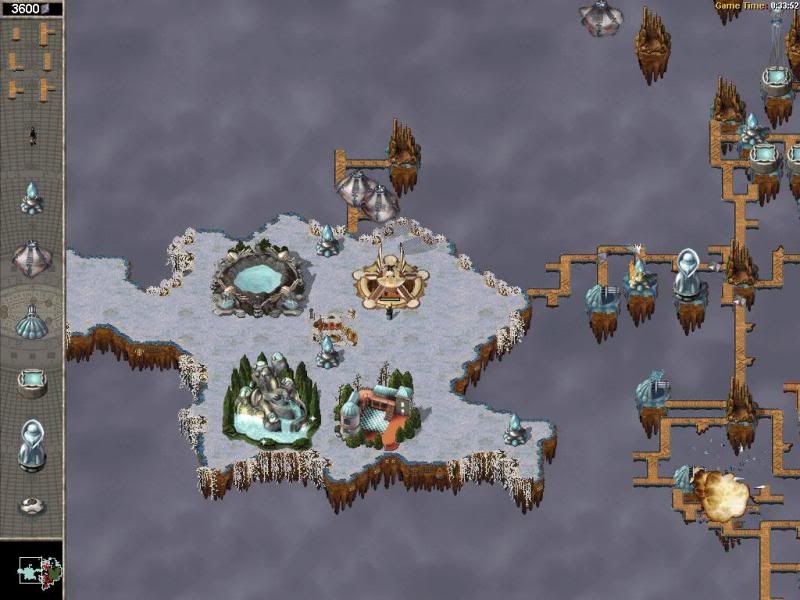
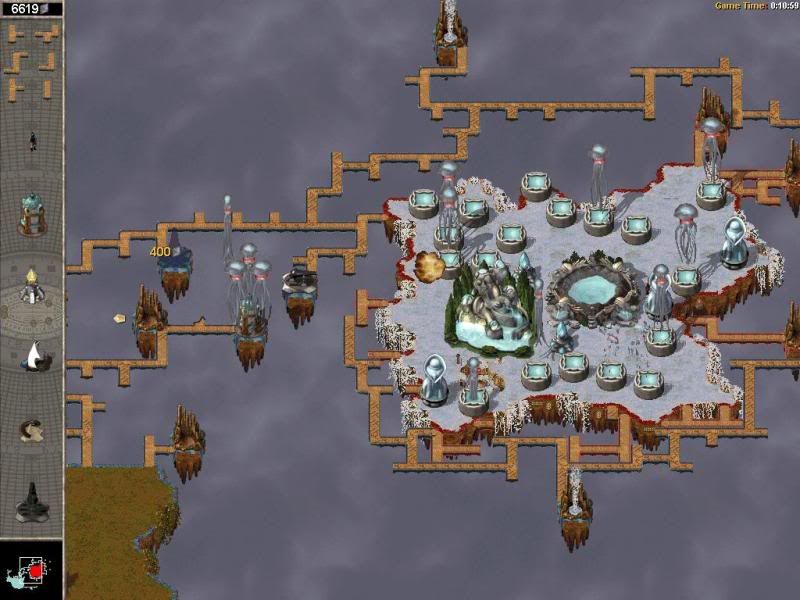
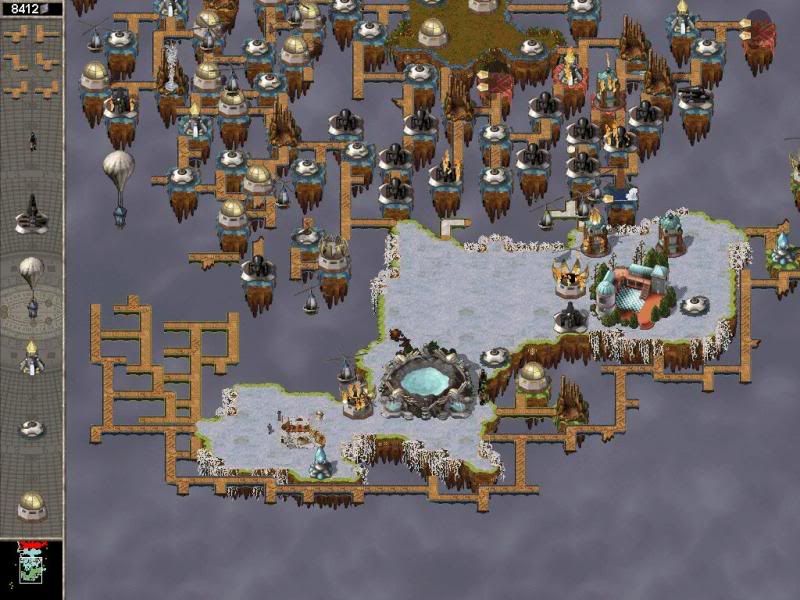
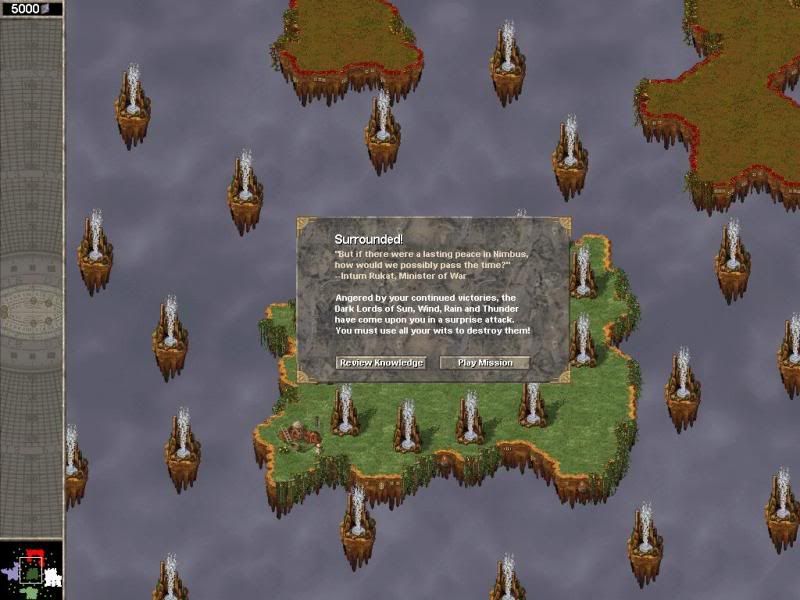
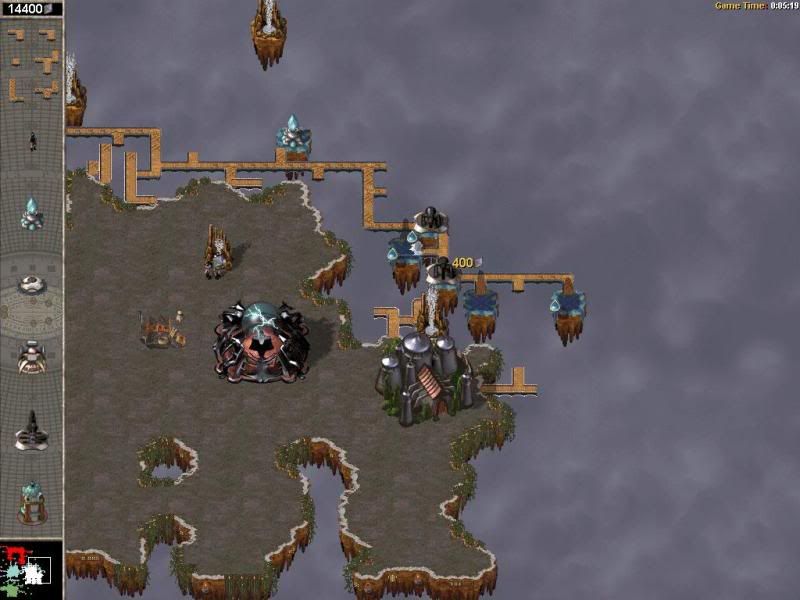
As you can see, we got betrayed by that faggy Duke of Rain. He is going to pay for his arrogance.

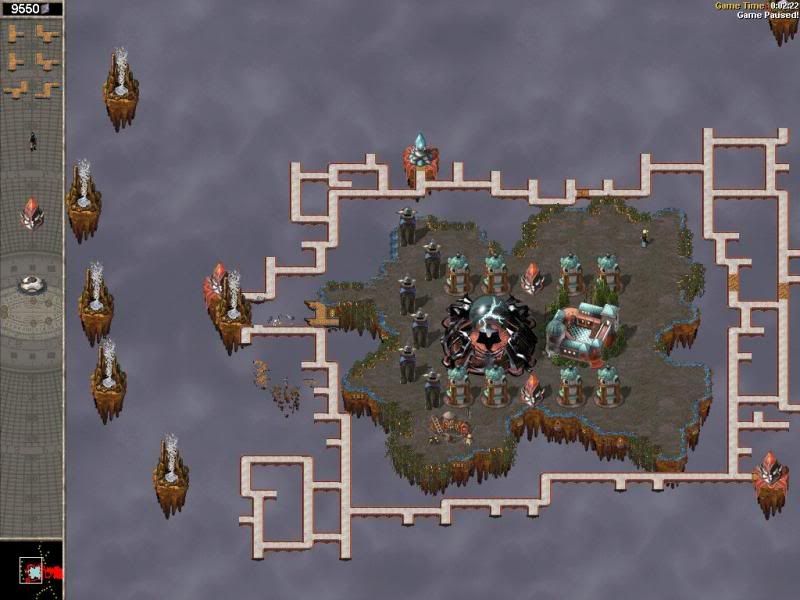
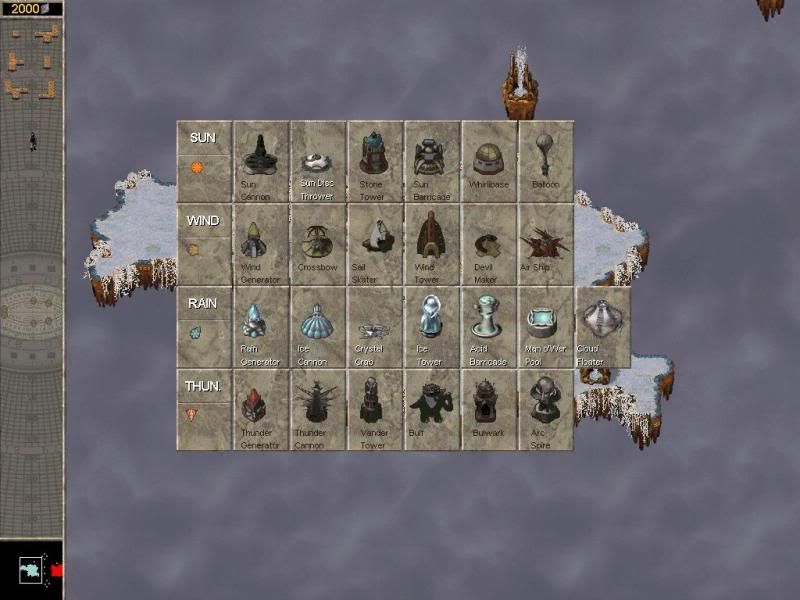
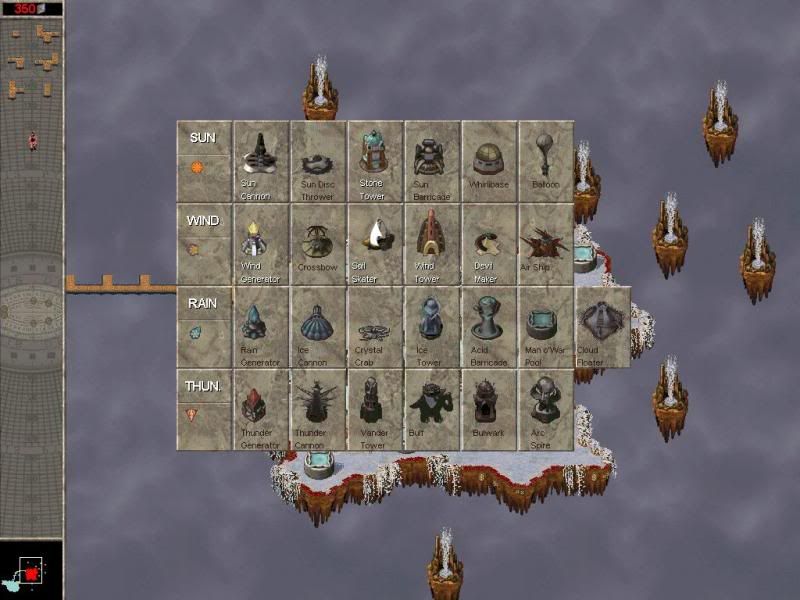
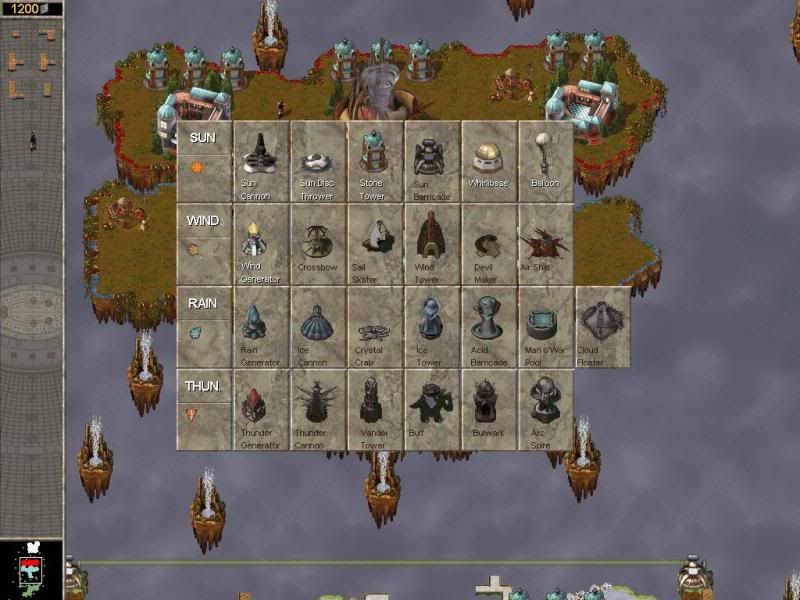
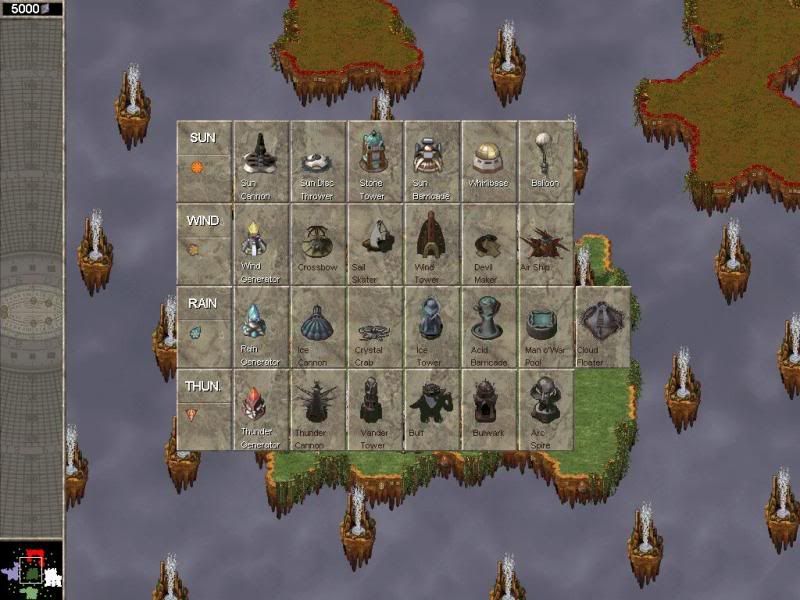
Let's review our new tech:

mis6pic2.jpg


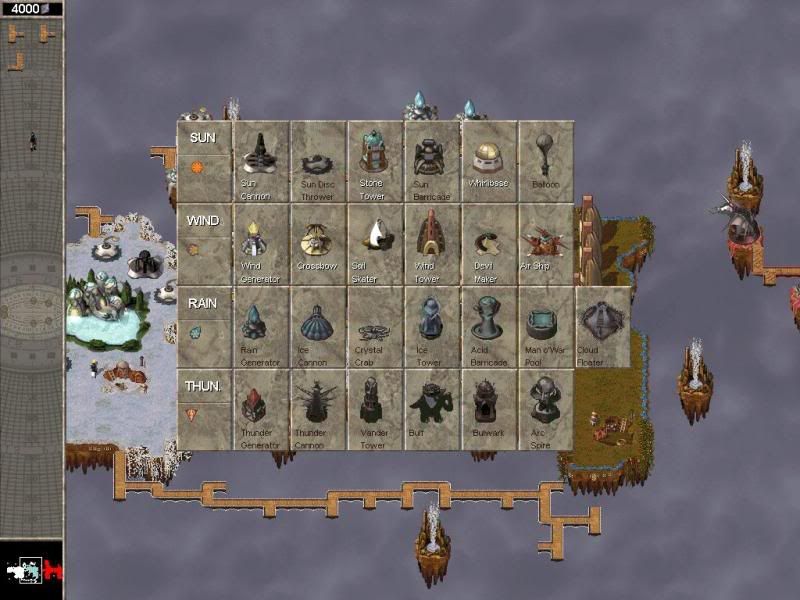
Awesome. The new tech is the best in the game. In fact it's so good that in multiplayer 90% of the players choose to play with it. The game is broken like that. Hopefully a new patch will fix this issue. So what's so good about it? Let's have a look:

xbow.jpg


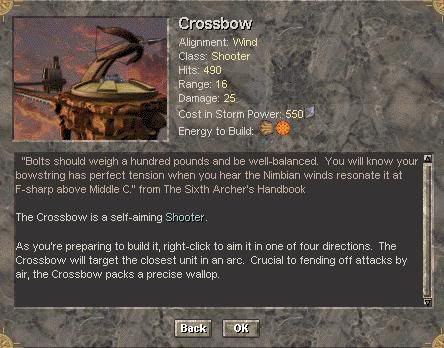
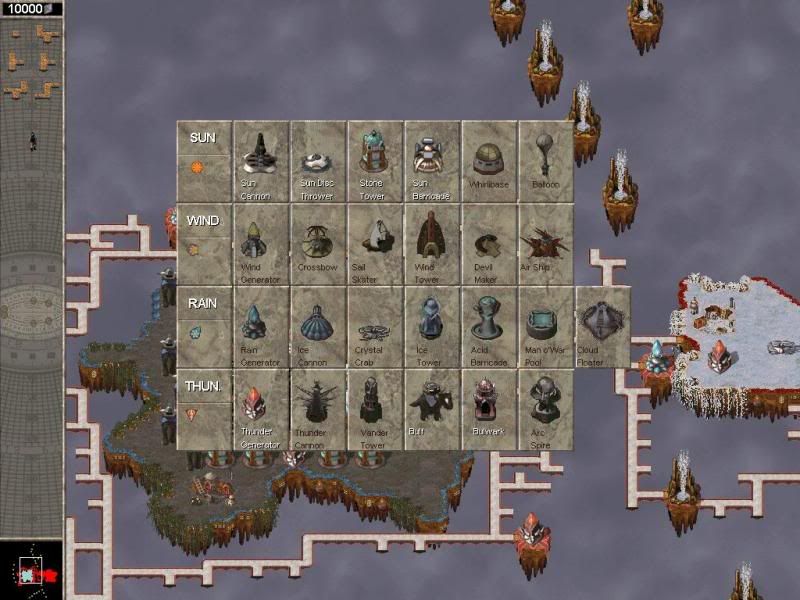
Crossbow! The best shooter you can buy. Why is it so good? Well, unlike other attackers this one fires in a 60 degree cone which as you can imagine gives it a great amount of flexibility., though the range isn't amazing. It's damage isn't too great however it fires really fast. And it costs only 550 crystals. Awesome.
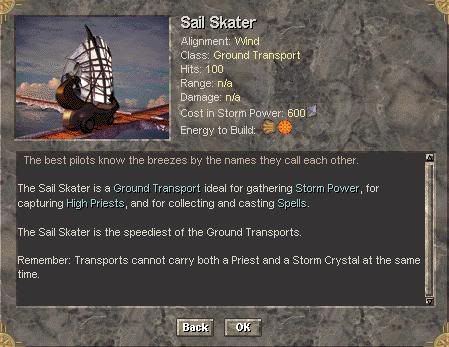
sailsk8r.jpg


Sailsk8er! :cool: I really like the idea behind this little thingamajig. The fastest transport in the game, however I won't be using it in this mission.

windtower.jpg


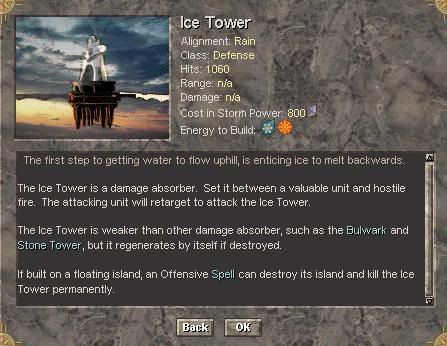
Windtower! In my opinion this one is tied with the thunder's tower for the best blocker in the game. It has poor hp however it is COMPLETELY immune to fire on it's curved side meaning with several of these you can make an impenetrable wall. You'll see how well it works in a sec.

devilmaker.jpg


dustdevil.jpg


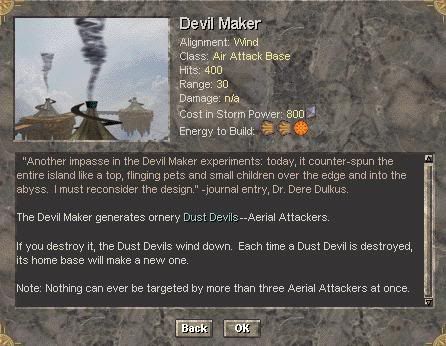
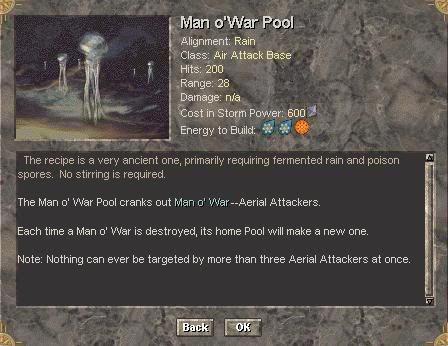
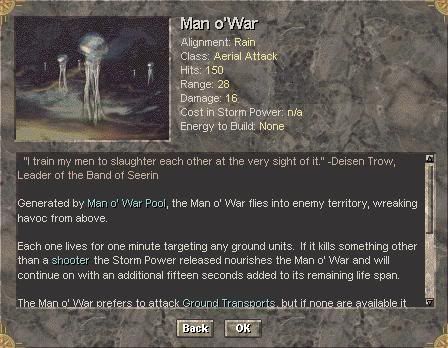
Another aerial attacker. This one spawns dust devils which only last 20 seconds, do little damage however are also immune to fire. In fact they can't be targeted at all, which I guess is not so good. They can also attack transports and priests which is a nice bonus. We'll be using a few of these.

airship.jpg


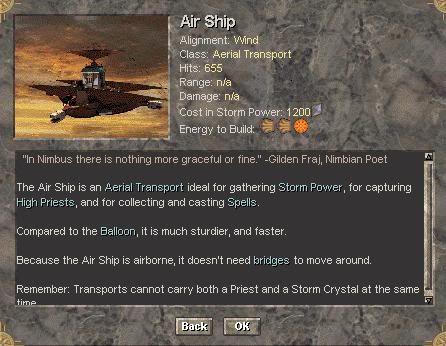
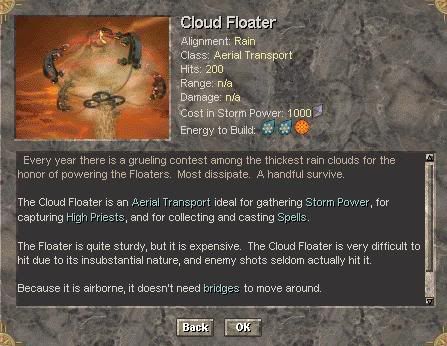
Airship! The most expensive transport in the game, however it's quite sturdy and being a flier it means it's not dependent on bridges to get to where I need them. These will have a very special role in this mission, you'll see what that is.

mis6pic3.jpg


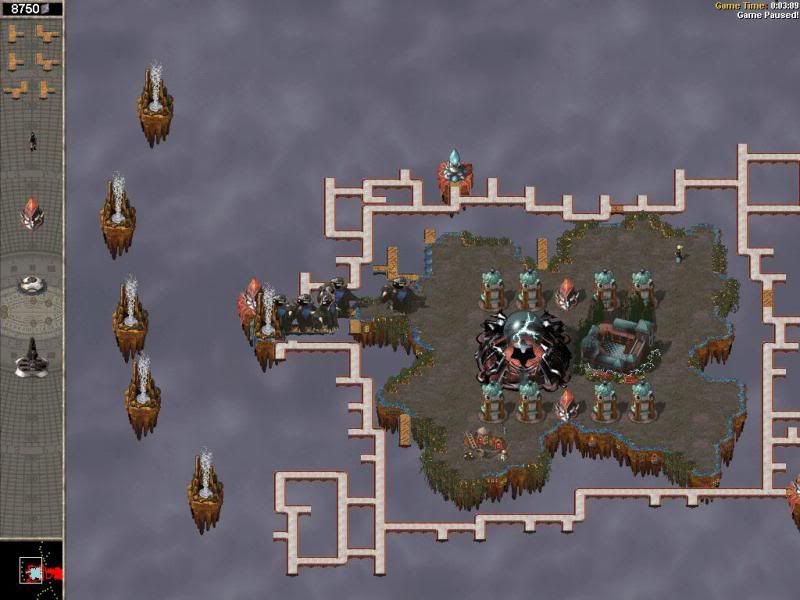
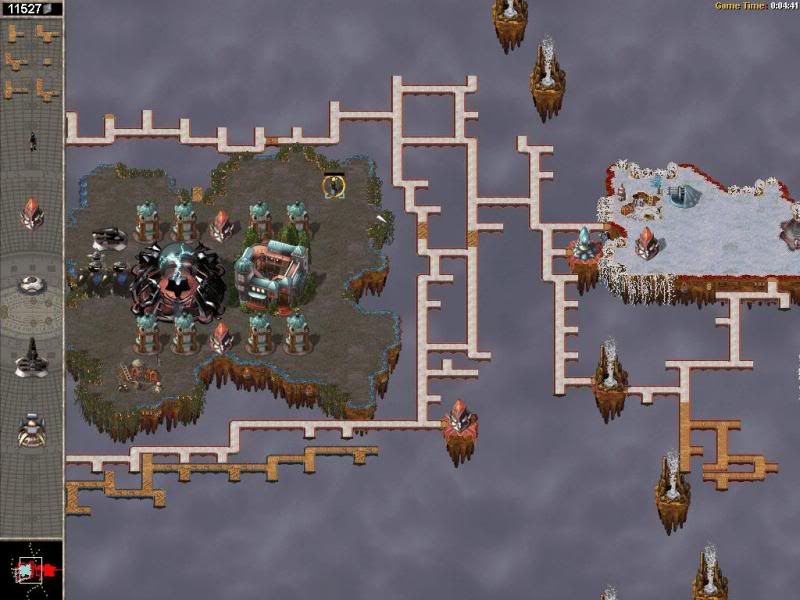
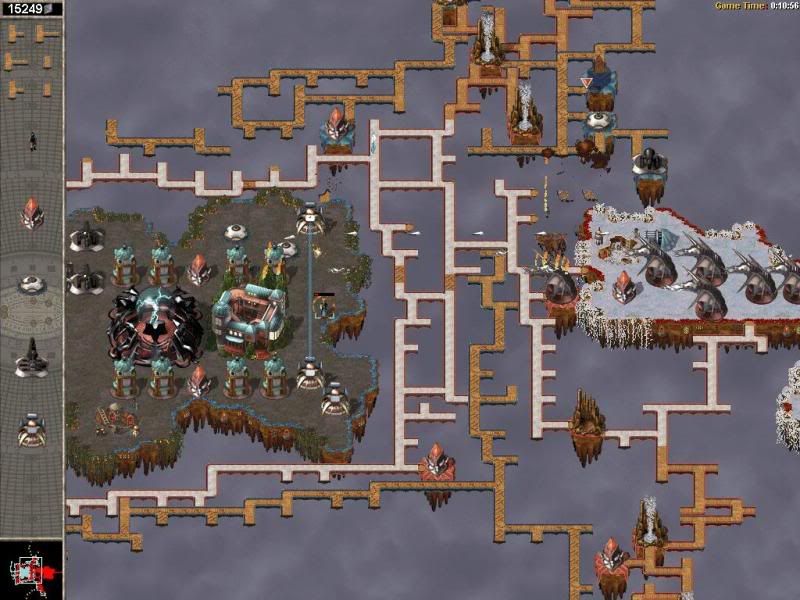
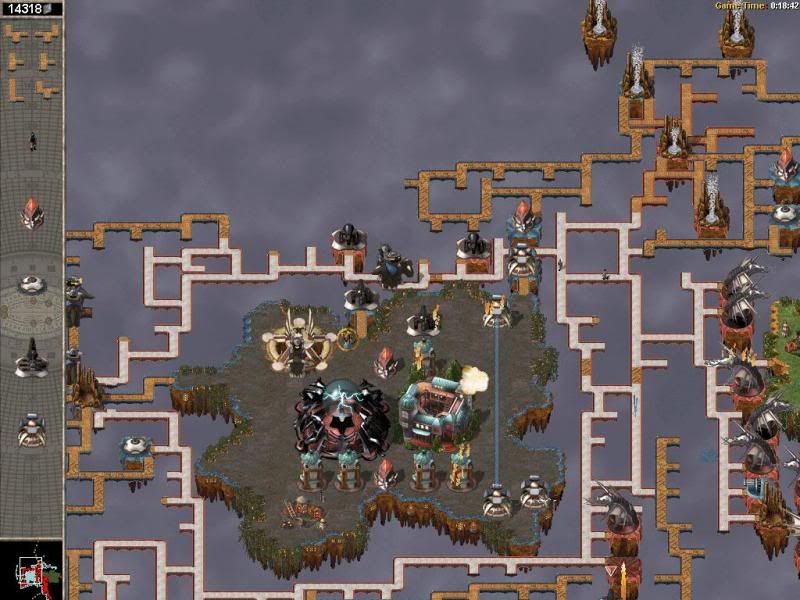
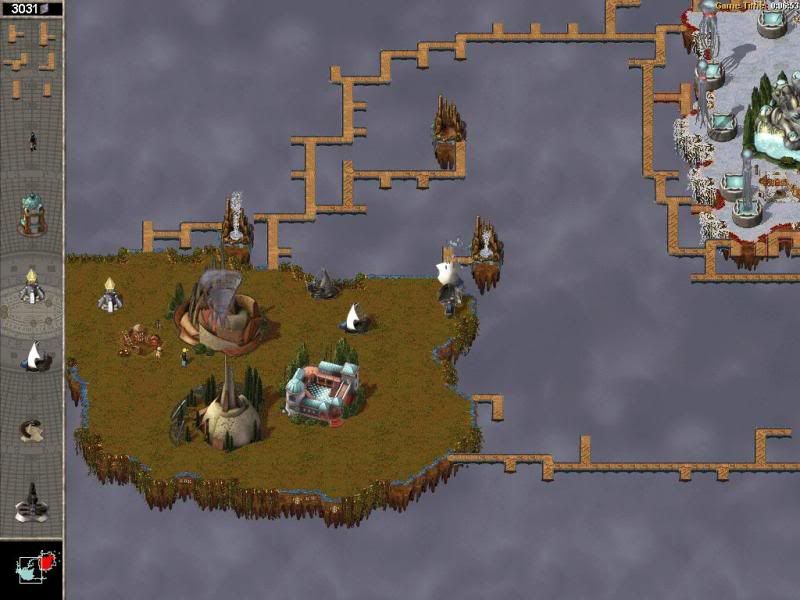
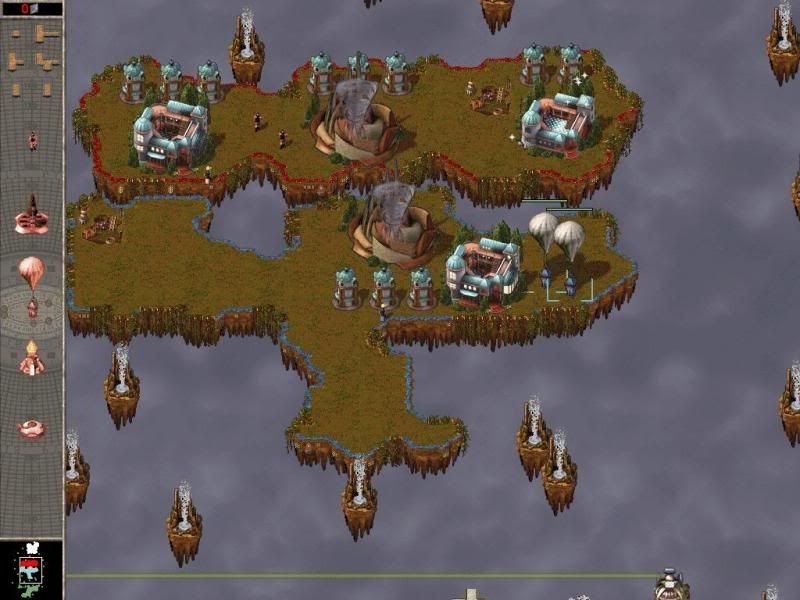
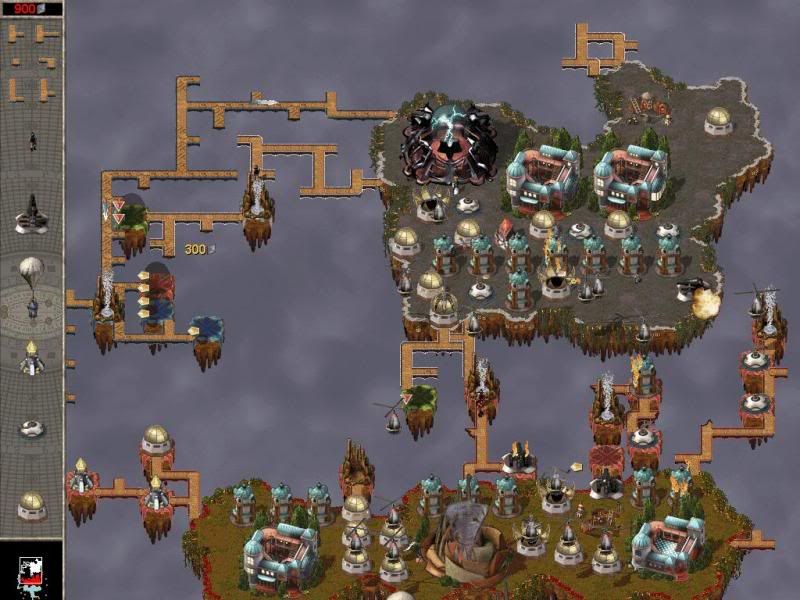
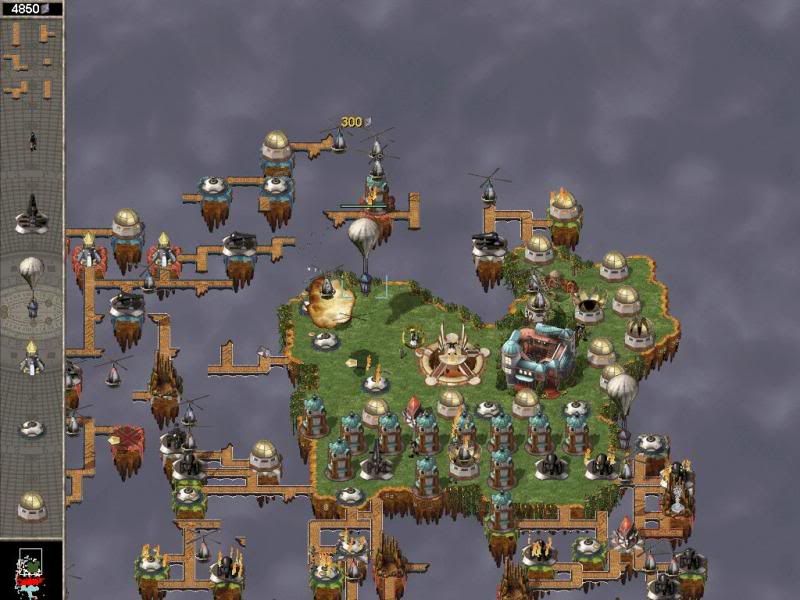
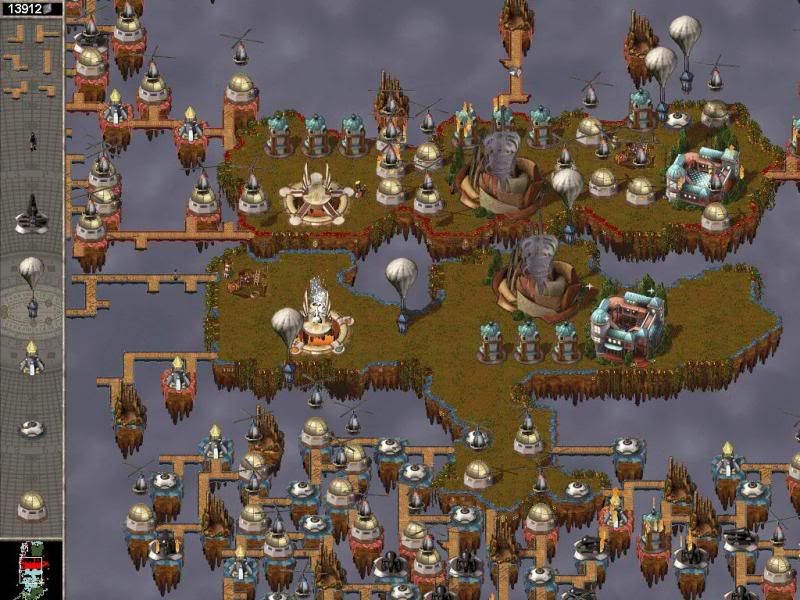
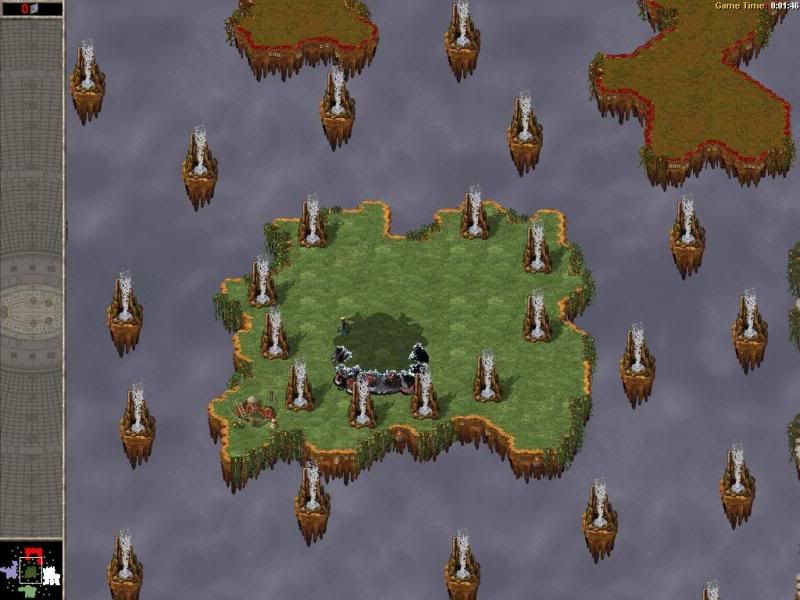
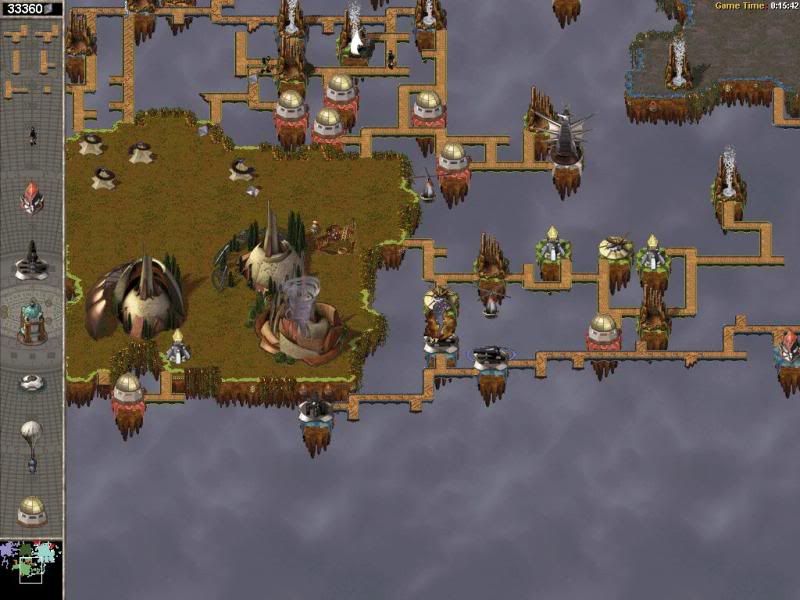
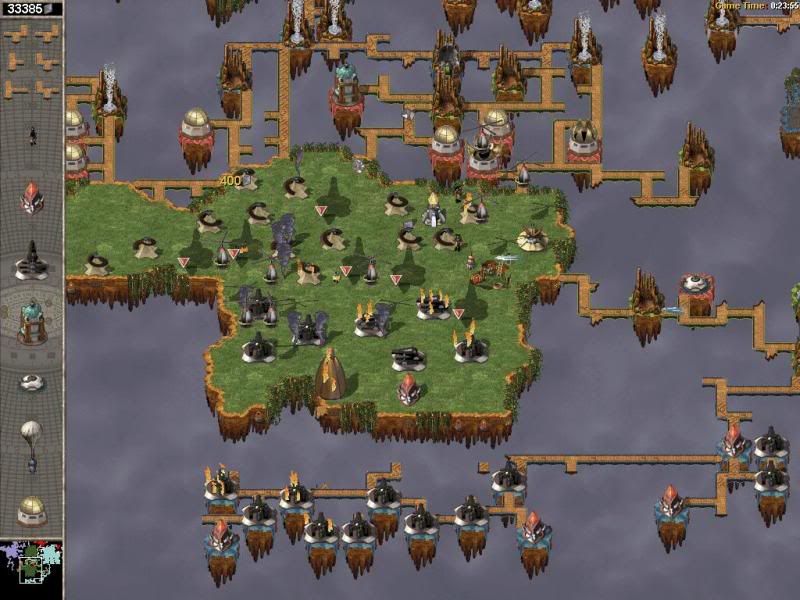
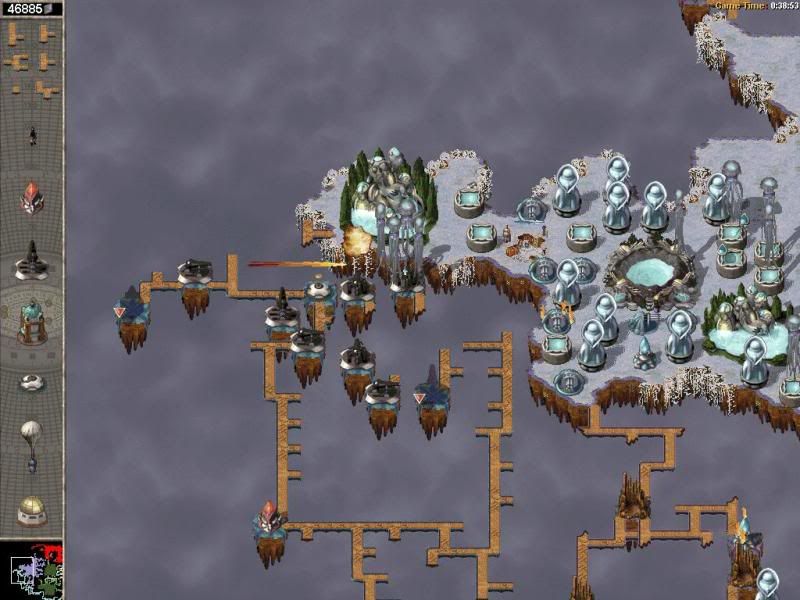
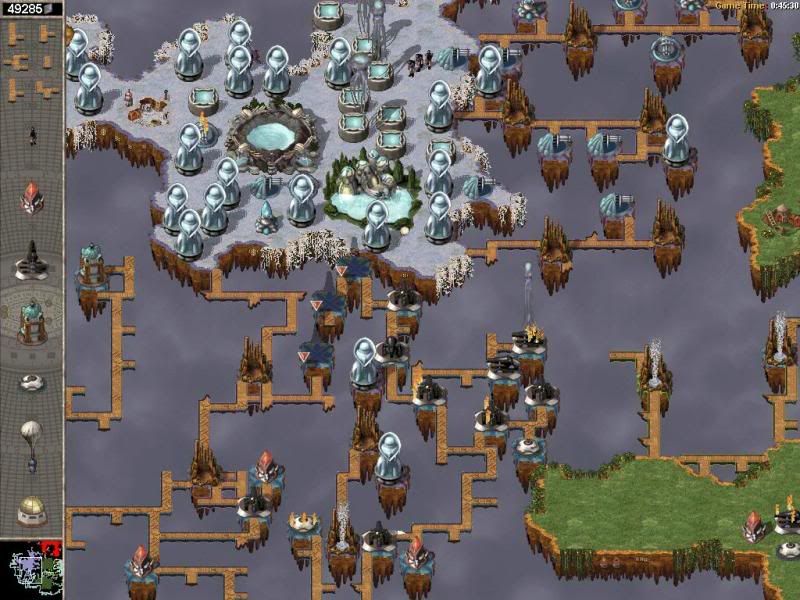
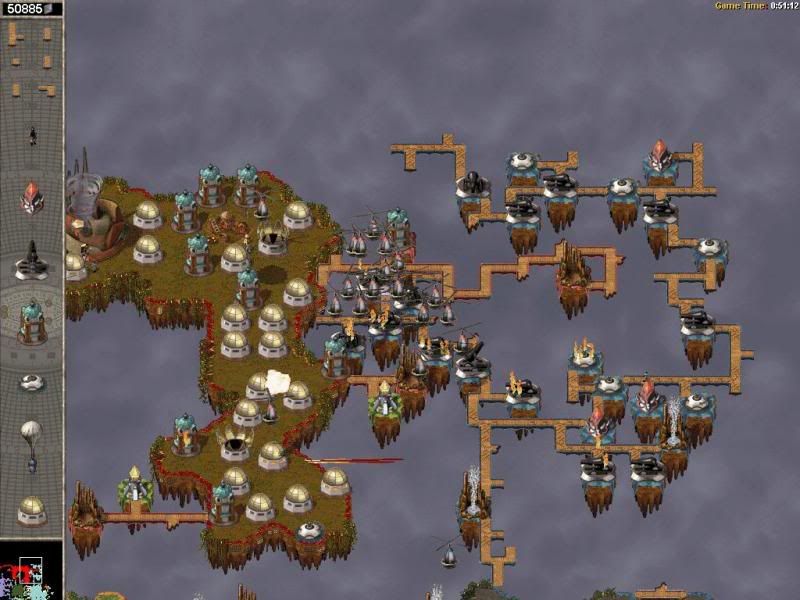
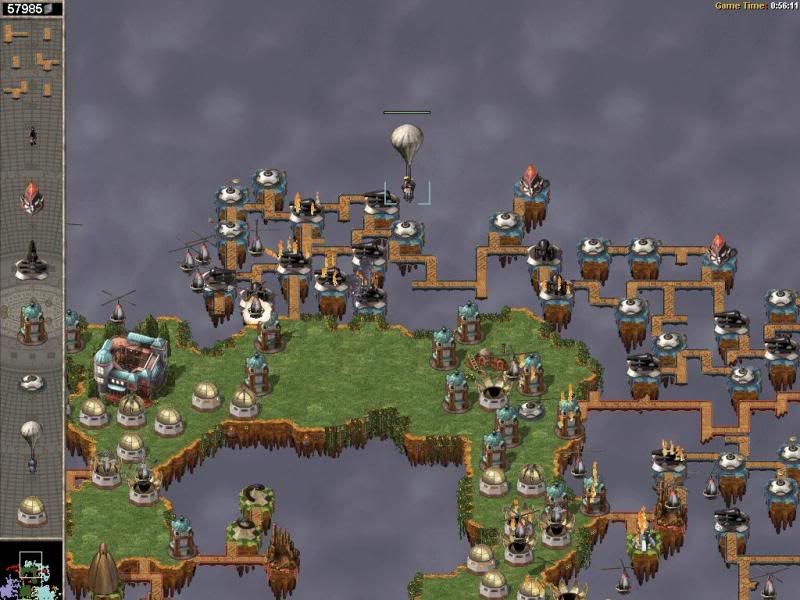
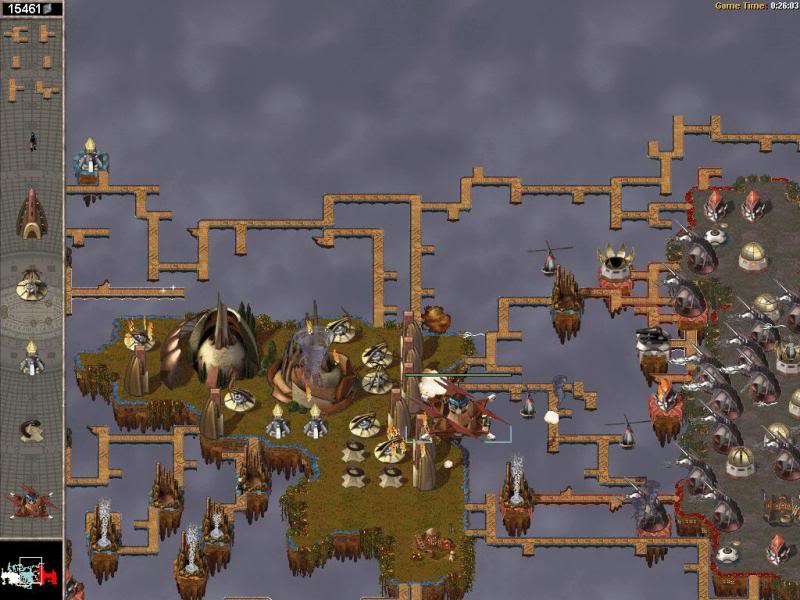
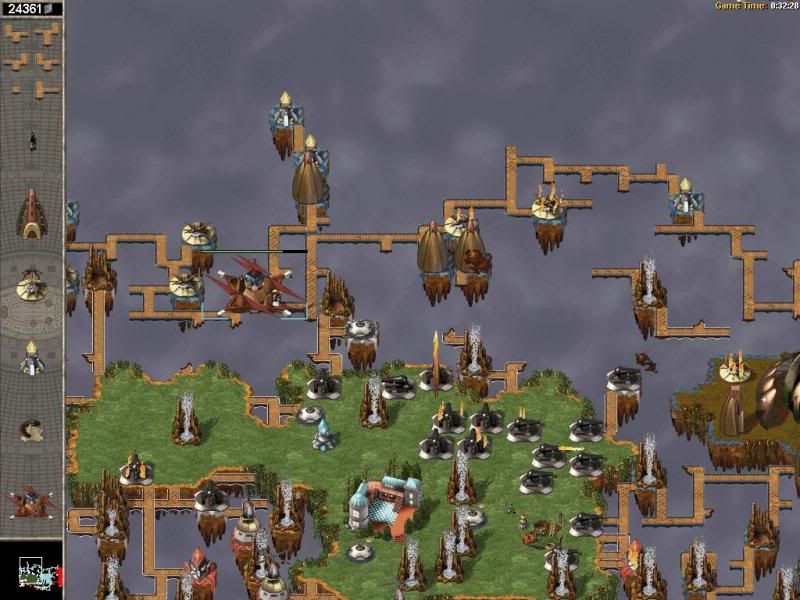
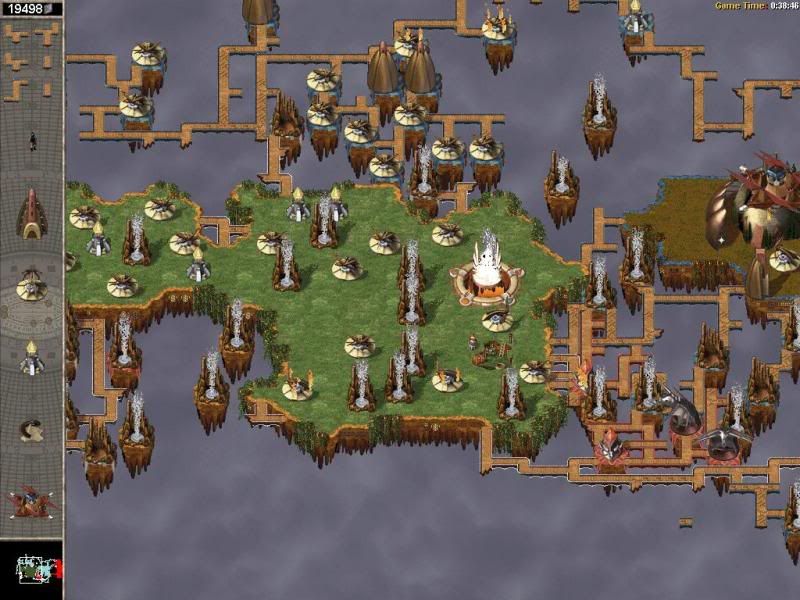
So yeah the situation is very brown. We're practically surrounded from all sides. Our first order of business is to secure the north and the south so white can't attack us from there anymore. I build a crossbow next to my temple to take care of the units from the north, and bridge off the portion to the south. Note that I strategically build 2 wind towers on the wind side to protect us from white's attacks. If everything goes well this will be the only defense we'll need against him.

mis6pic4.jpg


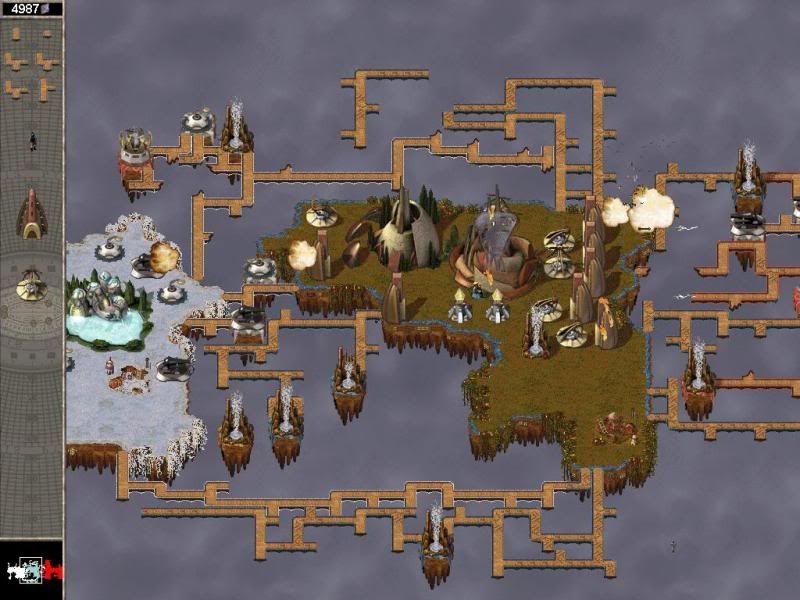
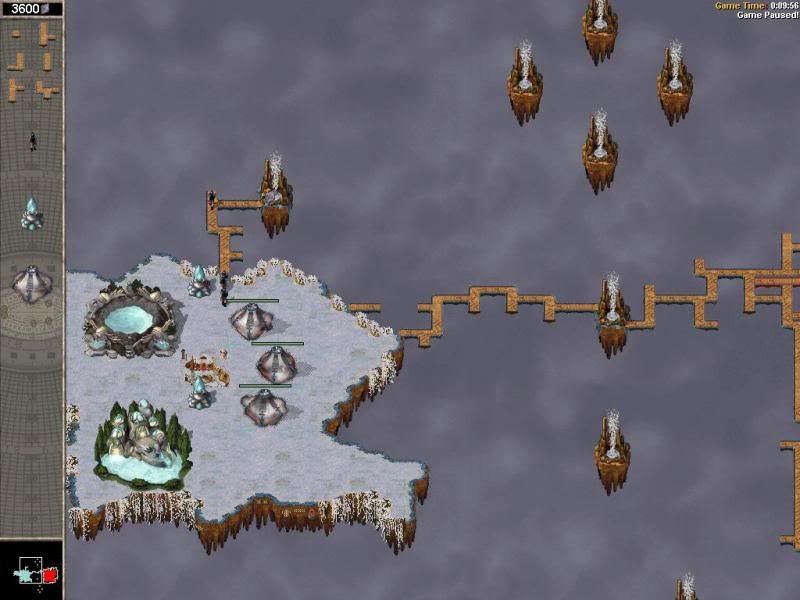
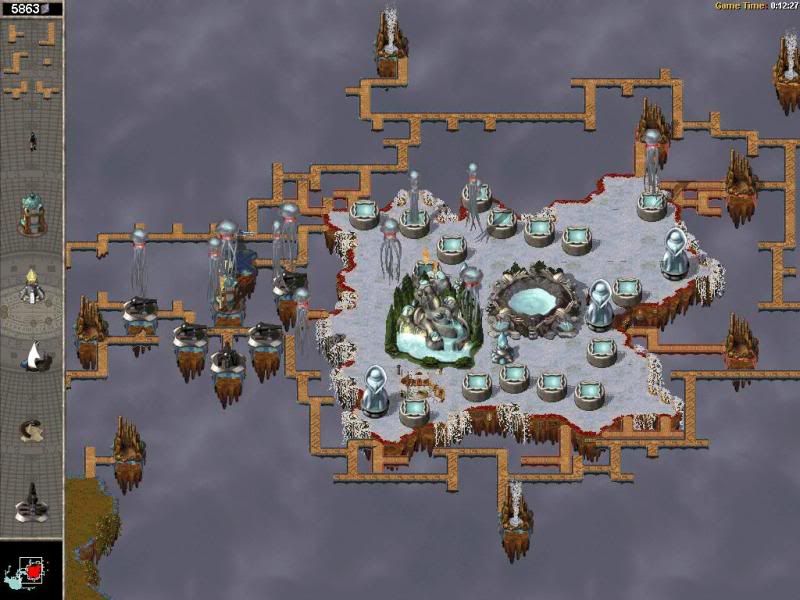
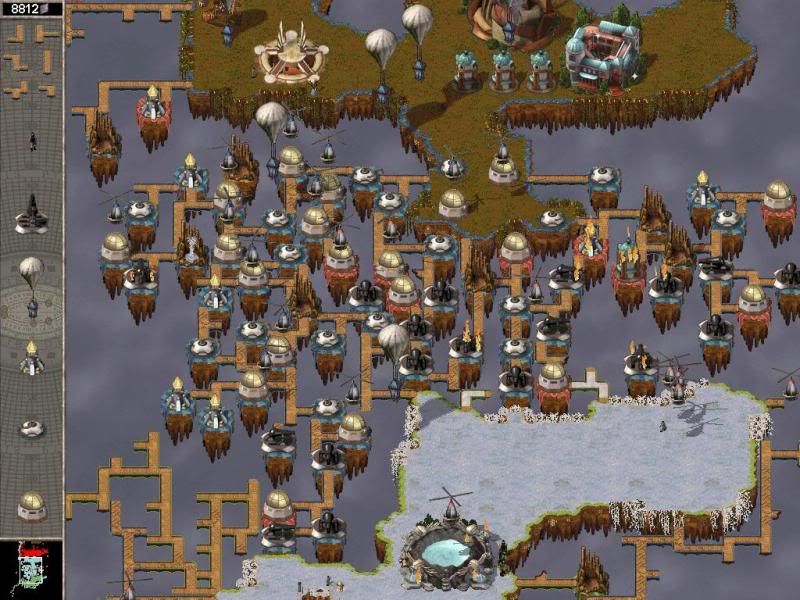
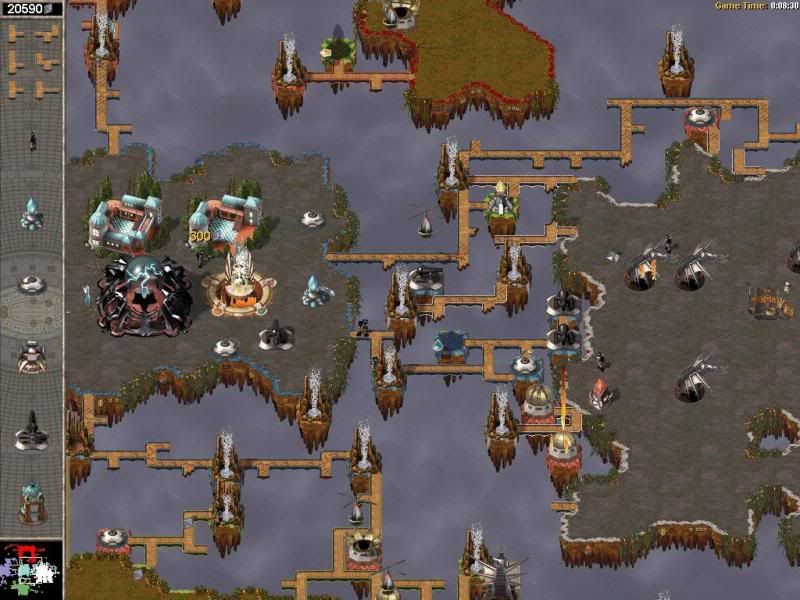
I build some more xbows in the east side mainly to defend against red's whiriligigs. Our main defense against his ground troops is going to be bridges. Now, if he tries to build cannons and whatnot near our tower wall the xbows are going to make short work of them HOWEVER that means that while they are busy firing against the cannons, the whirligigs can sneak past them and start attacking my towers. As I said before wind towers are invulnerable on their curved side but have shit hp, so a few whirligigs can fuck them up good.
Also, the only gatherer we are using in this mission is the priest. He is quite sturdy and can regenerate his health so he is an excellent candidate for the job. He can get captured yes, and I took a risk but ultimately it payed off.

mis6pic7.jpg


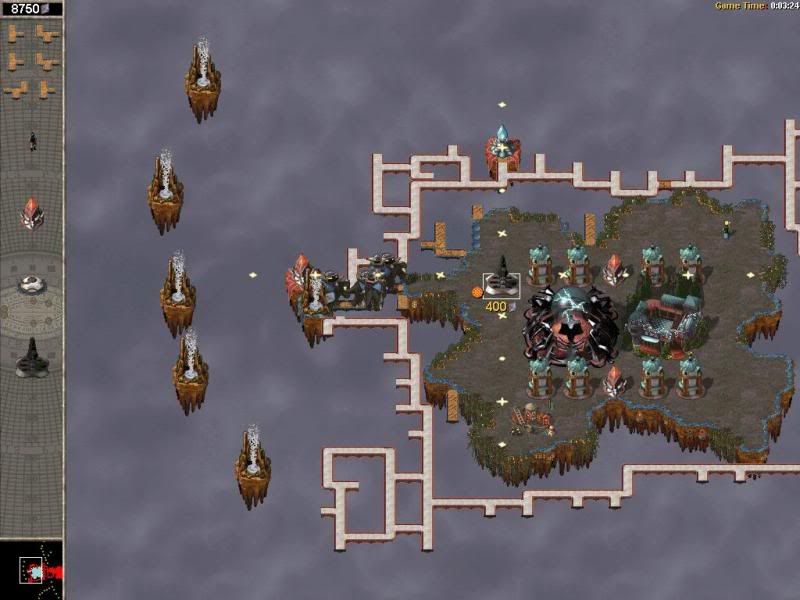
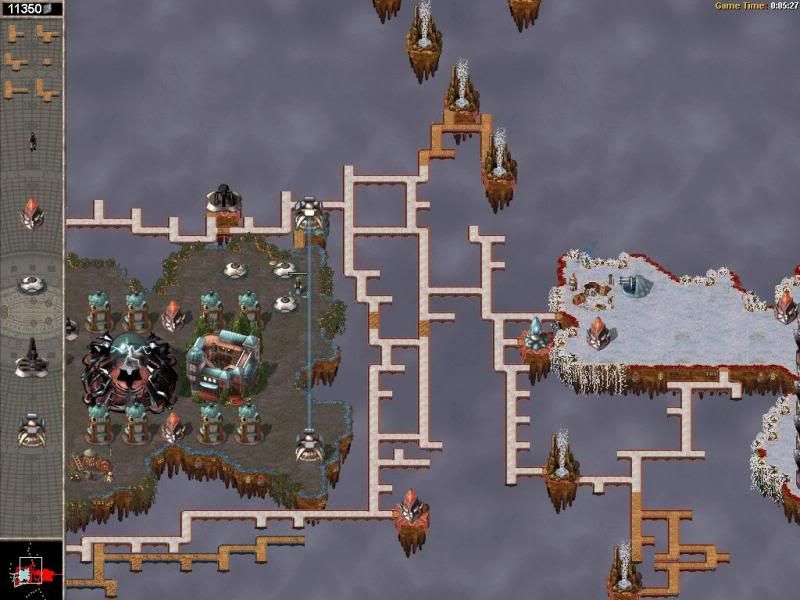
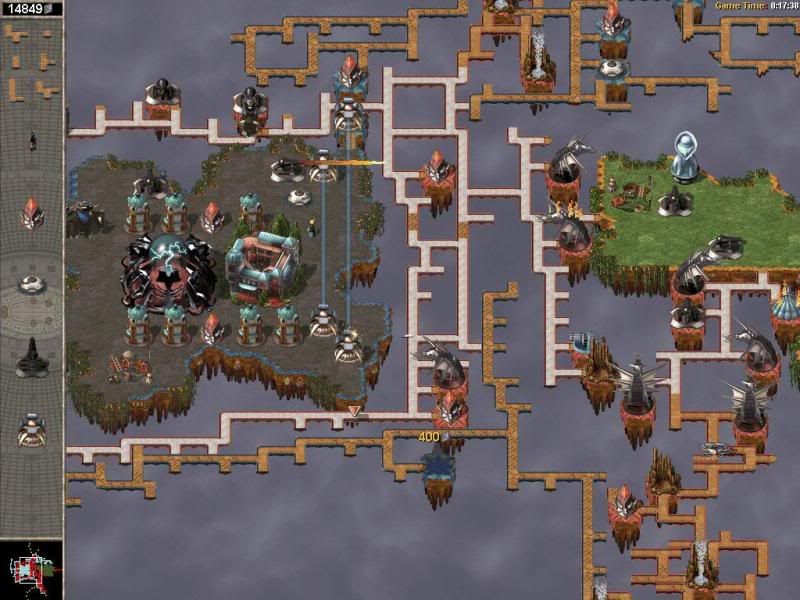
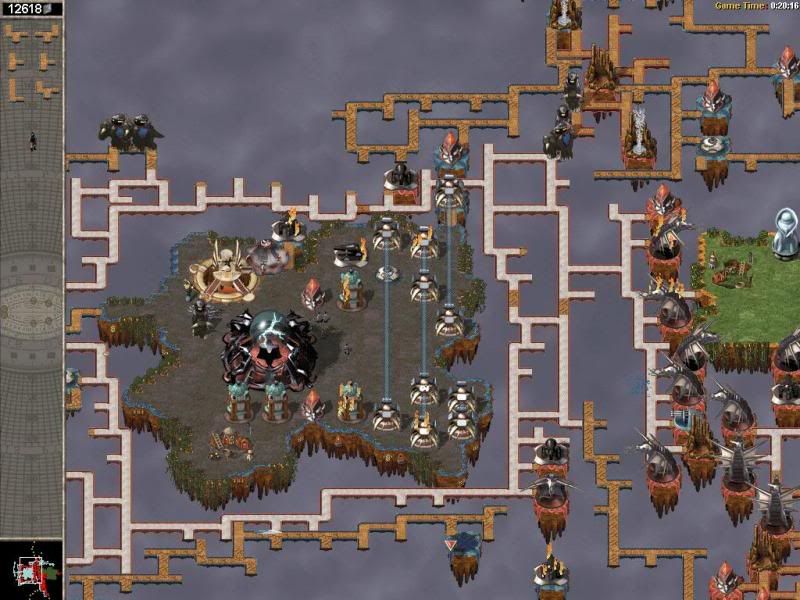
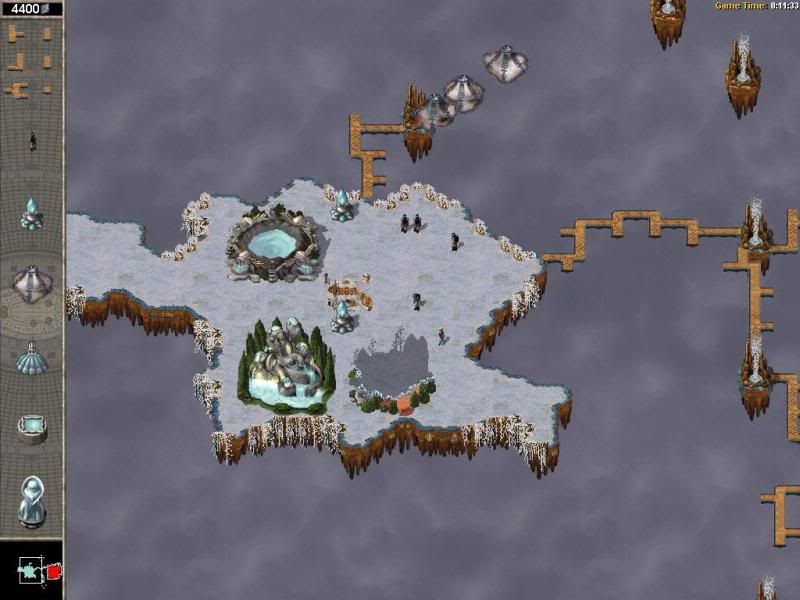
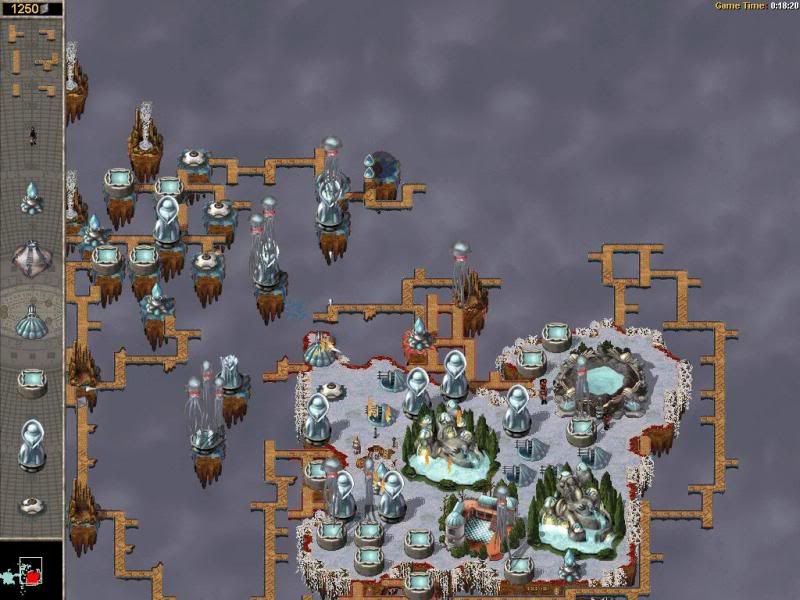
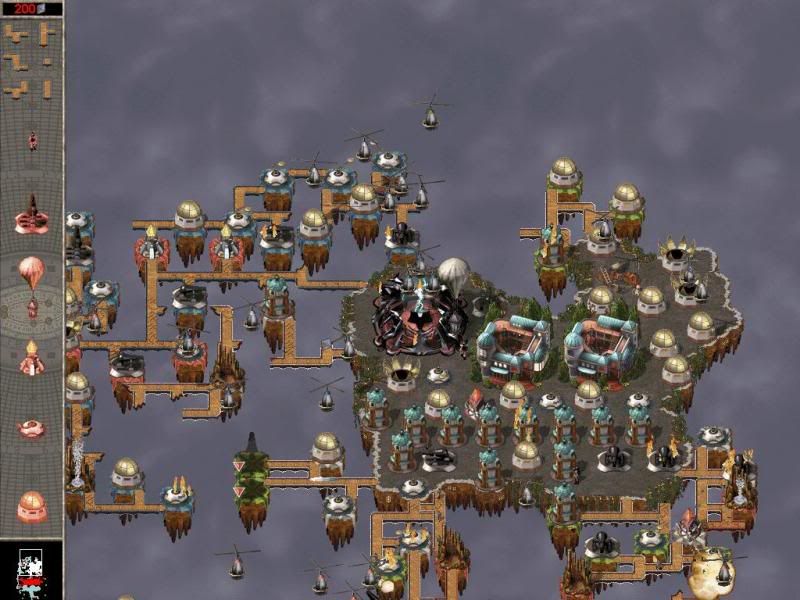
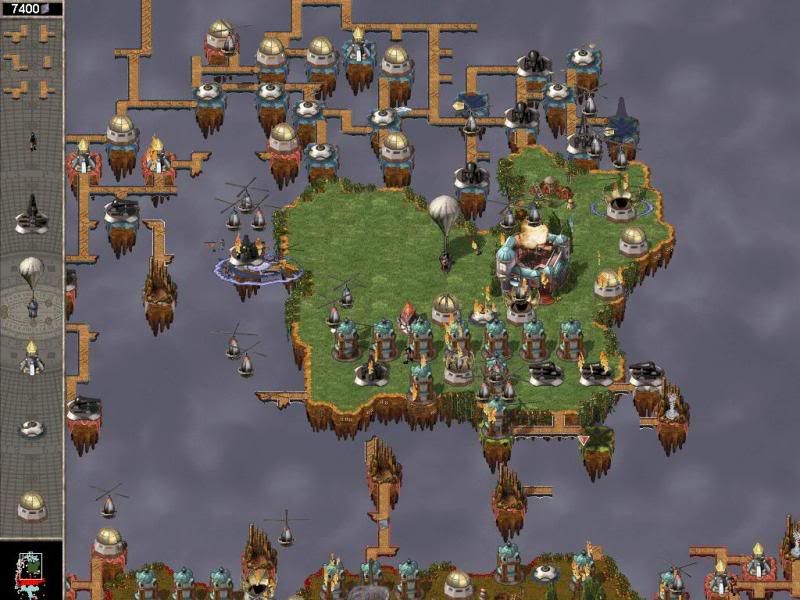
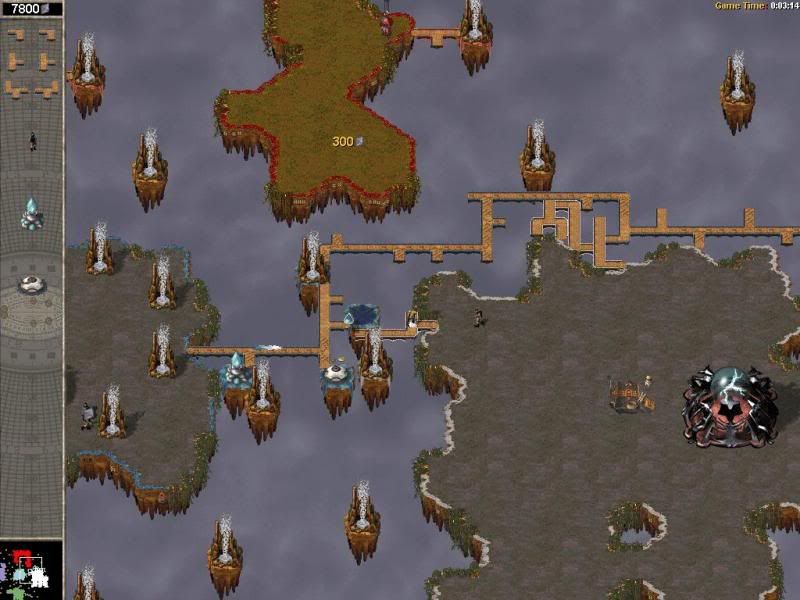
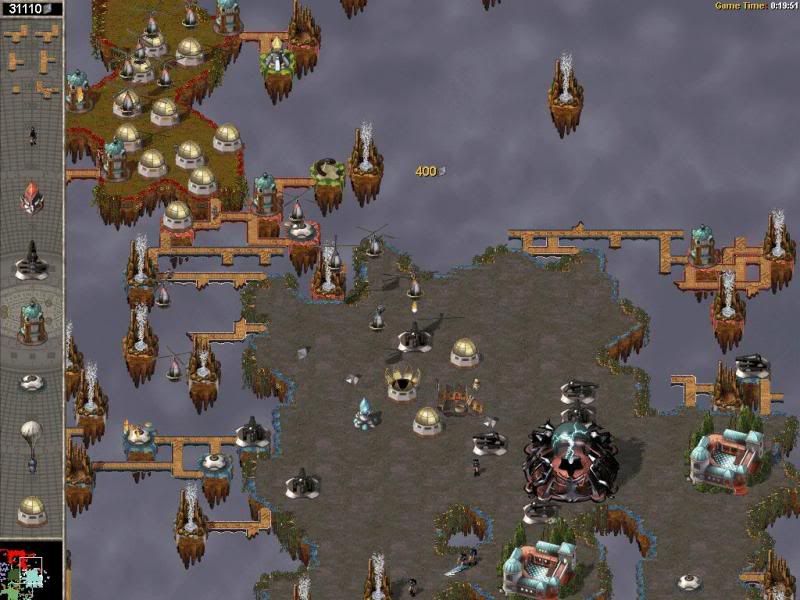
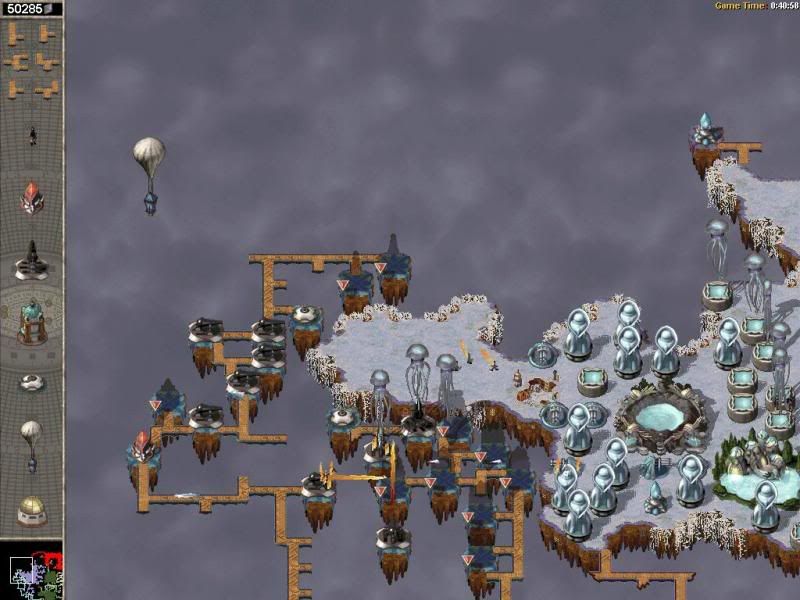
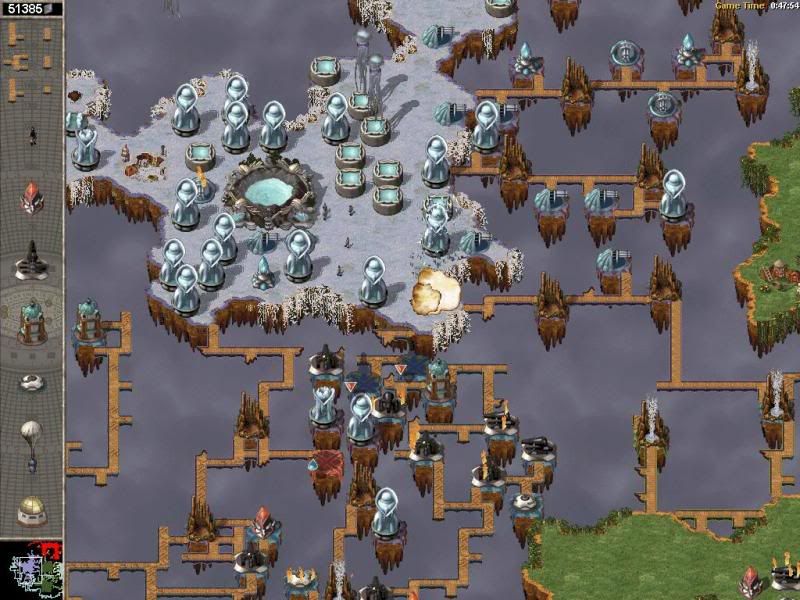
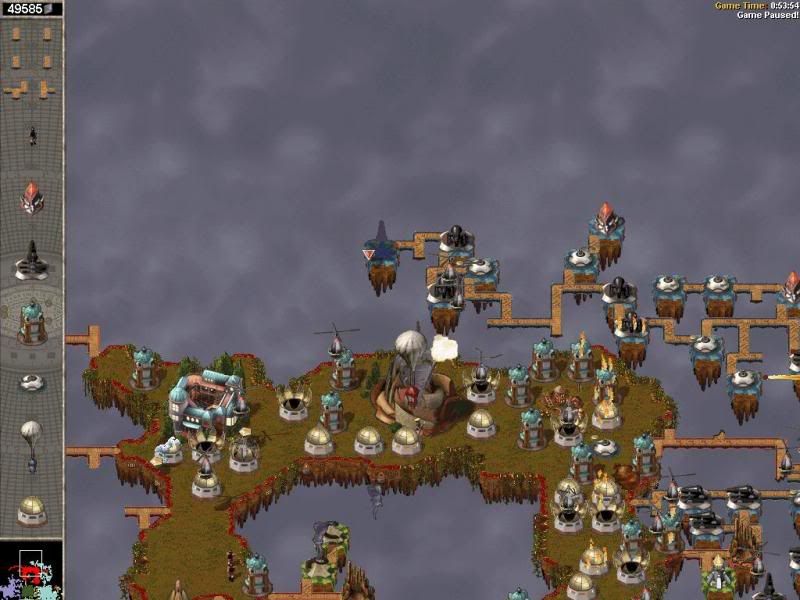
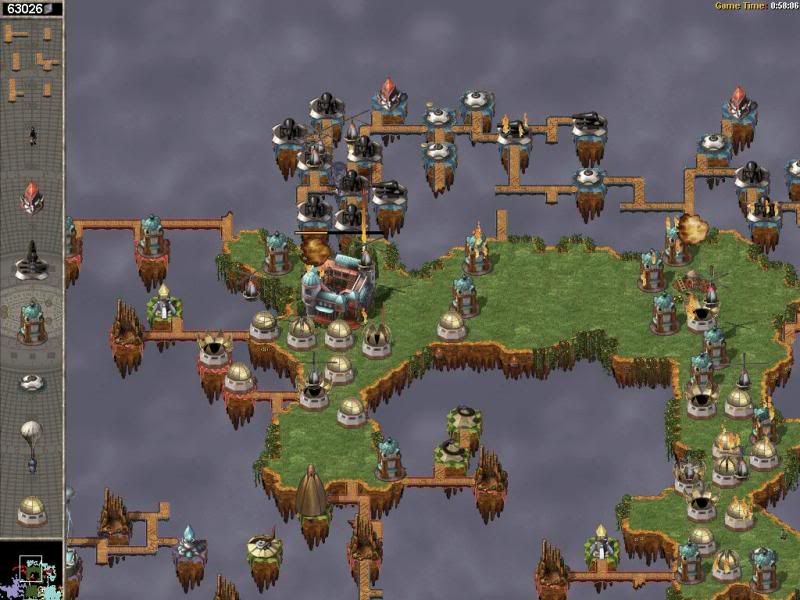
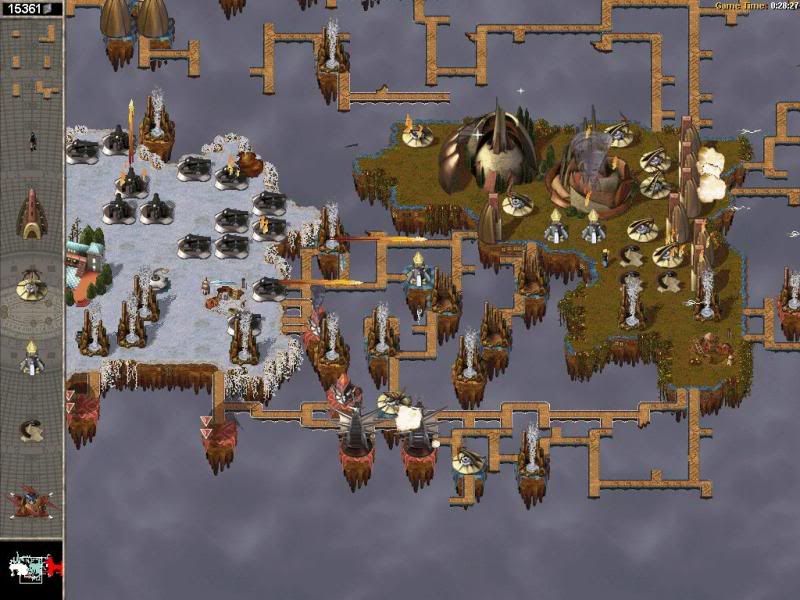
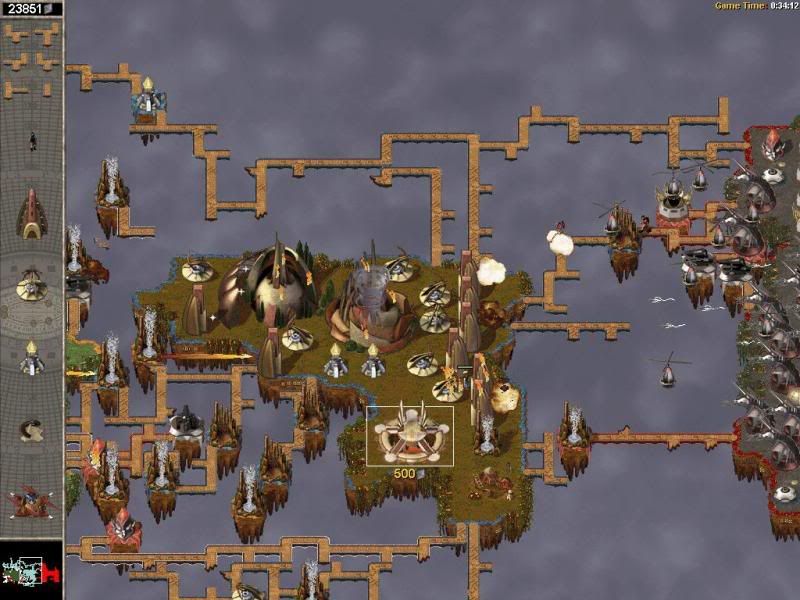
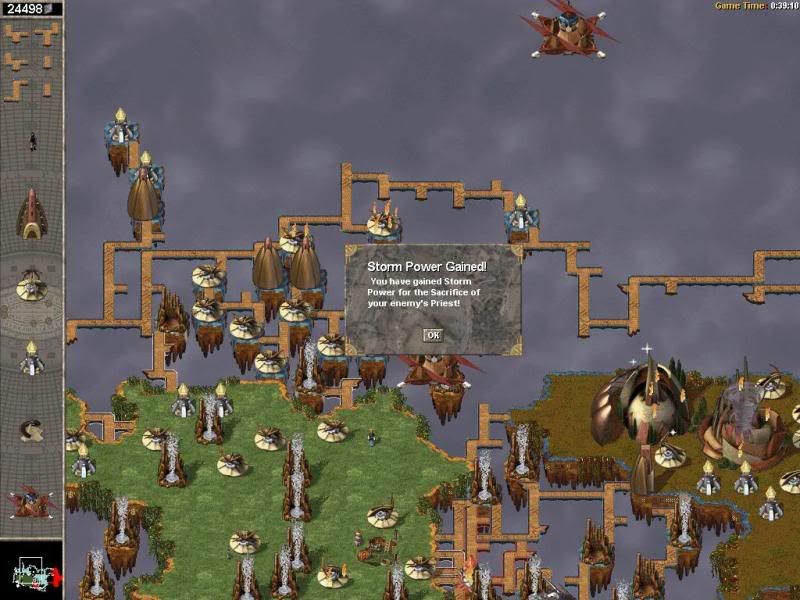
I activated the timer, as you can see almost half an hour passed, in the meantime I built some devil makers behind my eastern wall. My idea was to have a force that could reach the enemy and destroy his units, thus giving me extra dough. It turned out that it was an inspired move indeed. My dust devils attacked the red highpriest! I could not belive my luck! I quickly built an airship and scooped him right up, after which I sent my airship north to a safe location.
My birdges that I built between me and red get crumbled by the dust devils (a special ability of theirs) so I have to constantly rebuild them.
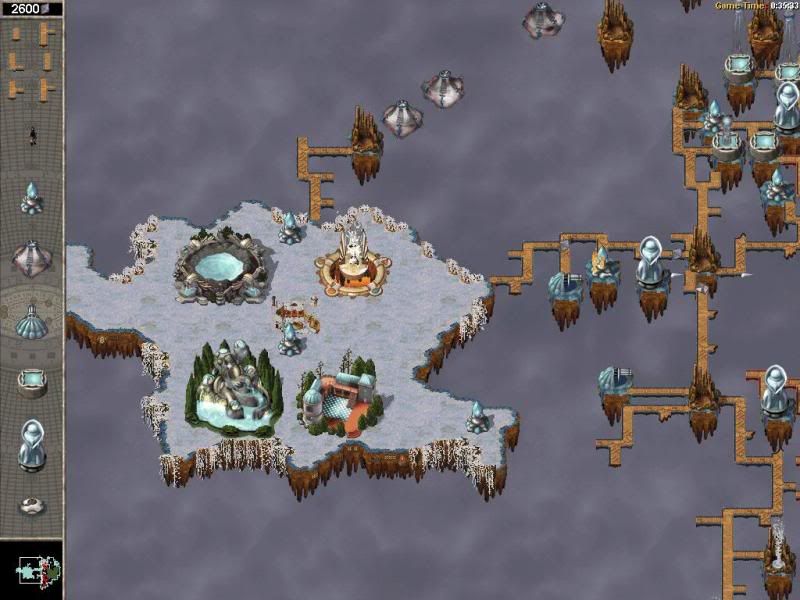
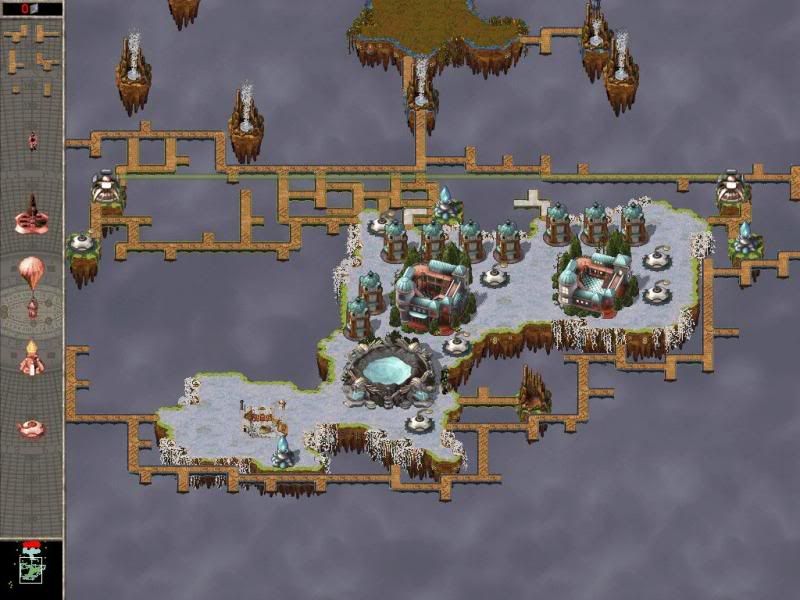
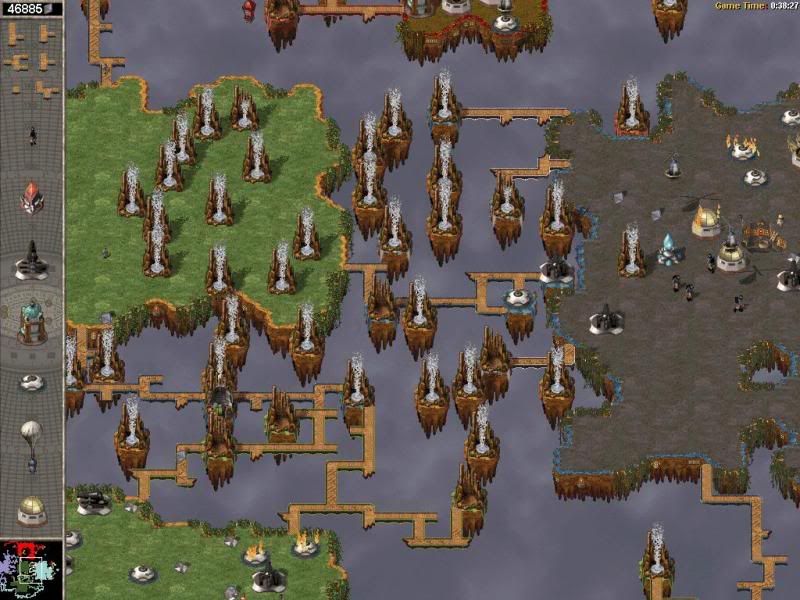
Look at my income: 15000 crystals! That's quite a lot. In this mission geysers respawn (which is both a blessing and a curse, you'll see why soon), usually in the same location so money isn't really a problem except in the beginning.

mis6pic8.jpg


FFFFFUUUUU.jpg


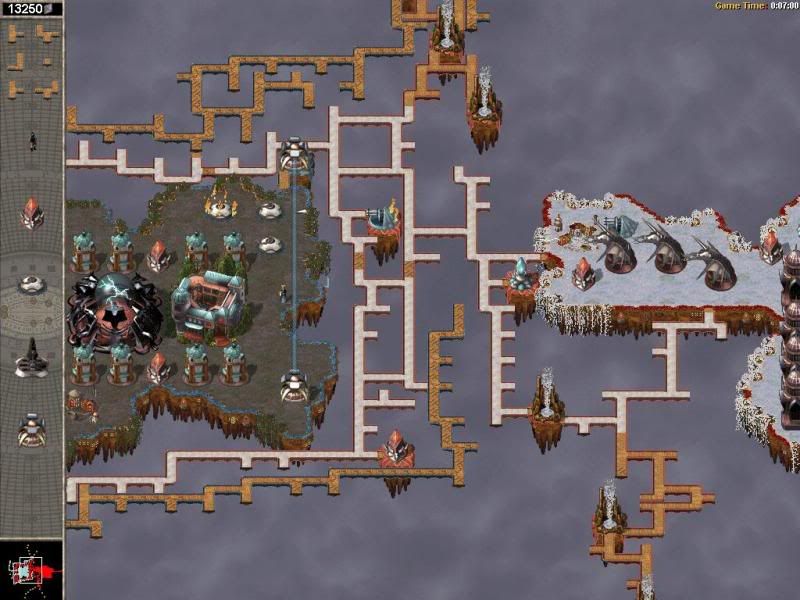
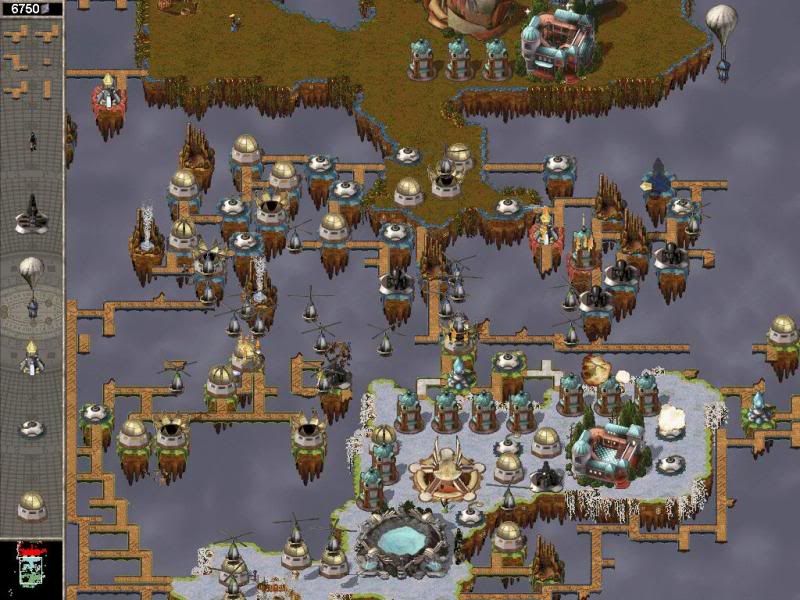
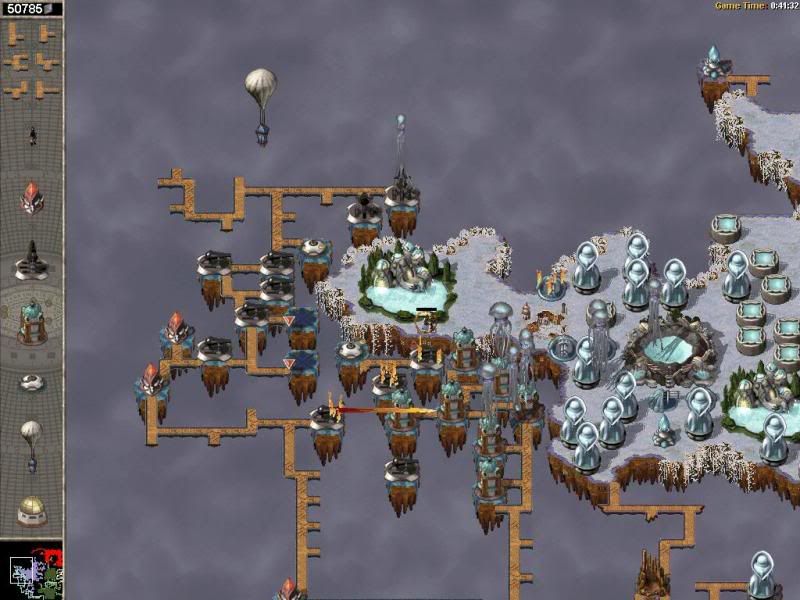
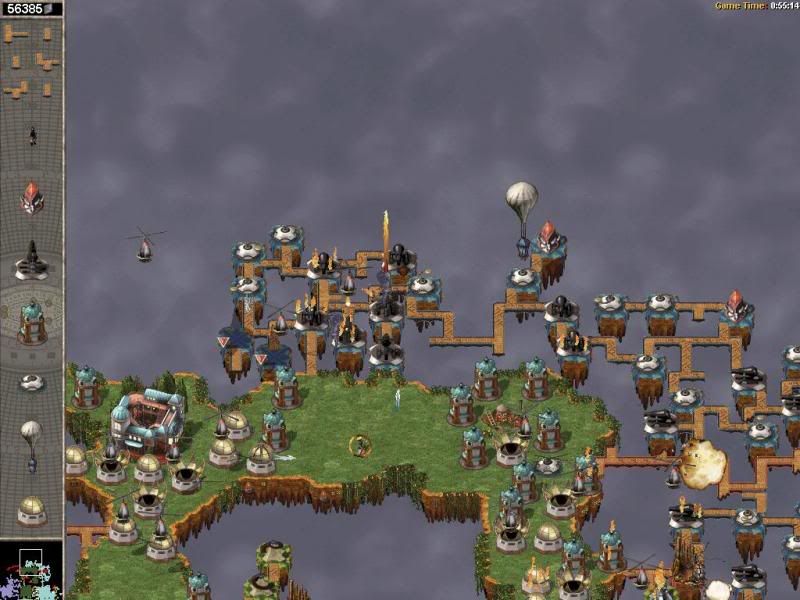
While I was away bridging to the north to attack white's base, red built some thunder cannons on the south side and destroyed one of my towers. I build some xbows to take care of them fast before they can cause more mischief. My workshop was in trouble.
Fun fact: you can heal workshops by upgrading them.

mis6pic10.jpg


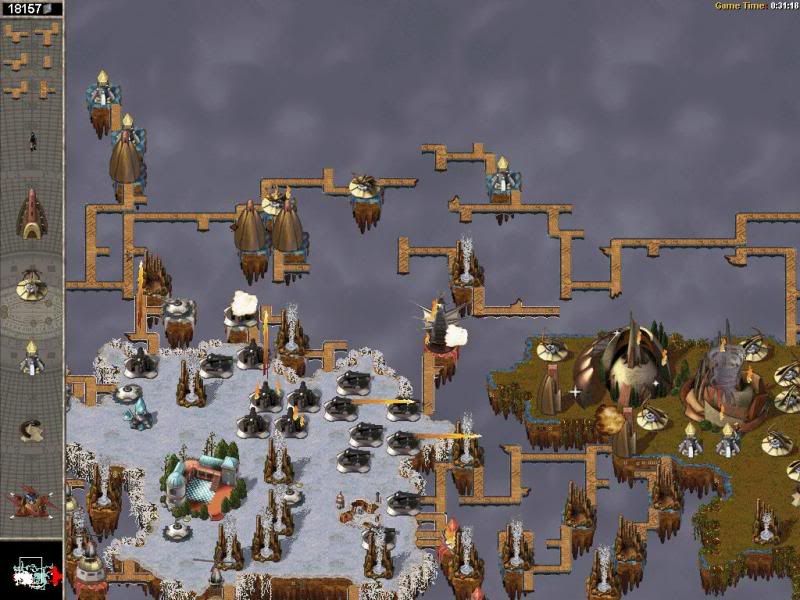
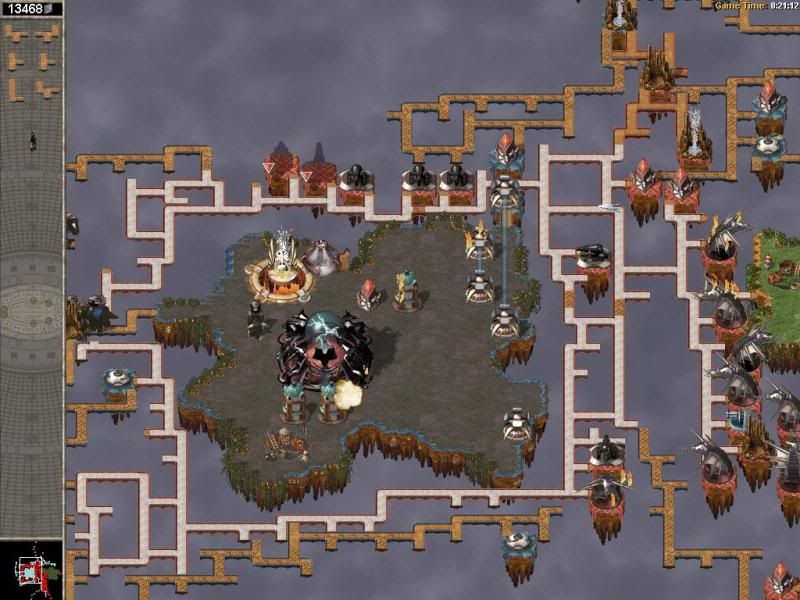
He did it again! This time he destroyed a unit of mine on the north thus severing the bridge and making me unable to build more units to attack white. I had to rebuild the bridges. BTW that crossbow to the left of the workshop was the best investment in the game. Xbow: $500, money earned per destroyed suncannon: $100, tons of money earned this way: $priceless.
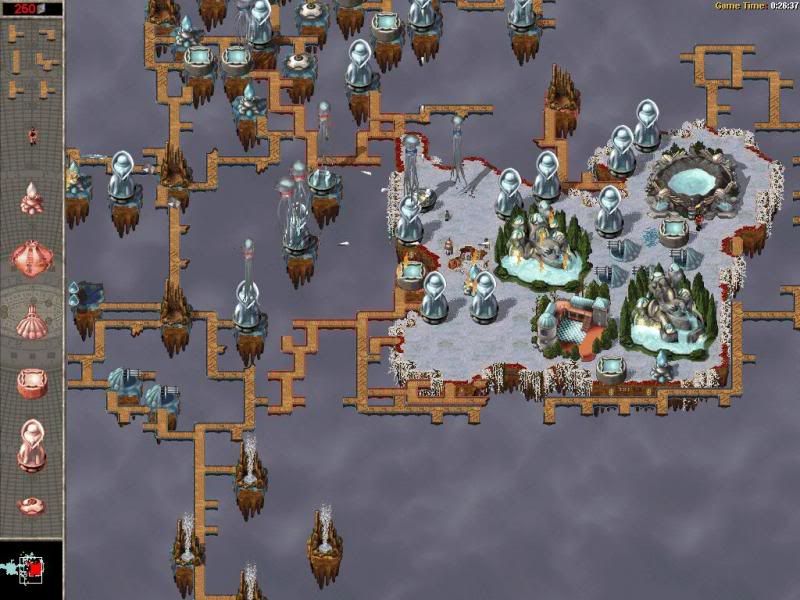
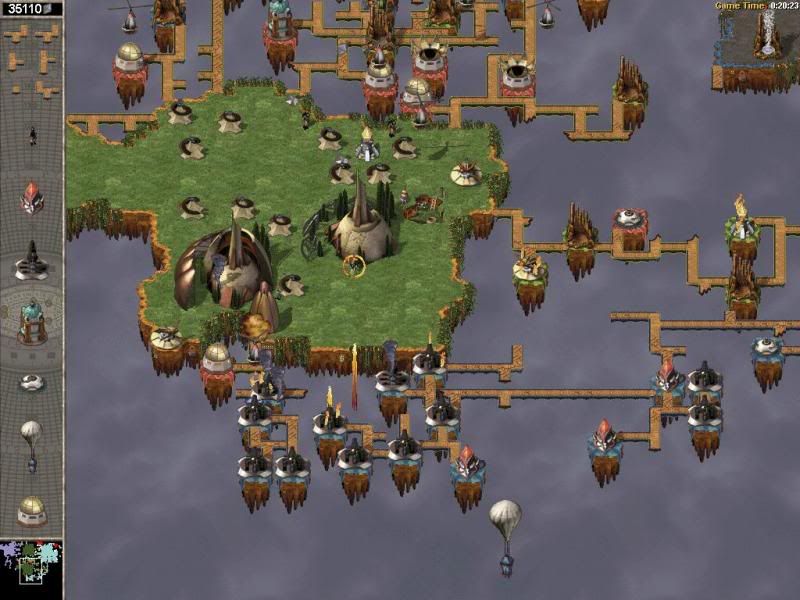
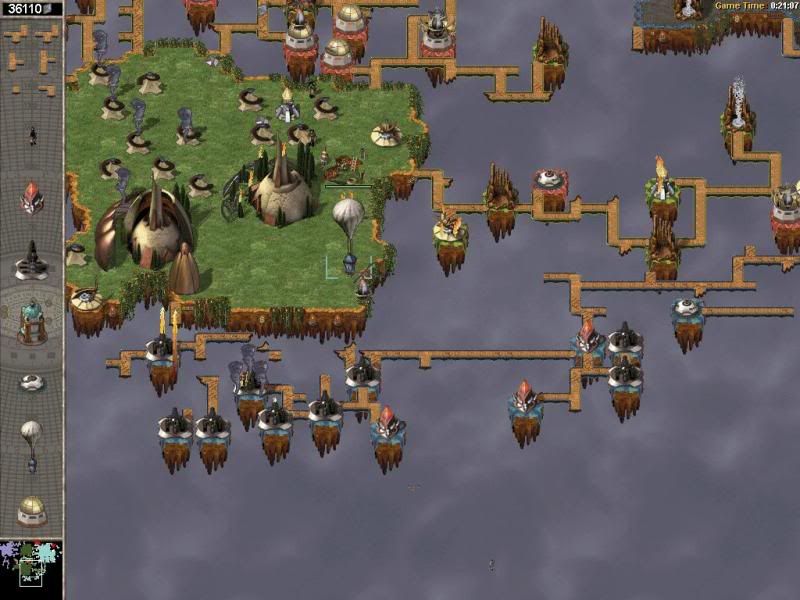
Also note how I defend my attacking force with wind towers.

mis6pic11.jpg


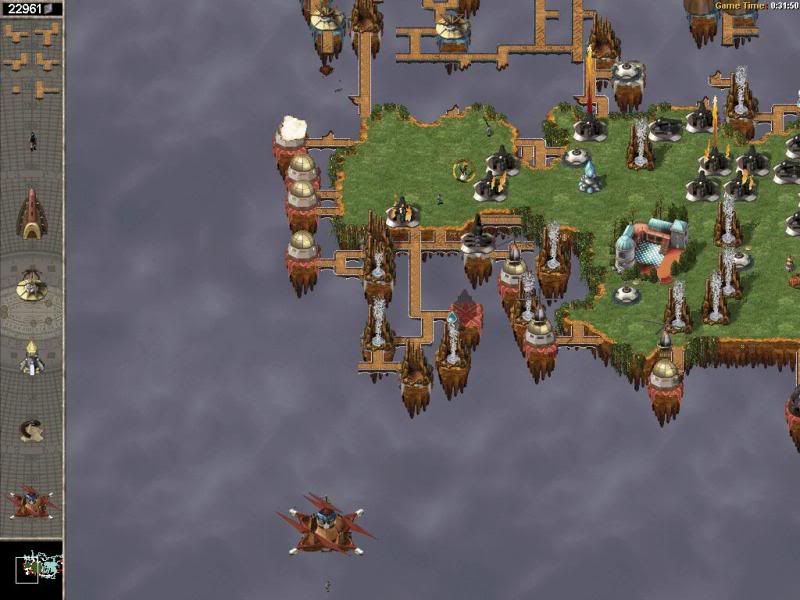
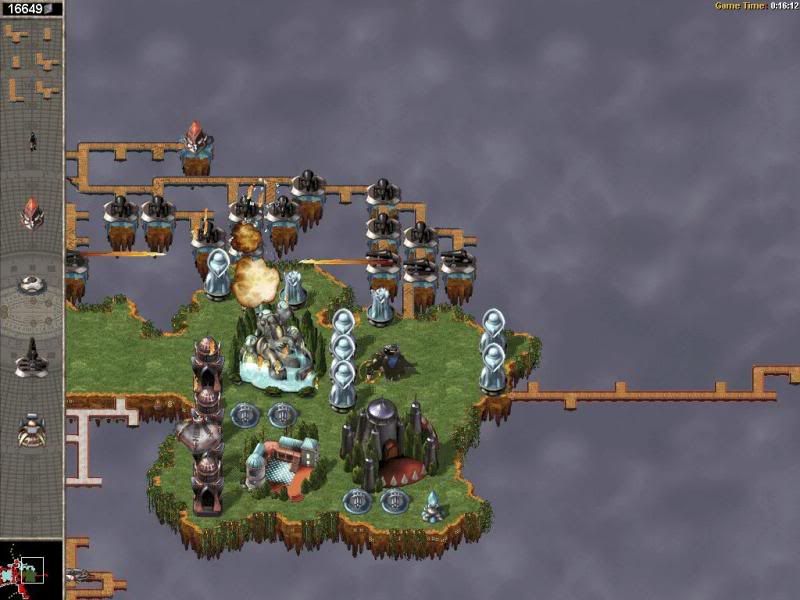
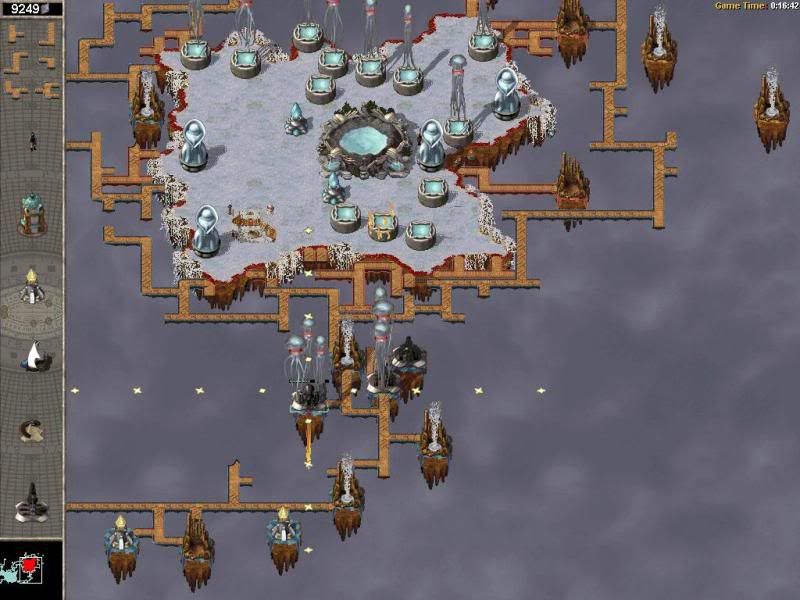
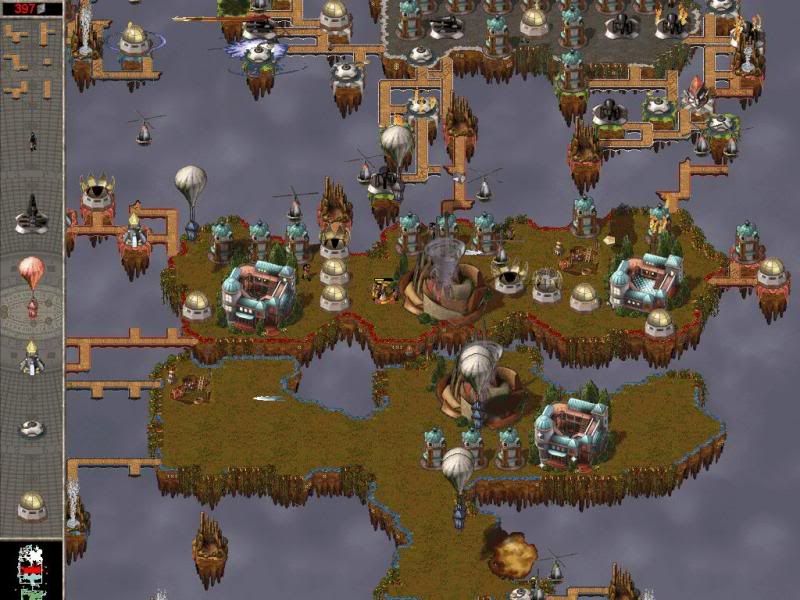
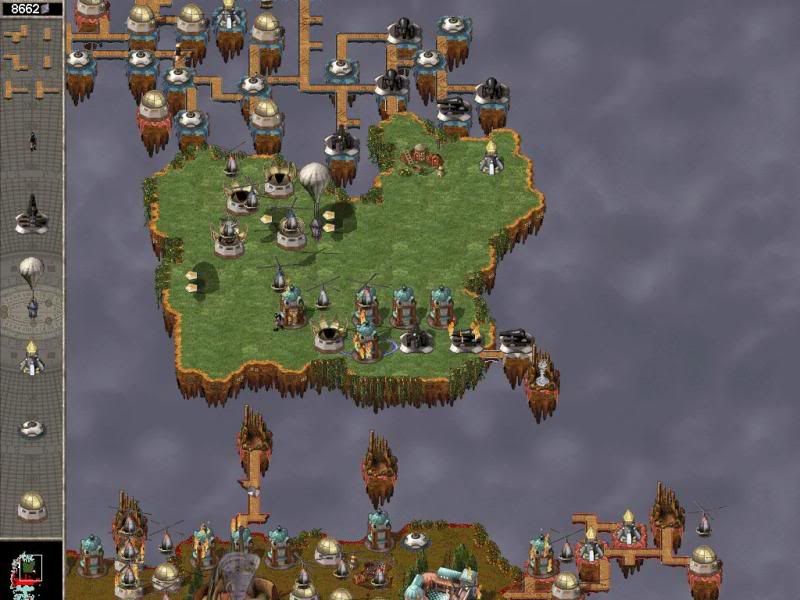
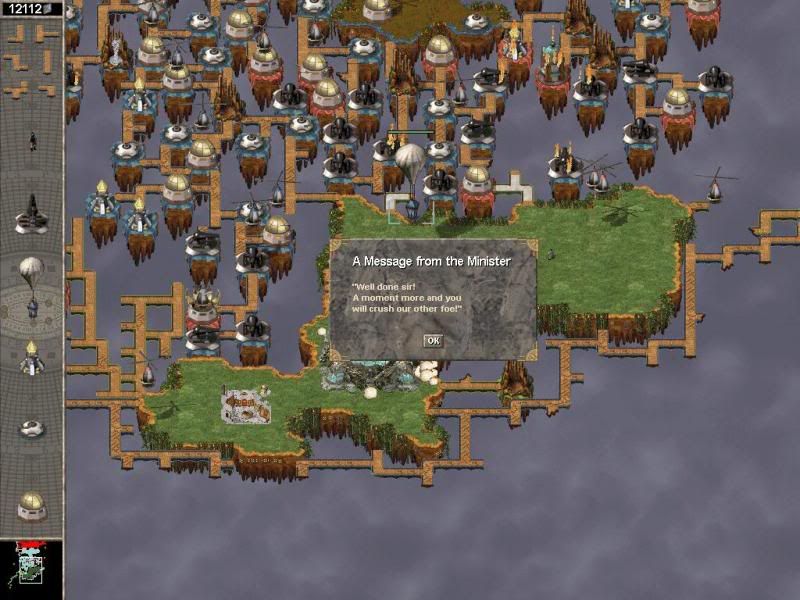
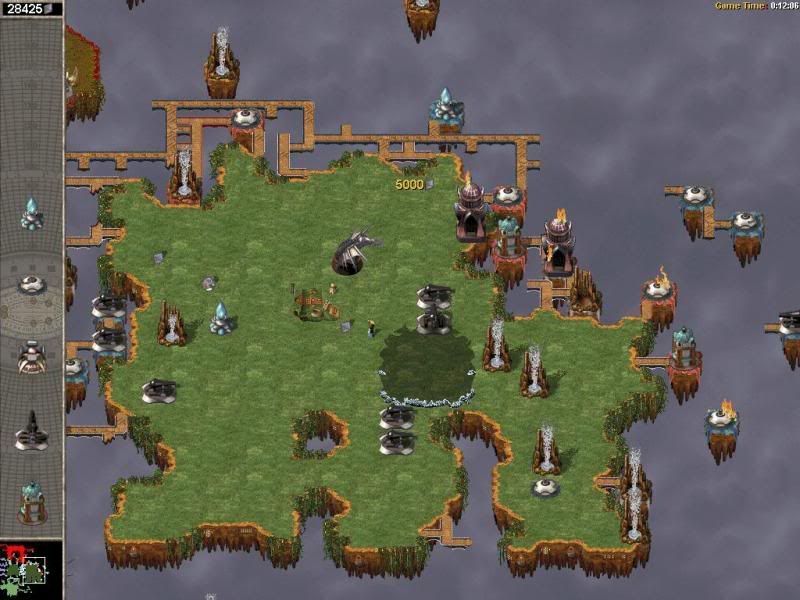
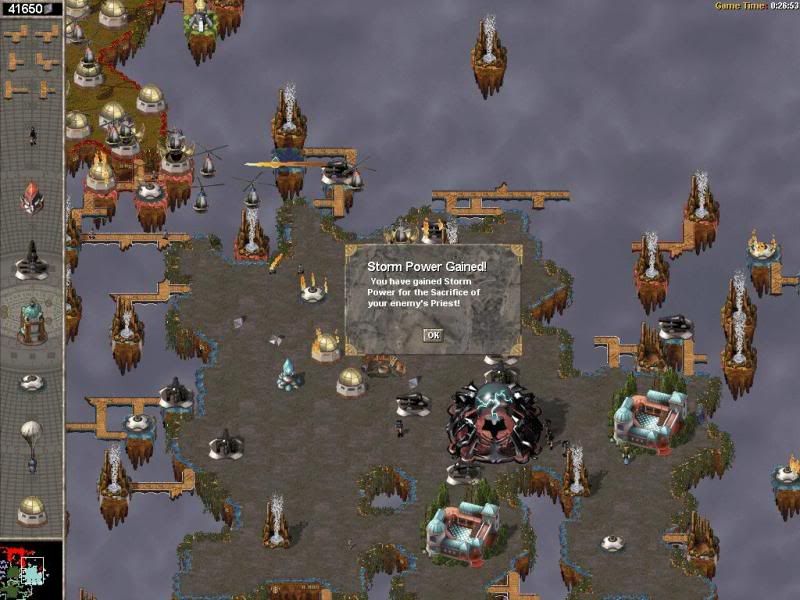
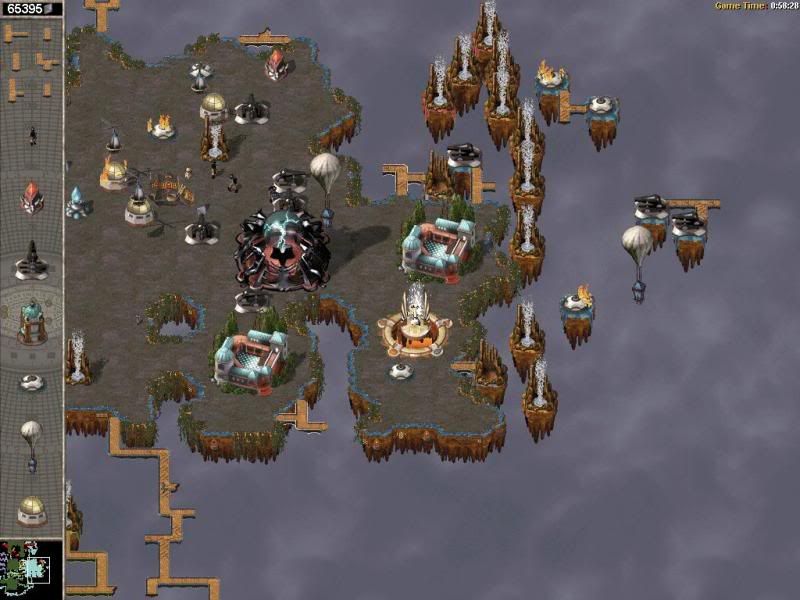
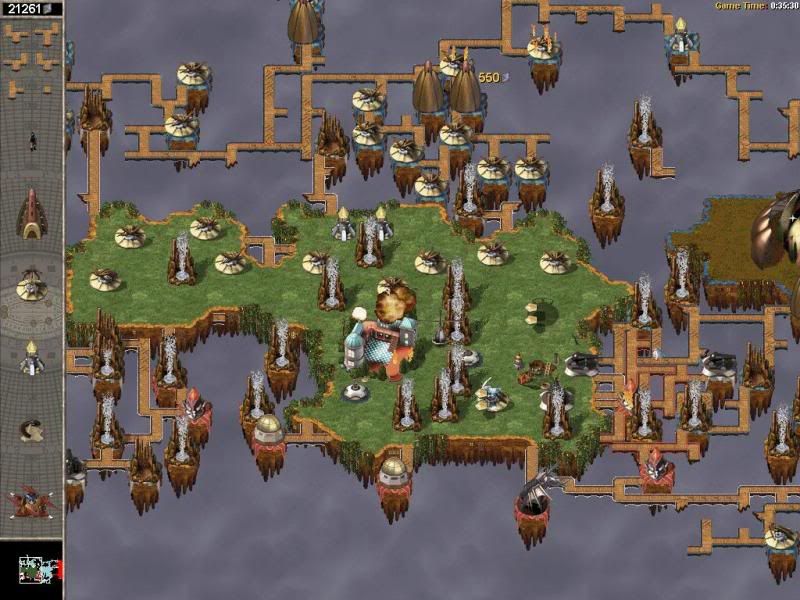
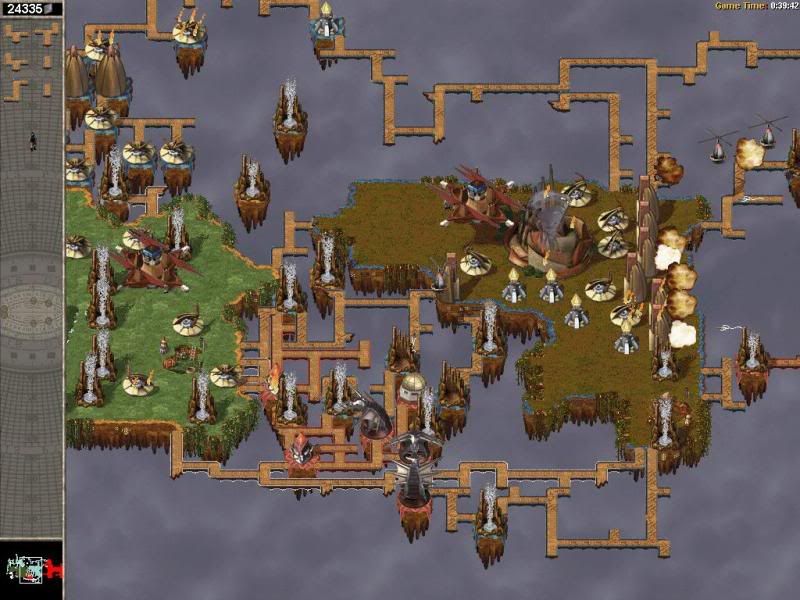
That's the sight I like to see: destroyed temple, and incapacitated high priest. My airship was waiting for this very moment.

mis6pic12.jpg


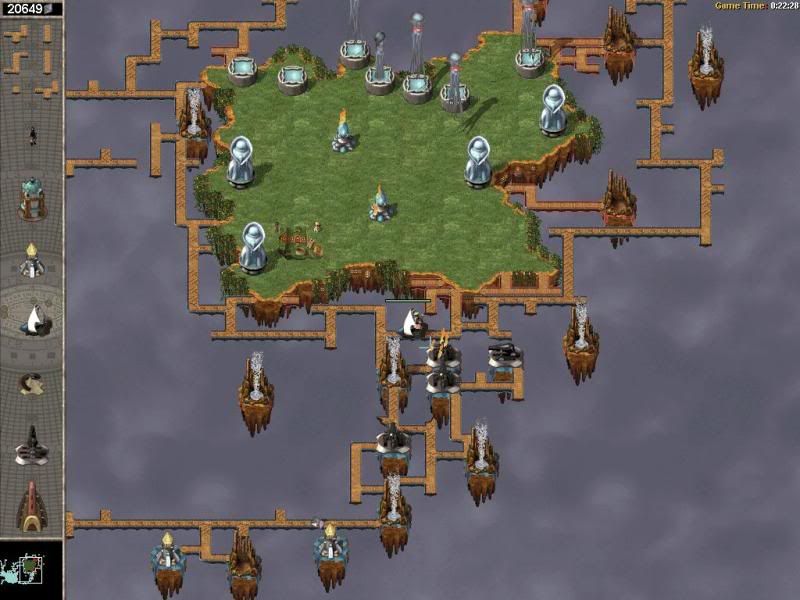
Now the second priest is captured. But we're not out of the woods yet, we still need to sacrifice them.

mis6pic13.jpg


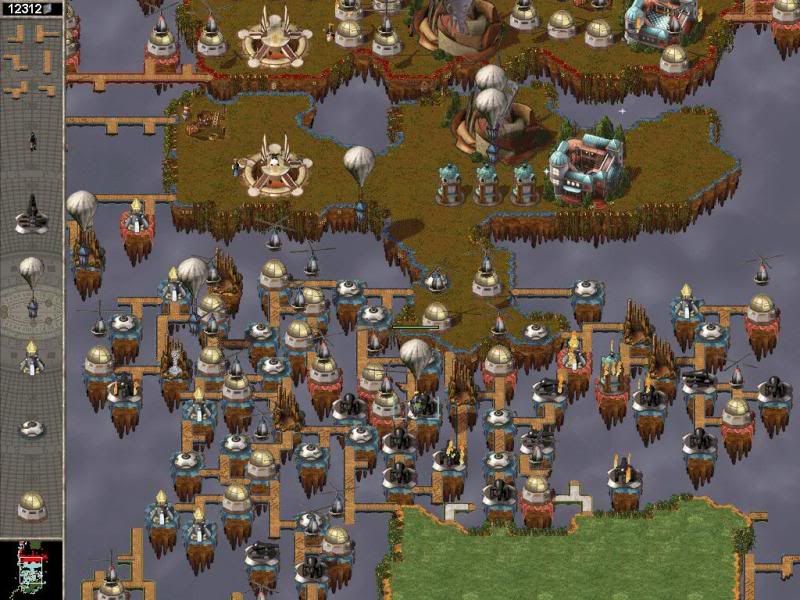
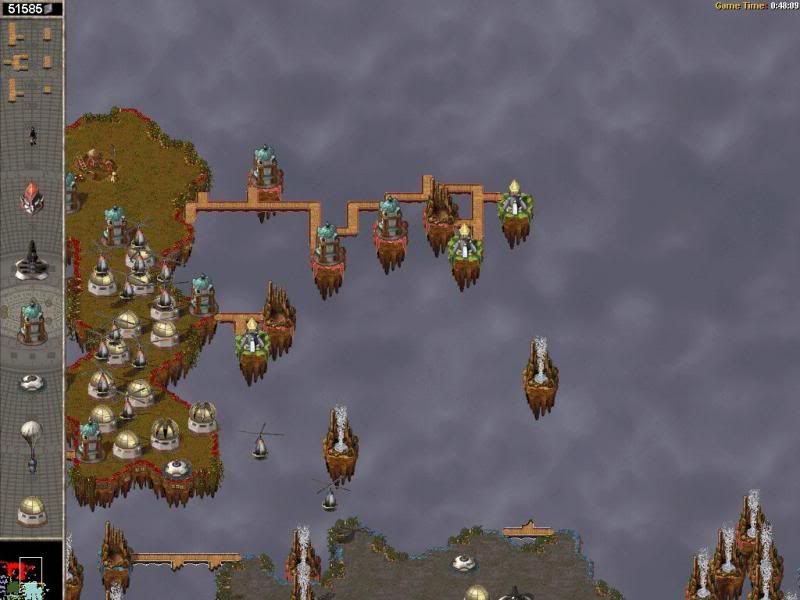
Originally I wanted to build the altar there, however first I had to mine that respawned geyser to make room for a wind tower. In the end I didn't build it there and I'm glad I didn't.

mis6pic14.jpg


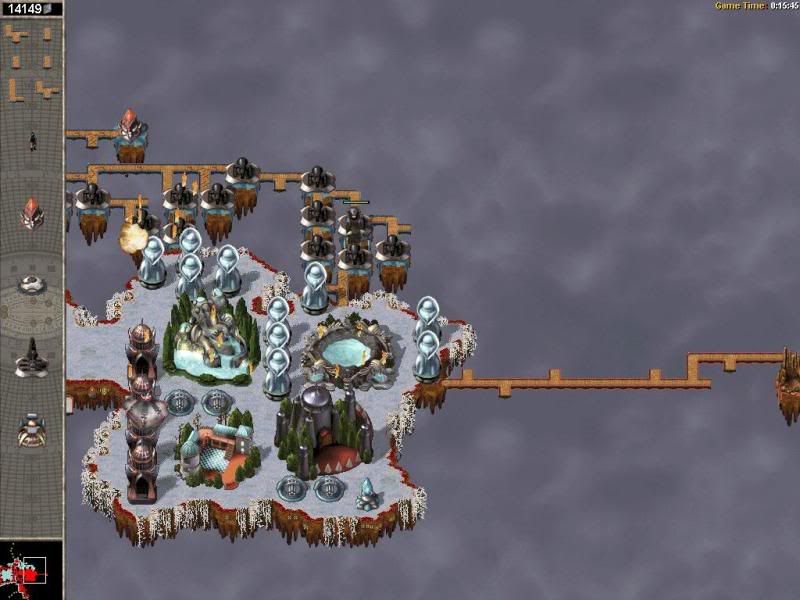
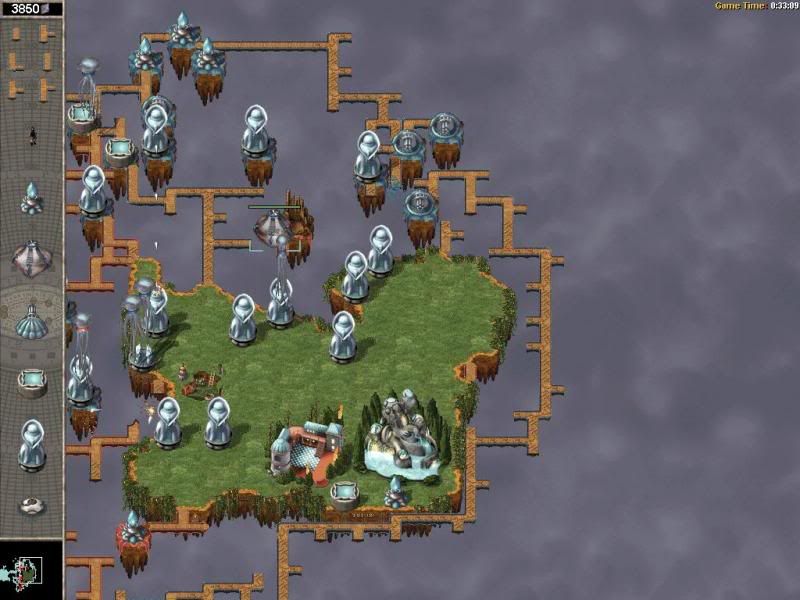
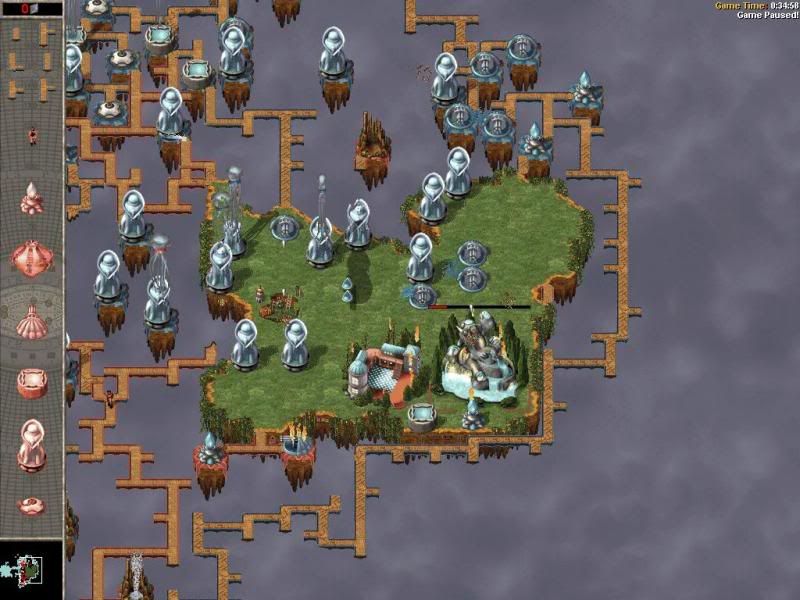
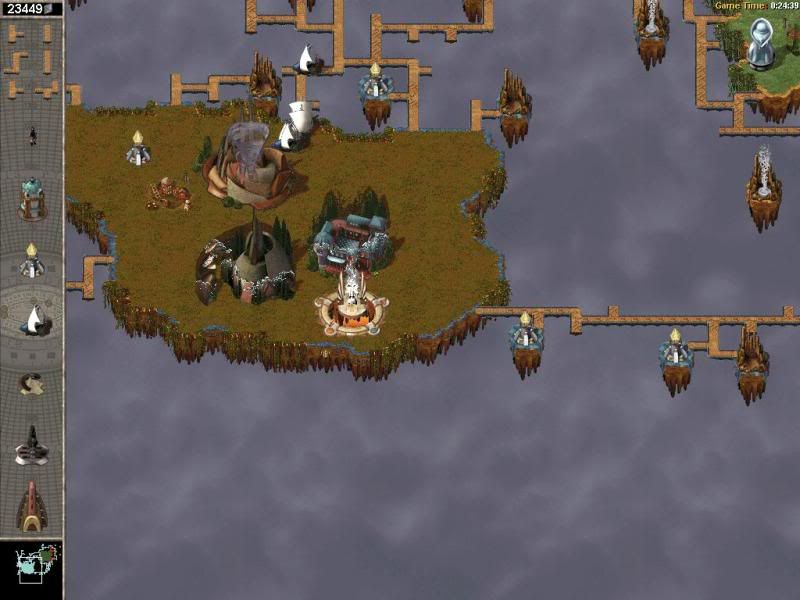
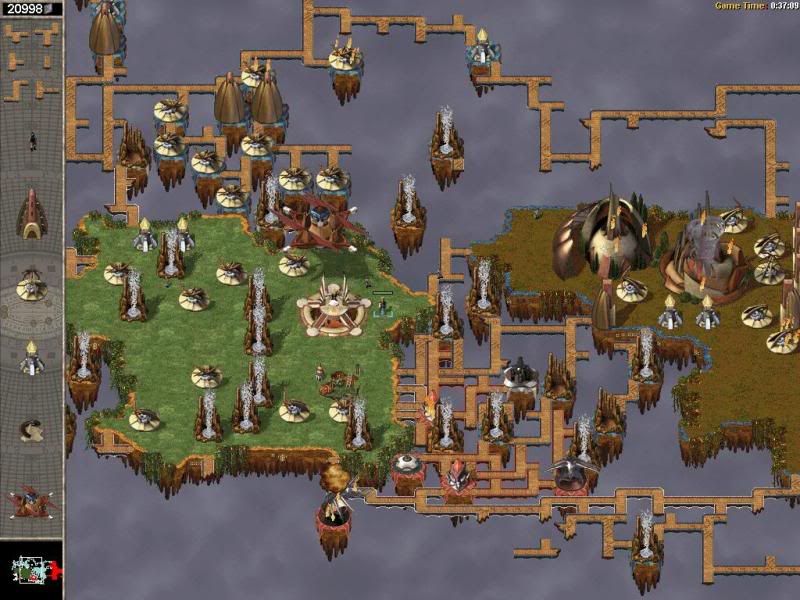
Instead I chose to build it on the white's island. With the temple out of the way I now could easily clear it of sun cannons. BOW SPAM OK GO ^___^

mis6pic15.jpg


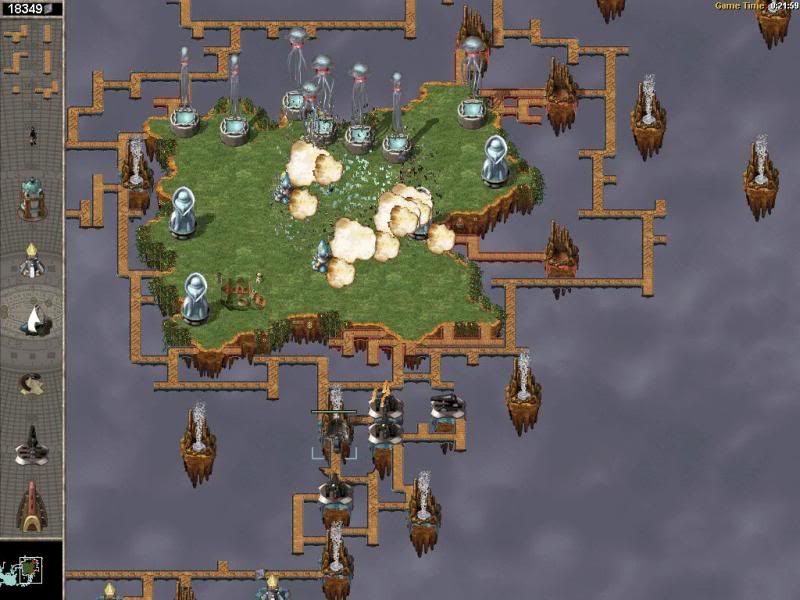
So let's get sacrificin'

mis6NOOO1.jpg


Burn, baby, burn!

mis6pic16.jpg


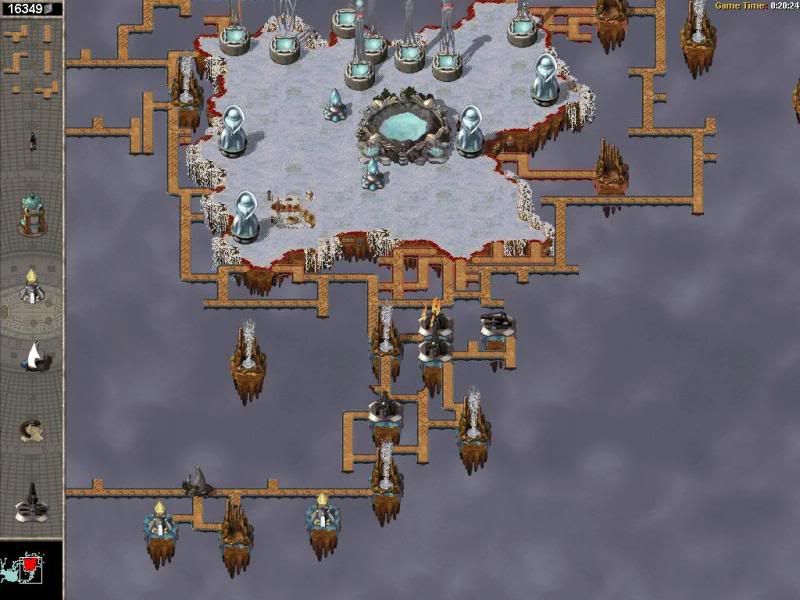
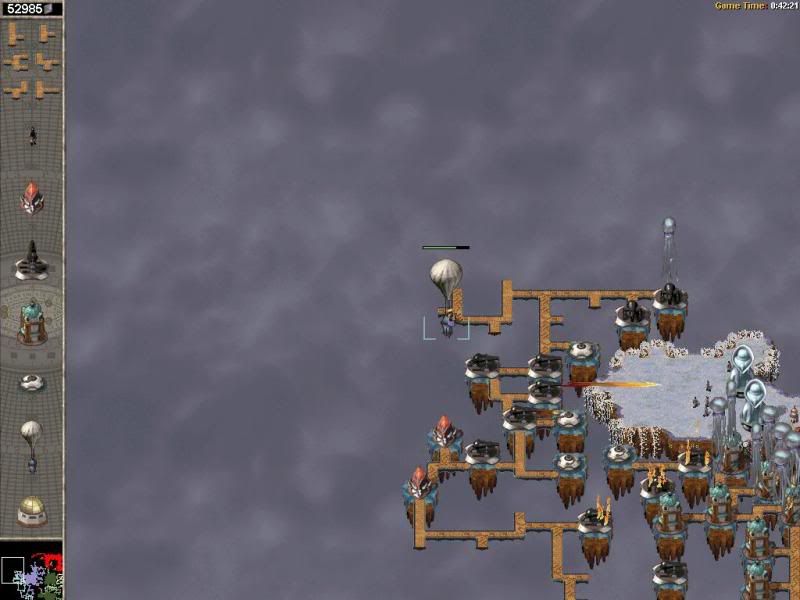
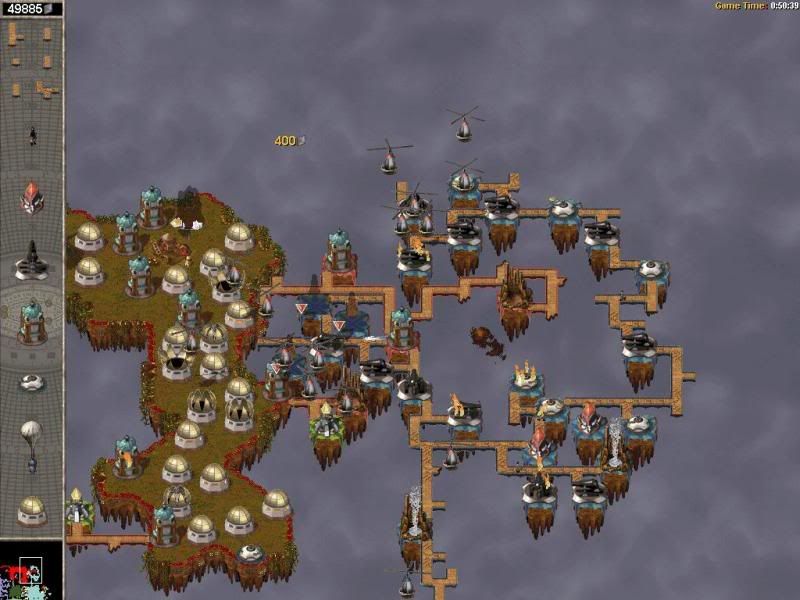
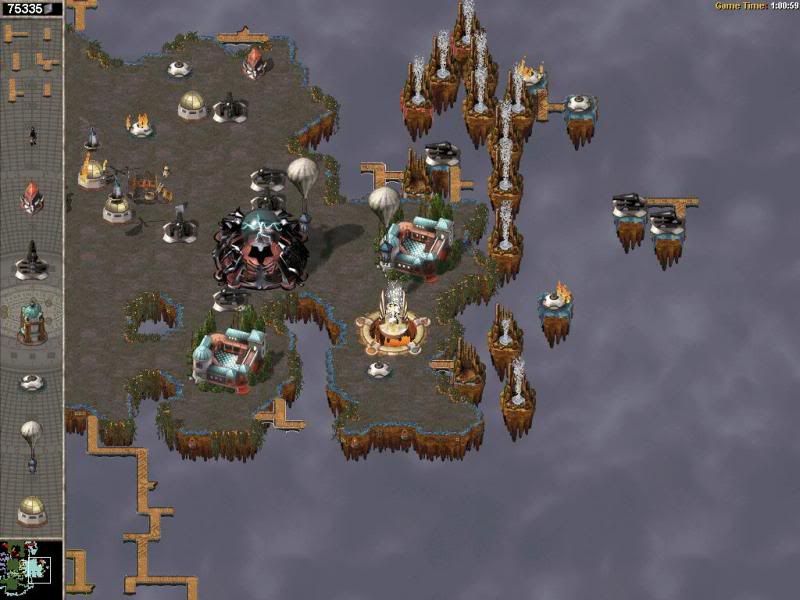
We have a shitload of money now and the red high priest is sitting cozily in my airship so what could possibly go wrong?

mis6pic17.jpg


FFFFFUUUUU.jpg


FUCKING THUNDER CANNON I took my eye off red for one second and he builds destroys my workshop. Now I had no space to build a new workshop on white's island (because of the fucking respawning geysers), and it would have been a sitting duck on my island. So I said fuck it and concentrated on sacrificing him instead.

mis6NOOO2.jpg


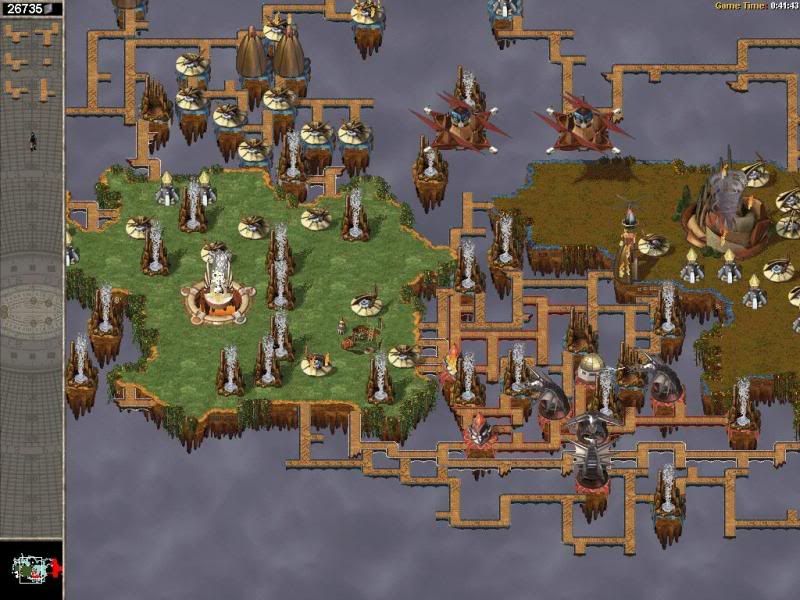
I got lucky here. I belive he could have found a place where to place a thunder cannon and prevent me from conducting the ritual, and with no workshop to build units to stop him the situation could have turned bad indeed.

mis6success.jpg


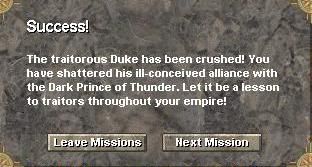
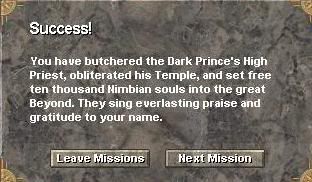
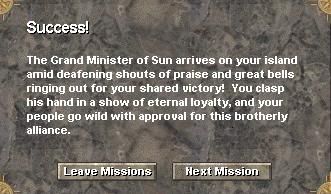
Man, this was a tough one. It took me 40 minutes to do it too.

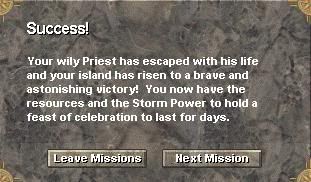
So long story short my strategy was to turtle in until I could muster enough resources to attack white. In this mission you really have to think about unit placement because attacks can come from all sides, and you also have to constantly bridge to prevent that from happening. I'll probably try this one again sometime applying this strategy to see if it's the working one, but I admit I also got lucky this time, especially with the easy capturing of red's priest. Things could have also gotten very bad at the end when I lost my workshop. So don't let that happen to you!

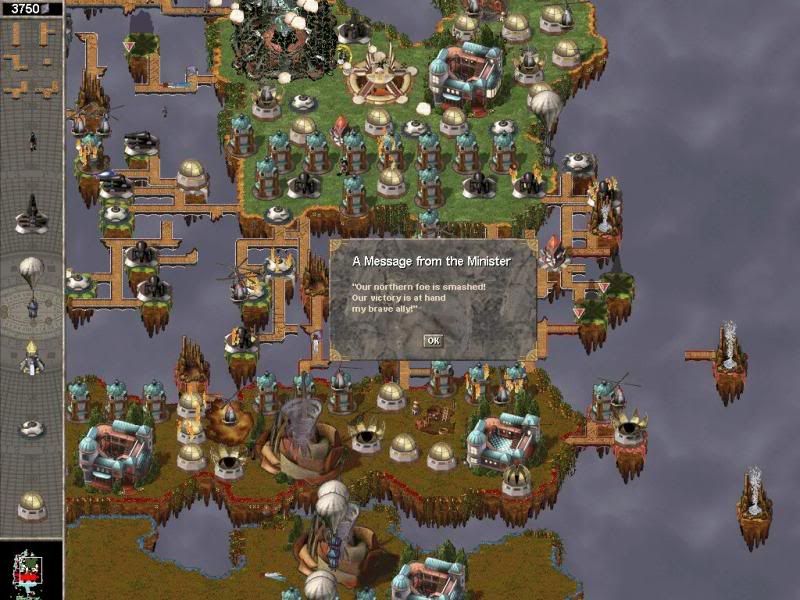
Well, that's it for the first campaign. If you thought you've seen the worst be ready for what's next.
 

catfood

AGAIN
Joined
Aug 28, 2008
Messages
9,345
Location
Nirvana for mice
Welcome back my friends, to the show that never ends. We're so glad you could attend, come inside come inside. ELP hasn't aged well at all.

So here we are at the second campaign of NetStorm, and things haven't gotten much easier for us. However compared to the previous one, this mission is almost a walk in the park.

Let's get started:

mis7pic1.jpg


MOAR

mis7pic2.jpg


So we got surrounded as usual, this time by indestructable bridges.

mis7pic3.jpg


We only got one new unit in this mission:

bulwark.jpg


The Bulwark! It's the toughest and most expensive of all blockers, however it is also completely immune to airborne attacks which makes it well worth the cost. We won't be using it in this mission however partly because there are no aerial attackers at all and partly because we just don't have the necessary space to build a thunder workshop. It's going to have to wait for another mission...

mis7pic4.jpg


Our first order of business is to break free. On the western side there is a small normal bridge section that we destroy by salvaging two units near it. I used sun disc throwers because they are the cheapest.

mis7pic5.jpg


There, it's destroyed. Now we can break free!

mis7pic6.jpg


The mission designers were kind enough to start us with 5 bulfs. Coupled with an abundance of geysers and in this mission money isn't a problem at all.

mis7pic7.jpg


I build a sun cannon to destroy the two generators so we don't get flanked.

mis7pic8.jpg


FUCK THIS IS NOT GOOD. An ice cannon incapacitates our high priest.

mis7pic9.jpg


I built disc throwers to destroy the incoming cloud floater, and I also build a sun barrier (I love them btw).

mis7pic10.jpg


I start briding like crazy; meanwhile our enemy starts putting pressure on us. As long as I have sun barricades errected there souln't be much of a problem.

mis7pic11.jpg


Me trying to win a bridging race against red.

mis7pic12.jpg


So now that we have the situation somewhat under control, what with the barriers and the steady income, we can begin our own little offense. It will mostly consist of good old fashioned sun cannon along with some disc throwers when needed.

mis7pic13.jpg


We attack his temple as soon as possible. I wanted to attack his workshops too but they're kind of out of the way.

mis7pic14.jpg


Soon it is destroyed and I had a bulf ready to capture the high priest.

mis7pic15.jpg


I have noticed that (in general) when I capture the enemy priest, the enemy AI starts to get really aggressive in an attempt to stop me from sacrifing him. In the next set of pics you'll see just how aggressive he can be.

mis7pic16.jpg


See? He flanked me from the north destroying some of my units and imobilisng my priest!

mis7pic17.jpg


The fucker sent a cloud floater to capture him but luckily he regenerated just in time.

mis7pic18.jpg


He somehow even manages to destroy my workshop. It was probably the work of the ice cannons, their projectiles do little damage however once they hit the surface they start jumping from one direction to the other, so the stray shards chipped my workshop's healt little by little.

mis7pic19.jpg


Fortunately the ritual was complete just in time. I fear that had one more minute passed I would have had to restart the mission.

mis7success.jpg


Tries taken: 1

Overall this one was quite easy especially compared to that last one. The important thing to do is to bridge as fast as possible around his "noose" so that he can't build units on it. As you can see I kinda failed at that part and almost payed the price. Otherwise attacking him is very easy, just spam sun cannons and it's smooth sailing.
 
Joined
Apr 18, 2009
Messages
8,268
Location
Gritville
I'm still stuck on that stupid sixth missions... Bah.

Well done, and i do hope you keep it up. This is probably the only way i'll see the rest of the game.
 

catfood

AGAIN
Joined
Aug 28, 2008
Messages
9,345
Location
Nirvana for mice
Stereotypical Villain said:
I'm still stuck on that stupid sixth missions... Bah.

Well done, and i do hope you keep it up. This is probably the only way i'll see the rest of the game.

Did you try using my tacs? I found that building those two towers on the west side is more than enough to keep you safe from white's attacks. The most important thing to do early on is to bridge the south side I believe and then quickly start bridging to the north. That way you only have to worry about 2 flanks, the eastern one being easy to defend: just make sure none of those pesky whirligigs get through. Once you gather about 12K+ storm power you can start spamming white with xbows. IMO your best bet is to make a run for his temple and be ready to capture him with an airship.
 
Joined
Apr 18, 2009
Messages
8,268
Location
Gritville
I tried it two or three times when you put the strat up, but i think it's just a matter of me being a bit slow in the blocking of the eastern front. Red usually spams me with whirlgigs as a result of that.

I'll keep trying during what little time i've got to play during the day though.

Thank you once more for "reminding" me of this game. :thumbsup:
 

catfood

AGAIN
Joined
Aug 28, 2008
Messages
9,345
Location
Nirvana for mice
No prob. Btw if you still get stuck but want to play the game, you can download user made campaigns from NetStormHQ. Some of them will only work through the edit mode though but can still be played this way.
 

FeelTheRads

Arcane
Joined
Apr 18, 2008
Messages
13,716
It has cool music

Here's a little piece of trivia for you: The music is made by Mark Morgan.

And the game can be found new on ebay.
I found mine by pure luck in a local store.
 

catfood

AGAIN
Joined
Aug 28, 2008
Messages
9,345
Location
Nirvana for mice
We're on a roll now :cool: This one was even easier than the last.

mis8pic1.jpg


Enslaving entire nations with necromancy? Now I know where Bioware got the idea from.

mis8pic2.jpg


Ah, finally my favorite tech tree: rain. It's ceratainly not better than wind but I like it's flavor a lot more.

icecannon.jpg


Ice cannon! The only downside of this baby is that it can only fire in 1 direction, however the range, and splash damage it deals more than makes up for it.

crystalcrab.jpg


Crystal crab! Ok, these suck. They look cool, but it's ability isn't all that's cracked up to be. I don't know whether it can stun high priests but if it could it woul definetely be a plus.

icetower.jpg


Ice tower! These are great aswell because they regenerate after being destroyed so we'll definetely be using them whenever we get the chance to do so.

acidbarricade.jpg


The acid bar!.. is fantastic: put two in a single line and any unit that gets between them gets instantly vaporized. They are EXTREMELY powerful, however they are also difficult to use so they won't be seeing any action this mission. I will probably replay this map some more to be able to get the hang of them and use them in a future mission.

manowarpool.jpg


manowar.jpg


Man O'War! You remember these from the fifth mission don't you? If there ever was a unit in a strategy game that I could call evil these would be IT. I mean, look at it it's like something from a hentai clip FFS. They tentacle rape everythin in their path AND they have a shit load of hp taking around 3 or 4 hits from a sun disc thrower to go down.

cloudfloater.jpg


Cloudfloater! I remember cloudfloaters being a lot better in an older version. Now they dodge maybe 33% percent of the time and that's me being generous.

mis8pic3.jpg


As usual I rush forward to cicrcle the enemy island with bridges.

NOTE: if you look at the time on the upper right you'll see we're already 8 minutes in; this is because the timer doesen't pause when I pause the game to take pics and save them. (I'm using printscrn->paste into MSPaint method)

mis8pic4.jpg


I make a mistake: instead of using a slot from the sun workshop to put the rain generator into production I use one from the rain workshop. This mistake cost me 1000 crystals so it's a reminder to anyone to be careful when adding research.
I also build cloud floaters to gather since our golems will be obsolete once our enemy has man o'wars out. (they can't attack flying transports unless they are landed)

mis8pic5.jpg


I also build a sun workshop to get sun disc throwers as defense against man o'wars.

mis8pic6.jpg


With red confined into it's own little area and no ability of gathering resrouces I felt confident and started the attack.

mis8pic7.jpg


Building some more ice cannons and ice towers to defend them.

mis8pic8.jpg


I'm attacking him from 2 fronts to speed things up. So far does man o'wars of his do a good job if defending which is why the first order of business is to destroy their pools.

mis8pic9.jpg


But he is fighting an uphill battle and now a cloudfloater is ready to capture the high priest.

mis8pic11.jpg


I wonder what it feels like to be riding a cloud...

mis8pic12.jpg


We plant him on the altar and get ready for the ritual.

mis8pic13.jpg


Meanwhile back at his base we clean up the place.

mis8NOOO.jpg


This one's a deader.

mis8success.jpg


The easiest mission we've had in quite a while, however I have a feeling the difficulty weapon is going to spring up the Y axis again very very soon. Mission 5 of this set is aproaching and I have NEVER been able to beat it.
 

catfood

AGAIN
Joined
Aug 28, 2008
Messages
9,345
Location
Nirvana for mice
Catfood here to provide you with your deadly dose of NetStorm!, the most awesomest strategy game that no one has heard of.

Today we'll be doing another relatively simple mission which doesen't even begin to train us for the horrors to come.

Let's begin.

mis9pic1.jpg


What could this dangerous mission be?...
MOAR

mis9pic2.jpg


So we need to bring our boys back home, sounds simple enough.

Let's review our knowledge.

mis9pic3.jpg


:( No new toys, and on top of that two of those are completely useless for this mission. Can you guess which ones they are?

mis9pic4.jpg


The first order of business is to get our boy back home because if we lose that sail skater things just might get a bit complicated later on.
The mission designers were also kind enough to provide us with a bridge that connects to the enemy isle. You know what that means don't you? Hint: it starts with bridge and ends with spam.

mis9pic5.jpg


Spot the one important difference between this pic and the last. Yes, in this mission geysers spawn, and close to our base too! so money is the LEAST of our worries.

mis9pic6.jpg


For the next 5 minutes or so I do nothing but connect to the respawning geysers and gather crystals. Then I get ready for the attack.

mis9pic7.jpg


So here's the plan:
1) with our nemeny confined in his small island he has no access to resources, hence he doesen't have money to build new units, HOWEVER in this game you gain money by destorying enemy units which leads to the next pary of the plan:
2) we build sun cannons to destroy the man o 'war pools to clear a path to his temple, and at the same time we salvage them just before they get destroyed thus denying our enemy of free storm power.

mis9pic8.jpg


The plan worls but it's slow due to the fact that our stupid cannons stop to target the man o'wars instead of their pools.

mis9pic9.jpg


In the end however we managed to clear a path and those 2 suncannons can safely fire away at red's temple.

mis9pic10.jpg


It goes off with a bang, or at least it goess of with a sound that resembles broken glass than falling buildings.

mis9pic11.jpg


We sneak inside with a sail sk8er and capture the high priest (sk8ers are LOT faster than man o'wars).
One thing to point out: in this patch man o'wars can't fly out of their initial range. In previous versions they could and they would have been able to follow our sk8er all the way back to our island and still have enough life to harrass it a bit more. Basically this small "fix" made this otherwise difficult mission into a cakewalk.

mis9pic12.jpg


You know the drill folks.

mis9success.jpg


HELLZ YEAH with 25k crystals we can have as many hookers and booze as we want. :cool:
 

catfood

AGAIN
Joined
Aug 28, 2008
Messages
9,345
Location
Nirvana for mice
Update time! This unfortunately may very well be the last update of this LP since the mission afterwards is the most difficult one yet and I've never been able to finish it (though truth be told I never did try my best to do it).

Let's begin:

mis10pic1.jpg


This is the first, and also last, mission where we have an ally with us and it really makes the playing much more enjoyable.

Let's also review our knowledge:

mis10pic2.jpg


No new tech as you might have expected but it gives us a good idea of how to build our strategies.

mis10pic3.jpg


First we build 2 ballons and start gathering crystals. I had a choice between making 2 baloons or 3 golems but I feel that making baloons pays off more in the long run.

mis10pic4.jpg


I found that the easisest strategy for this mission is to contain green with bridges...

mis10pic5.jpg


... and help our ally against red. This way we can finish an opponent fast and I don't have to worry about my stupid allied priest of being captured.

mis10pic6.jpg


As you can see we flank him and go straight for his temple.

mis10pic7.jpg


FFFFFUUUUU.jpg


Stupid red manages to get himselg incapacitated. Red is a p. cool guy he fights the good fight and doesen't afraid of anything but is pretty dumb.

mis10pic9.jpg


Oh crap what luck! I managed to destroy white's temple before he began sacrificing red.

mis10pic10.jpg


I build some disc throwers to divert the enemy units attention while my baloong goes for the grab.

mis10pic11.jpg


My whirligigs are dropping pidgeon poo on red's head.

mis10pic12.jpg


The altar is destroyed, but does the idiot run away? Nope. Now you understand why I chose to help him out with white first.

mis10pic13.jpg


Now it's time for green. He must be getting lonely down there so I\m gonna send some whirligigs to keep him company. In fact that's the strategy for taking him out:

choppa-predator.gif


mis10pic14.jpg


Meanwhile back at white's place I place some whirlibases to clean up. We don't want to leave a mess, do we? Red's high priest also decided to vacate the premises.

mis10pic15.jpg


Shit, that's a lot of choppas.

mis10pic16.jpg


Even moar choppas.

mis10pic17.jpg


Umm.. we already took care of that guy remember? Sheesh who made you high priest?

mis10pic18.jpg


Anyway I build an altar and wait for the balloons to arive.

mis10NOOO1.jpg


Whitey first.

mis10NOOO1.jpg


Then Mr Green.

mis10success.jpg


And they also made out in a very manly non-gay manner.

So that's it for mission 10, which is my favorite in the game. If you can slog through the previous ones you will be rewarded with a very fun gaming experience.
The next mission is called "Surrounded!" I'll let you take a guess what that means.

Will catfood be able to beat the next one or will he run away with his tail between his legs, taken down by frustrating mission design? Find out in the next exciting episode* of Let's Play NetStorm!


*Hopefully there will be a next episode.
 

RandomLurker

Scholar
Joined
Jul 8, 2005
Messages
137
Oh hey, Netstorm! Fuck yeah! This little game is one of those rare abberations where you play it and see something that's not only original (which is uncommon enough), but also working well and being generally fun. It's also the game that showed me the first hint that the decline of the gaming press is coming, as I remember the biggest polish gaming rag reviewing it and claiming that the first mission of the second campaign is unbeatable, and thus only reviewing the first campaign out of three in their single player part of the review :lol:.

But seriously, this is a one of a kind gem, and your LP does it justice.

The next mission is called "Surrounded!"

Oh man, that mission. Well, at least each of the enemies gets only one branch of the tech tree, so if you eliminate, say, the wind guy you won't have to deal with the xbows. That's got to count for something, right? If it helps, I remember beating it once by destroying the western guy (I think he was the rain priest) first and moving my temple and workshops to the relative safety of his island. Even after that it was a looong and difficult game, and still, that was many patches ago and I have no idea if it would work now. It may even have been a fluke back then, but hey, I wasn't complaining :lol:.

EDIT: Oh, and as for the acid barricades, there's a mission where you have to win with only the "exotic" weaponry from your arsenal, so I guess if you get there you'll be able to fully show everyone their awesome power.
 

catfood

AGAIN
Joined
Aug 28, 2008
Messages
9,345
Location
Nirvana for mice
Oh man, that mission. Well, at least each of the enemies gets only one branch of the tech tree, so if you eliminate, say, the wind guy you won't have to deal with the xbows. That's got to count for something, right? If it helps, I remember beating it once by destroying the western guy (I think he was the rain priest) first and moving my temple and workshops to the relative safety of his island. Even after that it was a looong and difficult game, and still, that was many patches ago and I have no idea if it would work now. It may even have been a fluke back then, but hey, I wasn't complaining Laughing.

Yes I am trying this strategy too and I believe it will work. Yesterday I managed to rush the wind guy (south) because he is the closest to me and take control of his island but after that it would have meant a very long and arduous battle with the rest of them and unfortunately during weekdays I don't have so much spare time. I will however definitely give it a go in the weekend so hopefully there will be a new update soon.
 

RandomLurker

Scholar
Joined
Jul 8, 2005
Messages
137
Hey, if that's really the case, could you at least write up your failure to win? You know, as a plot twist or something? It would still be better than just abandoning the LP of such a fine game without even any confirmation of the fact.
 

catfood

AGAIN
Joined
Aug 28, 2008
Messages
9,345
Location
Nirvana for mice
OMG FUCKING FINALLY FUCK FUCK SHIT FUCK CUNT SHIT THAT FUCKING MISSION FUCK I MANAGED TO FUCKING BEAT FUCKING IT

And here's the proof. :smug:
netstormmission11finished.jpg


Now all that remains is for me to complete it yet AGAIN, and actually take pics of me doing it. sigh.... The good news is that I belive I have found the winning formula for winning so hopefully things are going to go smoother tomorrow when I start again.

Hey, if that's really the case, could you at least write up your failure to win? You know, as a plot twist or something? It would still be better than just abandoning the LP of such a fine game without even any confirmation of the fact.

I actually do have the pics of another playthrough of mine however I got to this:
mis11pic15.jpg

and said to myself "fuck this shit it's not worth it" and quit in frustration. I could post those but I'm confident now that I can finish it again. If you guys want me to post them just say but I must warn you that they aren't really that artistic.
 

catfood

AGAIN
Joined
Aug 28, 2008
Messages
9,345
Location
Nirvana for mice
Watch out! Huge update incoming at 12 o'clock!

It's been a month since I last updated this and as you might have guessed it is because of the dreaded 11th mission. But now I've cracked it open and can safely say that I have discovered the winning formula to it. At the end of the update I shall post a link to a video of this mission by someone from NetstormHQ who used a different strategy than I. However I think that mine is better for a beginner since it's a lot safer and slower.

So without further ado I present to you Mission 11: Surrounded!

mis11pic1.jpg


Our knowledge:

mis11pic2.jpg


Unfortunately we are stuck with the shitty sun tech for this mission. It would have been a lot simpler for us if it let us choose our own branch at the beginning.

mis11pic3.jpg


OK so some data here:
- we are surrounded by 4 enemies, one controlling each fury.
- their islands aren't rich in resources like ours so we have small gathering advantage in the beginning.
- they start with a temple however they only begin moving when we have completed our own temple, so in the beginning you can analyze the situation at you leisure

I build a temple near some geysers to speed up production, afterward I create some golems to start gathering crystals and send my priest to build a workshop.

mis11pic4.jpg


Speed is of the essence in this map, and you can see here that I quickly make a run for the thunder guy who is by far the most dangerous opponent here. Here's my tip for anyone who wants to try this map: kill white ASAP, including his workshop and temple, because if you don't you are going to have a LOT o problems later one. If you don't belive me just look at my previous post and see what he is capable of.

In this pic you can see that he starts gathering with his priest and I build some disc throwers to intercept him. Now, it's possible that if you're both fast and lucky that you can capture more than one priest this way (up to 3 I believe), but I don't have that skill yet and since I also want to kill white first I ignore the other high priests for now.

mis11pic5.jpg


Now to destroy the workshop. You don't see it in this pic but I have captured white and so once I destroy his workshop he won't be able to build another one which means no more annoying thunder cannons.

mis11NOOO1.jpg


White is sacrificed along with his workshop so he is no longer a problem. Now all that remains is to destroy his temple because......

mis11pic6.jpg


... Hey what's our little priest doing there? Doesn't he now it's dangerous to wander around behind enemy lines like that?

mis11pic7.jpg


Yup, we're abandoning ship and relocating on white's former island. The reason for this is twofold: first and foremost it's a LOT safer than the middle island, and second it's the largest on on the map which gives us both protection and space to build on.

mis11pic8.jpg


Now that we are relatively safe from attacks we concentrate on our next biggest threat: green, the wind guy. Xbows and dust devils can ruin you day really fast so we launch an attack on him as soon as we get our bearings together.

mis11pic9.jpg


Here's a shot of our northwestern front. I have noticed that red seems to enjoy using whirligigs a lot for assault, coupled with sun disc throwers for defense. Wether he doesn't have sun cannons, or his AI isn't programmed to use them the important thing is that we don't have to worry about them.

mis11pic10.jpg


Green is incapacitated and a balloon is en route to pick him up, but we're not out of the woods yet we still need to destroy the workshops because he can still build units with them.

mis11pic11.jpg


There we go.

mis11pic12.jpg


After the workshops are destroyed I focus on cleaning up the island since we will be using this as our staging area for our next attack. At this point I don't even care how many units I lose so I just place them randomly on the island.

mis11NOOO2.jpg


We sacrifice green's high priest and we get even more storm power that we don't need.

mis11pic13.jpg


Now for the really hard part: taking out purple. He's the rain guy and you know what that means.. yup Man O'wars. Taking out this small area is a lot harder that it looks like since he also has ice towers which regenerate and aggro my sun cannons. The main goal here is to destroy the spawning pools.

mis11pic14.jpg


Shit..... just look at all those geysers. I'm beginning to think storm geysers are a sort of parasite that plague the islands. Can you imagine living on one of them and one day BAM you wake up with a geyser up your ass.

mis11pic15.jpg


So what the fuck is going on here? As you can see purple's temple is well defended by ice towers THAT FUCKING REGENERATE so my plan is to lure him out of hiding by destroying the rain workshop. When he begins rebuilding it he will be met by a volley of cannon balls in his stupid face hopefully. I hope..

mis11pic16.jpg


The workshop is destroyed and the balloon awaits its prey.

mis11pic17.jpg


Bingo! Note how I diverted the man o'wars attention with stone towers.

mis11pic18.jpg


Purple wins a free ride with a balloon!

mis11pic19.jpg


As I did with green, I try destroying the remaining workshop. I don't know what tech he has inside but I want to make sure he won't be able to help red in any way.

mis11pic20.jpg


I don't even bother with his temple since it is now useless.

mis11pic21.jpg


While I was away the cat would play, and he began expanding to the east which is the place from where I plan on launching my next attack.

mis11pic22.jpg


Here I tried pushing through his little expo but I failed miserably and I end up going around it anyway.

mis11pic23.jpg


Just look at that swarm of whirligigs it's like locust apocalypse.

locustLarge.jpg


I try assaulting the whirlibases with sun cannons but too much is too much.

mis11pic24.jpg


I decide to fuck it and just nuke his temple with all I got.

mis11pic25.jpg


Our balloon is a bit far away from its destination and red's health is regenerating fast.

mis11pic26.jpg


But not fast enough.

mis11pic27.jpg


I don't think it's necessary but as a precaution measure I destroy his workshop.

mis11NOOO3.jpg


With all the shit that went on I forgot to sacrifice purple.

mis11NOOO4.jpg


And red is last.

mis11success.jpg


Man this one was tough, I mean it was tough in the beginning. Once you take care of white and green, the other 2 just require stamina to beat.

So here's a recap of the strat I used:
1) Make a run for white as soon as you can.
2) If you can capture a high priest or two it's a bonus, especially white.
3) Salvage you temple first and then rebuild it on white's island. It's better if you wait a while before you salvage you workshop(s) as a precaution measure in case you need to build some defensive units.
4) Quickly go for green because with his xbows he can be a major pain in the ass.
5) Purple and red aren't that much of a problem and require no particular strategy to beat them. If you are persistent enough you will succeed.

As promised here's the youtube video made by someone else: http://www.youtube.com/watch?v=t0yugUlsSVI You can try it too, but you have to be really good for a couple of reasons:
1) you have to be fast, this one's a no brainer
2) you have to know how the AI works - for instance if you build disc throwers right from the start next to geysers that will scare the AI and he will NOT send him to gather crystals; basically you have to plan your trap carefully and in the end it just might not be worth it if white for instance manages to expand.
 

Erebus

Arcane
Joined
Jul 12, 2008
Messages
4,771
Very nice LP ! Good luck for the missions you'll now get to discover !
 

As an Amazon Associate, rpgcodex.net earns from qualifying purchases.
Back
Top Bottom