


-
Welcome to rpgcodex.net, a site dedicated to discussing computer based role-playing games in a free and open fashion. We're less strict than other forums, but please refer to the rules.
"This message is awaiting moderator approval": All new users must pass through our moderation queue before they will be able to post normally. Until your account has "passed" your posts will only be visible to yourself (and moderators) until they are approved. Give us a week to get around to approving / deleting / ignoring your mundane opinion on crap before hassling us about it. Once you have passed the moderation period (think of it as a test), you will be able to post normally, just like all the other retards.
You are using an out of date browser. It may not display this or other websites correctly.
You should upgrade or use an alternative browser.
You should upgrade or use an alternative browser.
Let's play Final Fantasy: 4 Heroes of Light! (Done, yay!)
- Thread starter Crooked Bee
- Start date


Oh gosh half of the updates fucked up thanks to Imageshack unleashing its fury on the Codex. :/
I'll be slowly reuploading them to the Codex's own gallery, but that's going to take a while since DU hasn't implemented the batch upload feature yet.
Fuck this shit.

I'll be slowly reuploading them to the Codex's own gallery, but that's going to take a while since DU hasn't implemented the batch upload feature yet.
Fuck this shit.

It's possible to go back, but the bear isn't there anymore.. 
Mrowak
Arcane
- Joined
- Sep 26, 2008
- Messages
- 3,947

Crooked Bee said:Oh gosh half of the updates fucked up thanks to Imageshack unleashing its fury on the Codex. :/
I'll be slowly reuploading them to the Codex's own gallery, but that's going to take a while since DU hasn't implemented the batch upload feature yet.
Fuck this shit.
Don't bother Bee. Too much work.
Just leave a method of viewing the blocked images in your initial thread opening post:
Antihero said:Never surrender.
Quoting my previous post:
About the domain's crimes against imageshack's ToS: if you're using Firefox, type about:config in the address bar, filter by "referer" and set it to zero (or maybe just one) and reload. Set it back to two later if you want. Sure there's a similar setting in other browsers. The images are still there, it's just hotlinking that's messed up.
Never surrender commrade Antihero

ACT III: THE GRAND FINALE
In which we enter the Schwarzwelt thingie, the identity of the Dark Lord is revealed, the final battles are fought, and all becomes right (?) with the world again.
Now that we have obtained all the crowns and crawled through all the optional towers, it's finally time to get down to business and kick-start the last part of the game. Yay!
Part 42: Stripped
A short update in which we enter the world of darkness -- with an unexpected result!
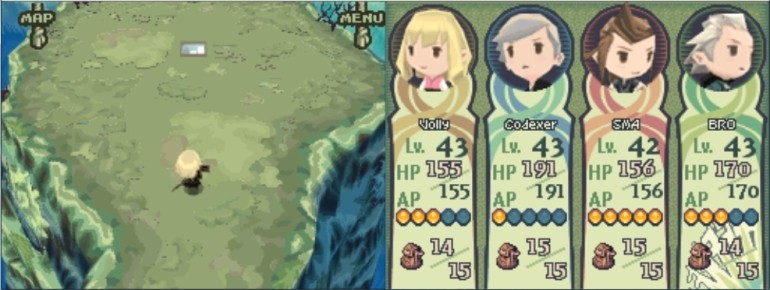
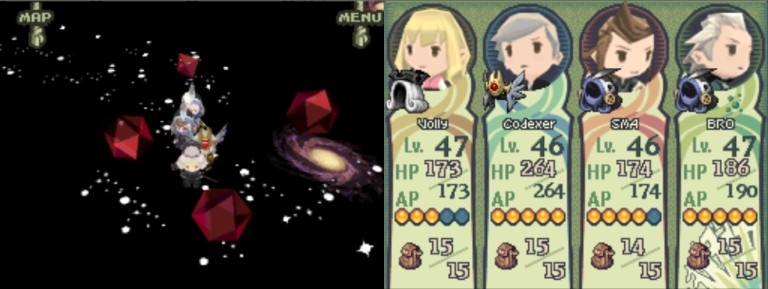
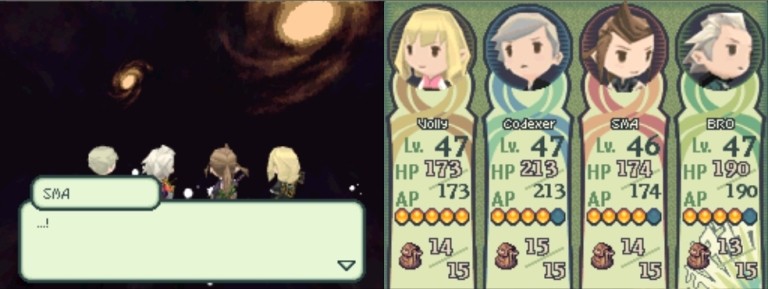
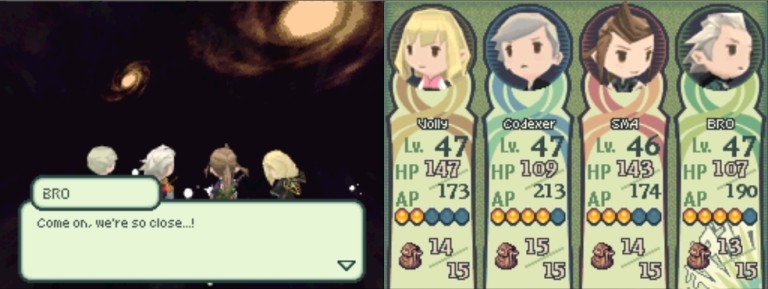
Having been awarded the last crown, Scribe, our brave heroes exit the Trial Tower:


Before we ride the whale Cetus straight into the Schwarzwelt, however, there are three locations we should, I think, visit in order to wrap things up and get all possible clues from NPCs: Urbeth, Guera (Krinjh), and Spelvia (Rolan).
Let's start with the latter, shall we?

And so we arrive to Spelvia.
A local goat tells us what we already know:

Yup, that's what Cetus is for.
And the Witch of the Sky reminds us of not leaving the legendary equipment behind if we want to defeat the Dark Lord:

We also get hints about the bonus towers, but we don't need those anymore:


We are also reminded to upgrade our crowns to master their power:

Otherwise we might lose the battle against the Dark Lord:

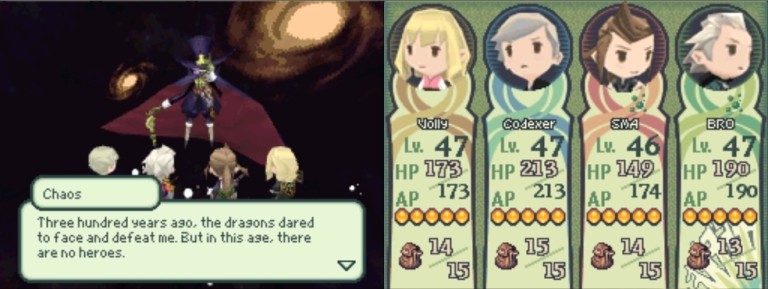
After all, he's said to be an extremely mighty being:

Too bad none of my readers has guessed the identity of the Dark Lord. Oh well.

Fear the Dark Lord? Bah!

This game totally has level scaling:

However, compared to Oblivion, this kind of level-scaling makes the game more challenging as you level-up, up to the point where many grindfags complained about the bosses being impossible to beat if you're too high level. So the smart thing to do is upgrade your crowns and equipment without leveling up too much.
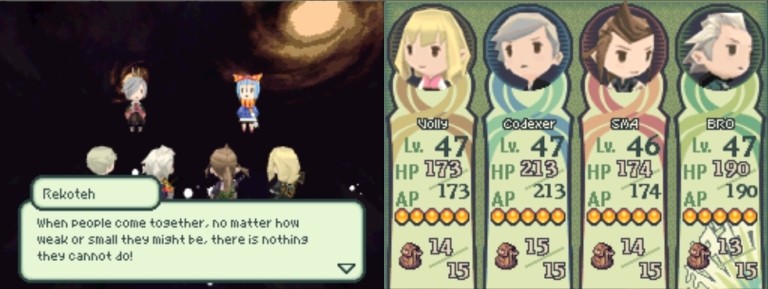
We enter Spelvia's throne room and chat Rekoteh up:

We totally will!
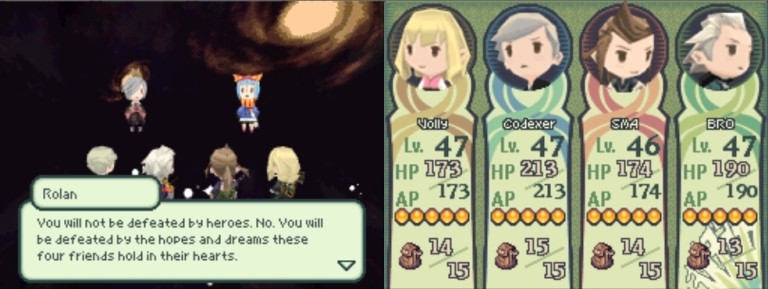
Then we approach Rolan the "hero":

Nope.

Oh really?

Codexer: What!?
BRO: How do we stop it!?
Rolan: You need the legendary weapons and armor that you collected as you fought the demons.

"The old Rolan" is the real hero Rolan of legend after which this failed hero was named.
Rekoteh chimes in:

But Rolan says he is of no real help:

And naturally he turns to us:

What a surprise.


Yep, sure. Piece of cake.

"We aren't heroes"? WTF? We are the heroes of light FFS.
Rolan: I know you can save us. I believe in you!

And so we depart. Off to Guera we fly!

The local populace seems extremely satisfied with Krinjh being the new king:

That's cool. Let's head straight to the palace, then.

Something called the Apocalypse, I assume.

Oh you sure are a brave one.

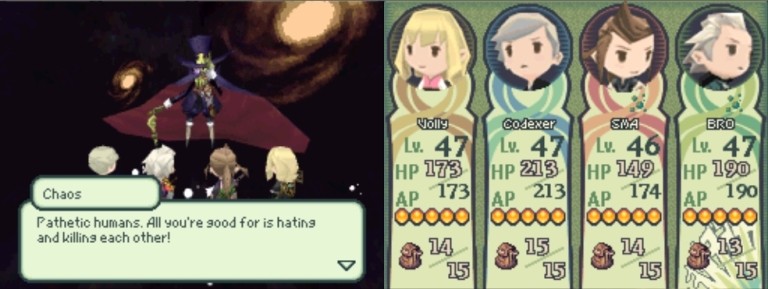
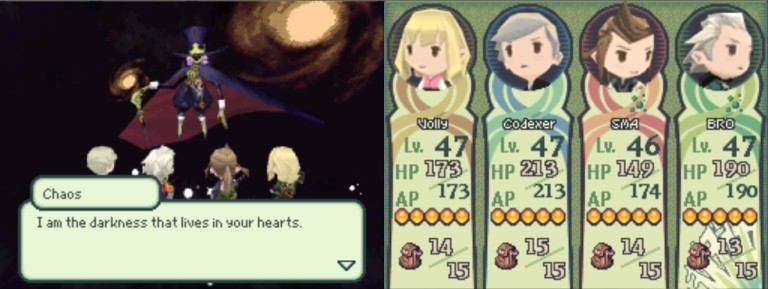
Yup, into chaos. After all...

...the Dark Lord is Chaos. So much for his, or rather its, identity.


Yeah, yeah, whatever.

Oh. :/
But I'm sure everything will be back to normal once we've defeated the Dark Lord.


Scholars, scholars never change.

Hmmm. As far as I know, there is no Flare spell in this game. It's probably just a nod to other Final Fantasy games:
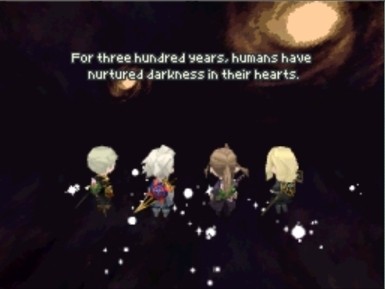
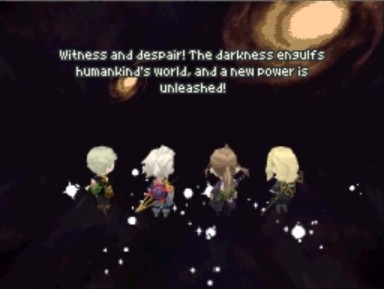
But anywayz. The world of darkness, also known as Schwarzwelt in the Shin Megami Tensei game Black Cat is LPing, has been totally unleashed:

So kewl.
In the Guera throne room, we are informed about the people called Sages:

Funny thing is, Volly the Sage is standing right in front of this clueless NPC.

Well, that kind of goes without saying.

Good.

Meh, nothing particularly interesting here. Next destination: Urbeth.

You see, the Schwarzwelt thingie has appeared right to the south of Urbeth:


No wonder the NPCs are distressed:


No worries, NPCs, the heroes of light are here to save the day!

It looks like the local people do nothing but pray all day:


They pray even to Rolan, and even for their accessories:


Their dedication is admirable. They even want us to pray along with them:


Some are more sceptical about the whole praying thing, though:


It's all hopeless...

As you may remember, we saved the town from Beelzebub's plague. But the situation is worse now.

This is no time for pets, it seems:

Oh. :/


So Chaos is the one who created the world, eh?

I wonder who that might be.

And to Cetus we fly!

I don't think we require any more preparations, with all the crowns and equipment we've got. Let's ride the sacred beastie straight into the world of darkness!


Here we go!
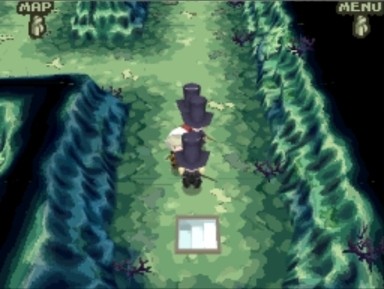
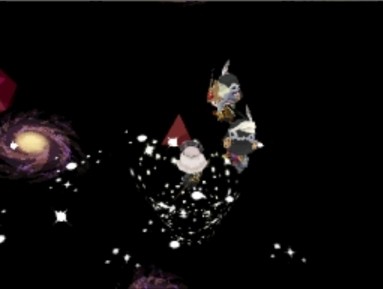
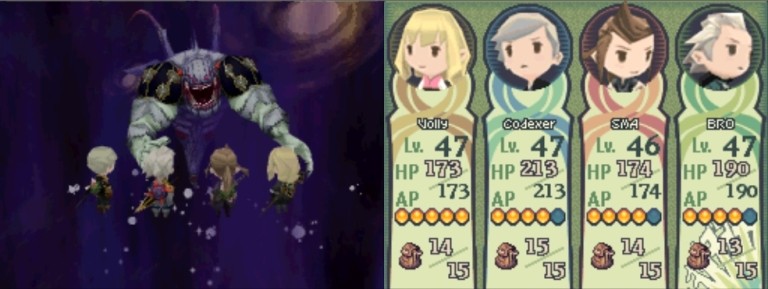
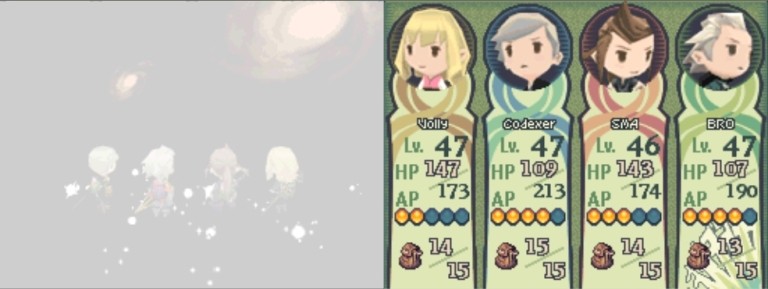
Entering the Schwarzwelt, we find ourselves inside some kind of underwater dungeon:

Everything goes next-gen...

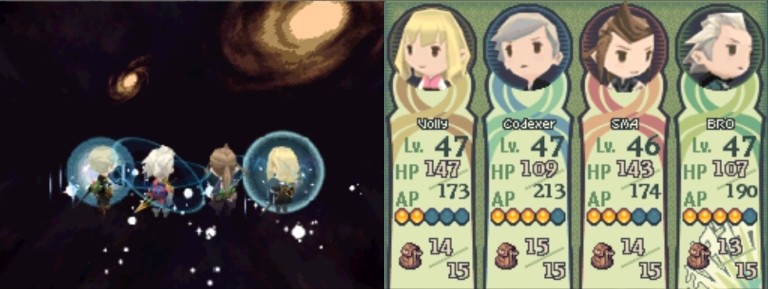
...and a menacing voice is heard:

:twisted:

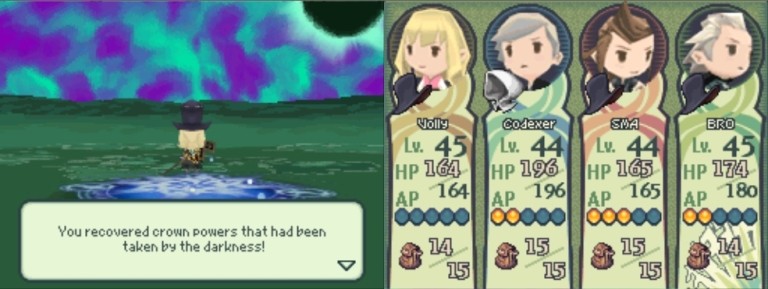
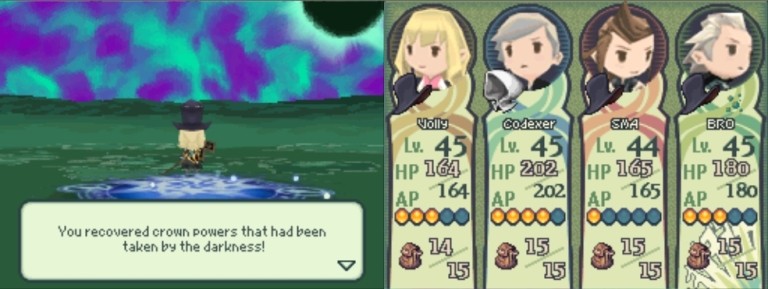
"Your powers have been taken away"?

Scary!
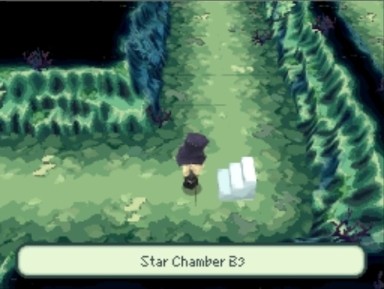
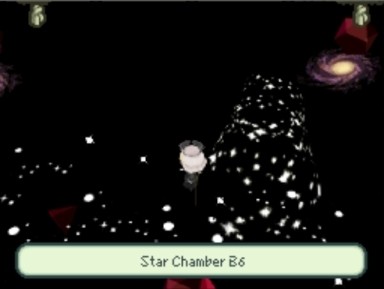
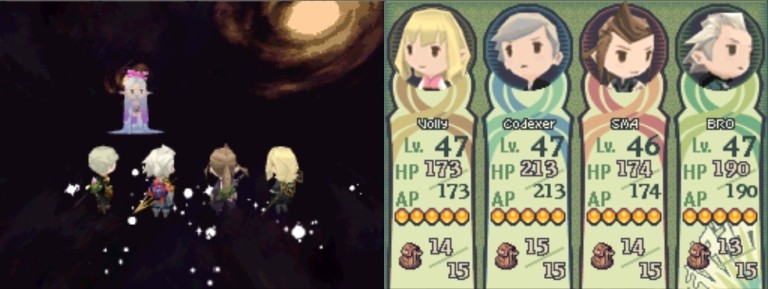
And everything's back to normal (?):

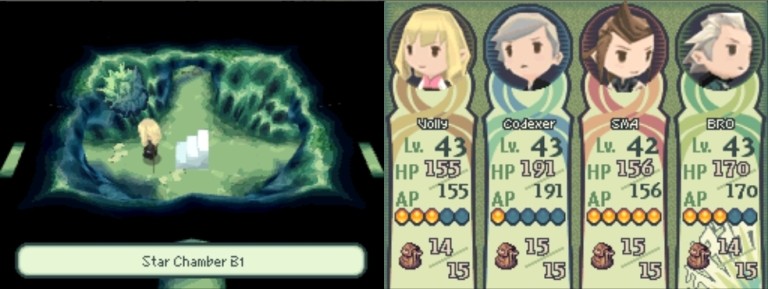
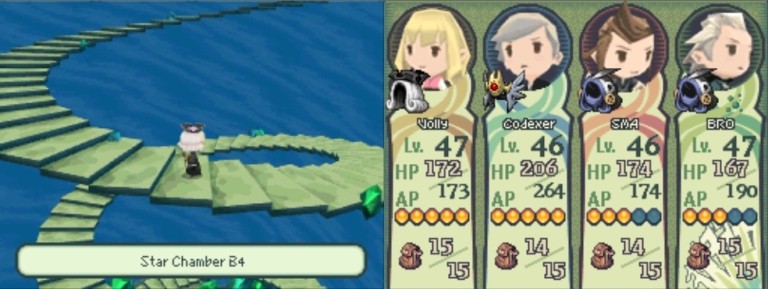
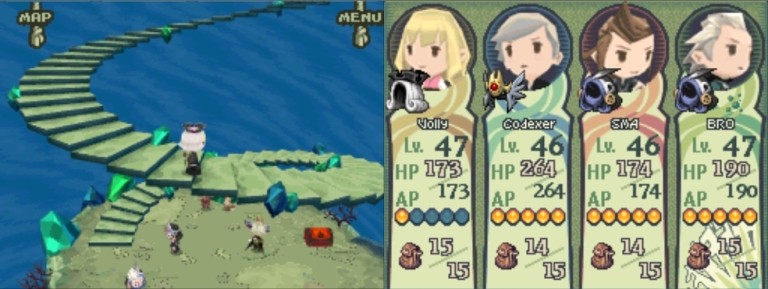
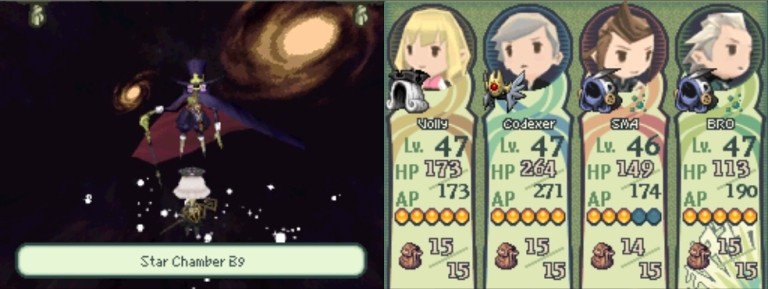
This dungeon is called Star Chamber, by the way.
But what was that about our powers having been taken away?

OMG! We've been stripped of all our crowns! Even the bonus ones are gone!

Now this is a twist. I wonder what happens next... Will we survive or will we not? Place your bets!
In which we enter the Schwarzwelt thingie, the identity of the Dark Lord is revealed, the final battles are fought, and all becomes right (?) with the world again.
Now that we have obtained all the crowns and crawled through all the optional towers, it's finally time to get down to business and kick-start the last part of the game. Yay!
Part 42: Stripped
A short update in which we enter the world of darkness -- with an unexpected result!
Having been awarded the last crown, Scribe, our brave heroes exit the Trial Tower:


Before we ride the whale Cetus straight into the Schwarzwelt, however, there are three locations we should, I think, visit in order to wrap things up and get all possible clues from NPCs: Urbeth, Guera (Krinjh), and Spelvia (Rolan).
Let's start with the latter, shall we?

And so we arrive to Spelvia.
A local goat tells us what we already know:

Yup, that's what Cetus is for.
And the Witch of the Sky reminds us of not leaving the legendary equipment behind if we want to defeat the Dark Lord:

We also get hints about the bonus towers, but we don't need those anymore:


We are also reminded to upgrade our crowns to master their power:

Otherwise we might lose the battle against the Dark Lord:

After all, he's said to be an extremely mighty being:

Too bad none of my readers has guessed the identity of the Dark Lord. Oh well.

Fear the Dark Lord? Bah!
spekkio said:The Dark Lord?
When compared to the Four Heroes... moar like The Gigantic Pussy, amrite?
This game totally has level scaling:

However, compared to Oblivion, this kind of level-scaling makes the game more challenging as you level-up, up to the point where many grindfags complained about the bosses being impossible to beat if you're too high level. So the smart thing to do is upgrade your crowns and equipment without leveling up too much.
We enter Spelvia's throne room and chat Rekoteh up:

We totally will!
Then we approach Rolan the "hero":

Nope.

Oh really?

Codexer: What!?
BRO: How do we stop it!?
Rolan: You need the legendary weapons and armor that you collected as you fought the demons.

"The old Rolan" is the real hero Rolan of legend after which this failed hero was named.
Rekoteh chimes in:

But Rolan says he is of no real help:

And naturally he turns to us:

What a surprise.


Yep, sure. Piece of cake.

"We aren't heroes"? WTF? We are the heroes of light FFS.
Rolan: I know you can save us. I believe in you!

And so we depart. Off to Guera we fly!

The local populace seems extremely satisfied with Krinjh being the new king:

That's cool. Let's head straight to the palace, then.

Something called the Apocalypse, I assume.

Oh you sure are a brave one.

Yup, into chaos. After all...

...the Dark Lord is Chaos. So much for his, or rather its, identity.

Yeah, yeah, whatever.

Oh. :/
But I'm sure everything will be back to normal once we've defeated the Dark Lord.


Scholars, scholars never change.

Hmmm. As far as I know, there is no Flare spell in this game. It's probably just a nod to other Final Fantasy games:
Final Fantasy Wiki said:Flare (フレア Furea), also known as Nuke, is a recurring spell throughout the Final Fantasy series. It is often among the most powerful of the Black Magic spells and is a counterpart to the White Magic Holy. It first appears in the original Final Fantasy. The type of damage it does depends upon the game it is in, though it is usually Fire or non-elemental damage and is always Black Magic.
But anywayz. The world of darkness, also known as Schwarzwelt in the Shin Megami Tensei game Black Cat is LPing, has been totally unleashed:

So kewl.
In the Guera throne room, we are informed about the people called Sages:

Funny thing is, Volly the Sage is standing right in front of this clueless NPC.

Well, that kind of goes without saying.

Good.

Meh, nothing particularly interesting here. Next destination: Urbeth.

You see, the Schwarzwelt thingie has appeared right to the south of Urbeth:


No wonder the NPCs are distressed:


No worries, NPCs, the heroes of light are here to save the day!

It looks like the local people do nothing but pray all day:


They pray even to Rolan, and even for their accessories:


Their dedication is admirable. They even want us to pray along with them:


Some are more sceptical about the whole praying thing, though:


It's all hopeless...

As you may remember, we saved the town from Beelzebub's plague. But the situation is worse now.

This is no time for pets, it seems:

Oh. :/


So Chaos is the one who created the world, eh?

I wonder who that might be.

And to Cetus we fly!

I don't think we require any more preparations, with all the crowns and equipment we've got. Let's ride the sacred beastie straight into the world of darkness!


Here we go!
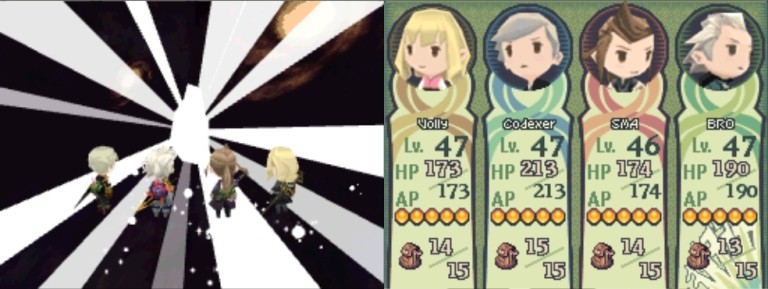
Entering the Schwarzwelt, we find ourselves inside some kind of underwater dungeon:

Everything goes next-gen...

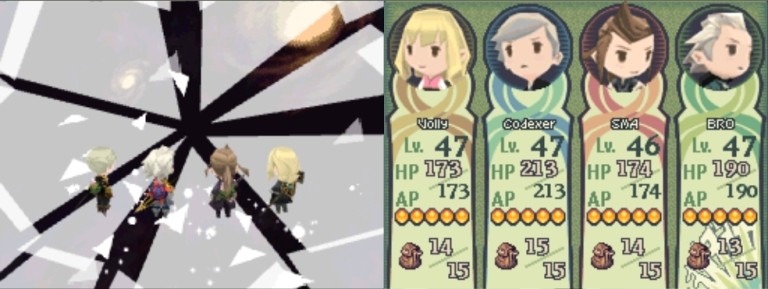
...and a menacing voice is heard:

:twisted:

"Your powers have been taken away"?

Scary!
And everything's back to normal (?):

This dungeon is called Star Chamber, by the way.
But what was that about our powers having been taken away?

OMG! We've been stripped of all our crowns! Even the bonus ones are gone!
Now this is a twist.

lightbane
Arcane
- Joined
- Dec 27, 2008
- Messages
- 10,238
Probably you'll have to fight certain bosses to get back the crowns like it happened with FF8. By the way, you still have not commented how powerful/useful the Scribe crown is... Also, that Dark Lord still reminds me of Terranigma's Dark Gaia.
A shame, I insist it would have been better if the Dark Lord was actually the Crystal of Light itself, that was trolling you to do stuff so that he could fully awaken his power.
A shame, I insist it would have been better if the Dark Lord was actually the Crystal of Light itself, that was trolling you to do stuff so that he could fully awaken his power.
Jaedar said:It'd be a pretty cool troll if they forced you to fight the last boss without crowns")
Nah, I'm pretty sure that won't happen.
lightbane said:Probably you'll have to fight certain bosses to get back the crowns like it happened with FF8.
Yup, bro lightbane has it right.
lightbane said:By the way, you still have not commented how powerful/useful the Scribe crown is...
Okay, I'll try it out... Once I get it back.
lightbane said:A shame, I insist it would have been better if the Dark Lord was actually the Crystal of Light itself, that was trolling you to do stuff so that he could fully awaken his power.
Agreed. But well, that'd be expecting too much, I guess.
Also,
Final Fantasy Wiki said:Chaos (カオス Kaosu) is the antagonist and the final boss of the original Final Fantasy.
Going back to the roots indeed.
Thanks for the bump, folks, but the update will happen only in a couple of days. I'm too damn busy now.
Oh, and
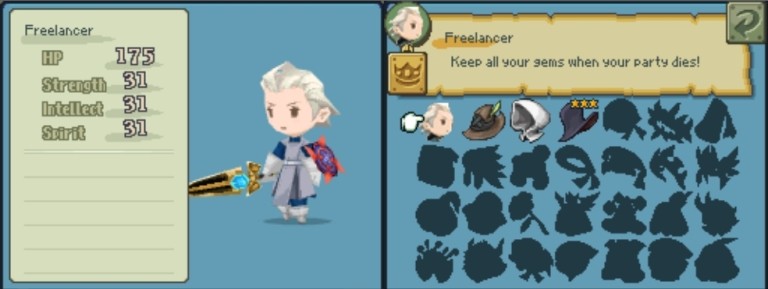
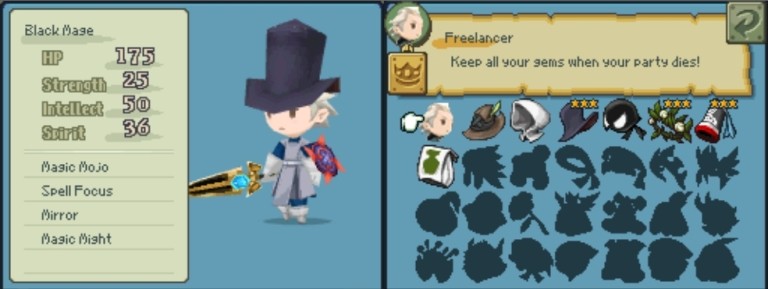
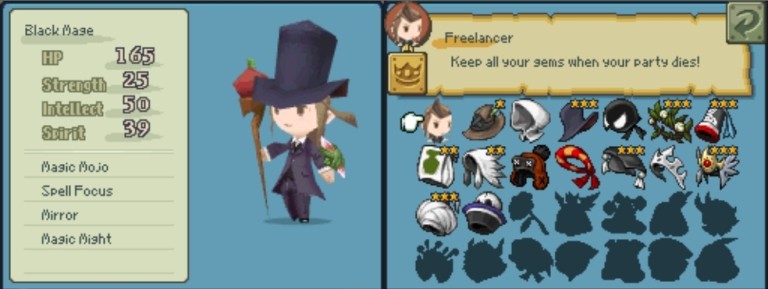
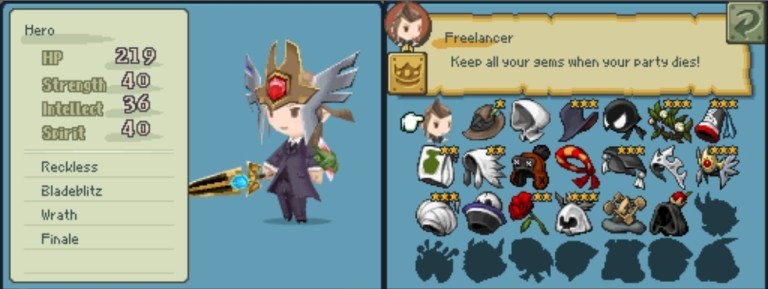
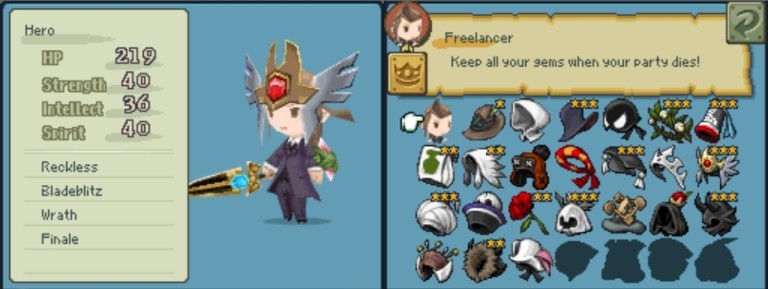
It turns out you can totally avoid reclaiming all the lost crowns and fight the Dark Lord without any crowns but Freelancer. Anyone sadistic enough to want to see me try?
Oh, and
Jaedar said:It'd be a pretty cool troll if they forced you to fight the last boss without crowns
It turns out you can totally avoid reclaiming all the lost crowns and fight the Dark Lord without any crowns but Freelancer.
- Joined
- Dec 31, 2007
- Messages
- 11,099
Crooked Bee said:It turns out you can totally avoid reclaiming all the lost crowns and fight the Dark Lord without any crowns but Freelancer.
Well... if you're masochistic enough to even consider it...
Edward_R_Murrow
Arcane
No crowns, Freelancer only, Final destination?
Give it a try if you want, but don't worry too much if it's too masochistic...I mean you already did the marathon crawling. I think you've sated any Codexer's appetite for sadism.
Give it a try if you want, but don't worry too much if it's too masochistic...I mean you already did the marathon crawling. I think you've sated any Codexer's appetite for sadism.
Edward_R_Murrow said:Give it a try if you want, but don't worry too much if it's too masochistic...I mean you already did the marathon crawling. I think you've sated any Codexer's appetite for sadism.
Okay then. I'm still going to try that, I think, but only after I've reclaimed all the lost crowns. So that I don't have to crawl through the same dungeon twice.
Part 43: Getting the Crowns Back
In which we battle the archdemons again.
Previously on this LP, we entered the world of darkness only to be stripped of all our hard-earned crowns. Looks like this game is trolling us! Now we should, I think, get all the crowns back before we fight the Dark Lord. I don't think we stand a chance against him with an all-Freelancer party. To boot, this LP's got to be as complete as possible, so in this update we'll be getting all of our crowns back. To do that, as lightbane-kun said, we have to fight the bosses -- the archdemons -- again. This time I'll only provide a brief battle description for each archdemon, since we know them all, and their weaknesses, already.
Okay, so here we go.
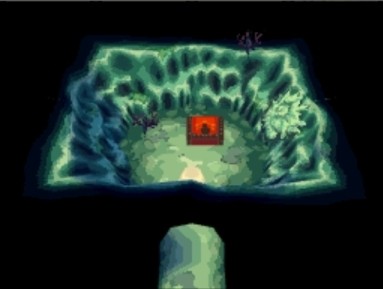
The Star Chamber is a 9-floor dungeon, with the 2nd and 3rd floors being the main and biggest ones. They are spiral-like and zigzaggish. It's a nice dungeon overall, I even got lost in it myself and I think I didn't manage to find all the treasure chests scattered around the place. I even missed Lucifer initially and had to wander around a bit and go back to the previous level to find him.
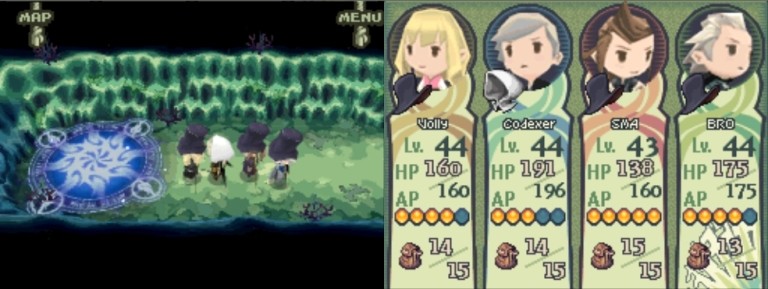
But anyway. Our brave freelancer party descends to B1:
To the north is a small room with a chest containing a Phoenix Down:
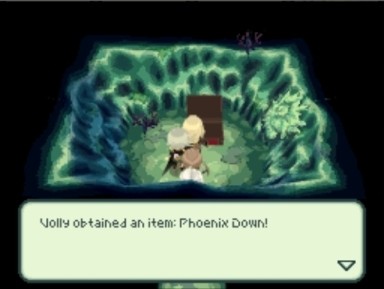
We've got quite many of those already though, so it isn't of particular use.
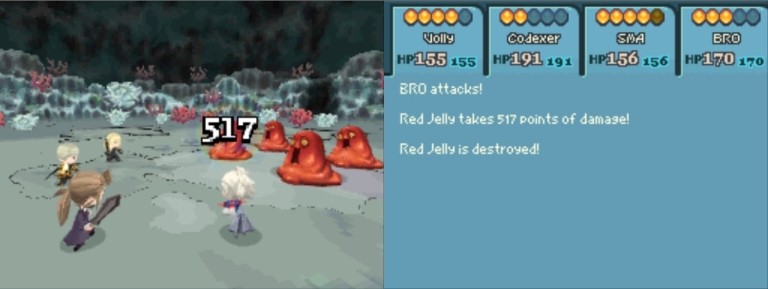
The most common enemy in here is Red Jelly:
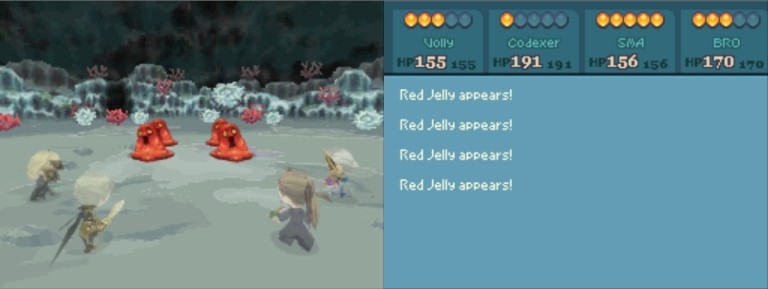
With our super duper upgraded weapons, we kill them no probs:
Back at the previous intersection we head east:
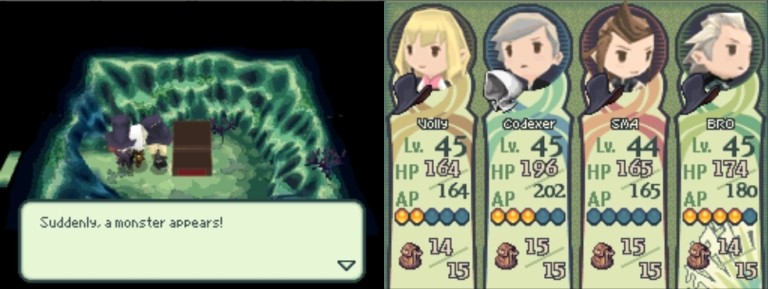
Looks like a boss battle is incoming!
We step on the teleporter glyph...
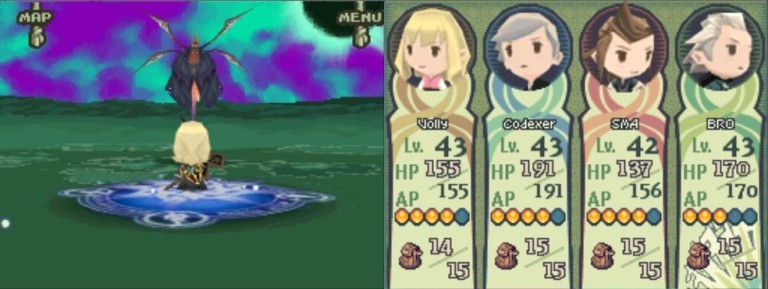
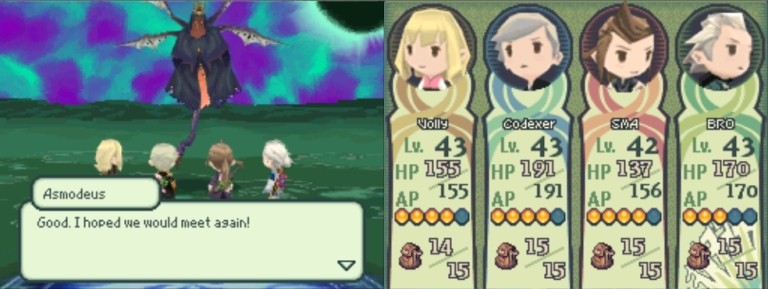
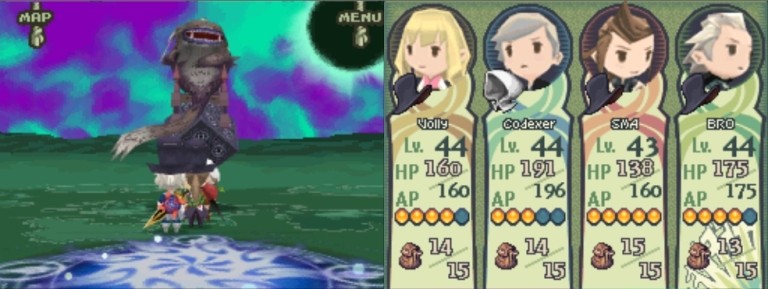
...and find ourselves on a dark barren plain, with Asmodeus waiting for us.
Boss #1: Asmodeus
Shall we approach the scary demon thingie?
The pleasure's all ours.
We're good, yeah.
With that, Asmodeus attacks!
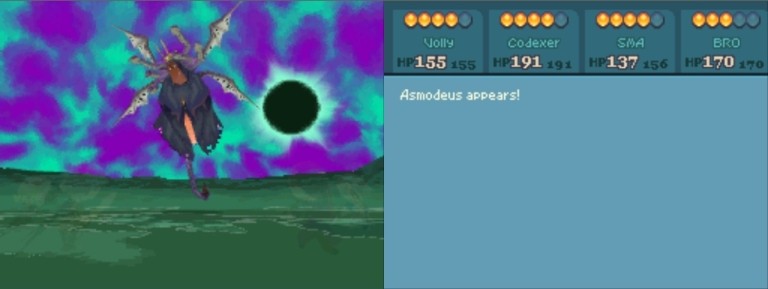
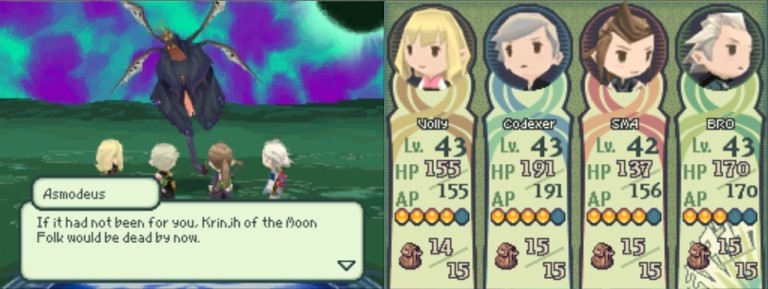
Asmodeus, the demon of lust, is the one we fought at the Sand Castle after he had taken the place of King Guera and tried to kill Krinjh and Ariadne:

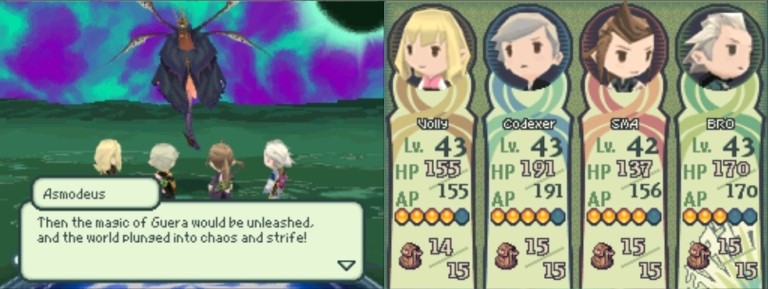
As I believe I already mentioned, everyone's goal in this game seems to be world domination. No wonder given that they all are either demons or possessed by demons.
But back to the battle at hand. Asmodeus' main trick is spamming status ailments. His special ability, Sidewinder, inflicts a lot of random ailments at once. And given that he uses it at least twice per turn, things tend to get nasty. Here's an example:
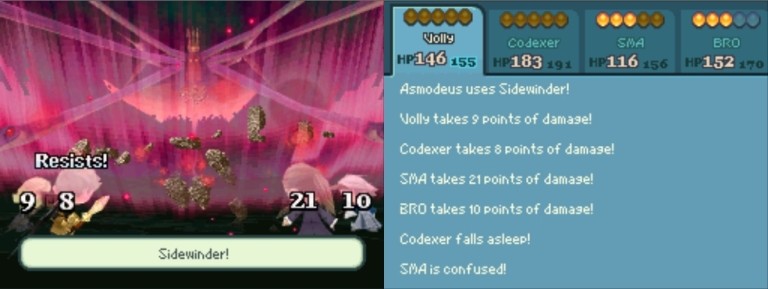
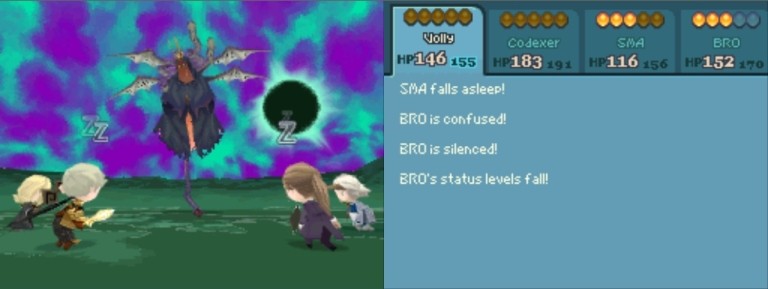
Just one Sidewinder, and Codexer is asleep, SMA is confused and asleep, and BRO is confused, silenced and debuffed. Another problem is, since Codexer has fallen asleep, he can't cast Lux to boost our HP and attributes.
Asmodeus' another ability is a group debuff called Moonlight Curse:

And his random attacks also tend to inflict different status ailments.
Being Freelancers, we don't have many abilities at our disposal. Volly wields the ultimate black magic spell, Desolator, so we put it to use:

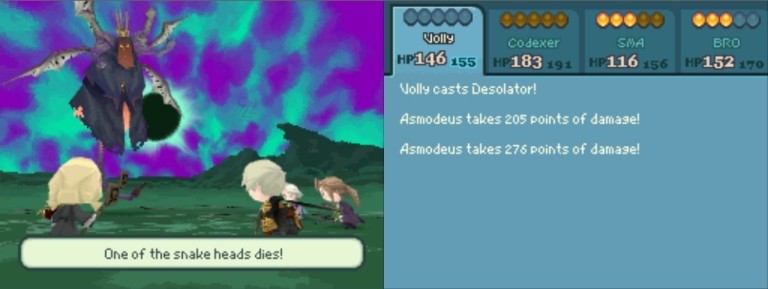
With its help, we slay the demon's snake heads one by one. Another goal is to silence the foe. Lux + Silence + Desolator = pure win.
At one point the bastard petrifies our Codexer...
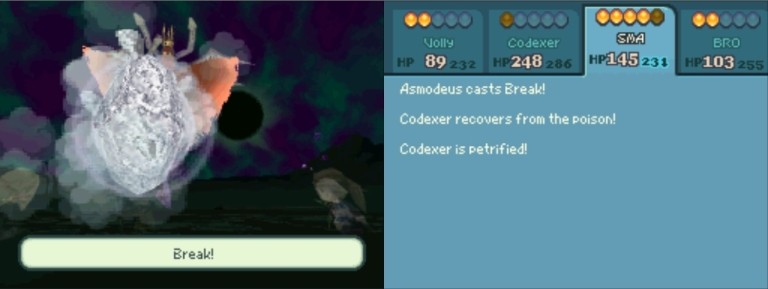
...but eventually our attacks bring the archdemon down:

Codexer's still petrified, and so he doesn't get any exp:
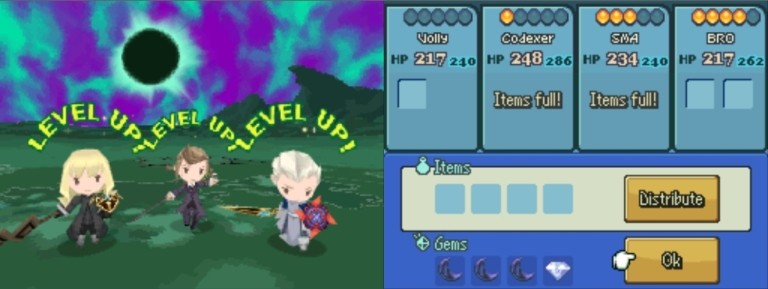
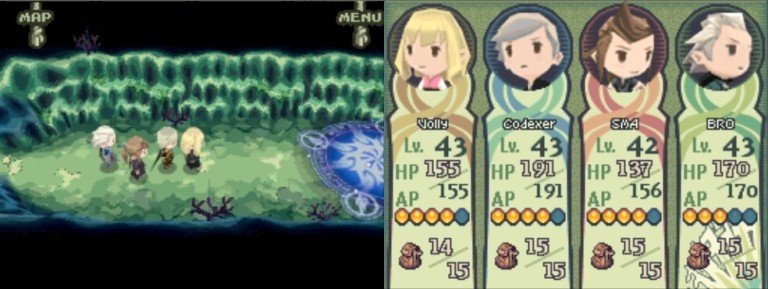
Volly, SMA and BRO level up.
Volly -> level 44: HP +5, STR +1, SPT +1.
SMA -> level 43: HP +4, STR +1, SPT +1, INT +1.
BRO -> level 44: HP +5, STR +1, SPT +1, INT +1.
Then everything goes next-gen, and a message appears:
We've got a few crowns back!
It's Wayfarer, White Mage, and Black Mage.
We use a Remedy to de-petrify Codexer...

...and then turn Volly into a Black Mage, Codexer into a White Mage, and SMA and BRO into Black Mages, too. The Magic Mights should make the next boss battles significantly easier.
To the east of the original intersection is another Glyph of Boss Battle:
As you can see from the screenshot, Codexer has leveled up along the way, making it to level 44: HP +5, SPT +2.
And the next boss is...
...hell yeah, it's Belphegor the demonic kittie!
#2: Belphegor
Let's approach him, yay!
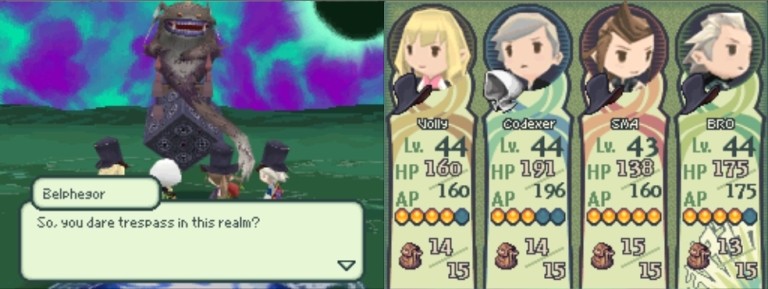
Sure thing.
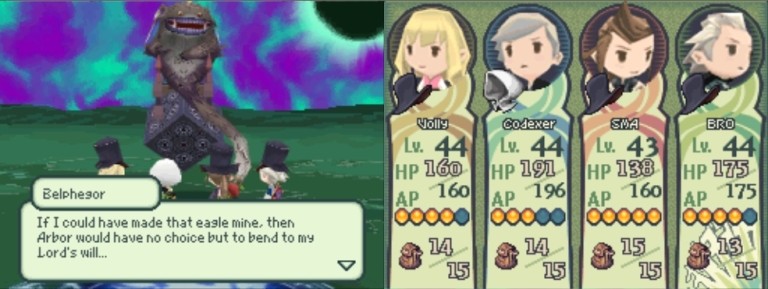
As you may remember, earlier we prevented Arbaroc from becoming possessed by Belphegor.

We'll see about that.
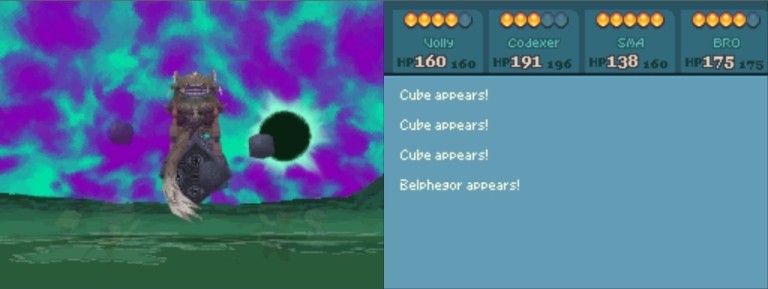
Like earlier, Belphegor is accompanied by three cubes that cast different Fire spells, and we have to first destroy the cubes before we can begin dealing damage to Belphie himself. With our gear, which allows us not to take any significant damage from enemy magic, and our three Black Mages using Magic Might, the battle becomes a real cakewalk:
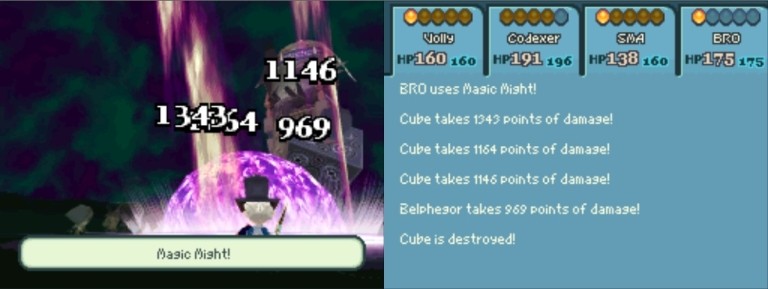
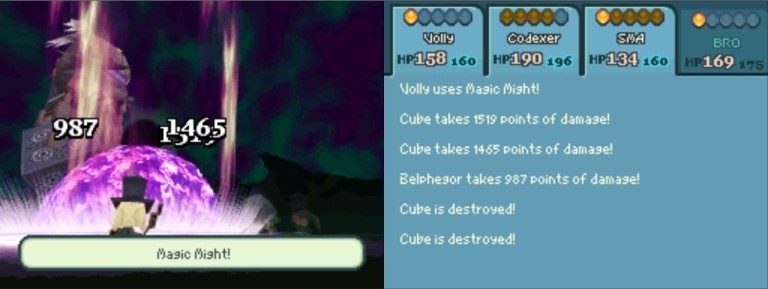
All the three cubes are destroyed in one turn.
Belphegor soon follows them:
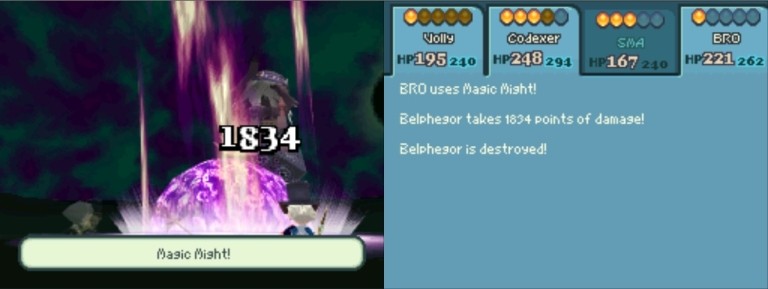
Good.
We reclaim several more crowns:
It's Bandit, Bard, Merchant, and Salve-maker. But our current party is mighty fine, so we won't be equipping any of the newly-recovered crowns at the moment.
Exploring B1 further, we come across a treasure chest containing a Ribbon:
This is extremely cool and extremely useful, actually, so we equip it on Codexer. Now both Codexer (Ribbon) and Volly (Shield of Light) are immune to status ailments.
In the northernmost room of B1, another boss area awaits:
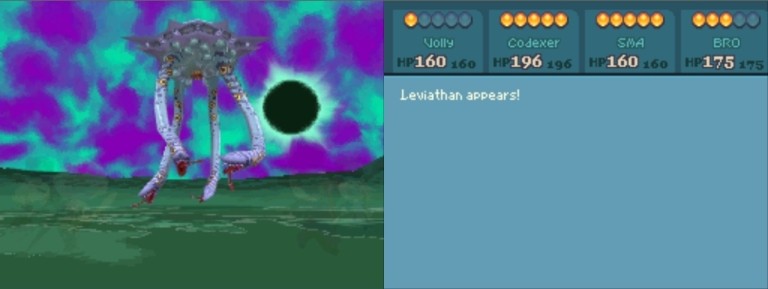
#3: Leviathan

This is our old pal Leviathan, the one we defeated after having awakened the sacred fishie Cetus.
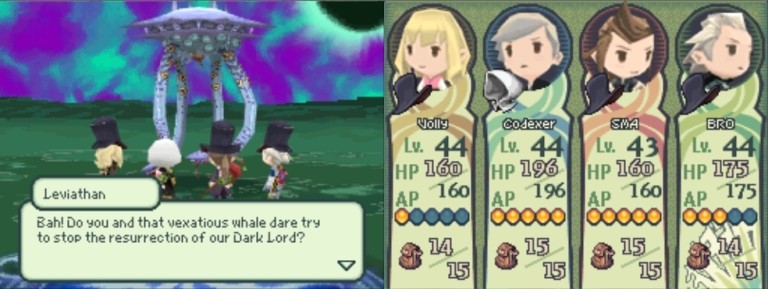
Yup, exactly.
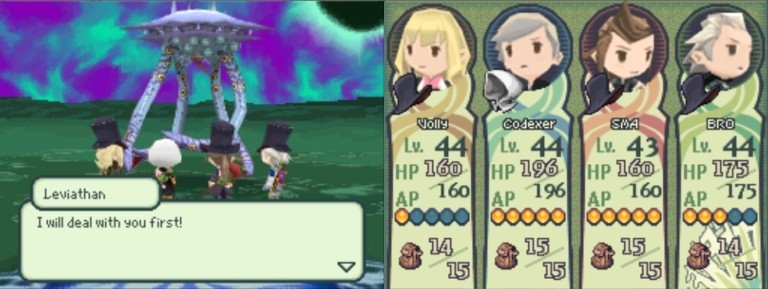
Scary!
No matter how powerful Leviathan is supposed to be, three Magic Mights in a row put him to eternal (?) rest:
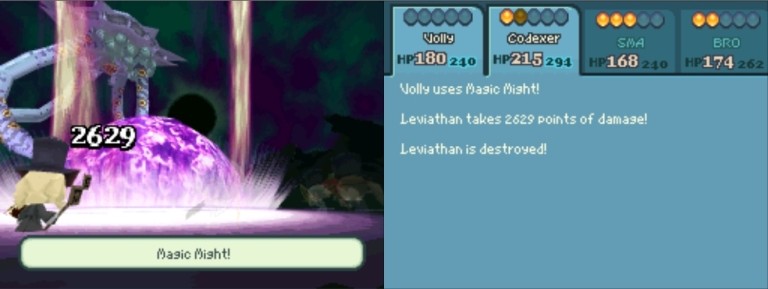
Piece of cake. :D
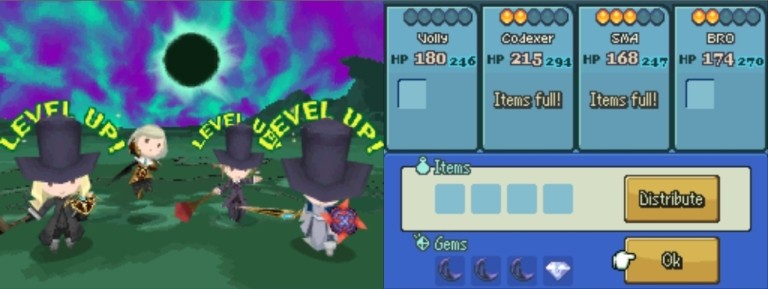
Volly, SMA and BRO level up.
Volly -> level 45: HP +4, SPT +1, INT +2.
SMA -> level 44: HP +5, STR +1, INT +2.
BRO -> level 45: HP +5.
More crowns coming our way!

Elementalist, Ranger, Fighter, Scholar. Nice. With our gear, though, and taking into account that the archdemons haven't really grown stronger since we last fought them -- this game is obviously balanced around not beating the bonus towers -- we don't even need an Elementalist in our party. For now, at least.
So onwards to the next boss we go!
Codexer levels up along the way -> level 45: HP +6, STR +1, INT +1.
We also discover a treasure chest that turns out to be a Mimic:
Or rather, a Death Trap:
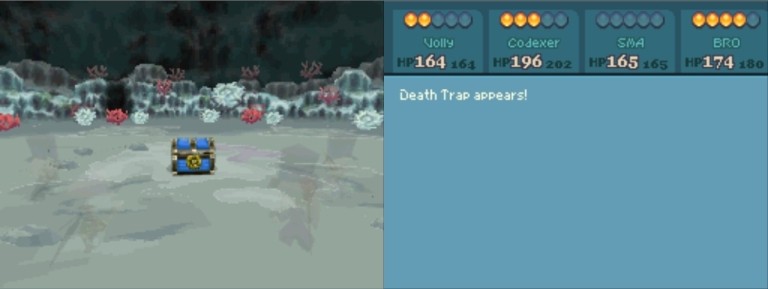
But it's very easy to bring down.
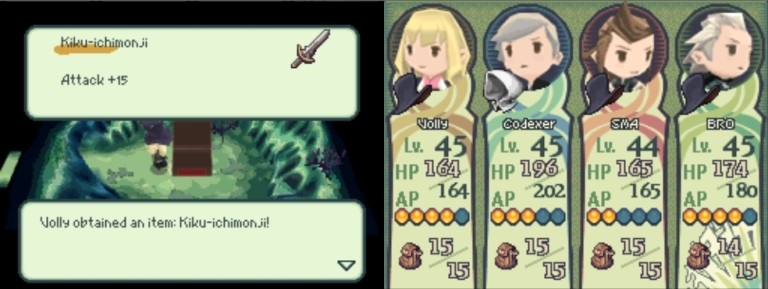
Hmm, this sword looks nice, especially if it belongs to the quickly upgradeable type. But this is the endgame already, so who cares?
We descend to B3:
And stumble upon another boss area:
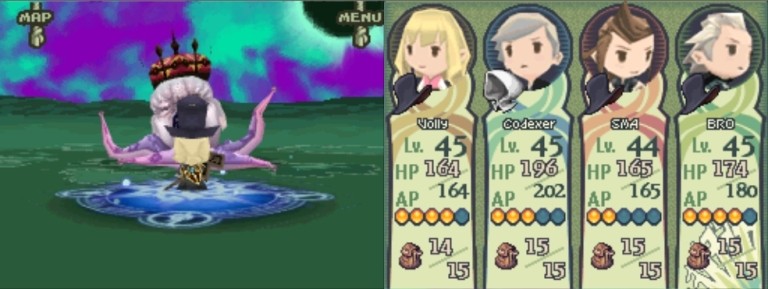
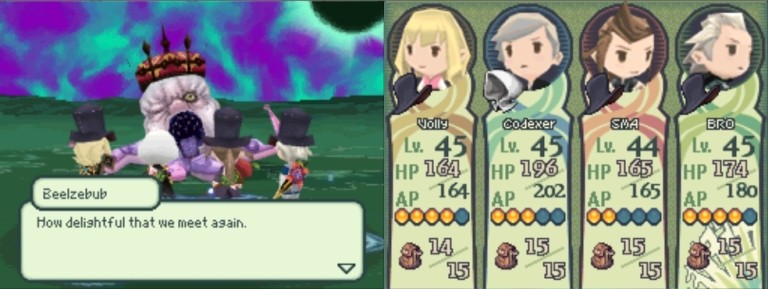
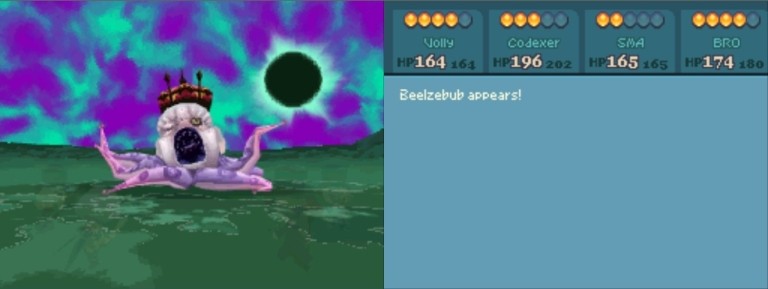
#4: Beelzebub
Beelzebub is the one who inflicted a terrible plague on Urbeth and the one we slayed on top the Tower to the Sky where he threatened the Urbeth priests a.k.a. merchant lords.

Indeed.
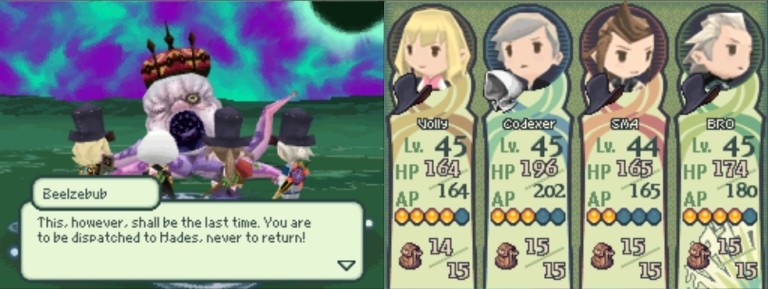
Dispatched to Hades, you say? I doubt that.
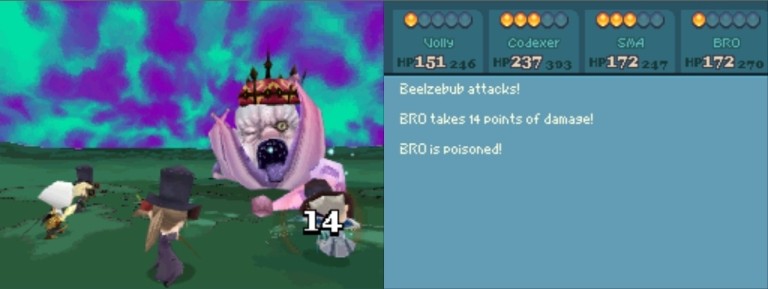
Beelzebub starts spamming Fira and Firaga, but they don't do any real harm to us. He poisons BRO...
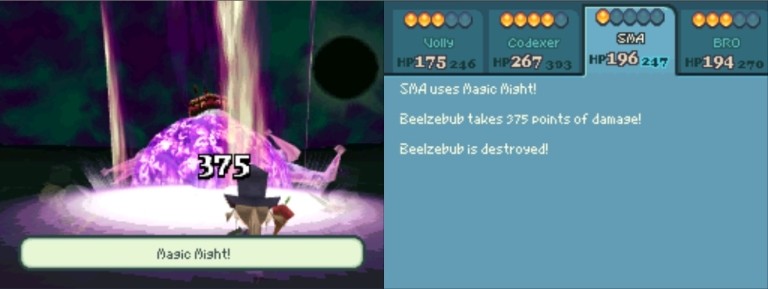
...but it doesn't matter as well. We easily destroy him, anyway.
It seems that the order in which you fight the archdemons doesn't matter: you always obtain the next four crowns.
This time it's Party Host, Hero, Spell Fencer, and Monk. Movin' on!
And the next boss is...
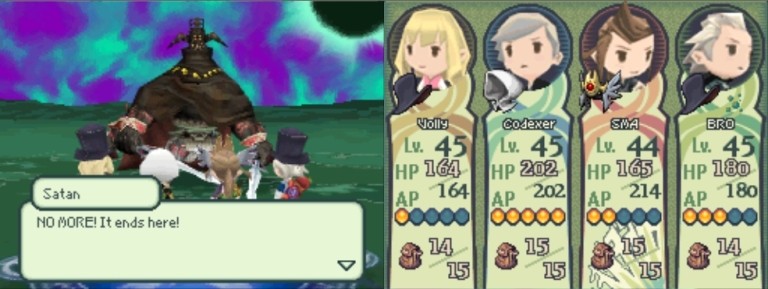
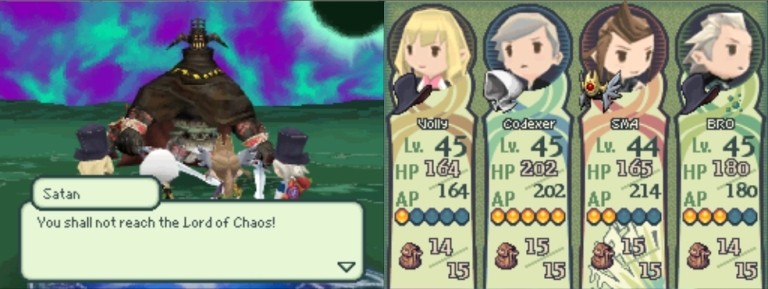
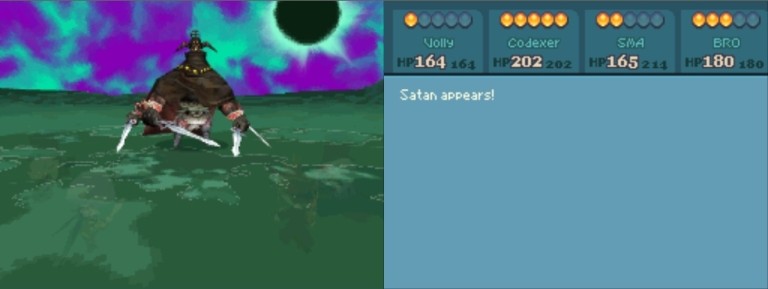
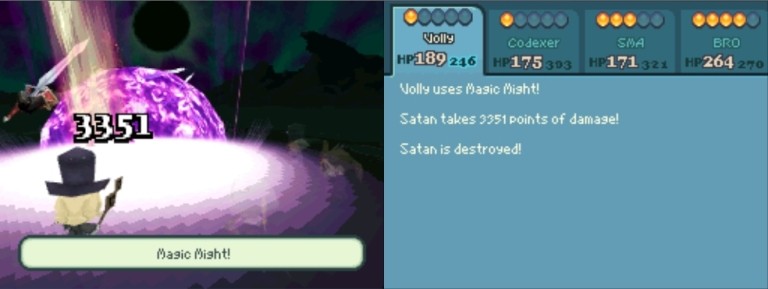
...Satan, yay!
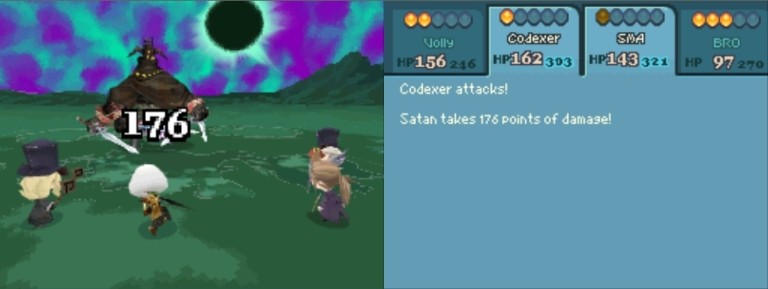
#5: Satan
Big and scary one!
We turn SMA into a Hero. We're going to need a melee damage-dealer.
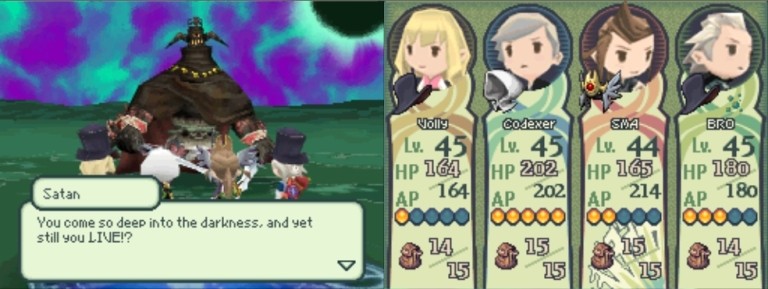
Satan took the guise of King Horne, Volly's royal father, in his attempt to get hold of Horne's legendary black magic. Needless to say, we were the ones who put an end to his wicked plans.
Oh really?
Wanna bet?
Satan is tougher than Belphegor, Leviathan and Beelzebub. Not only does he spam Arcane Force...
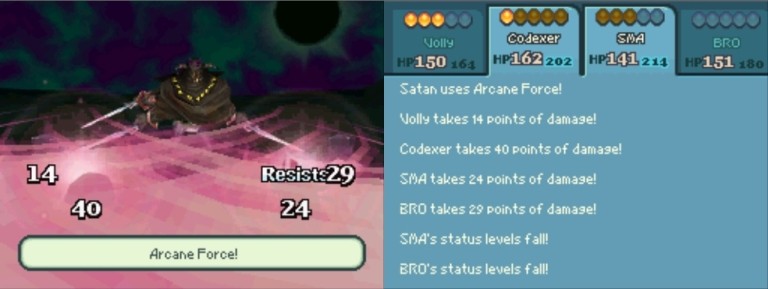
...but he also has two stances, Sword God and Demon Lord. While he is in the Sword God phase, spells and abilities -- even Magic Might and Wrath -- do no harm to him, and regular melee attacks is the only way to go:
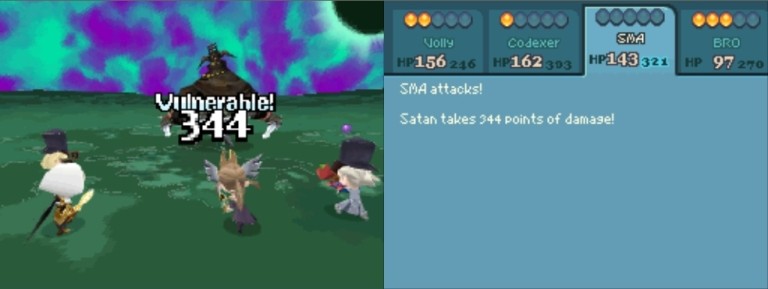
(Yup, he's vulnerable to Light.)
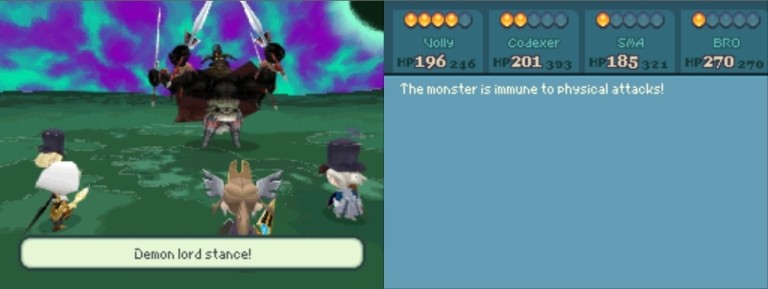
And the Demon Lord stance makes him immune to physical attacks:
His regular attacks deal ca. 20 damage to us:
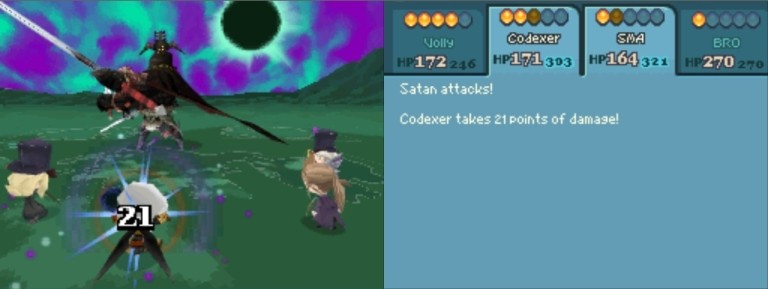
But of course we're much more powerful than he is:
Volly and SMA level up.
Volly -> level 46: HP +4, INT +1.
SMA -> level 45: HP +5, SPT +1.
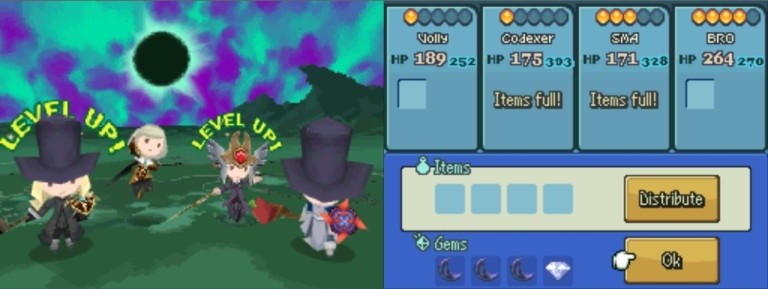
Everything goes next-gen -- and four more crowns are back!
Dancer, Paladin, Alchemist, and Shaman. Just two archdemons left to slay, yay!
As we crawl through the Star Chamber, BRO levels up:
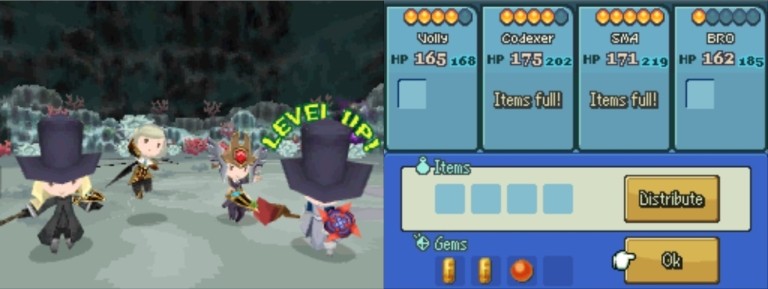
He's level 46 now: HP +5, SPT +2, INT +1.
And the next boss is...
#6: Lucifer
...Lucifer!
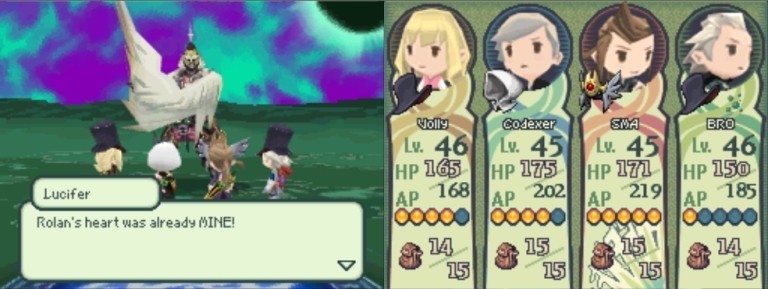
Yep, Lucifer was the one who took control of the hero Rolan's emo heart.
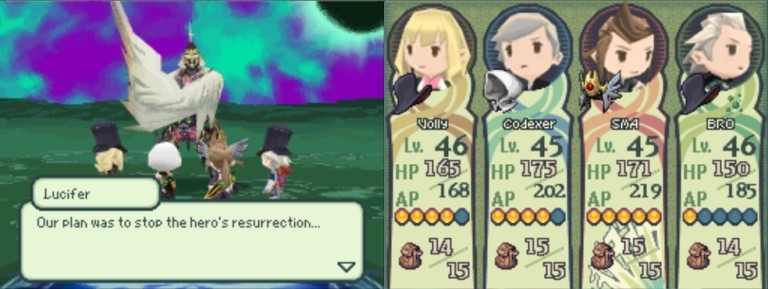
Oh, so that's what it was all about.
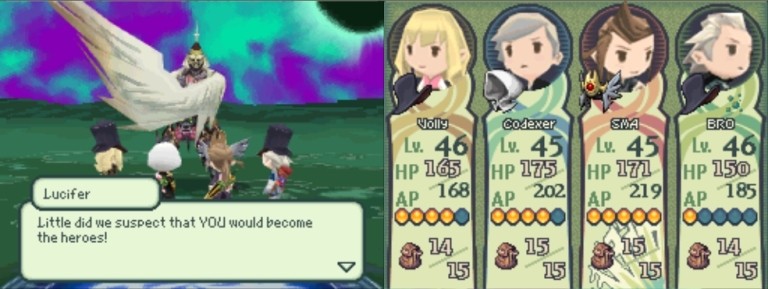
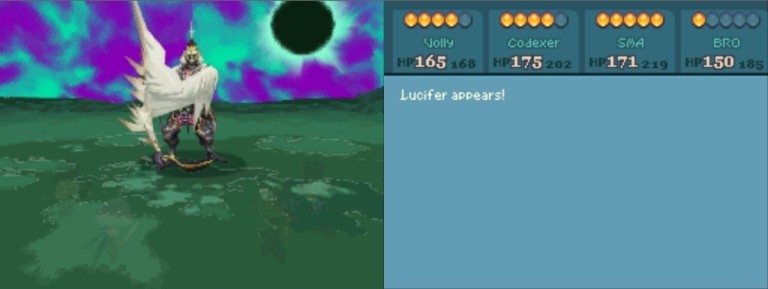
This battle is a cakewalk, too. The only (minor) problem is that, being what he is, Lucifer is healed by Light, and so SMA's Light Sword is more of a hindrance in this fight:

Lucifer paralyzes us with Thundara, but that doesn't help him much in the end...
Kewl.
Codexer gains a level -> level 46: HP +5, SPT +1.
It's Dark Fencer, Seamstress, Beastmaster, and Musician.
Guess who's left for us to fight? Yup, that's right.
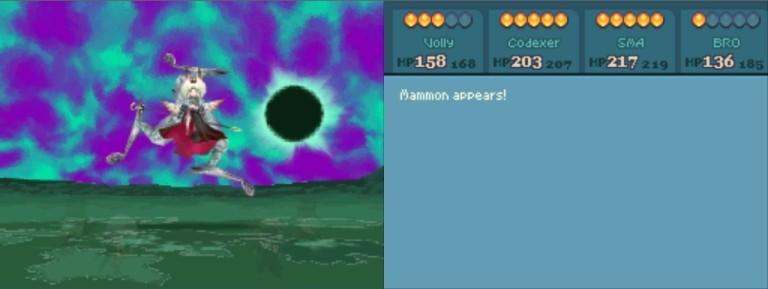
#7: Mammon
The loli Mammon, yay.
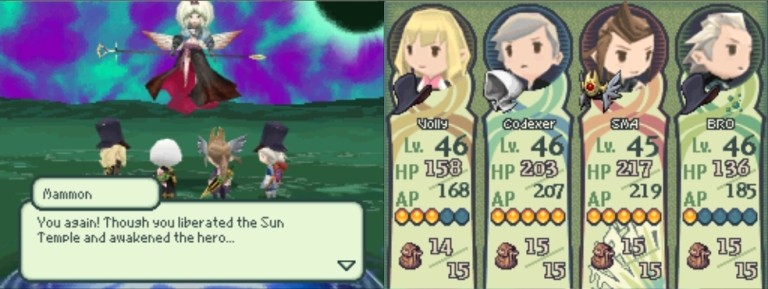
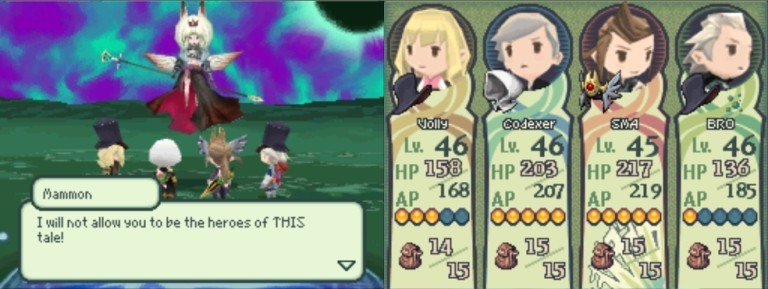
It was Mammon who cast a Winter's Grasp spell on Invidia and made Master Chief yearn for world domination. Her only trick is to boost her physical and magic defense so that she becomes nigh invulnerable. That's why we mustn't allow her cast Shell or Protect. In other words, we must silence her:
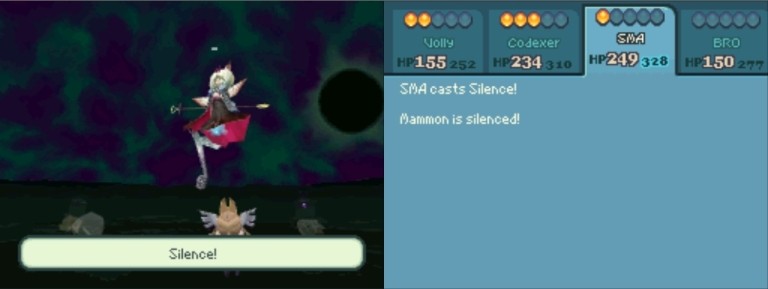
After that, it's Magic Might + Wrath time!
Mammon can still use her Blizzard Dance ability even when silenced...
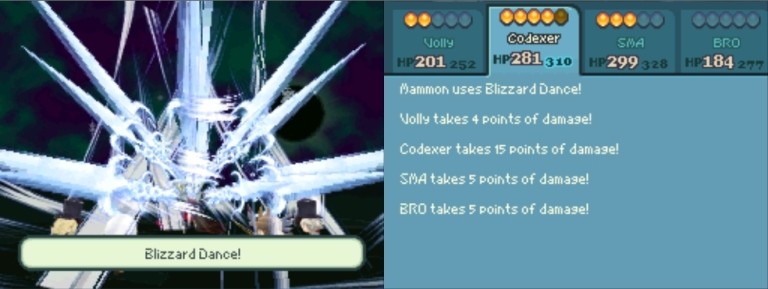
...but it isn't exactly powerful.
First we must deal with her monstrous arms...
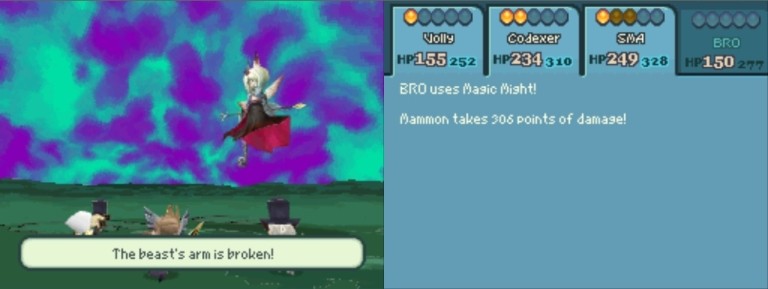
...and then with Mammon herself:


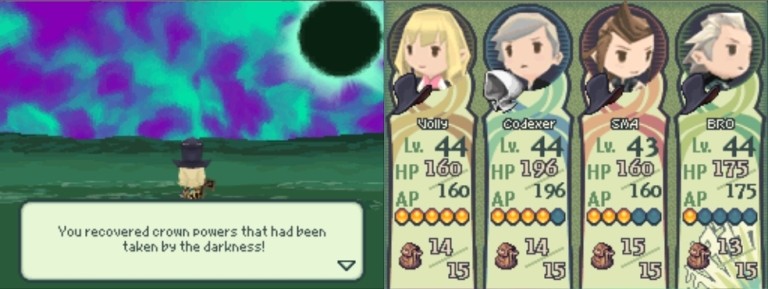
All the archdemons are slain!
Volly and SMA level up.
Volly -> level 47: HP +5, SPT +2.
SMA -> level 46: HP +7, STR +1, SPT +1, INT +2.
BRO too, if a bit later.
BRO -> level 47: HP +5, STR +1, SPT +1, INT +2.
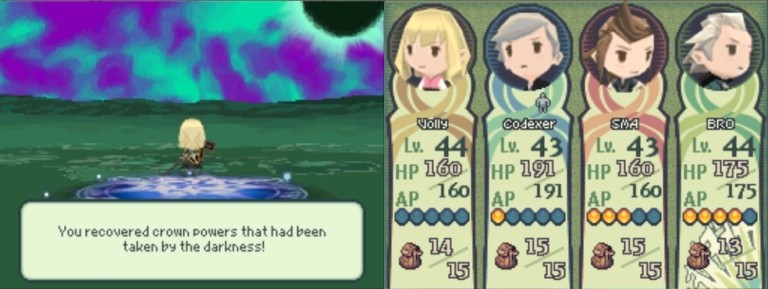
And all the crowns are ours again!
Next stop: the Dark Lord's lair.
In which we battle the archdemons again.
Previously on this LP, we entered the world of darkness only to be stripped of all our hard-earned crowns. Looks like this game is trolling us! Now we should, I think, get all the crowns back before we fight the Dark Lord. I don't think we stand a chance against him with an all-Freelancer party. To boot, this LP's got to be as complete as possible, so in this update we'll be getting all of our crowns back. To do that, as lightbane-kun said, we have to fight the bosses -- the archdemons -- again. This time I'll only provide a brief battle description for each archdemon, since we know them all, and their weaknesses, already.
Okay, so here we go.
The Star Chamber is a 9-floor dungeon, with the 2nd and 3rd floors being the main and biggest ones. They are spiral-like and zigzaggish. It's a nice dungeon overall, I even got lost in it myself and I think I didn't manage to find all the treasure chests scattered around the place. I even missed Lucifer initially and had to wander around a bit and go back to the previous level to find him.
But anyway. Our brave freelancer party descends to B1:
To the north is a small room with a chest containing a Phoenix Down:
We've got quite many of those already though, so it isn't of particular use.
The most common enemy in here is Red Jelly:
With our super duper upgraded weapons, we kill them no probs:
Back at the previous intersection we head east:
Looks like a boss battle is incoming!
We step on the teleporter glyph...
...and find ourselves on a dark barren plain, with Asmodeus waiting for us.
Boss #1: Asmodeus
Shall we approach the scary demon thingie?
The pleasure's all ours.
We're good, yeah.
With that, Asmodeus attacks!
Asmodeus, the demon of lust, is the one we fought at the Sand Castle after he had taken the place of King Guera and tried to kill Krinjh and Ariadne:

As I believe I already mentioned, everyone's goal in this game seems to be world domination.
But back to the battle at hand. Asmodeus' main trick is spamming status ailments. His special ability, Sidewinder, inflicts a lot of random ailments at once. And given that he uses it at least twice per turn, things tend to get nasty. Here's an example:
Just one Sidewinder, and Codexer is asleep, SMA is confused and asleep, and BRO is confused, silenced and debuffed. Another problem is, since Codexer has fallen asleep, he can't cast Lux to boost our HP and attributes.
Asmodeus' another ability is a group debuff called Moonlight Curse:
And his random attacks also tend to inflict different status ailments.
Being Freelancers, we don't have many abilities at our disposal. Volly wields the ultimate black magic spell, Desolator, so we put it to use:
With its help, we slay the demon's snake heads one by one. Another goal is to silence the foe. Lux + Silence + Desolator = pure win.
At one point the bastard petrifies our Codexer...
...but eventually our attacks bring the archdemon down:
Codexer's still petrified, and so he doesn't get any exp:
Volly, SMA and BRO level up.
Volly -> level 44: HP +5, STR +1, SPT +1.
SMA -> level 43: HP +4, STR +1, SPT +1, INT +1.
BRO -> level 44: HP +5, STR +1, SPT +1, INT +1.
Then everything goes next-gen, and a message appears:
We've got a few crowns back!
It's Wayfarer, White Mage, and Black Mage.
We use a Remedy to de-petrify Codexer...
...and then turn Volly into a Black Mage, Codexer into a White Mage, and SMA and BRO into Black Mages, too. The Magic Mights should make the next boss battles significantly easier.
To the east of the original intersection is another Glyph of Boss Battle:
As you can see from the screenshot, Codexer has leveled up along the way, making it to level 44: HP +5, SPT +2.
And the next boss is...
...hell yeah, it's Belphegor the demonic kittie!
#2: Belphegor
Let's approach him, yay!
Sure thing.
As you may remember, earlier we prevented Arbaroc from becoming possessed by Belphegor.
We'll see about that.
Like earlier, Belphegor is accompanied by three cubes that cast different Fire spells, and we have to first destroy the cubes before we can begin dealing damage to Belphie himself. With our gear, which allows us not to take any significant damage from enemy magic, and our three Black Mages using Magic Might, the battle becomes a real cakewalk:
All the three cubes are destroyed in one turn.
Belphegor soon follows them:
Good.
We reclaim several more crowns:
It's Bandit, Bard, Merchant, and Salve-maker. But our current party is mighty fine, so we won't be equipping any of the newly-recovered crowns at the moment.
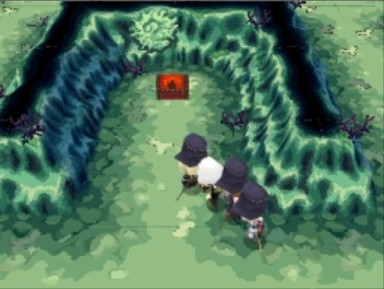
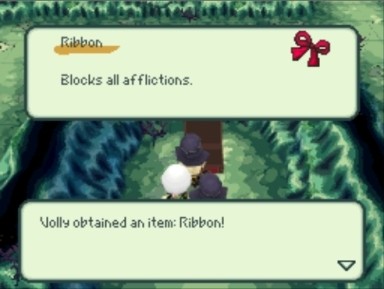
Exploring B1 further, we come across a treasure chest containing a Ribbon:
This is extremely cool and extremely useful, actually, so we equip it on Codexer. Now both Codexer (Ribbon) and Volly (Shield of Light) are immune to status ailments.
In the northernmost room of B1, another boss area awaits:
#3: Leviathan
This is our old pal Leviathan, the one we defeated after having awakened the sacred fishie Cetus.
Yup, exactly.
Scary!
No matter how powerful Leviathan is supposed to be, three Magic Mights in a row put him to eternal (?) rest:
Piece of cake. :D
Volly, SMA and BRO level up.
Volly -> level 45: HP +4, SPT +1, INT +2.
SMA -> level 44: HP +5, STR +1, INT +2.
BRO -> level 45: HP +5.
More crowns coming our way!
Elementalist, Ranger, Fighter, Scholar. Nice. With our gear, though, and taking into account that the archdemons haven't really grown stronger since we last fought them -- this game is obviously balanced around not beating the bonus towers -- we don't even need an Elementalist in our party. For now, at least.
So onwards to the next boss we go!
Codexer levels up along the way -> level 45: HP +6, STR +1, INT +1.
We also discover a treasure chest that turns out to be a Mimic:
Or rather, a Death Trap:
But it's very easy to bring down.
Hmm, this sword looks nice, especially if it belongs to the quickly upgradeable type. But this is the endgame already, so who cares?
We descend to B3:
And stumble upon another boss area:
#4: Beelzebub
Beelzebub is the one who inflicted a terrible plague on Urbeth and the one we slayed on top the Tower to the Sky where he threatened the Urbeth priests a.k.a. merchant lords.
Indeed.
Dispatched to Hades, you say? I doubt that.
Beelzebub starts spamming Fira and Firaga, but they don't do any real harm to us. He poisons BRO...
...but it doesn't matter as well. We easily destroy him, anyway.
It seems that the order in which you fight the archdemons doesn't matter: you always obtain the next four crowns.
This time it's Party Host, Hero, Spell Fencer, and Monk. Movin' on!
And the next boss is...
...Satan, yay!
#5: Satan
Big and scary one!
We turn SMA into a Hero. We're going to need a melee damage-dealer.
Satan took the guise of King Horne, Volly's royal father, in his attempt to get hold of Horne's legendary black magic. Needless to say, we were the ones who put an end to his wicked plans.
Oh really?
Wanna bet?
Satan is tougher than Belphegor, Leviathan and Beelzebub. Not only does he spam Arcane Force...
...but he also has two stances, Sword God and Demon Lord. While he is in the Sword God phase, spells and abilities -- even Magic Might and Wrath -- do no harm to him, and regular melee attacks is the only way to go:
(Yup, he's vulnerable to Light.)
And the Demon Lord stance makes him immune to physical attacks:
His regular attacks deal ca. 20 damage to us:
But of course we're much more powerful than he is:
Volly and SMA level up.
Volly -> level 46: HP +4, INT +1.
SMA -> level 45: HP +5, SPT +1.
Everything goes next-gen -- and four more crowns are back!
Dancer, Paladin, Alchemist, and Shaman. Just two archdemons left to slay, yay!
As we crawl through the Star Chamber, BRO levels up:
He's level 46 now: HP +5, SPT +2, INT +1.
And the next boss is...
#6: Lucifer
...Lucifer!
Yep, Lucifer was the one who took control of the hero Rolan's emo heart.
Oh, so that's what it was all about.
This battle is a cakewalk, too. The only (minor) problem is that, being what he is, Lucifer is healed by Light, and so SMA's Light Sword is more of a hindrance in this fight:
Lucifer paralyzes us with Thundara, but that doesn't help him much in the end...
Kewl.
Codexer gains a level -> level 46: HP +5, SPT +1.
It's Dark Fencer, Seamstress, Beastmaster, and Musician.
Guess who's left for us to fight? Yup, that's right.
#7: Mammon
The loli Mammon, yay.
It was Mammon who cast a Winter's Grasp spell on Invidia and made Master Chief yearn for world domination. Her only trick is to boost her physical and magic defense so that she becomes nigh invulnerable. That's why we mustn't allow her cast Shell or Protect. In other words, we must silence her:
After that, it's Magic Might + Wrath time!
Mammon can still use her Blizzard Dance ability even when silenced...
...but it isn't exactly powerful.
First we must deal with her monstrous arms...
...and then with Mammon herself:
All the archdemons are slain!
Volly and SMA level up.
Volly -> level 47: HP +5, SPT +2.
SMA -> level 46: HP +7, STR +1, SPT +1, INT +2.
BRO too, if a bit later.
BRO -> level 47: HP +5, STR +1, SPT +1, INT +2.
And all the crowns are ours again!
Next stop: the Dark Lord's lair.
lightbane said:I would suggest you to kill the final boss using the Merchant crowns, just to see if greed can destroy god-like beings
Oh it totally can.
I've included one merchant in one of the two final parties, as you're soon to see.Part 44: The Dark Lord
In which the final battle is fought.
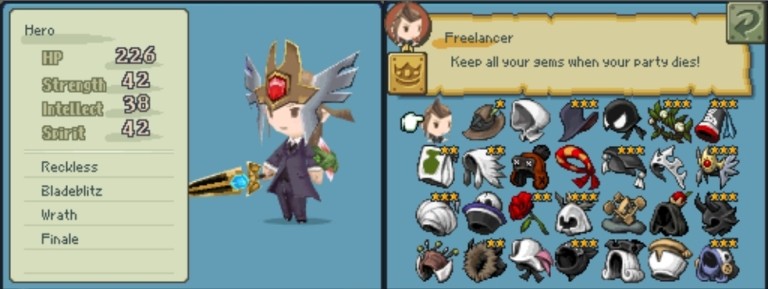
Having defeated all the archdemons and reclaimed all the lost crowns, we must be movin' on, to the Dark Lord's hiding place, now. First, however, let's change our party set-up. SMA will be our Storyteller with Runaway and Escape equipped so we could flee all the random encounters:
Volly's going to be our Sage:
Codexer, a Hero:
And BRO a Storyteller specializing in buffs:

Go team go!
This is the large central room of B3, with stairs leading further down into the Star Chamber. We descend the stairs and find ourselves on a long winding path:
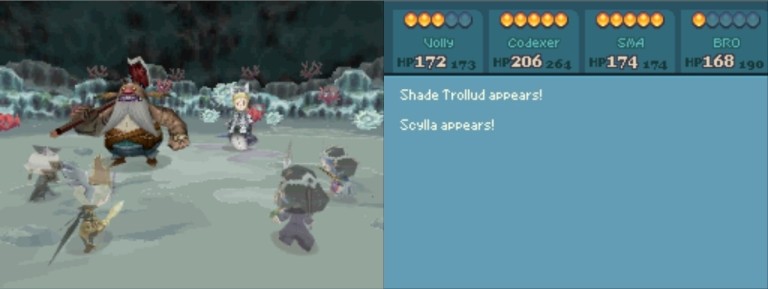
We encounter a Shade Trollud and a Scylla here...
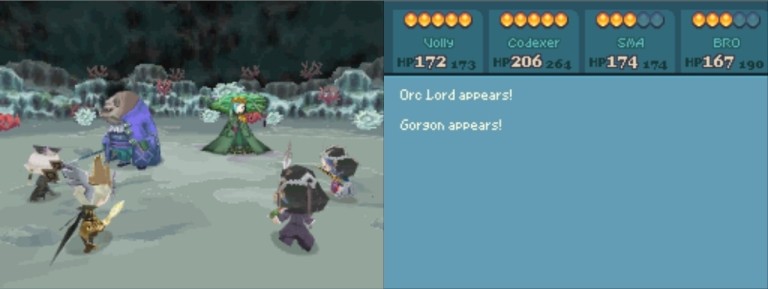
...as well as an Orc Lord accompanied by a Gorgon:
Descending the stairs...
...we reach the area where we can save our game and listen to some party banter.
There's a treasure chest with an X-Potion here:
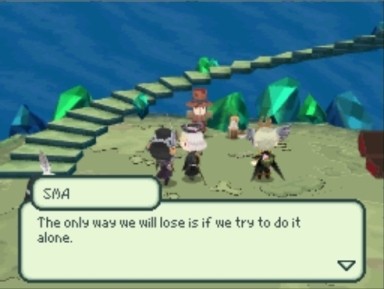
The Faithful Fox encourages us to not give up:
Don't worry, Fox-kun, we're p. good, so why should we stop here?
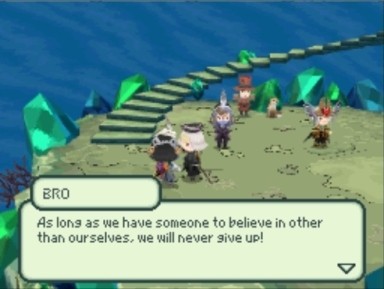
Codexer is full of resolve, too:
"No matter how many times we get knocked down", you say?

Shoulder to shoulder, yay!

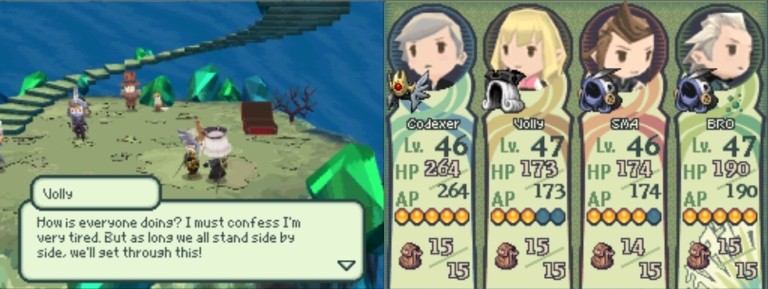
Our pwetty pwinces is tired! But yeah, let's get through this!
And further down we go.
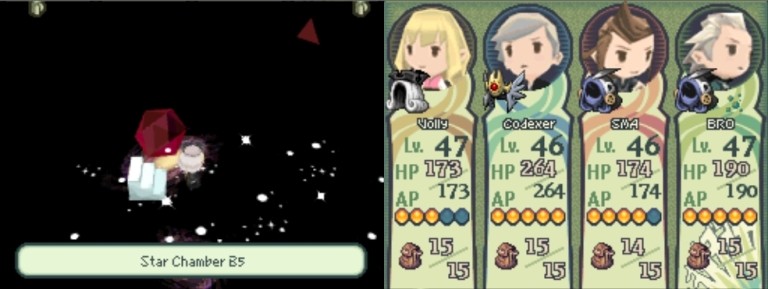
This is indeed a Star Chamber, it seems. The goal is to follow the star trail:
In order to reach a down-leading star whirlwind:
The path isn't always linear, and there are some dead ends and intersections. It's pretty easy to lose all sense of direction, to boot, given that everything looks the same.
The enemies we encounter here include Garm, Bullkings and Neko Natters...
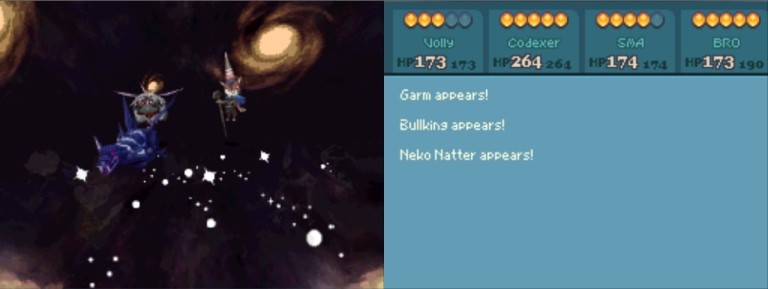
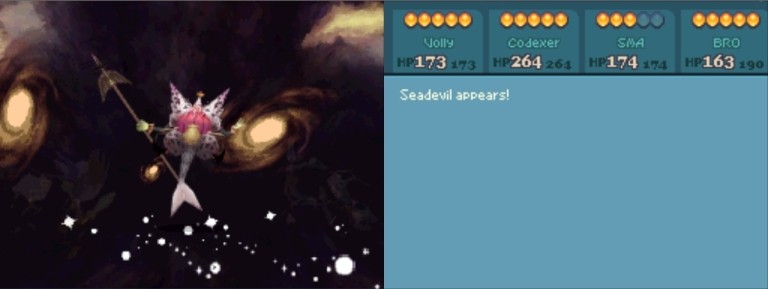
...Seadevils...
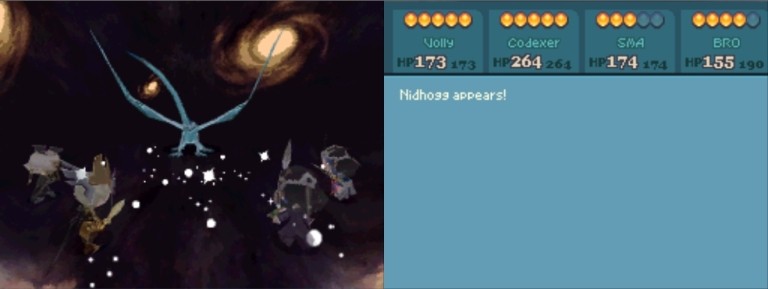
...Nidhoggs...
(Codexer levels up -> level 47: HP +7, SPT +1, INT +1.)
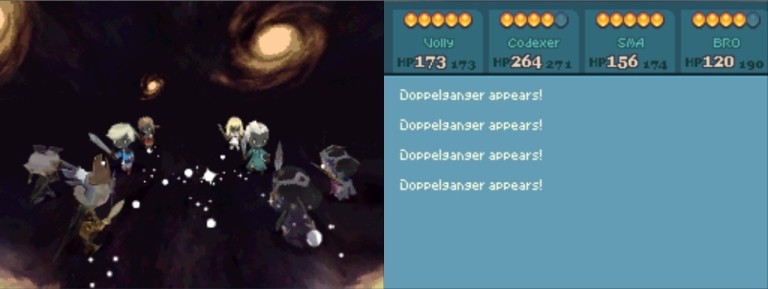
...and Doppelgänger:
Scary!
Finally we reach B8...
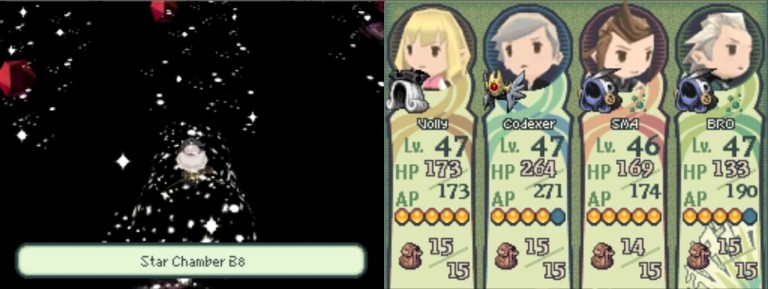
...the path becomes zigzaggish yet linear here, and eventually...
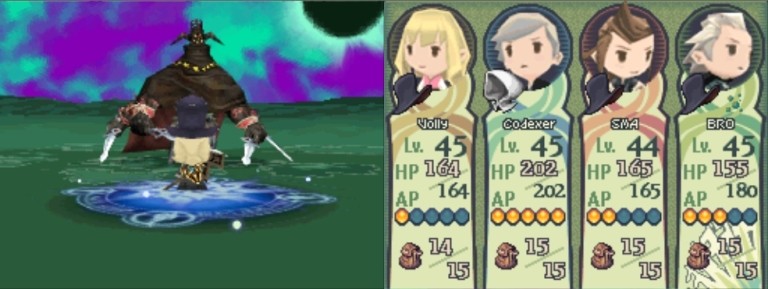
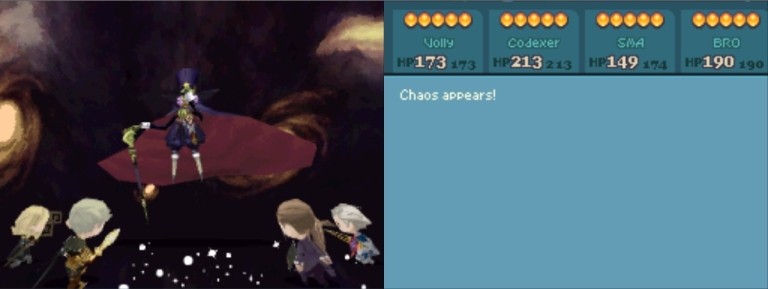
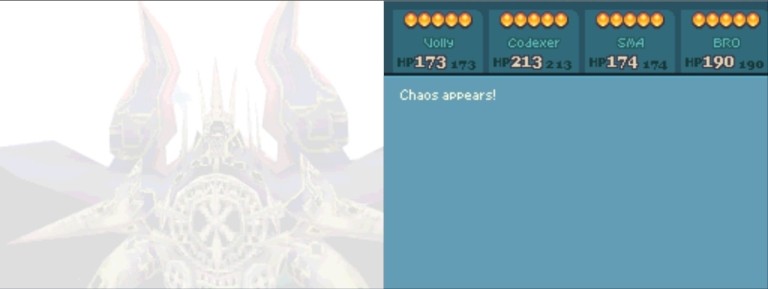
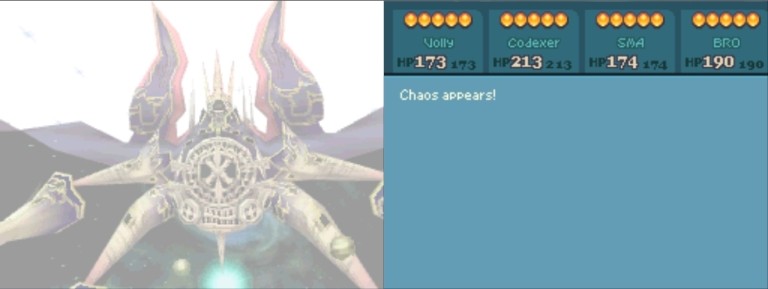
...we make it to the Dark Lord himself, yay!
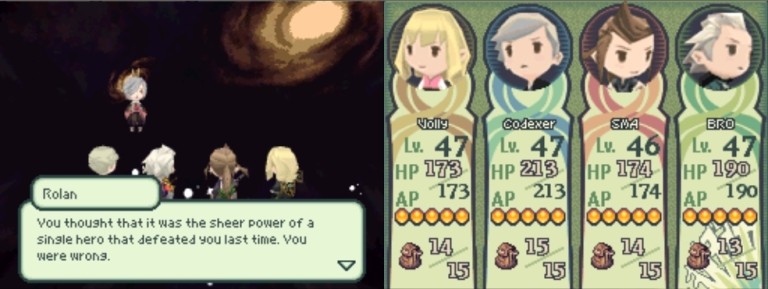
Okay, so how 'bout an all-Freelancer party?")


Let's chat Mr. Chaos up!
Agreed!
:twisted:
No heroes? And you're talking about what, Dragon Age?
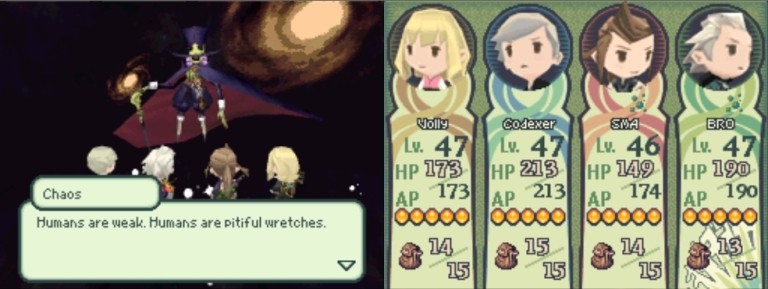
:twisted:
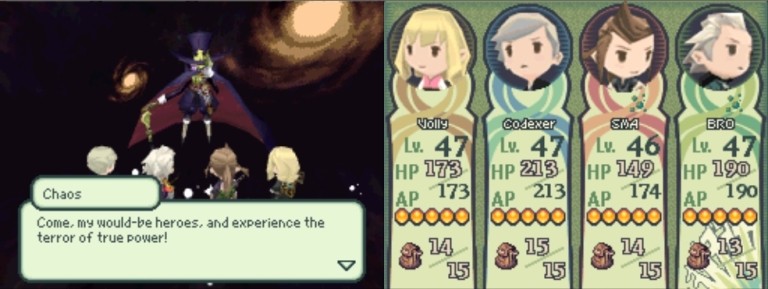
This gentleman doesn't look too powerful, now does he?

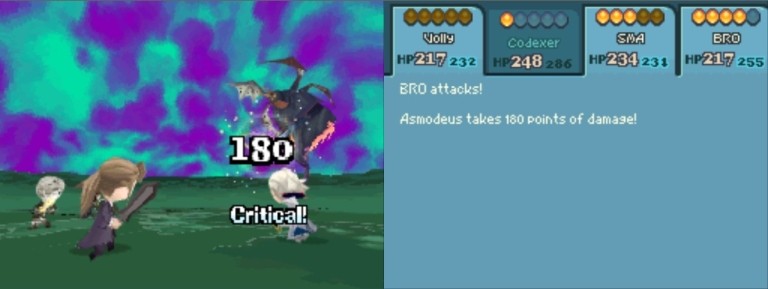
And the final battle enters its first phase. Being Freelancers, all we can do (for the most part) is attack in melee with our upgraded weapons:
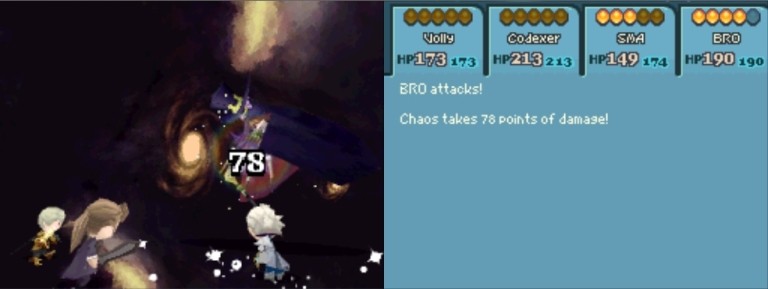

Not bad, really.
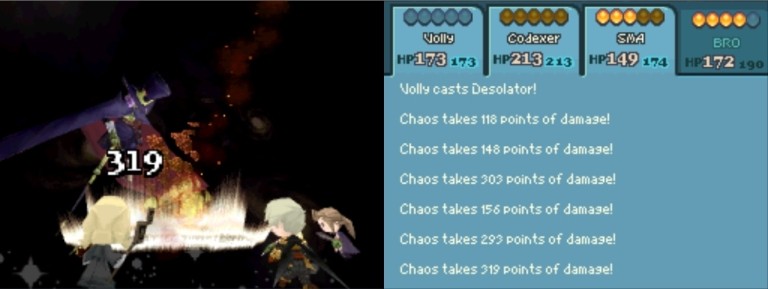
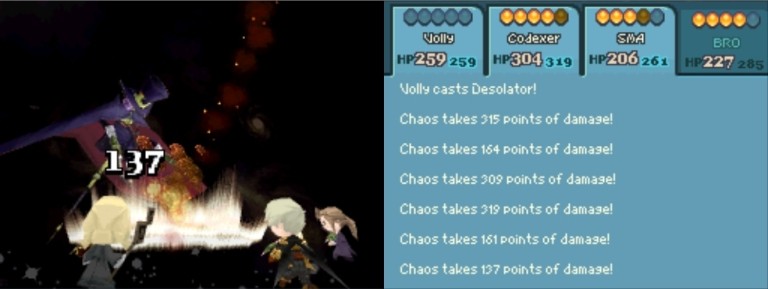
Also, despite being a Freelancer, Volly still has a trick up her sleeve. The trick is called Desolator:

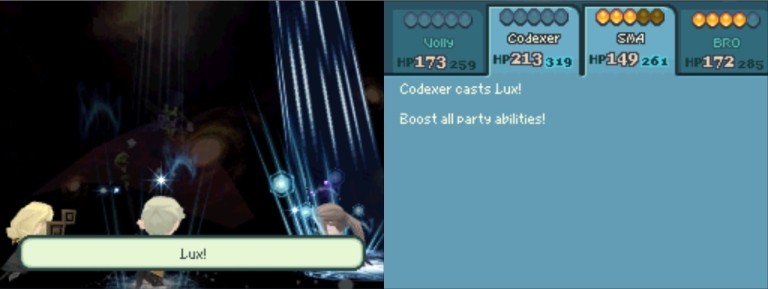
Codexer casts Lux to boost our attributes and max HP:
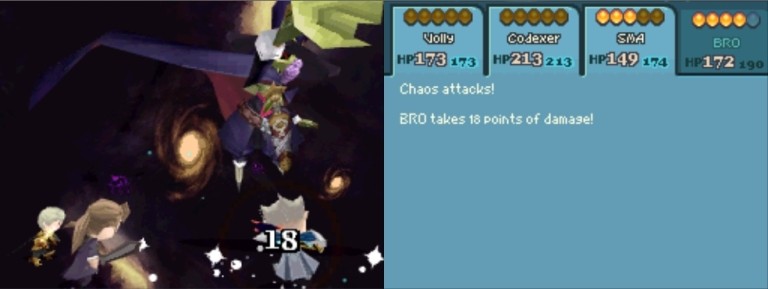
Chaos' regular attacks don't deal much damage to us:
He can also cast Darkaga:
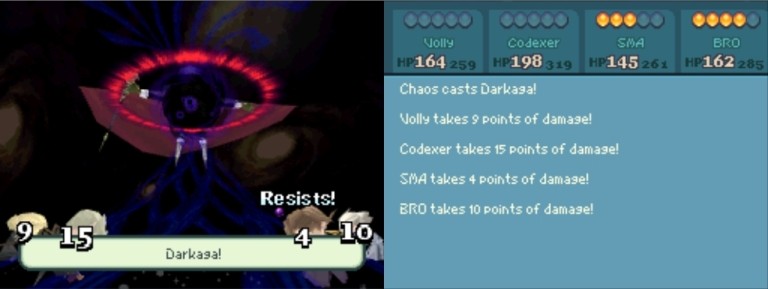
But even without Mysterio, we're fine. Yay for upgraded gear!
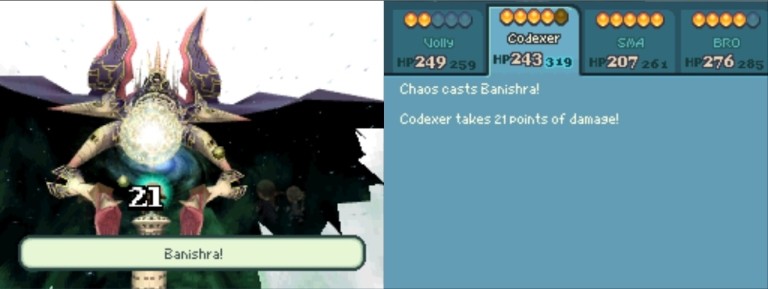
Apart from offensive spells, Chaos has a couple of boosts at his disposal -- like Magick, Protect and Shell, for instance:
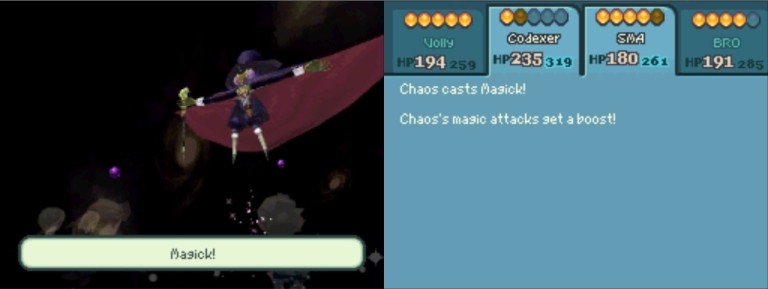
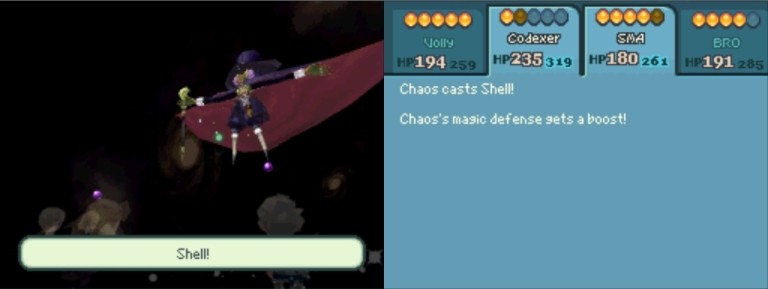
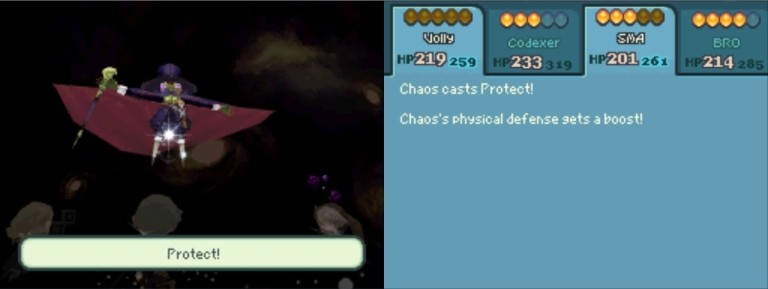
But even his Magick + Banishra combo is p. weak compared to our (upgraded) defense:
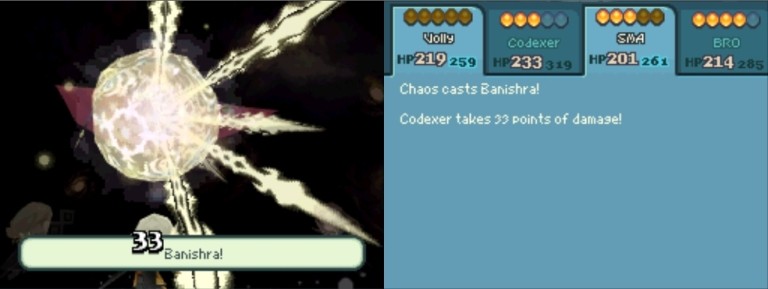
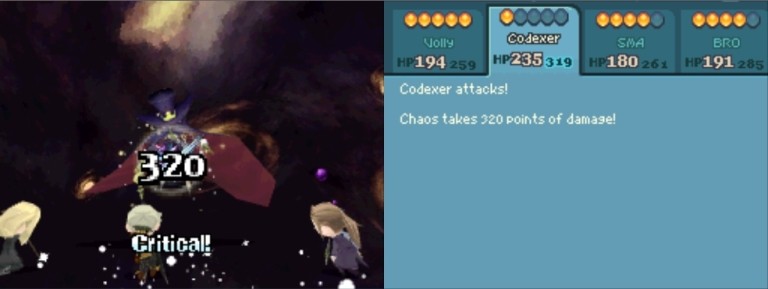
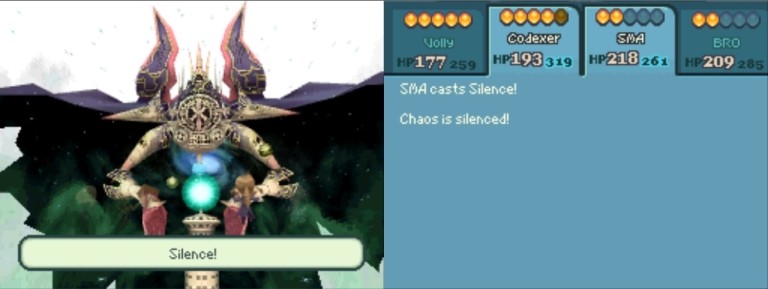
The funniest thing, however, is we can silence him:
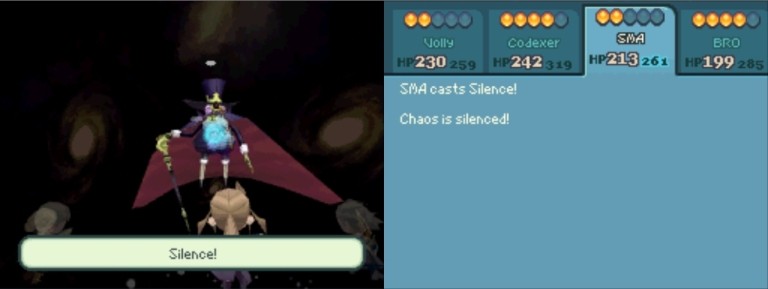
Yep, we can silence the final boss.
SMA's Suppres + Volly's Desolator seems to work wonders:
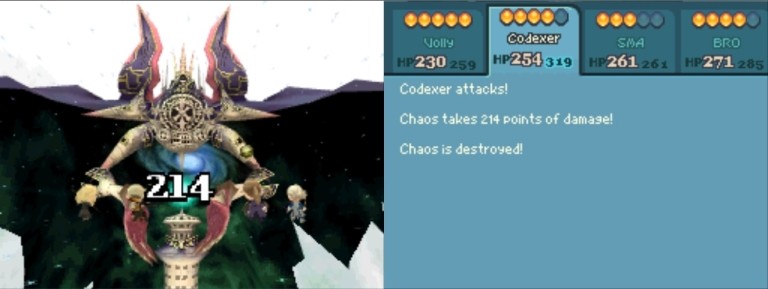
Kewl. And finally...
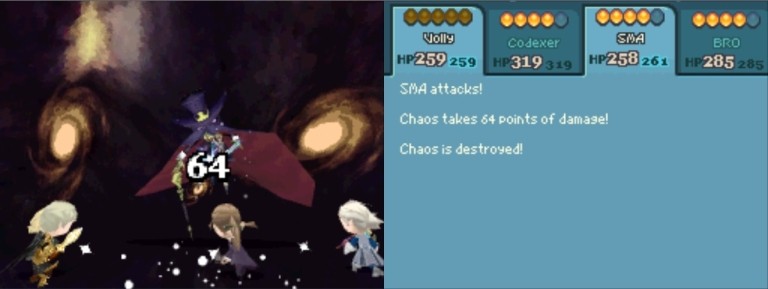
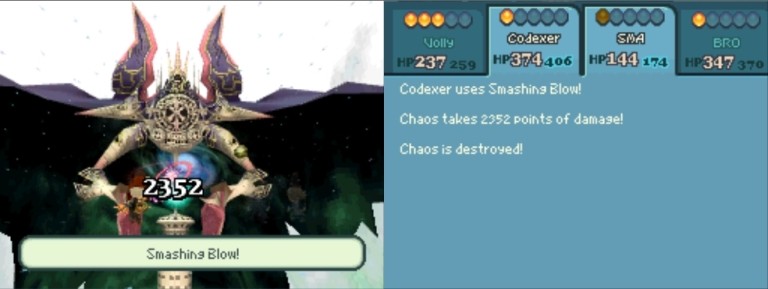
...Chaos is destroyed, yay!
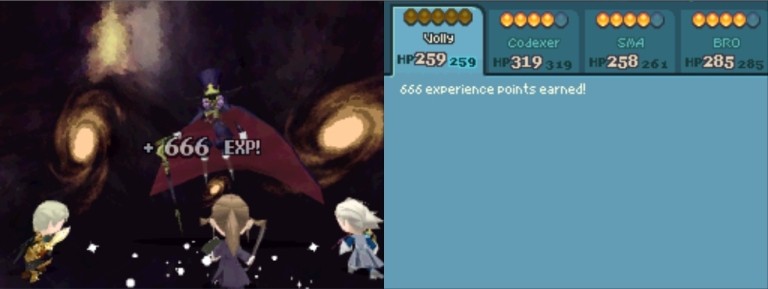
666 exp gained! :twisted:
Codexer is totally astonished:
Volly rejoices:
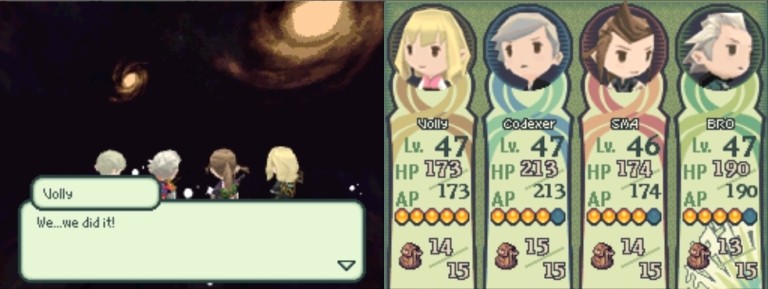
But BRO remains doubtful as always:

The Dark Lord's voice is heard:
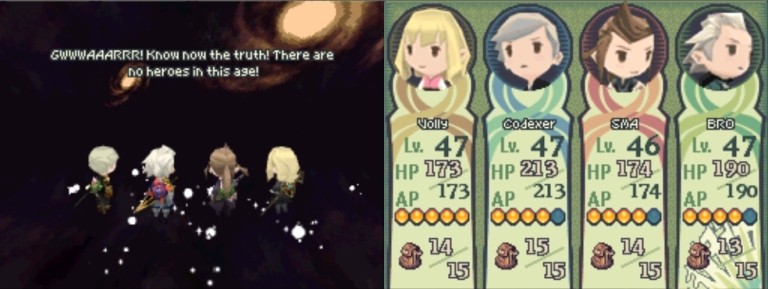
GWWWAAARRR!
Surprised, eh, SMA?
:twisted:
SUDDENLY
CHAOS' SECOND FORM IS REVEALED!
Ouch!
One tough-looking mofo!
Our tactics, of course, remain the same. Surprisingly enough, all our attacks deal roughly the same amount to damage to Chaos' 2nd form as they did to his 1st form:
But even if Chaos' defense hasn't improved, his attack power has:
That hurts!
We still can silence him, by the way:
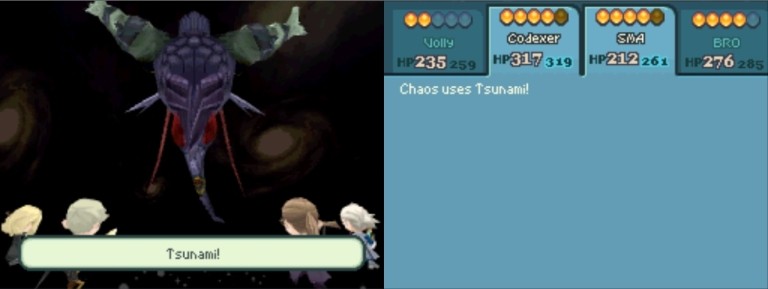
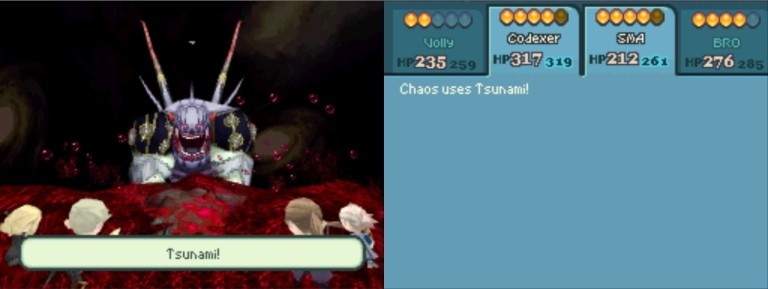
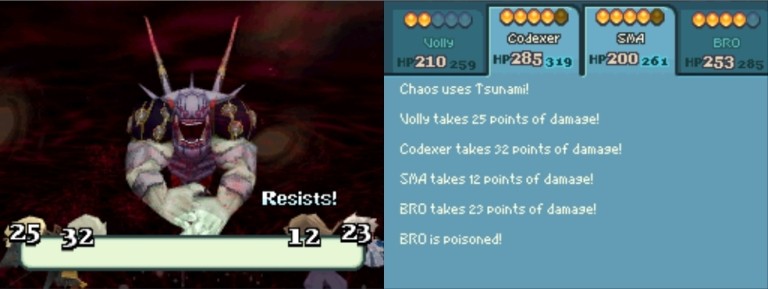
But he has new, unsilenceable powers now. Tsunami, for instance:
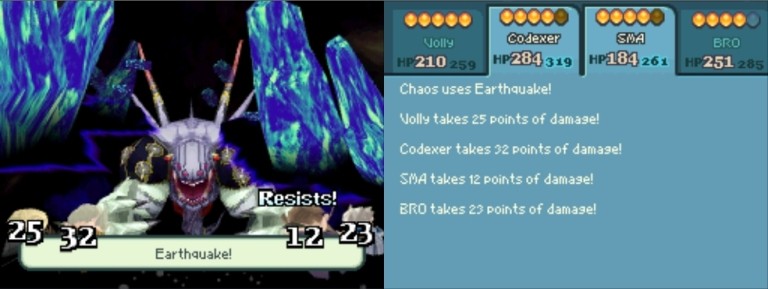
Or Earthquake:
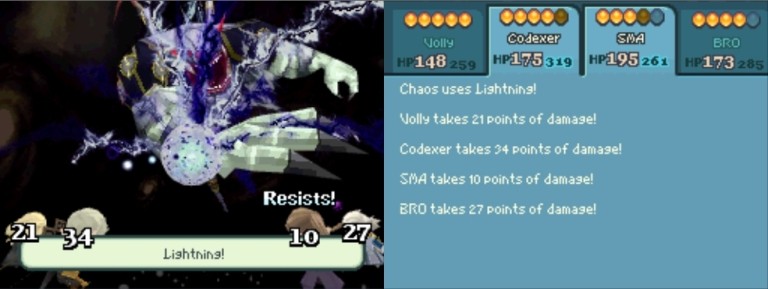
Or Blaze:
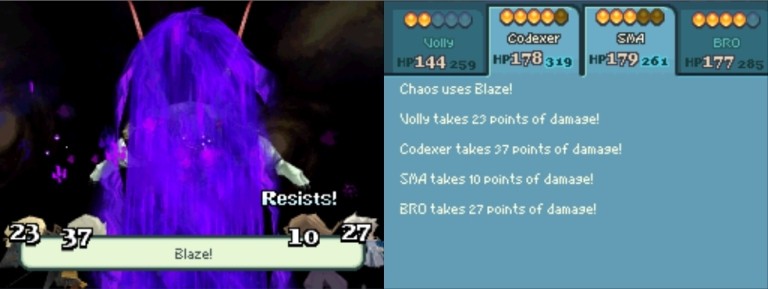
Or, say, Lightning:
As well as a powerful melee strike, Fly Swat:
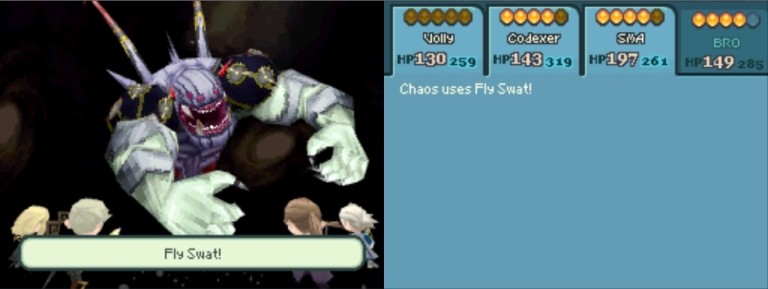
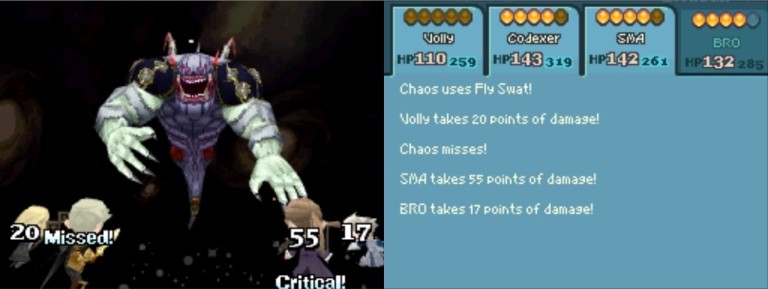
He spams Tsunami and Blaze and Earthquake and Lightning and Fly Swat like crazy. Had our equipment not being upgraded this much, we'd be already dead for sure!
But eventually...

...we slay the beastie!
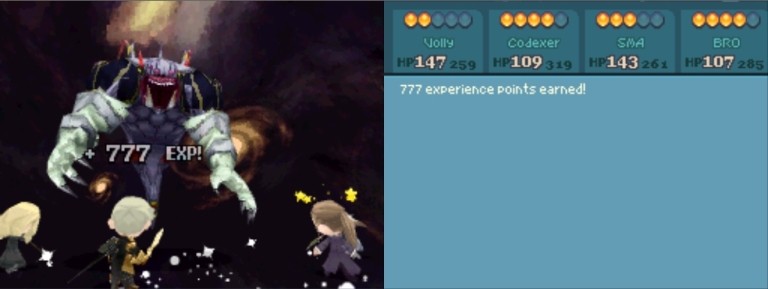
777 experience points.
But it's not over yet, it seems:
Oh gosh why don't you die already!?
Uh-oh indeed...
Right! Right?

Oh. :/

:twisted:
BUT SUDDENLY
EVERYTHING GOES NEXT-GEN AND...
...WE'RE FULLY HEALED!
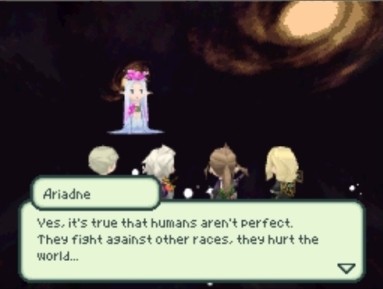
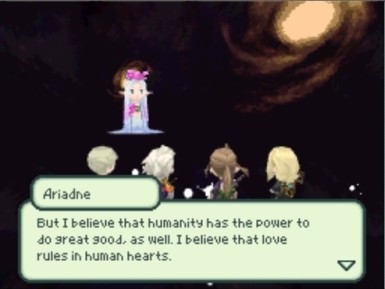
ARIADNE APPEARS!
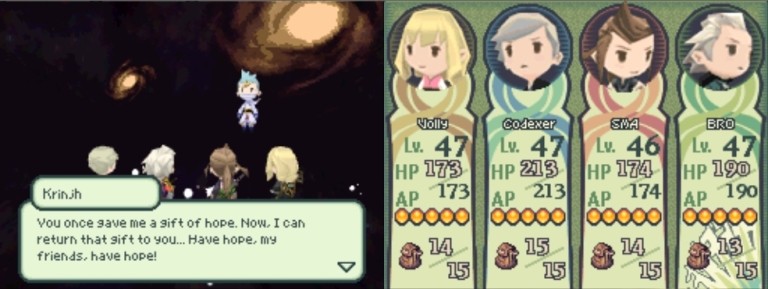
AND KRINJH!
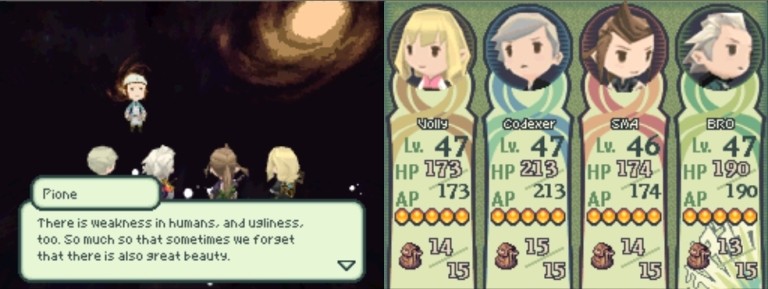
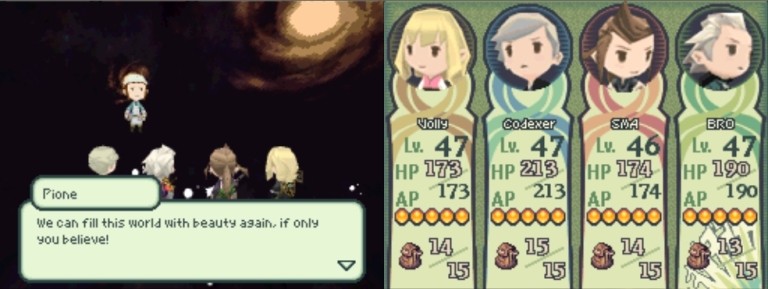
AND PIONE!
AND LILIBELLE THE FAT-LEGGED FAIRY!

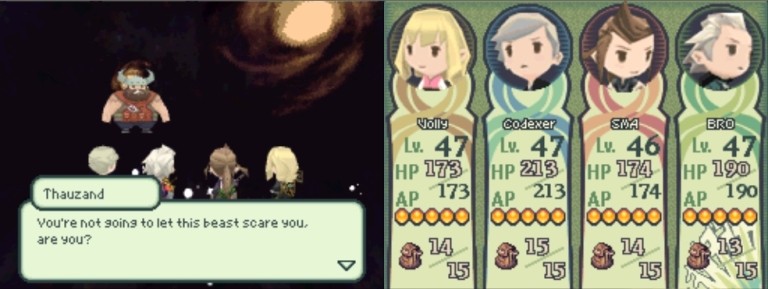
AND THAUZAND THE PRIESTLY MERCHANT LORD!
NO WAY!

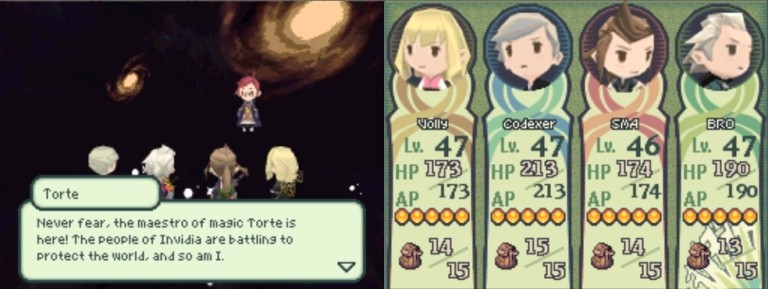
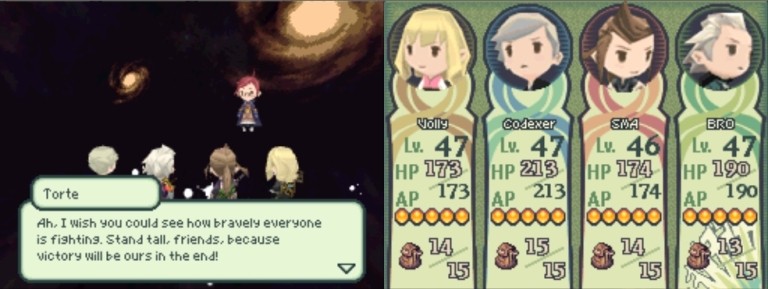
AND THEN TORTE APPEARS!
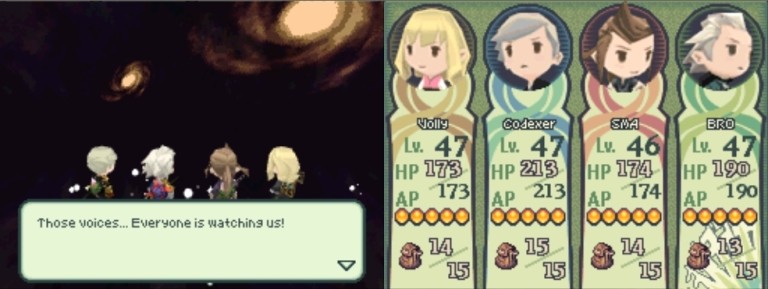
Everyone is watching?
Chaos is totally butthurt:
Hell yeah!
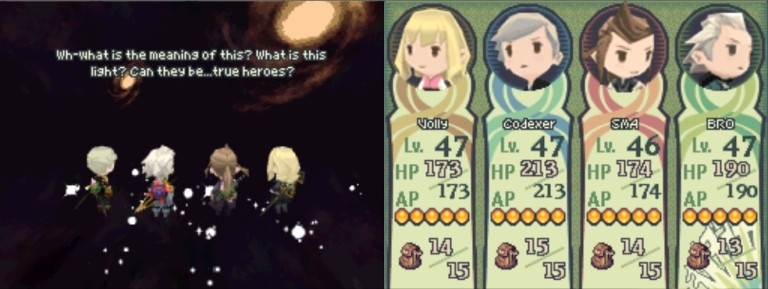
ROLAN IS HERE:
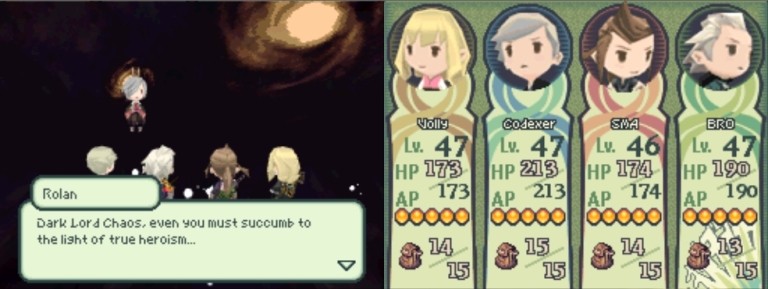
True heroism?
AND OUR SIS REKOTEH!
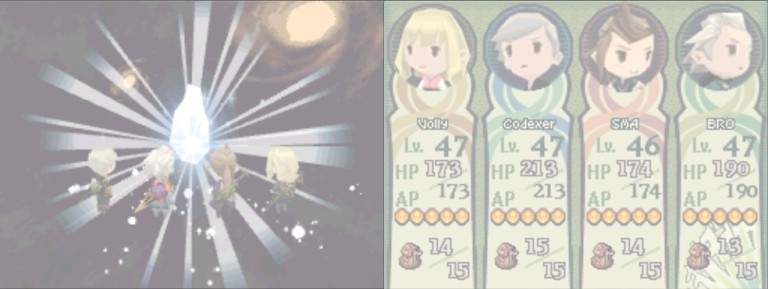
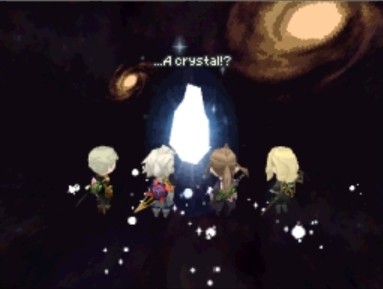
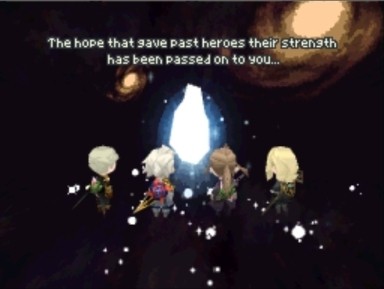
AND THEN IT ALL GOES NEXT-GEN AGAIN AND THE CRYSTAL APPEARS:
Chaos is totally surprised:
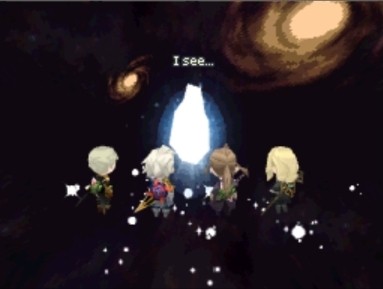
You see?
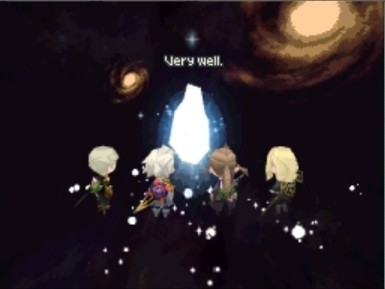
Very well?
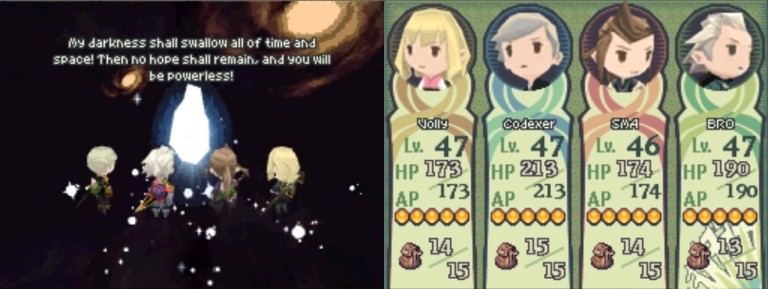
Swallow all of time and space!? :yikes:
And indeed...
...the crystal is shattered...
...and Chaos reveals his ultimate form!
It's huge!
And fearsome!
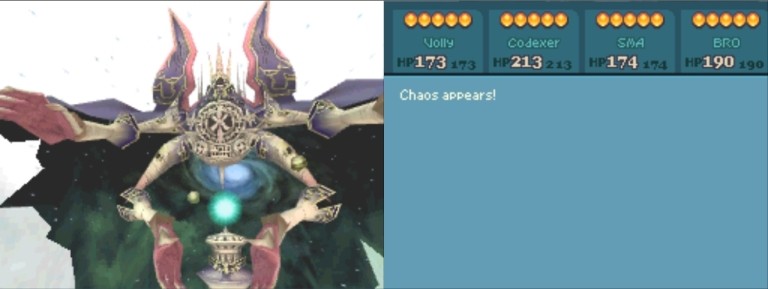
And funny-looking!
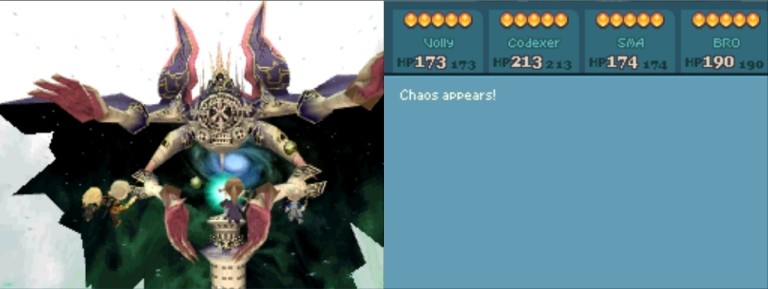
Kewl!
of Chaos.
In this fight, our enemies are three: Left Arm, Right Arm, and Chaos itself. Our tactics remains unchanged, though -- attack full-on!
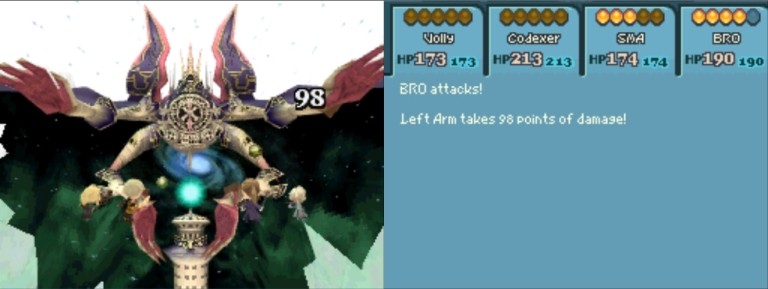
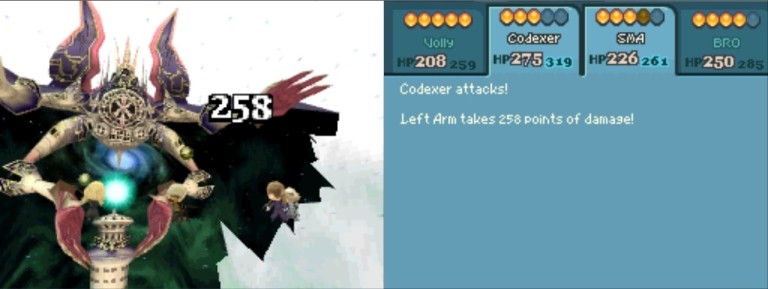
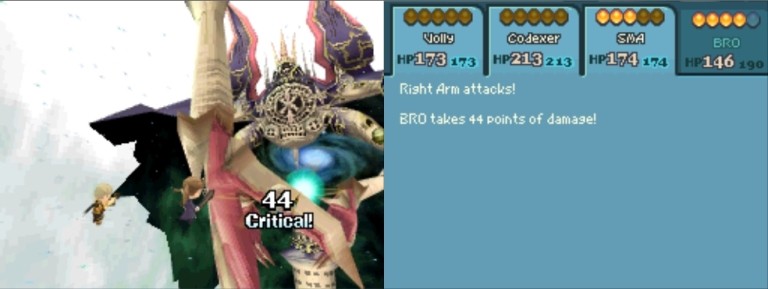
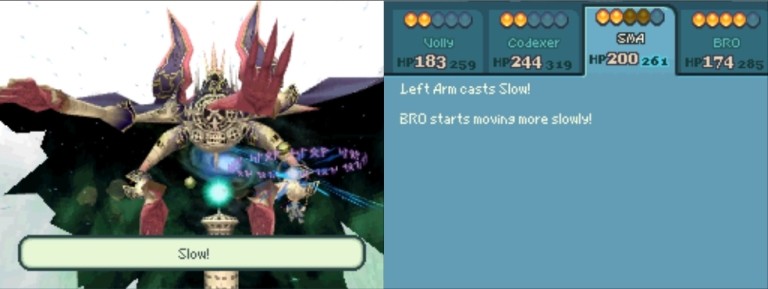
The Arms are p. powerful:
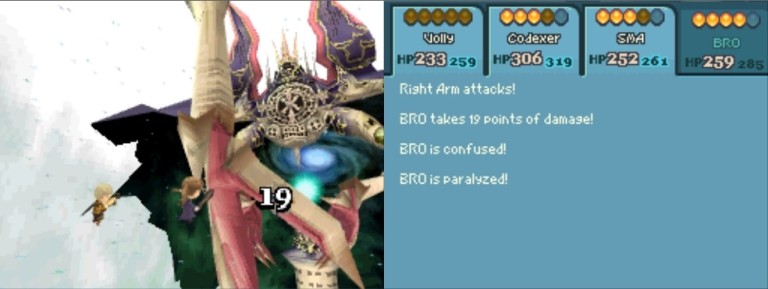
Apart from hitting with regular attacks that inflict status ailments, they can cast Slow:
And Confuse:
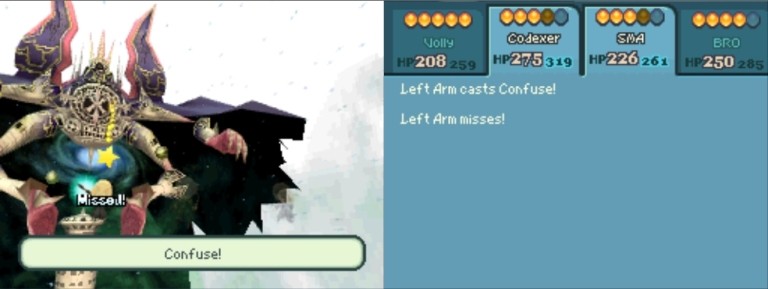
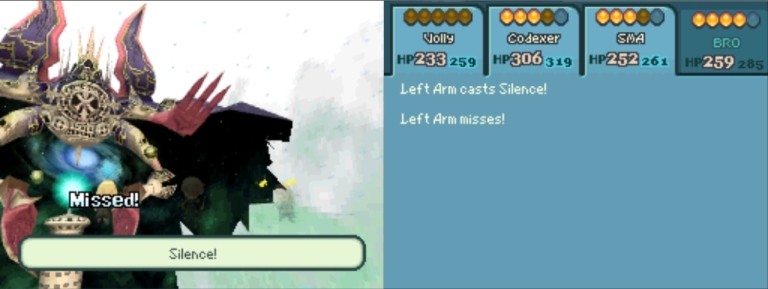
And Silence:
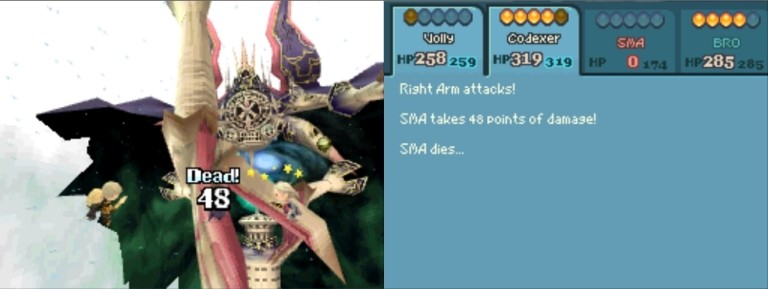
And Sudden death:
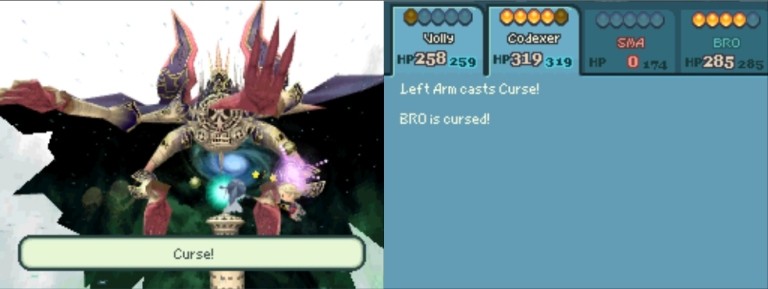
And Curse:
And Sleep:
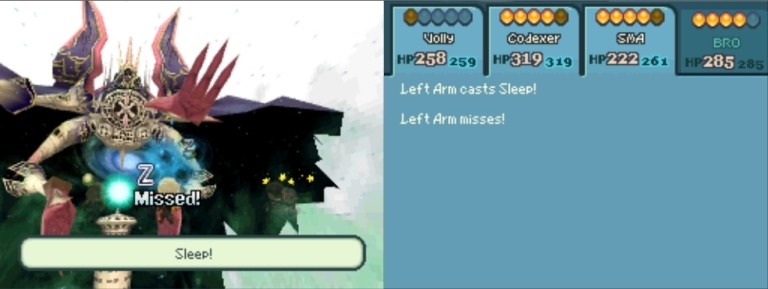
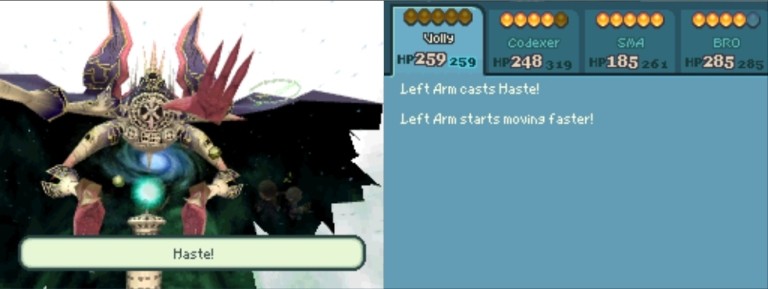
And Haste:
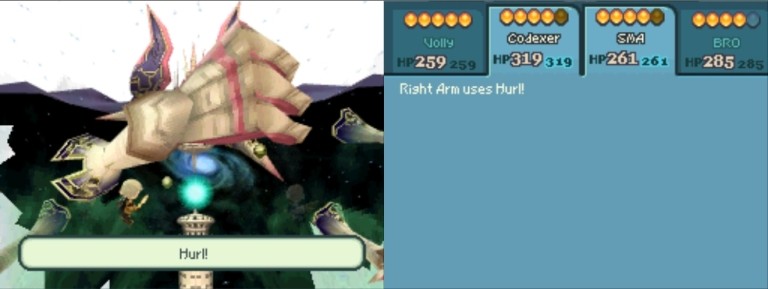
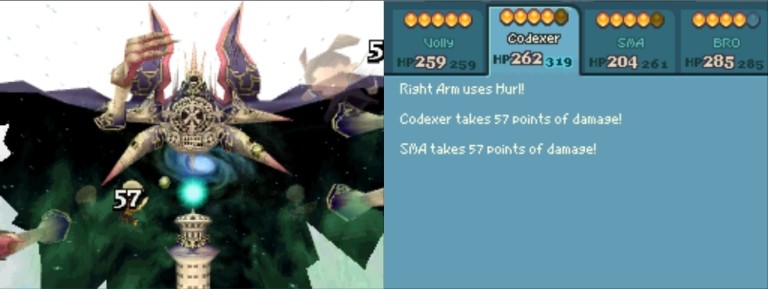
As well as use Hurl -- i.e., grab one of our heroes and slam her against another:
Another of the Arms' powerful abilities is Stop:
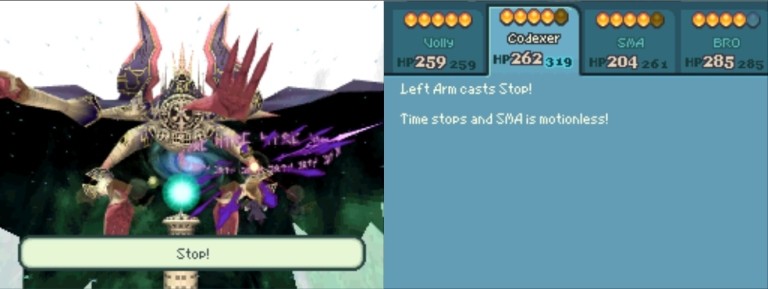
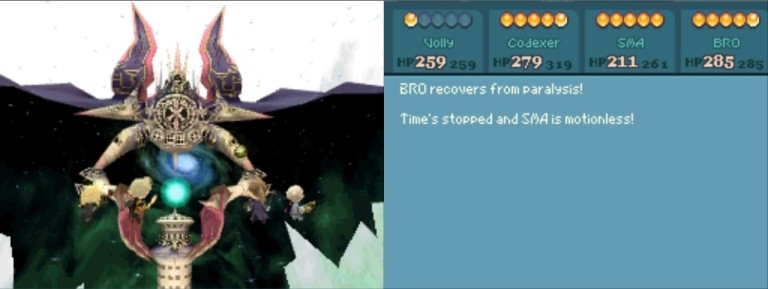
SMA is now rendered useless for several turns.
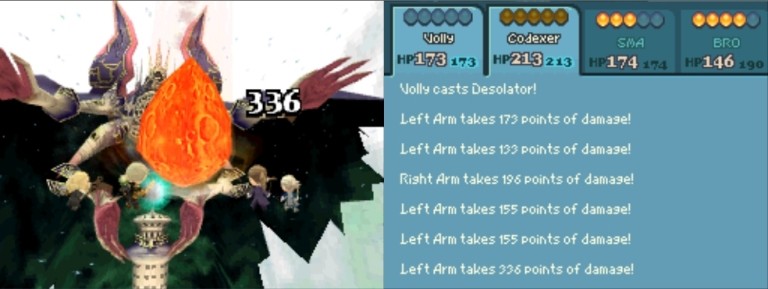
Finally, Volly's Desolator destroys both Arms at once:
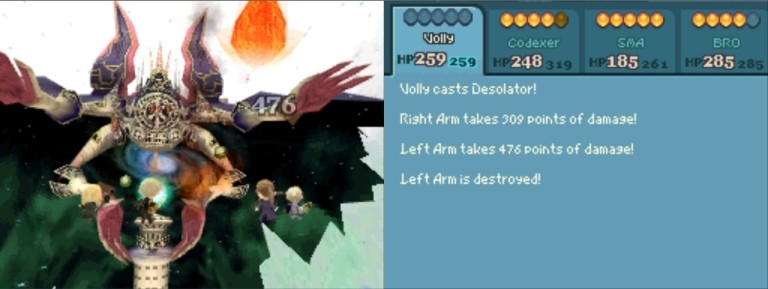
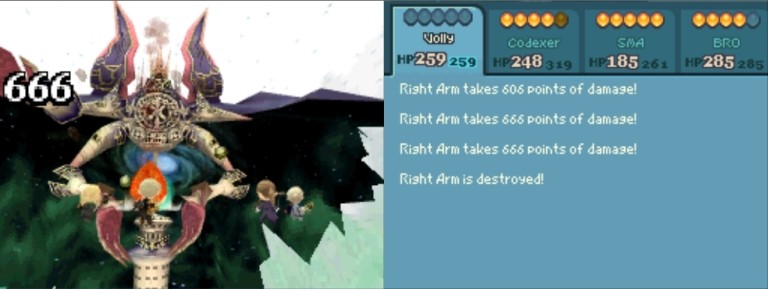
(I especially love those 666 points of damage.)
Even in this form, Chaos still likes casting Darkaga and Banishra:

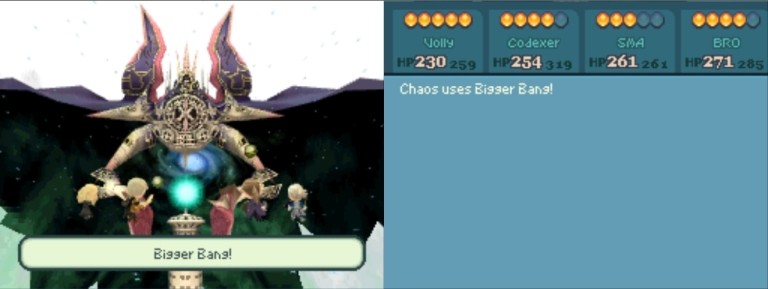
Another trick of his is Big Bang:
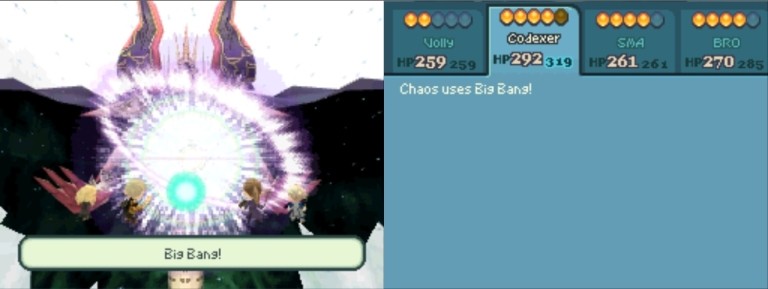
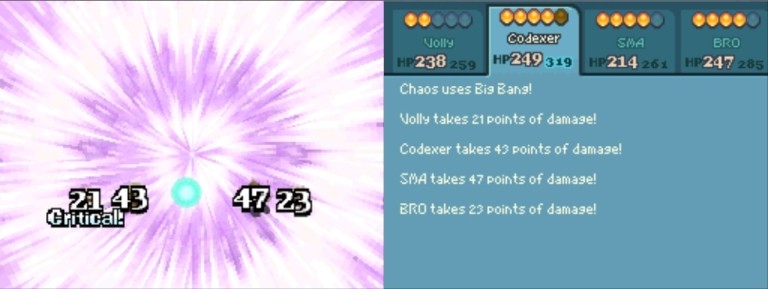
He spams it like stupid. :/
He also continues using Blaze, Lightning, and the like. Silencing him is of no use now, even if it works...
...simply because all his most powerful attacks are abilities, not spells, and thus aren't silenceable.
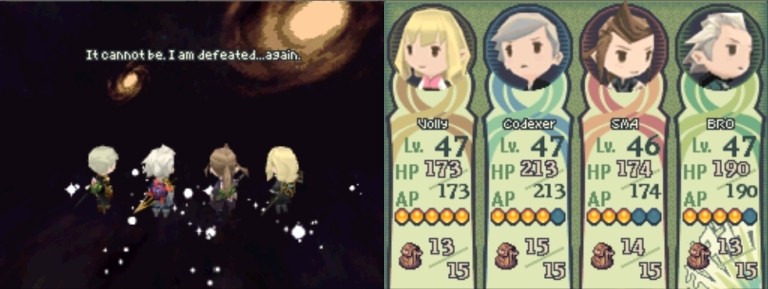
In the end...
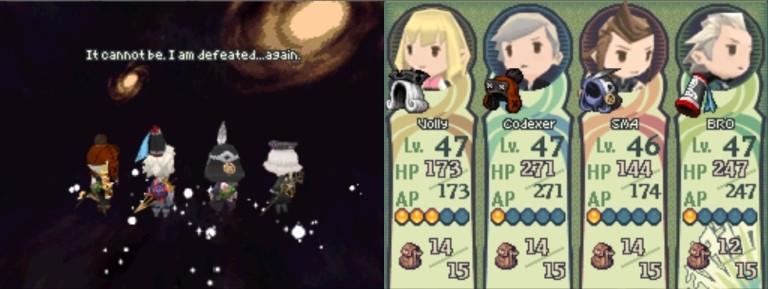
...Chaos is destroyed, yay!
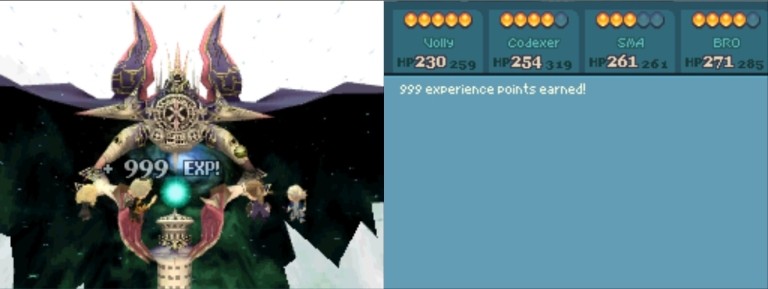
999 exp.
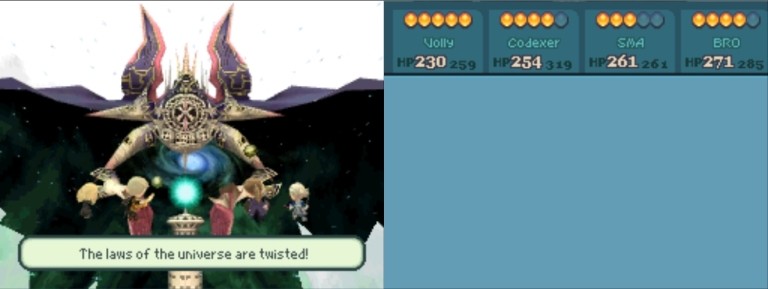
THE LAWS OF THE UNIVERSE ARE TWISTED!
BIGGER BANG!
Chaos explodes...
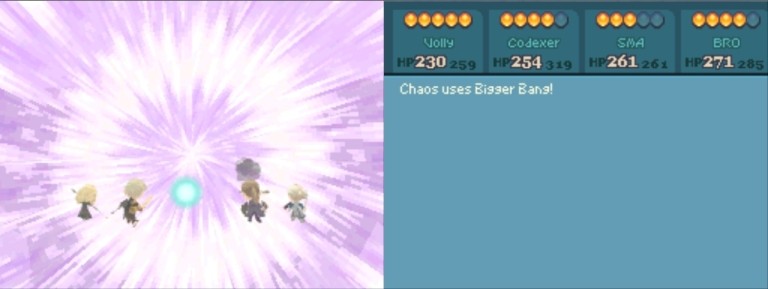
...and his voice is heard again:
And now...
...how 'bout a different party set-up? (Yup, I created a save state right before the battle with Chaos.)
I tried making Codexer a Scribe..

...but it looks like I haven't been playing this game long enough:

So I decide to roll with yet another set-up. Codexer will be a Ranger:


Volly will be the Sage, SMA the Storyteller...
...and BRO the Merchant:
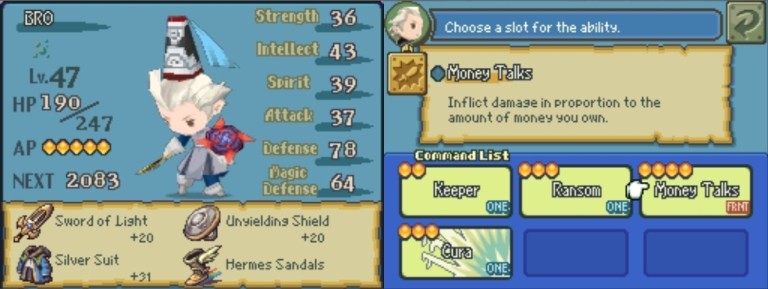
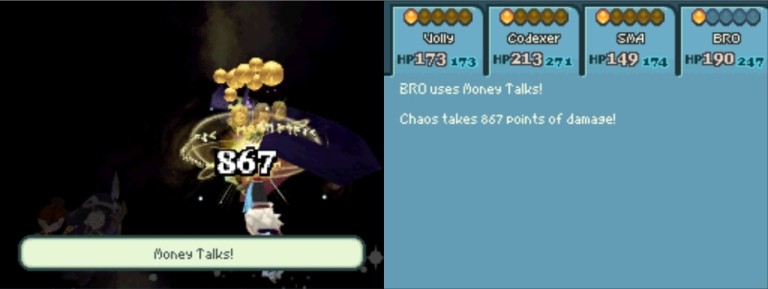
I won't be describing this in too much detail, but this set-up is *extremely* powerful. We've got ca. 87000 coins, and so BRO's Money Talks deals ca. 870 damage to Chaos:
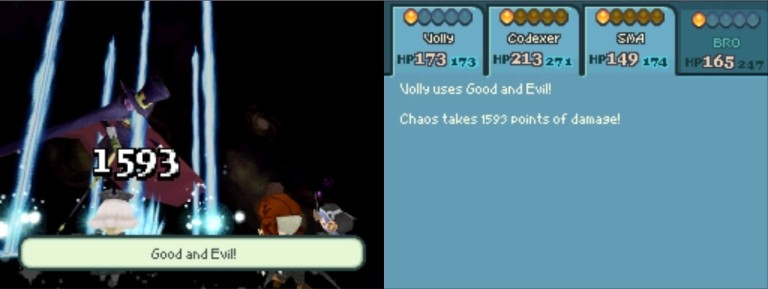
Volly's Good and Evil is as cool as ever:

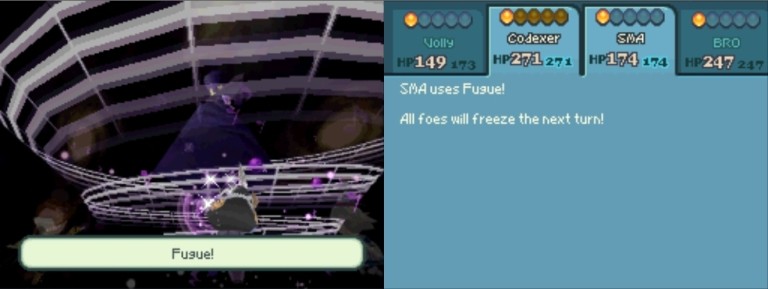
SMA can use Fugue:
And Codexer, Smashing Blow:

With this, we breeze through Chaos' three forms.
Sudden Death is, of course, the main problem, but we've got enough Phoenix Downs to not be afraid of anything.
And here's a little piece of concept art for you:
Chaos, as you surely know, is the infinite sea of shapeless potentiality which was there in the beginning, before time and space -- and Order in general -- kicked in. That's why, in this game, Chaos has to shatter time and space to reveal his true form. In alchemy, from what I've gathered, Chaos is usually identifies with water element, and that's why the world of darkness is placed underwater. Even though opposed to Order, Chaos of course remains within the very essence of it, corrupting it -- and the world -- from within. That's why demons, as beings of chaos, are naturally sided with him in his effort to harm the reality of order, disrupting the balance of the universe. Chaos, however, isn't simply a dis-order, it is a different principle than order, a separate element; and as a principle and an entity, it can be challenged -- and turned into a boss fight, of course. One coud say that, in this game, we aren't simply fighting chaos as a metaphor, we're fighting the Chaos route itself. As for why the Dark Lord Chaos is depicted with a clock, well, maybe that's because -- as the enemy of true, i.e., free and rational, order -- he can be regarded as allied with determinism and, say, the Laplace demon?
But I rant too much. So yeah.
Next stop: the epilogue!
Dear readers -- provided there are any left -- could you please bump this to the next page for the last update? Pretty please?
In which the final battle is fought.
Having defeated all the archdemons and reclaimed all the lost crowns, we must be movin' on, to the Dark Lord's hiding place, now. First, however, let's change our party set-up. SMA will be our Storyteller with Runaway and Escape equipped so we could flee all the random encounters:
Volly's going to be our Sage:
Codexer, a Hero:
And BRO a Storyteller specializing in buffs:
Go team go!
This is the large central room of B3, with stairs leading further down into the Star Chamber. We descend the stairs and find ourselves on a long winding path:
We encounter a Shade Trollud and a Scylla here...
...as well as an Orc Lord accompanied by a Gorgon:
Descending the stairs...
...we reach the area where we can save our game and listen to some party banter.
There's a treasure chest with an X-Potion here:
The Faithful Fox encourages us to not give up:
Don't worry, Fox-kun, we're p. good, so why should we stop here?
Codexer is full of resolve, too:
"No matter how many times we get knocked down", you say?
Shoulder to shoulder, yay!
Our pwetty pwinces is tired!
And further down we go.
This is indeed a Star Chamber, it seems. The goal is to follow the star trail:
In order to reach a down-leading star whirlwind:
The path isn't always linear, and there are some dead ends and intersections. It's pretty easy to lose all sense of direction, to boot, given that everything looks the same.
The enemies we encounter here include Garm, Bullkings and Neko Natters...
...Seadevils...
...Nidhoggs...
(Codexer levels up -> level 47: HP +7, SPT +1, INT +1.)
...and Doppelgänger:
Scary!
Finally we reach B8...
...the path becomes zigzaggish yet linear here, and eventually...
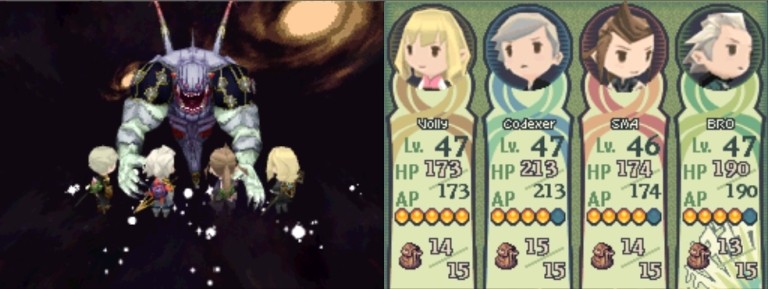
...we make it to the Dark Lord himself, yay!
Okay, so how 'bout an all-Freelancer party?
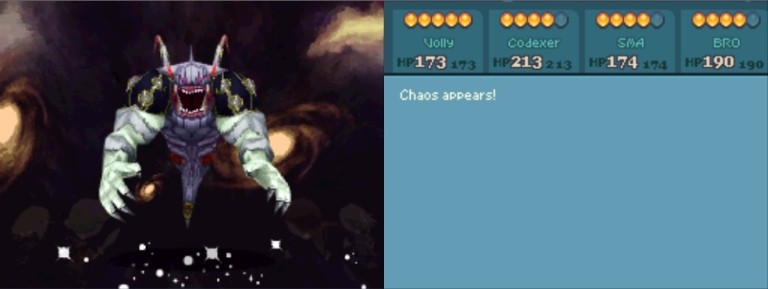
Let's chat Mr. Chaos up!
Agreed!
:twisted:
No heroes? And you're talking about what, Dragon Age?
:twisted:
This gentleman doesn't look too powerful, now does he?
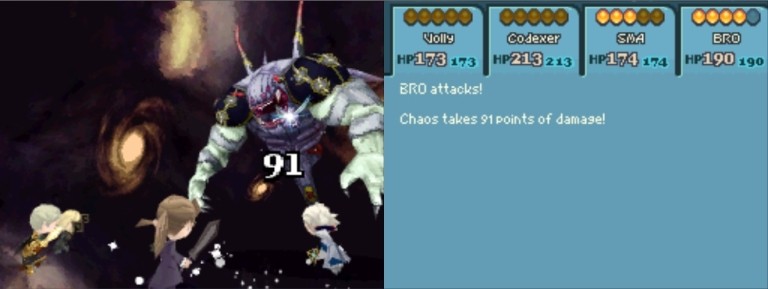
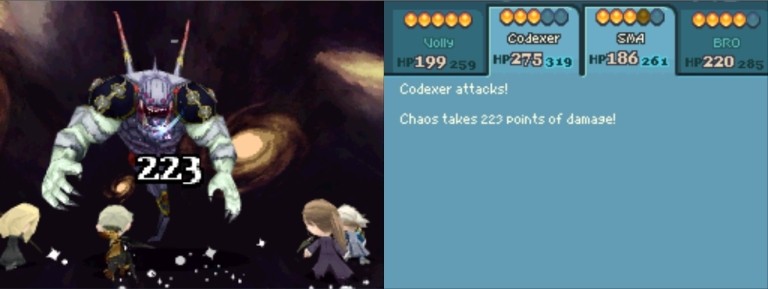
And the final battle enters its first phase. Being Freelancers, all we can do (for the most part) is attack in melee with our upgraded weapons:
Not bad, really.
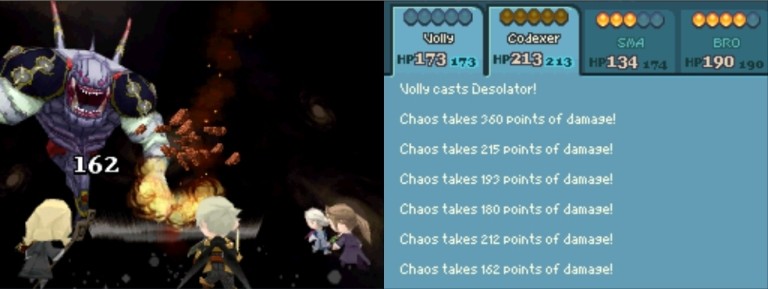
Also, despite being a Freelancer, Volly still has a trick up her sleeve. The trick is called Desolator:
Codexer casts Lux to boost our attributes and max HP:
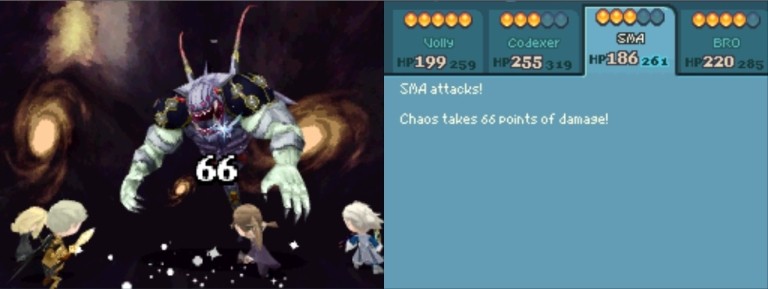
Chaos' regular attacks don't deal much damage to us:
He can also cast Darkaga:
But even without Mysterio, we're fine. Yay for upgraded gear!
Apart from offensive spells, Chaos has a couple of boosts at his disposal -- like Magick, Protect and Shell, for instance:
But even his Magick + Banishra combo is p. weak compared to our (upgraded) defense:
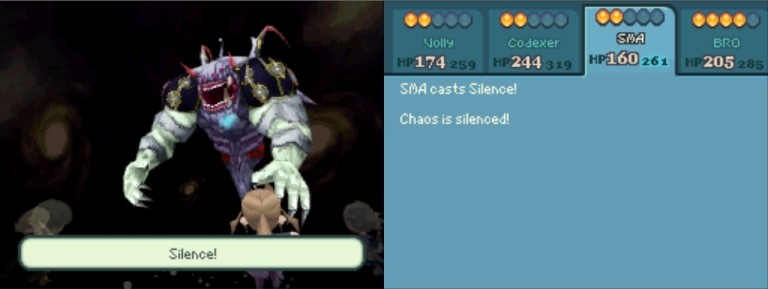
The funniest thing, however, is we can silence him:
Yep, we can silence the final boss.
SMA's Suppres + Volly's Desolator seems to work wonders:
Kewl. And finally...
...Chaos is destroyed, yay!
666 exp gained! :twisted:
Codexer is totally astonished:
Volly rejoices:
But BRO remains doubtful as always:
The Dark Lord's voice is heard:
GWWWAAARRR!
Surprised, eh, SMA?
:twisted:
SUDDENLY
CHAOS' SECOND FORM IS REVEALED!
Ouch!
One tough-looking mofo!
Our tactics, of course, remain the same. Surprisingly enough, all our attacks deal roughly the same amount to damage to Chaos' 2nd form as they did to his 1st form:
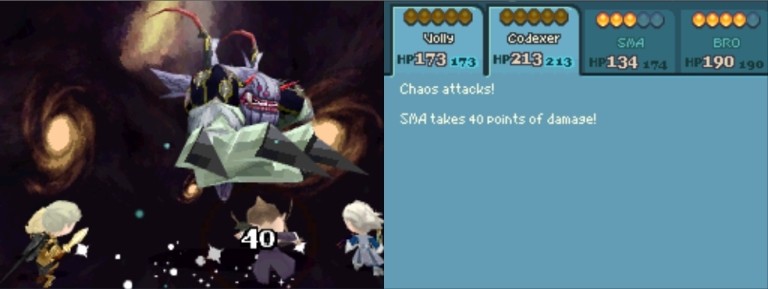
But even if Chaos' defense hasn't improved, his attack power has:
That hurts!
We still can silence him, by the way:
But he has new, unsilenceable powers now. Tsunami, for instance:
Or Earthquake:
Or Blaze:
Or, say, Lightning:
As well as a powerful melee strike, Fly Swat:
He spams Tsunami and Blaze and Earthquake and Lightning and Fly Swat like crazy. Had our equipment not being upgraded this much, we'd be already dead for sure!
But eventually...
...we slay the beastie!
777 experience points.
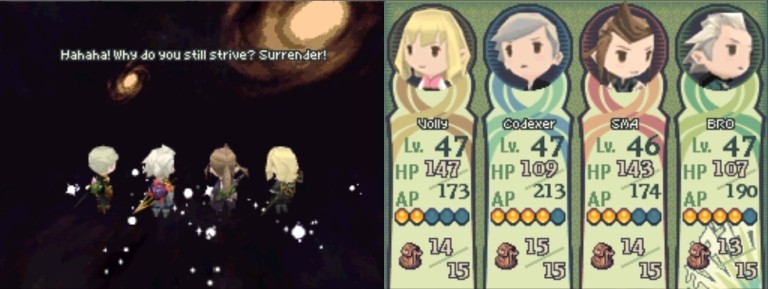
But it's not over yet, it seems:
Oh gosh why don't you die already!?
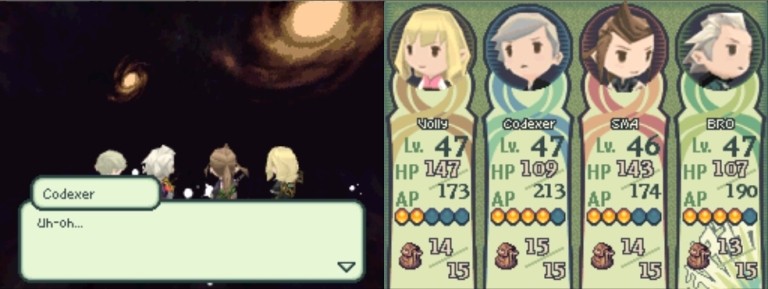
Uh-oh indeed...
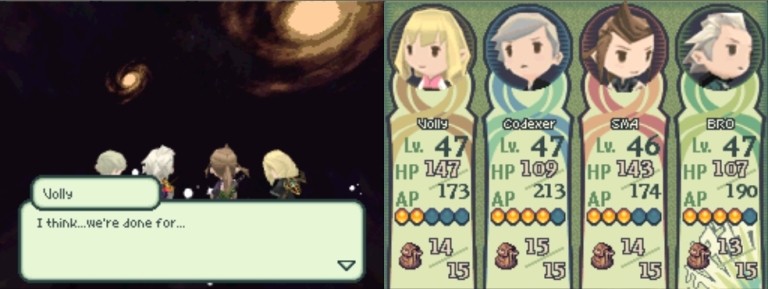
Right! Right?
Oh. :/
:twisted:
BUT SUDDENLY
EVERYTHING GOES NEXT-GEN AND...
...WE'RE FULLY HEALED!
ARIADNE APPEARS!
AND KRINJH!
AND PIONE!
AND LILIBELLE THE FAT-LEGGED FAIRY!
AND THAUZAND THE PRIESTLY MERCHANT LORD!
NO WAY!
AND THEN TORTE APPEARS!
Everyone is watching?
Chaos is totally butthurt:
Hell yeah!
ROLAN IS HERE:
True heroism?
AND OUR SIS REKOTEH!
AND THEN IT ALL GOES NEXT-GEN AGAIN AND THE CRYSTAL APPEARS:
Chaos is totally surprised:
You see?
Very well?
Swallow all of time and space!? :yikes:
And indeed...
...the crystal is shattered...
...and Chaos reveals his ultimate form!
It's huge!
And fearsome!
And funny-looking!
Kewl!
of Chaos. In this fight, our enemies are three: Left Arm, Right Arm, and Chaos itself. Our tactics remains unchanged, though -- attack full-on!
The Arms are p. powerful:
Apart from hitting with regular attacks that inflict status ailments, they can cast Slow:
And Confuse:
And Silence:
And Sudden death:
And Curse:
And Sleep:
And Haste:
As well as use Hurl -- i.e., grab one of our heroes and slam her against another:
Another of the Arms' powerful abilities is Stop:
SMA is now rendered useless for several turns.
Finally, Volly's Desolator destroys both Arms at once:
(I especially love those 666 points of damage.
Even in this form, Chaos still likes casting Darkaga and Banishra:
Another trick of his is Big Bang:
He spams it like stupid. :/
He also continues using Blaze, Lightning, and the like. Silencing him is of no use now, even if it works...
...simply because all his most powerful attacks are abilities, not spells, and thus aren't silenceable.
In the end...
...Chaos is destroyed, yay!
999 exp.
THE LAWS OF THE UNIVERSE ARE TWISTED!
BIGGER BANG!
Chaos explodes...
...and his voice is heard again:
And now...
...how 'bout a different party set-up? (Yup, I created a save state right before the battle with Chaos.)
I tried making Codexer a Scribe..
...but it looks like I haven't been playing this game long enough:
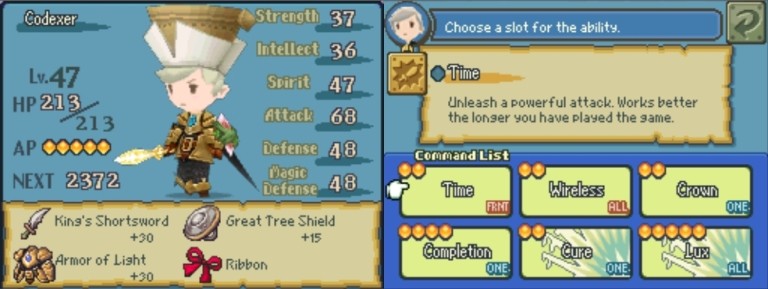
So I decide to roll with yet another set-up. Codexer will be a Ranger:
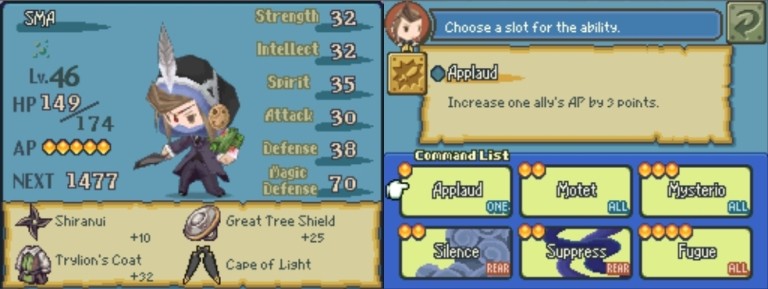
Volly will be the Sage, SMA the Storyteller...
...and BRO the Merchant:
I won't be describing this in too much detail, but this set-up is *extremely* powerful. We've got ca. 87000 coins, and so BRO's Money Talks deals ca. 870 damage to Chaos:
Volly's Good and Evil is as cool as ever:
SMA can use Fugue:
And Codexer, Smashing Blow:
With this, we breeze through Chaos' three forms.
Sudden Death is, of course, the main problem, but we've got enough Phoenix Downs to not be afraid of anything.
And here's a little piece of concept art for you:
Chaos, as you surely know, is the infinite sea of shapeless potentiality which was there in the beginning, before time and space -- and Order in general -- kicked in. That's why, in this game, Chaos has to shatter time and space to reveal his true form. In alchemy, from what I've gathered, Chaos is usually identifies with water element, and that's why the world of darkness is placed underwater. Even though opposed to Order, Chaos of course remains within the very essence of it, corrupting it -- and the world -- from within. That's why demons, as beings of chaos, are naturally sided with him in his effort to harm the reality of order, disrupting the balance of the universe. Chaos, however, isn't simply a dis-order, it is a different principle than order, a separate element; and as a principle and an entity, it can be challenged -- and turned into a boss fight, of course.
But I rant too much. So yeah.
Next stop: the epilogue!
Dear readers -- provided there are any left -- could you please bump this to the next page for the last update? Pretty please?
Nice going Bee! 


As an Amazon Associate, rpgcodex.net earns from qualifying purchases.