almondblight
Arcane
- Joined
- Aug 10, 2004
- Messages
- 2,642
It depends if there will be good exploration.
It's a metroidvania. So No.
It depends if there will be good exploration.
The art is nice and the combat looks like it could be fun. Metroid-style world is awful though. I never like that.It depends if there will be good exploration.
It's a metroidvania. So No.
Our public Demo is live here on Steam!
Hi everyone!
We’ve got an exciting update for you today:
Our public Demo is now available for download on Steam!
So if you'd like to get your hands on some Mandragora action and share it with your friends/family/cats, then this public demo is for you!
Dev Diary #3 - Class Playstyles
Welcome to the world of Mandragora! This series of ‘Dev Diary’ posts will take you behind the scenes and give you a more in-depth look at all the cool features you can expect from our game as we get closer to release.
•──────────────────────────•
Hi everyone!
We’re back again with another Dev Diary focused on a very key element of Mandragora.
Many of you have likely already familiarized yourselves with some of the below while playing the Mandragora demo, but we wanted to provide you with even more details, as the full release will include even more possibilities!
So, without any further ado…
Today’s topic: Class Playstyles!
We can’t include all possible playstyles in this Dev Diary, as the combinations are almost limitless, but we’ll do our best to give you at least a rough idea about the basics.
The basic playstyle of each class is determined by the equipped Weapon and Off-hand Item, its Special Ability, and the selected Active Skills.
In our second Dev Diary, we already mentioned that the Vanguard class can play with 3 different Weapon Setups depending on the types of weapons you prefer to wield, resulting in 3 different basic playstyles to start with:
These Weapon and Off-hand Item combos make up your Weapon Set. Each Item held in your Off-hand slot (e.g. Shields or 2H Weapons) also has a Special Ability that you can use while it’s equipped.
- 1H Weapon + Light Shield
- 1H Weapon + Tower Shield
- 2H Weapon (Greathammer or Greatsword)
And your playstyle also heavily depends on your selected Active Skills, so be sure to choose wisely which ones you add to your Active Skill Set!
To better understand all the above, we’ll be delving into even more detail on playstyles for you in this Dev Diary, using the Vanguard class as our first example.
Playstyles of a Vanguard
First, let’s talk about the basics of how this class works. The Vanguard is a melee class focused on Heavy Armor and Shields or 2-Handed Weapons.
Its main resources are Adrenaline and Stamina:
- Adrenaline is a resource generated through Light or Heavy Attacks and different Talents, which we went over in more detail in our second Dev Diary. Adrenaline is consumed by most Combat Skills - a subcategory of Active Skills - with the exception of Light or Heavy Attacks. It also decays slowly outside of combat.
- Stamina allows you to use Combat Skills, and is a quickly regenerating resource used by most attacks and certain movement and evasive actions (like Roll or Evade). While Stamina is depleted, no such actions can be executed until enough Stamina is regained.

And here are some of the Active Skills that you can use as a Vanguard (please note that numbers are not final):
So, now that we know about the Vanguard’s resources and Active Skills, let’s see what kind of Weapon Setups we can use to further customize our playstyle!
- Enrage: Enter a barbaric trance, increasing Physical Damage by 15% but also increasing damage taken by 15%.
- Heavy Attack: Charge up the attack to deal up to 300% Weapon Damage and generate 40 Adrenaline based on charge up time.
- Uppercut: Uses up all Adrenaline to deal 120% Weapon Damage and apply Bleed. The more Adrenaline is used, the longer the Bleed effect lasts.
- Whirlwind (requires any 2H Weapon): Channel a continuous whirlwind of cleaving attacks around you, dealing 25% Weapon Damage per second to all nearby enemies and slowly advancing forward.
- Shield Charge (requires any Shield): Rush forward with your shield, bashing the first enemy hit for 150% Shield Damage and Stagger.
- Defend (requires any Shield): Block incoming attacks reducing their damage at the cost of your Stamina. Heavier Shields block more damage and drain less Stamina.
1H Weapon + Light Shield
With this Weapon Set, you gain an additional Special Ability that can protect you from enemy attacks:
You can also Defend when wielding Light Shields, but it is usually better to Parry as it is more Stamina effective – but you must time your Parry right!
- Parry: Parry melee attacks and physical projectiles if timed correctly. Successfully Parrying a melee attack damages and Staggers the attacker. Parried projectiles are deflected instead.
This Weapon Set is perfect if you prefer a fast and dynamic playstyle with a focus on quick reactions to your enemies’ movements.
1H Weapon + Tower Shield
With this setup, you can Defend enemy attacks effectively, stun larger enemies with Shield Charge, and you can also use the Tower Shield’s Special Ability:
Using a sturdy Tower Shield is ideal if you prefer a more cautious strategy, allowing you to control the battle instead of simply reacting to your opponent.
- Inner Strength: Using Adrenaline charges up your shield. When it is fully charged you can release its charge to deal Physical damage in front of you.
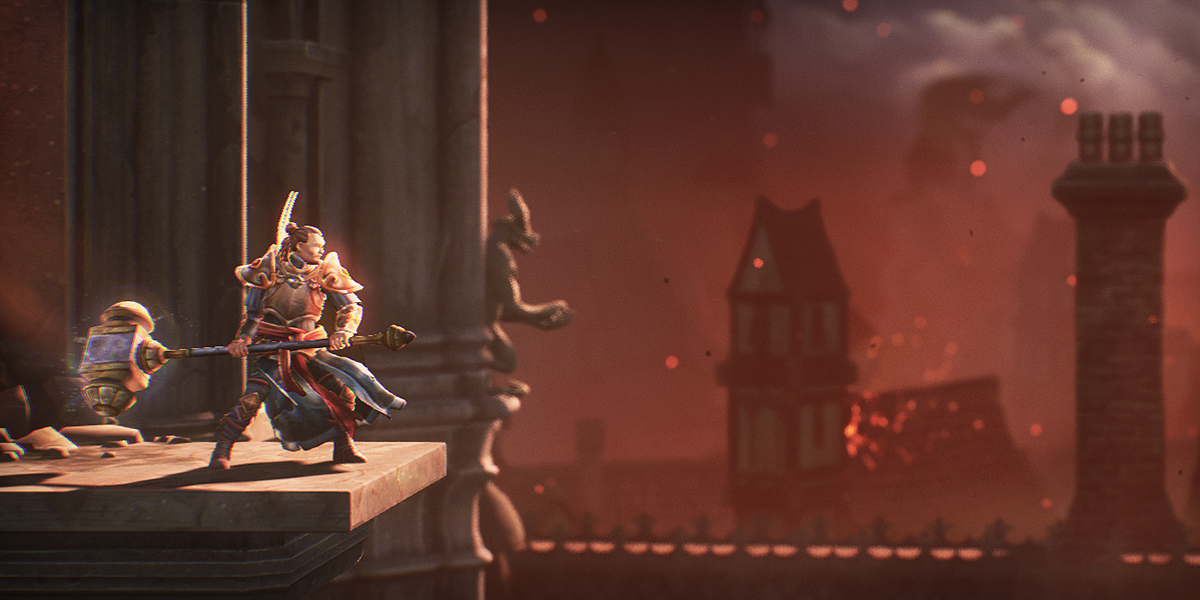
2H Weapon
Greathammers and Greatswords are slow but powerful weapons. Their attack range, damage and stagger is bigger than 1H Weapons'. The effective use of 2H Weapons relies on good timing and positioning against enemies.
2H Weapons also have a unique Special Ability that charges them up when using Adrenaline:
When wielding 2H Weapons, all Active Skills available for 1H Weapons are at your disposal, but you have to give up your shield abilities. To help you balance that, 2H Weapons let you use Whirlwind to create a continuous whirlwind of cleaving attacks around you.
- Resonance: When activated, successful weapon hits create radial shockwaves that expand out from the impact location, dealing damage to all affected enemies.
They also provide some unique and powerful new Active Skills depending on the type of weapon you’re wielding:
While this playstyle doesn’t offer you any additional protection from a shield, that high risk absolutely means high reward, and you can best your enemies from a larger attack range and even stagger them.
- Impale & Execute (Greatsword): Stabs forward with your Greatsword, dealing 120% Weapon Damage and you can reactivate it again to consume all Adrenaline to do a follow-up strike, dealing bonus damage based on the Adrenaline consumed.
- Sunder (Greathammer): Leap into the air with a swing of your Greathammer and smash it into the ground in front of you, dealing 140% Weapon damage and sending a shockwave forward for an additional 110% Weapon damage.
We hope you enjoyed getting to know these different Weapon Setups! This is just a taste of the possibilities for playstyles available in the full game.
If you’d like to try your hand at Vanguard playstyles in the meantime, be sure to check out our demo here on Steam and have fun wielding mighty weapons!
Switching Playstyles
Weapon Sets
Your equipped Weapon and Off-hand Item make up your Weapon Set - like a 1H Sword and Shield, for example.
As you continue on your travels, you’ll find plenty more - and cooler - weapons and shields, so it may often feel tough to decide exactly what to use in your next battle. Luckily, you always have the ability to create 2 Weapon Sets, and you can switch between them whenever you feel it’s necessary (even during combat!).
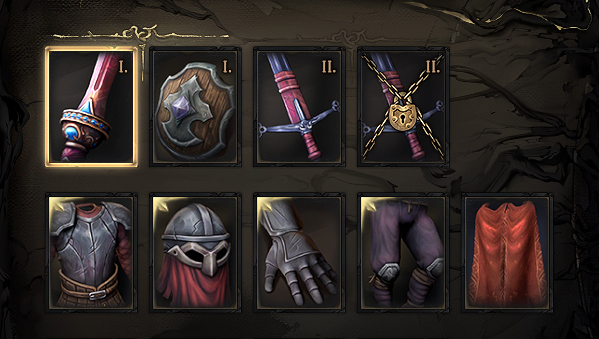
With 2 Weapon Sets available, you can freely choose which to use based on the current challenge - for example, with a 1H Weapon and Shield in one set, and a 2H Weapon in the other, you could:
Active Skill Sets
- Open with a 2H Heavy Attack on an approaching enemy, then switch back to your 1H Weapon and Shield to Defend and Parry…
- …or you could start with 1H Weapon and Shield against a Boss, then switch to 2H and use Uppercut to apply a huge Bleed effect on that Boss!
When changing weapons, you might also want to change your Active Skills. This is no problem, as you will get access to 2 Active Skill Sets, too.
In addition, each set can be used freely, so if a combat situation calls for you to combine Weapon Set 1 with Active Skill Set 2, then you can easily do just that!
That makes for a total of up to 6 Active Skills usable at the same time.

And if you prefer to always set your Weapon Set to match the corresponding numbered Active Skill Set, there is an option to do this in settings: “Combine Skill and Weapon Sets”.
Later in the game, you’ll also unlock the skill upgrade system that allows you to further adjust your Active Skills to better suit a different playstyle. This gives you the option to upgrade your Active Skills with enhanced versions of their existing effects - or by adding completely new effects to them!
Playstyles of a Spellbinder
Let’s now take a look at another class, one that isn’t available in our public demo: the Spellbinder.
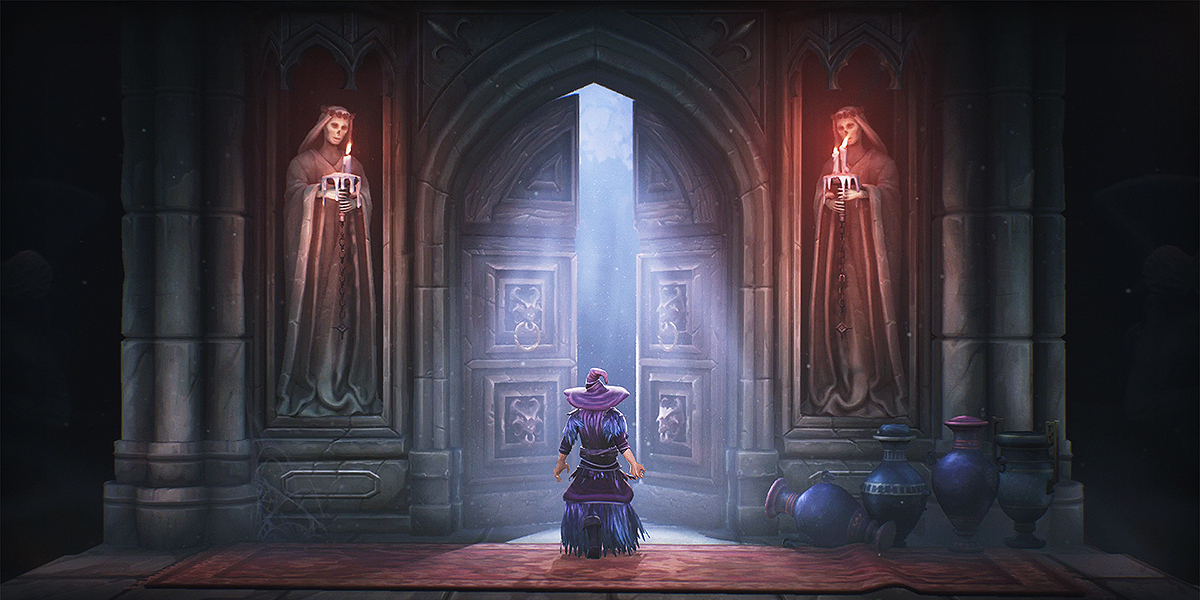
This is a fragile ranged caster class, focusing on Chaos Magic. Its starting Weapon Setup is 1H Weapon + Chaos Relic Off-hand Item.
If you’re wondering what exactly a Relic is and does: Relics are Off-hand Items that must be held to allow the casting of Spells of the matching element. In order to equip a Relic, the corresponding Mastery Talent must be unlocked in the Talent Tree, which is the Starting Node for each class Talent Tree - which we talked about more in Dev Diary #2.
So in this case, a Chaos Relic would allow you to use Chaos Spells - and also have a Special Ability:
It’s not just Relics that you need in order to be able to cast spells. The Spellbinder’s main resource is Mana:
- Discharge: Using Mana charges your Relic. When it is fully charged, you can Discharge it to stagger all enemies in a large area, and it also applies the Weakness status effect to them.
- (Weakness reduces the target’s Movement Speed by 25% and increases their Chaos Damage taken by 15% for a short duration. Fun fact: Weakness is not exclusive to Relics, but any Chaos Damage can apply it based on your Weakness Chance.)
- Mana is a limited resource, which doesn’t regenerate by default, but you can refill it by using various consumables and it is also refilled at checkpoints, also known as Witch Stones.

Spellbinders also bring some Active Skills to combat. The following Spells can suit almost any playstyle you use (please note that numbers are not final):
As you progress in Mandragora, you can get access to a much wider variety of Spells, and choosing which ones you put into your Active Skill Sets will make a huge impact on your playstyle.
- Chaos Beam (Starting Spell): Channel a beam of chaotic energy that deals 110 Chaos damage per second to the first enemy hit.
- Chaos Vortex: Channel to rip open the air in front of you, creating a powerful vortex that deals 170 Chaos damage per second to nearby enemies and pulls them towards the center.
- Splintering Sparks: Open a set of rifts in the air for 8 seconds which fire chaotic sparks at nearby enemies, dealing 42 Chaos damage with each hit. Each rift can fire up to 5 sparks.
Let’s see how that works out in practice!
Starting Playstyle
At first, you will be limited by Mana, so you’ll need to use your weapon to kill enemies alongside Chaos Beam. As you are wearing Cloth Armor, it is best to peel off enemies from a longer range, then finish them off with your weapon. You really don’t want to get hit!
After a while, you will become more Mana-efficient and less dependent on your weapon attacks and you can even just use Spells to kill enemies and bosses. To get to this point, you will need to learn some key Spells and Talents.
Now we will be showcasing two specializations: going full caster and nuking enemies from afar, and playing more like a mage assassin. And while some Chaos Spells may better fit one of those styles, you can always mix and match any Spell you prefer and create your own playstyle!
Mage assassin-style
This playstyle is great if you prefer to blast your enemies with powerful bursts of magic from short range.
With this playstyle, you'll stun your enemies in both senses of the word: with your stunningly quick wave of Spells that lead to their quick demise, and their literal stun effect.
- Shadow Shards: Release a short-range blast of shadowy shards that deals 107 Chaos damage to enemies and pushes them back slightly. Causes high Stagger.
- Dark Echo: Leave behind a shadowy echo for 10 seconds. While active, you store a portion of your Chaos damage dealt, releasing it as an explosion around you when the effect ends. Reactivate to trigger the explosion early and teleport to the location of your echo.
- Shadow Wisp: Rip a shadowy wisp from the nearest enemy, applying Weakness to the target in the process. The wisp follows you and strikes enemies with a beam of energy, dealing 80 Chaos damage. The beam chains to nearby enemies affected by Weakness, dealing 20% reduced damage. The wisp has 12 charges.
Full caster-style
This playstyle allows you to attack your enemies from afar before they get the chance to strike their first blow!
These Spells let you master the art of kiting, hitting like a glass cannon while staying elusive and always just out of your enemies' reach.
- Chaos Dice: Throw a bouncing die that activates on contact with an enemy and provides one of 3 bonuses when collected. The bonus must be collected before a die can be thrown again. The die can grant you either 1 stack of Freecast, 35 Relic Charge, or increase your Spell damage by 100% and your Mana costs by 50% for 10 seconds.
- Chaos Storm: Conjure a chaotic storm that moves forward and periodically strikes up to 3 nearby enemies, dealing 120 Chaos damage.
- Dark Orb: Throw a bouncing orb of chaotic energy which passes through enemies and detonates after 5 second(s), dealing 150 Chaos damage in a small radius. Reactivate to detonate the orb early.
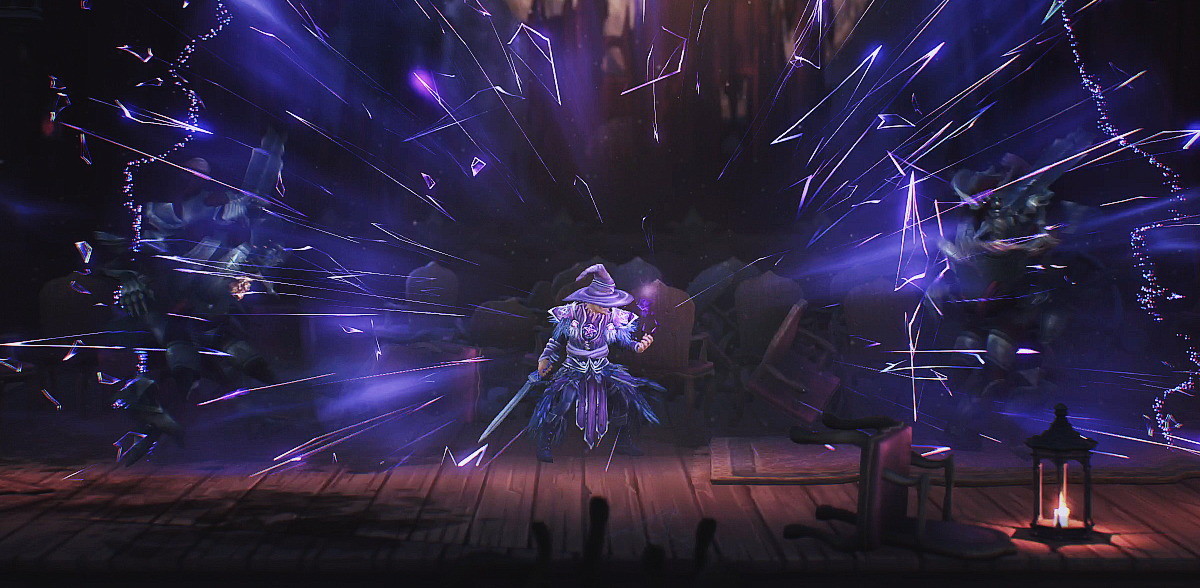
Further Possibilities
Chaos Talents
Choosing your Talents to best support your Spells is also something that can help you to focus on your preferred playstyle. As a Spellbinder, here are some of the key Talents you might want to consider:
Mixing Elements
- Inspiration: Casting a Chaos Spell has a 5% chance to grant you 1 stack of Freecast. This chance is increased by 0,1% for each percent of your missing Mana. Freecast makes your next Spell cost no Mana. Channeled Spells become free for the first 2 seconds instead.
- Cripple: Increases your Weakness Chance by 5%. The Slow of your Weakness effects is increased to 40%.
- Chaotic Rejuvenation: Applying Weakness to an enemy restores 10 Mana. This effect has a 1 second cooldown.
- Unstable Trail: Evading leaves a shadowy mark on the ground for 10 seconds. The mark explodes on contact with enemies, dealing 80 Chaos damage in a small radius. This effect has a 10 second cooldown.
- Chaos Tentacles: Casting a Chaos Spell has a 15% chance to spawn chaotic tentacles behind the nearest enemy. The tentacles pull nearby enemies toward themselves and deal 10 Chaos damage per second to affected enemies.
Last, but certainly not least, with 2 Weapon Sets available, you could even switch to a Fire Relic and use Fire Spells as well, further tailoring your build to your playstyle. The damage of Fire Spells also scales with your Power attribute so you can set enemies ablaze with similar efficiency.
But before you can set everything around you in flames with the help of a Fire Relic, you will also need to know Fire Mastery, which is the name of the Starting Node in the Talent Tree for the Flameweaver class, one of the six included in the full game.
In the meantime, here’s a sneak peek at the key Talents for a Chaos-Fire mixed build:
…and those are just some of the sweet Skills and Spells you can expect to use when you delve further into the world of Mandragora!
- Shadow Burn: Your Weakness effects also amplify the target's Fire damage taken. Applying a Weakness or Burn effect has a 15% chance to also apply the other one.
- Shadowmelt: Your Chaos damage deals an additional 5% damage as Fire. Your Fire damage deals an additional 5% damage as Chaos.
•──────────────────────────•
And that’s a wrap!
We hope you enjoyed this Dev Diary entry. We’re excited to be sharing more and more with you as we get closer to release!
And don’t forget: there is also a Mandragora Demo available right now on Steam, so be sure to play and help us spread the word by telling your friends/family/cats!
We really appreciate the incredible support of our community so far, and are grateful for every wishlist, download, like, and follow.
Have any thoughts or questions on playstyles? Please go ahead and let us know in the comments below or over on our Discord[discord.gg]!
Agree with this summary, but I like this game. Moving left doesnt bother me.takes forever to boot. Like few mins, wtf is this? not like anything special is happening inside. Also few agreements, EULAS, and that extremely annoying hold space to agree(I assume console shit?)
Used keyboard. dodging(shift) crashes the game if used frequently.
Most useless char gen, could have skipped it and provide screen shot instead at this point.
Going left to progress is extremely weird, not sure if i could get used to it. You start in the middle of nowhere, with hostile environments in both directions. Some city/hub instead would make more sense...
Slashing sword while mid air results in double jump... sort of. It is funny considering that your character cant double jump normally
While on jumping - there are lots of platformer sequences but I find it impossible to 'feel' my character jump distance. Thinking about it now perhaps thats the reason why every ledge is marked as something you can hang on to? Devs might have tried to fix this issue by giving you some leeway. Instead now every jump appears to be tuned to your character barely making it and grabbing the ledge, thus increasing my frustration. It aint prince of persia
gameplay(combat) wise I think I hate 2d souls like games. Or at least this one? I loved regions of ruin, not sure what makes it different from this
Dev Diary #4 - Damage Types and Effects
Welcome to the world of Mandragora! This series of ‘Dev Diary’ posts will take you behind the scenes and give you a more in-depth look at all the cool features you can expect from our game as we get closer to release.
•──────────────────────────•
Hi everyone!
We hope you’re excited for another installment of our Dev Diary series, where we’re showcasing different key aspects of Mandragora.
Today’s topic: Damage Types and Effects!
We already mentioned quite a few Damage Types as well as some Status Effects in our previous Dev Diaries. You may have also experienced some of them firsthand when playing the Mandragora Demo!
So in today’s installment, we’ll be discussing all those damage types and status effects in further detail!
In Mandragora, your Weapons, Active Skills, and Talents can cause one or more types of damage.
Each damage type has an associated Status Effect which can be applied based on the corresponding Status Effect Chance when dealing direct damage of that type. Some effects may also directly apply Status Effects.

This is the base damage type of all weapons and Combat Skills.
Physical damage can be increased by either Strength or Dexterity which is indicated in the Weapon or Active Skill tooltip.
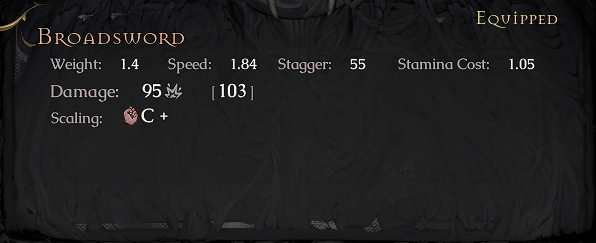
In the above case, the base damage of the Broadsword (95) is increased by Strength with a C+ scaling quality that increases its damage to 103.
With better scaling, that value would be higher - and with a worse scaling rank, the final damage value would be lower. To help you rank items by their scaling quality, Mandragora uses a ranking system from D to S+, with S+ being the strongest.
Weapons can also scale with multiple attributes. For example, a Copper Straight Sword scales with both Strength (B) and Dexterity (C).
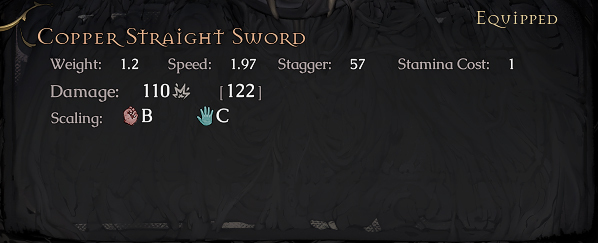
However, damage scaling has diminishing effects, which are separate for each Attribute. So here, even if Strength scaling is stronger than Dexterity, if you put a lot of Talent Points to Strength, you will reach a threshold when Dexterity becomes a better choice.
You can always check which attribute gives you more damage when selecting attributes in the Talent Tree.

Physical damage is mitigated by both Armor and Physical Resistance and can cause 2 Status Effects: Poison and Bleed. Let’s take a closer look at what these entail:
Bleed Status Effect
Poison Status Effect
- Bleed can be applied when dealing direct Physical damage.
- Bleed deals Bleed damage over a short duration and the damage is increased based on the target's maximum Health.
- Bleeding targets also take increased Physical damage.
- Bleed effects do not stack.
- Bleed damage can be reduced by increasing Bleed Resistance.
- Poison can be applied when dealing direct Physical damage.
- Poison deals Poison damage over a long duration.
- Multiple Poison effects can overlap on a target, up to 5 stacks.
- Poison damage can be reduced by increasing Poison Resistance.

Astral, Chaos, Fire, Wyld, Void, and Frost damage are all considered Magic damage.
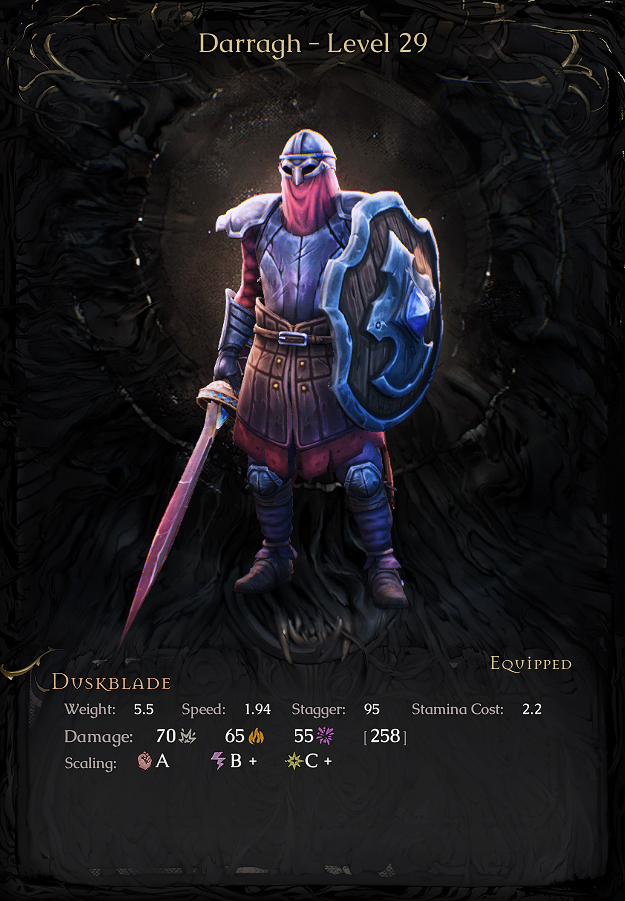
All Magic damage on weapons can be increased by the Power or Spirit Attribute, indicated on the weapon’s tooltip:
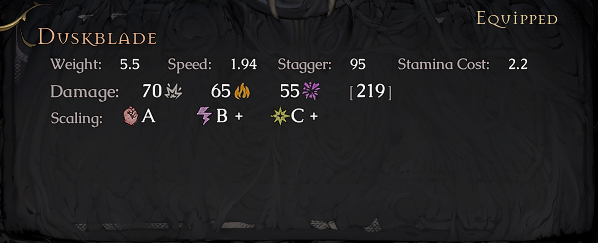
Duskblade deals 70 Physical base damage, which is scaled by Strength (A). It also deals 65 Fire and 55 Chaos base damage, which is scaled by both Power (B+) and Spirit (C+).

Astral Spells, Astral Talents, and some weapons can cause Astral damage by default. You can also apply Astral Oil (consumable) or an Astral Runestone (permanent enchant) to your weapon to add extra Astral damage to it.
Astral Spell damage is increased by your Spirit Attribute and the Spell Buff Attribute of your Off-hand Item:
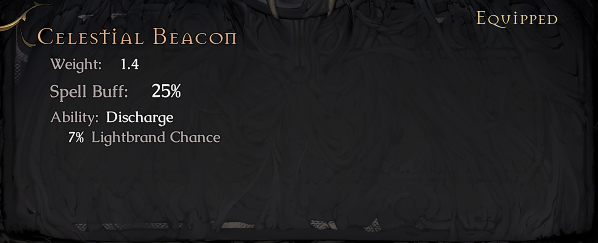
Enemies’ Astral Resistance mitigates the Astral damage they receive. (Note: Playable characters don't have Astral Resistance.)
Astral damage can cause the Lightbrand Status effect - and some Astral Spells and Talents can also generate Light Barrier.
Lightbrand Status Effect
Light Barrier
- Lightbrand can be applied when dealing direct Astral damage.
- Lightbrand lasts a short duration and heals you for a portion of Astral damage taken by the target.
- Lightbrand effects do not stack.
Light Barrier is a damage absorption effect generated by certain Astral Spells and Talents. Light Barrier absorbs all incoming damage at 100% efficiency. The maximum amount of Light Barrier you may have at any time is limited to 20% of your maximum Health.

By default, Chaos Spells, Chaos Talents, and some weapons can cause Chaos damage. To add extra Chaos damage to your weapon, you can also apply Chaos Oil (consumable) or a Chaos Runestone (permanent enchant) to it.
Chaos Spell damage is increased by your Power Attribute and the Spell Buff Attribute of your Off-hand Relic:
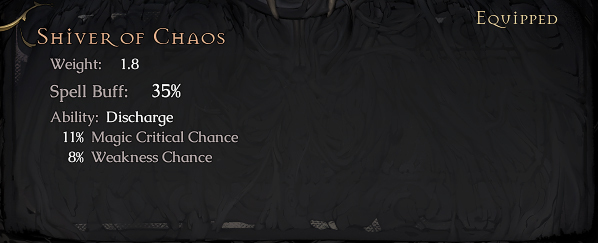
Enemy Chaos Resistance mitigates the Chaos damage they receive. (Note: Playable characters don't have Chaos Resistance.)
Chaos damage can cause the Weakness Status effect.
Weakness Status Effect
- Weakness can be applied when dealing direct Chaos damage.
- Weakness reduces the target's Movement Speed by 25% and increases their Chaos damage taken by 15% for a short duration.
- Weakness effects do not stack.

For those who want to wield the power of fire, remember that Fire Spells, Fire Talents, and some weapons can cause Fire damage by default.
If you’d like to add extra Fire damage to your weapon, you can also apply Burning Oil (consumable) or a Fire Runestone (permanent enchant) to it.
Fire Spell damage can be increased by your Power Attribute and the Spell Buff Attribute of your Off-hand Relic:
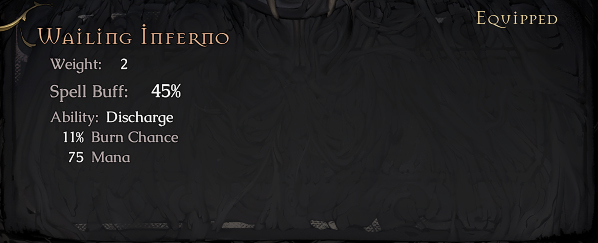
Fire damage is mitigated by Fire Resistance and can cause the Burn Status effect:
Burn Status Effect
- Burn can be applied when dealing direct Fire damage. Burn deals Fire damage over a short duration.
- Burn effects do not stack.
- Burn damage can be reduced by increasing Fire Resistance.


To harness the power of nature, you can cause Wyld damage by default with Wyld Spells, Wyld Talents, and some weapons. To add extra Wyld damage to your weapon, you can buff it by applying Wyld Oil (consumable) or a Wyld Runestone (permanent enchant).
Wyld Spell damage is increased by your Spirit Attribute and the Spell Buff Attribute of your Off-hand Relic:
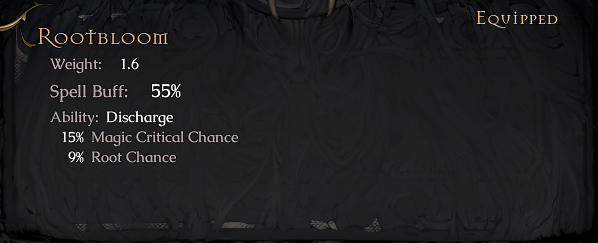
Wyld damage is mitigated by Wyld Resistance and can cause the Root Status effect.
Root Status Effect
- Root can be applied when dealing direct Wyld damage.
- Root snares the target, preventing them from moving for a short time.
- Root effects do not stack.

Only enemies who gain their powers from Entropy can cause Void damage.
Void damage is mitigated by Void Resistance and it is the only damage type without a Status Effect.

Last but certainly not least, we have Frost damage, which is wielded by those who really want to ice their enemy out.
Stay on your toes when facing an enemy using this, as Frost damage is incredibly dangerous - mainly because it can cause the target to be Frozen in place!
Frost damage is mitigated by Frost Resistance and can cause the Chill and Frozen Status effects.
Chill Status Effect
Frozen Status Effect
- Chill can be applied when dealing direct Frost damage.
- Frost damage taken is increased by 5% per Chill Stack.
•──────────────────────────•
- At 5 Chill Stacks, the target becomes completely Frozen for 3 seconds.
And that’s a wrap!
We hope you enjoyed reading this latest Dev Diary and learning more about damage types. It’s really exciting for us to be able to share even more Mandragora with you, and we hope you’re looking forward to the next one!
And if you’d like to take a closer look at the features highlighted in these Dev Diaries, don’t forget: the Mandragora Demo is live here on Steam right now, ready for you to play!
Have anything you’d like to share on this latest topic? Please let us know right here in the comments below or over on our Discord[discord.gg]!
Dev Diary #5 - Crafting & Caravan NPCs
Welcome to the world of Mandragora! This series of ‘Dev Diary’ posts will take you behind the scenes and give you a more in-depth look at all the cool features you can expect from our game as we get closer to release.
•──────────────────────────•
Hi everyone!
We really hope you’ve been enjoying the Mandragora Demo and have been having fun experiencing many of the core game features highlighted in this Dev Diary series!
Now it’s time for another installment, focusing on another key feature - one that’s crucial to success in Mandragora:
Today’s topic: Crafting & Caravan NPCs!
As we already mentioned in our previous Dev Diary about Gear Progression, Items are a huge part of Mandragora: you can find, earn, or craft over 350 Items and 110 Consumables & Enchants during your adventures.
Today we’ll go into more detail about the Crafting part - how and with whom you can craft powerful Items.
Artisan Vendor Basics
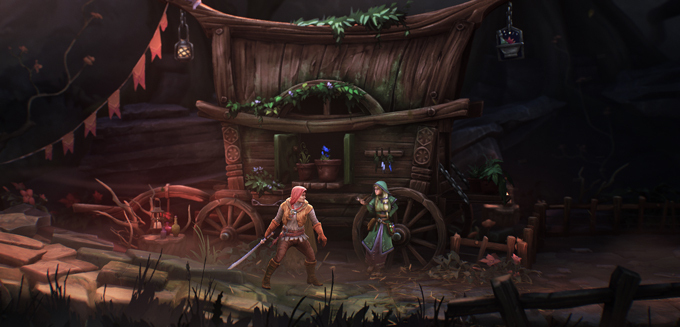
During your adventures, you’ll encounter dozens of NPCs, and among them, 7 skilled Artisan Vendors that can join your Caravan and travel with you on your journey. (You’ve probably already met some of them while playing the Mandragora Demo!)
All Artisan Vendors start at Artisan Level 1 when they join your Caravan. They can level up when you craft Items, Consumables or Enchants with them. As they level up, they’ll learn how to craft new and better Items for you. You’ll also be able to find new Diagrams which you can give them to unlock new craftable Items.
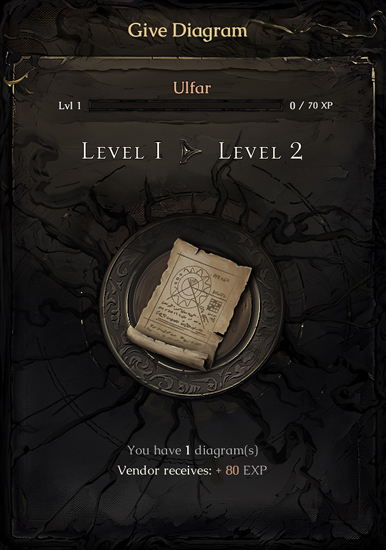
Each Diagram has a Diagram Level. Your Artisan must reach the same number Artisan Level in order to be able to craft it.
Crafting gives the most XP to Artisans when the Diagram Level matches theirs. More experienced Artisan Vendors gain less experience from lower Diagram Level crafts, so it’s always a good idea to craft Diagrams as they become available - provided you have the Materials for it!
Carts and Tents
Each Vendor will have their own place at your Caravan. Some will set up their Tents, while others will move in with their Carts.
Vendor Carts and Tents can also be upgraded for small bonuses, such as cheaper crafting, longer-lasting effects of Consumables or extra Material drops!
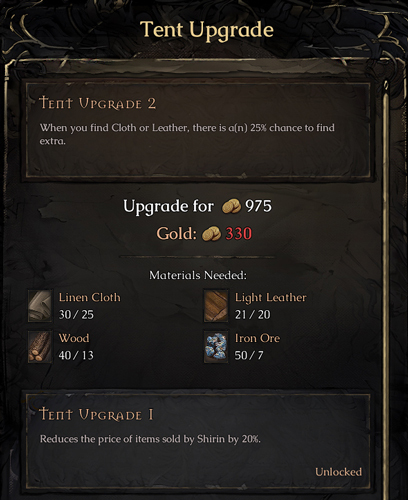
Beside crafting Items for you, all of the Vendors have some stockpiles as well, so it is always worth checking out what they sell.
(Just make sure you don’t make the mistake of asking Yrsa the Goldsmith about where she manages to acquire such stunning gemstones…)
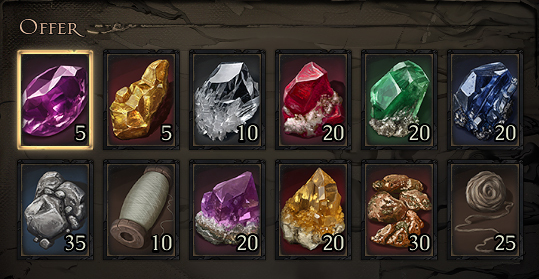
Now that we’ve covered the basics, let’s get to know each Artisan Vendor and learn more about what kind of useful skills they have that can help make your adventure that much more epic.

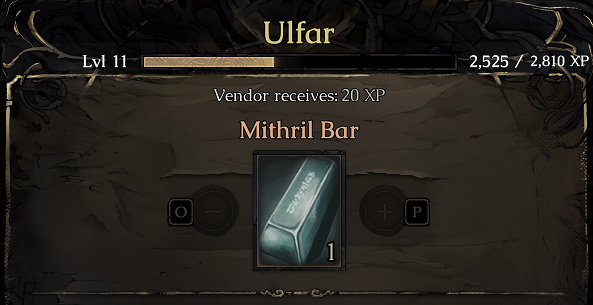
Ulfar is a skilled Blacksmith who can craft Weapons, Shields, and Mail or Plate Armor for you. He can also smelt raw ores you have gathered.
When you open the Craft menu, you can find all the information you need before deciding what to craft, organized into 3 main sections:
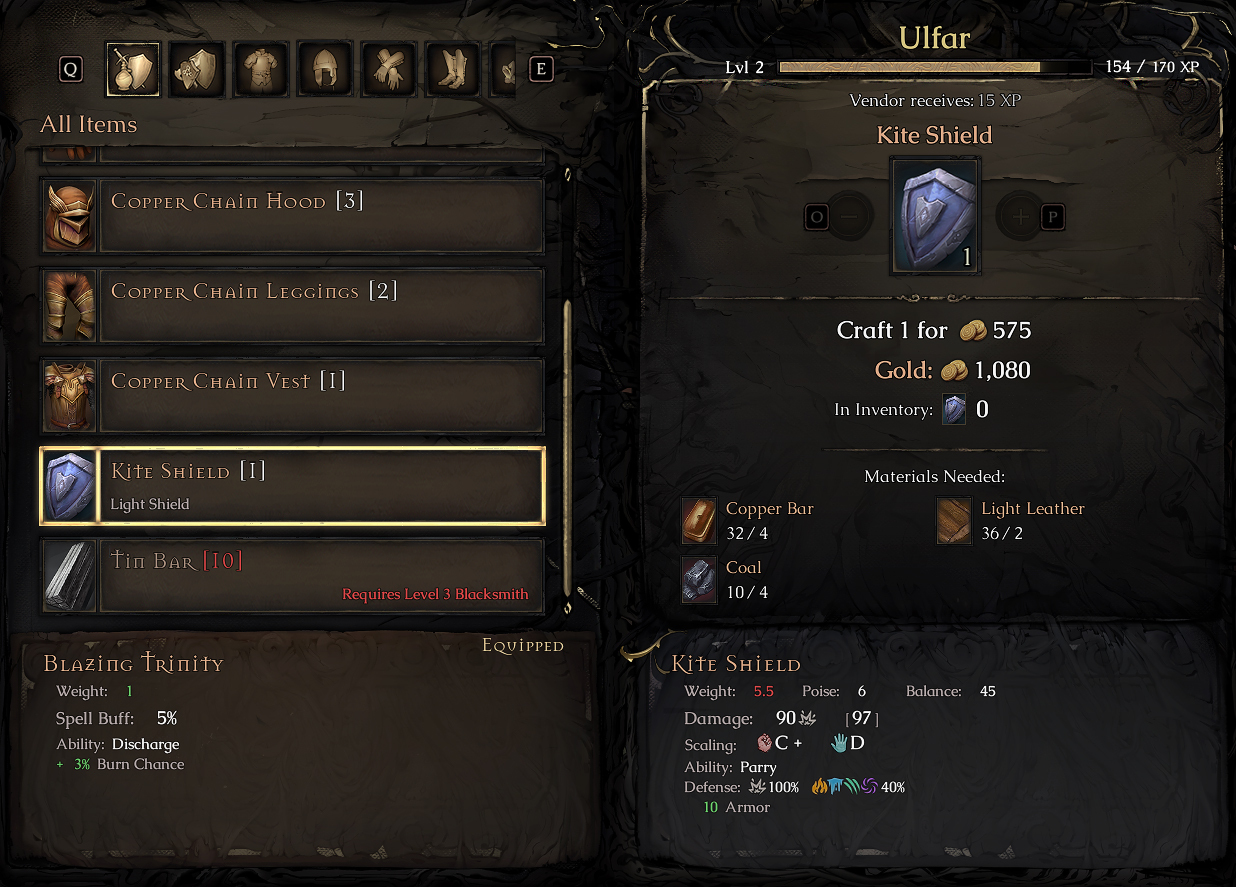
The top left part shows the list of craftable Items and the currently selected Item. The number beside it shows how many you can craft with the Materials you have.
Also in the top left, you can find filters which will become very useful when the Vendor becomes more experienced and has dozens of Diagrams to craft.
The top right part shows detailed information about the experience of Ulfar, the crafting cost of the selected Item and your Material stocks.
The bottom part shows your currently equipped Item compared to the selected Item, which can help you to decide whether it’s worth crafting or not.
We talked a little more about how to decide which Weapon to equip in our previous Dev Diary about Gear Progression, so be sure to check that out if you’d like to learn more about Weapons and what to wield!

Shirin may appear to be just a humble tailor, but using her services can help mean the difference between victory and defeat. She can craft Bandages to heal you, and Armor Kits to temporarily strengthen and increase your Armor.
For example, there are two small but key early-game items she can craft for you:
- Light Leather Armor Kit: Increases Armor by 25 for 10 hits.
- Linen Bandage: Restores 150 Health over 10 seconds.
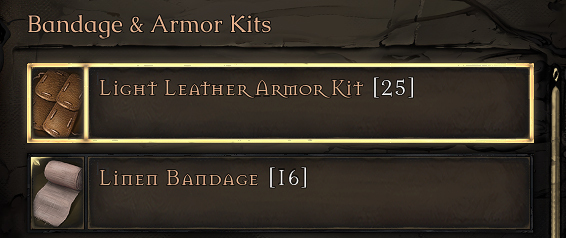
And of course she can also craft Cloth and Leather Armor for you - and even if you prefer to wear Heavy Armor, her skills are still important as she can provide Cloth and Leather Capes for you.

Alannah is the one to go to when it comes to all things alchemy. There are 2 main types of Consumables she can craft for you: Potions which you can drink, and Oils which you can use to coat your Weapon.
She also has a small garden which you can use to grow your own Herbs from the Seeds and Spores you have gathered during your adventures.
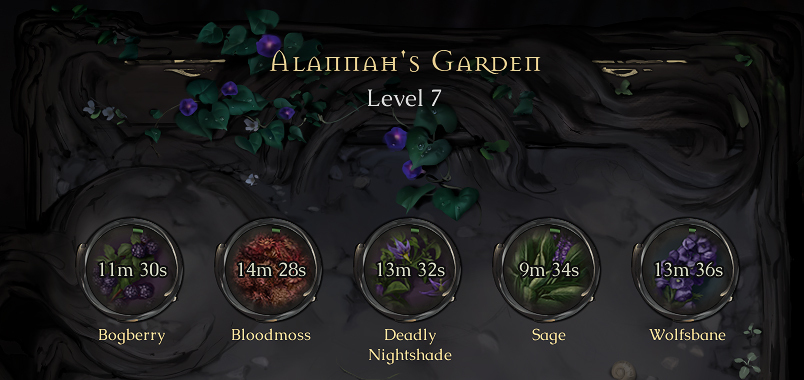
You can place a Seed or Spore onto an empty slot, and after a while, you can then harvest the Herbs which can be used to brew Potions.
Let’s see some examples of her Recipes:
- Minor Stone Skin Potion: Increases Physical Resistance by 10 for 60 seconds.
- Minor Rage Potion: Increases Physical damage and attack speed by 5% for 20 seconds.
- Lesser Chaos Oil: Adds 25 Chaos damage to the Weapon’s damage for 30 hits.
- Lesser Venomous Oil: Adds 15 Poison damage and 10% chance to apply Poison for 30 hits.

Rhys has great knowledge of the occult, making him skilled at crafting Runestones for you that can be used to enchant certain Items: Helms, Chest Armor, and Weapons.
If you’d like to learn more about Enchanting, be sure to check out our previous Dev Diary where we talked more about just that.
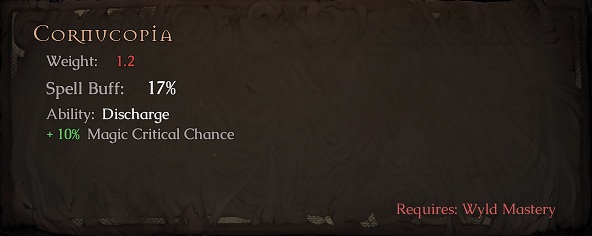
Rhys can also craft Relics which can make your Spells stronger as well as provide different valuable bonuses.
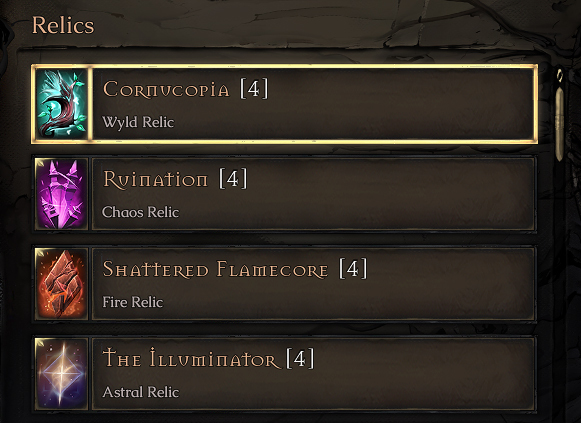
One example of these powerful Relics is Cornucopia, a Wyld Relic which, like all Relics, offers the Discharge Ability - and it provides you with a potent 17% Spell Buff and +10% Magic Critical Chance.
To learn more about Relics and their Discharge ability, you can revisit our Dev Diary on Class Playstyles where we talk about them in a little more detail when discussing the Spellbinder class!

Yrsa is a pro when it comes to jewelry making, and can craft Rings for you.
These can be incredibly helpful, as Rings can give you unique bonuses that are not available on any Armor or Weapon.
You can also equip up to 4 Rings at a time, so you can also combine these bonuses to best suit your build.
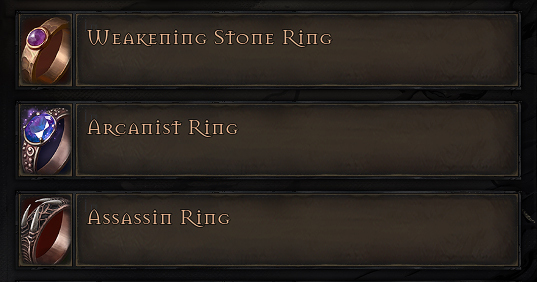
Here are some early-game Rings that Yrsa can craft for you:
- Weakening Stone Ring: Increases Weakness chance by 7%.
- Arcanist Ring: Increases Magic Critical chance by 5%.
- Assassin Ring: Increases Physical Critical chance by 5%.

Gerald Borough is a special NPC. He might not be able to craft, but he’s still a very resourceful guy!
He provides the Map for you, by piecing together the Map Fragments you gather all around the world.
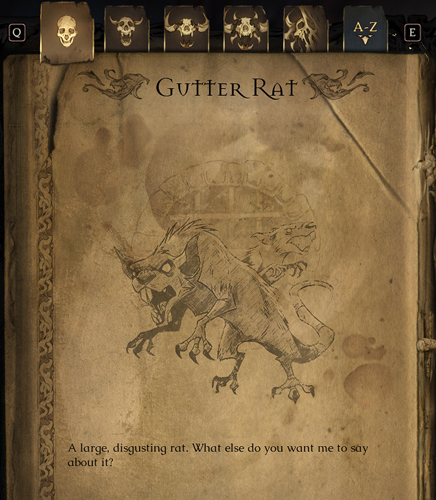
He also collects useful information about any enemies you encounter, which you can review in the Bestiary by talking to him. The more times you slay a certain enemy, the more information you’ll learn about it from Gerald.
Gerald can also supply you with handy Items such as Lockpicks, Warpstones, and Throwing Knives.
- Warpstone: Teleports you back to the Caravan. Cannot be used while in combat.

Graeme can cook delicious food for you, which you can use to restore or increase your Health, Mana or Stamina. The higher his Artisan Level is, the better food he can provide using the ingredients you collect.
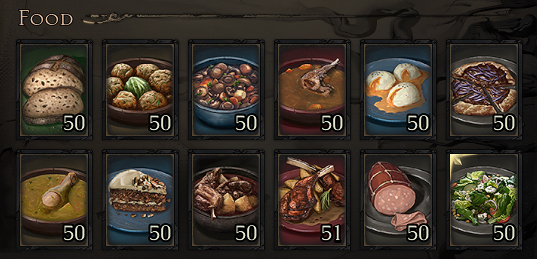
While these foods do provide useful bonuses, it’s important to remember that you can only have 1 food effect on you at a time.
Here are some of the delicious early-game Recipes Graeme can cook:
- Bread: Increases Max Stamina by 10 and Move Speed by 6% for 10 minutes.
- Cabbage Dumplings: Restores 50 Health and Mana over 2 minutes.
- Mushroom Stew: Increases maximum Mana by 30 and restores 0.5 Mana per second out of combat for 10 minutes.
- Rabbit Broth: Increases Maximum Health by 50 and restores 1 Health per second out of combat for 10 minutes.
•──────────────────────────•
And that’s a wrap!
We hope you enjoyed this latest Dev Diary highlighting Crafting & Caravan NPCs - and that you’re already looking forward to crafting cool stuff in the full release!
Curious to already experience a taste of these features first-hand? Don’t forget: the Mandragora Demo is still live here on Steam and ready for you to dive in!
And, as always, we’d love to hear your thoughts on this latest entry. Be sure to share your feedback in the comments below or over on our Discord[discord.gg]!
Mandragora is Coming on April 17: Preorder Today!
Hi everyone,
We have some really big news to share with you today about our game:
Mandragora is coming on April 17, 2025 - and you can preorder it today!

While we previously aimed for a 2024 release, we found we need more time to ensure Mandragora exceeds expectations. We really wanted to bring Mandragora to you by the end of the year, but quality is important to us, and the last thing we ever want to do is deliver you a subpar experience.
Many of you played the public Steam Demo, and you sent us plenty of invaluable feedback about many areas we still want to improve upon before the full release. This extra time will allow us to integrate those insights into a better, smoother gaming experience.
We’re incredibly grateful for your support and patience, and we’re confident this updated timeline will help make the final release well worth the wait!
If you or your friends are looking to get your hands on some Mandragora action, then this is the perfect opportunity to get your hands on the game as well as some cool extras.
Everyone who preorders the game will receive exclusive digital rewards as well as access to two preview builds of the game ahead of release.
With your preorder, you will gain immediate access to the Preview 1 build, and will keep that access until Preview 2 becomes available in its place. This first Preview offers about 4 times more content compared to the demo - including more enemies, levels, loot, and another class to try out!
And while Preview 1 is already a solid experience, we’re already hard at work addressing earlier feedback and implementing improvements, many of which will be featured in Preview 2. Preview 2 is planned for release in early 2025, and will provide a much deeper look into the game, offering a more substantial slice of what’s to come - so with your preorder, you'll have that to look forward to as well!
Preorder rewards:
There is also a Digital Deluxe edition available, which you can preorder to receive all the above rewards available as well as even more cool digital rewards!
- Preorder Pet Follower
- Preorder Armor Transmog Set
- Preorder Exclusive In-Game Quest*
- Access to Preview Builds
Digital Deluxe Preorder rewards:
*Limited time exclusivity. Available for everyone at a later date.
- All Preorder rewards
- Deluxe Pet Follower
- Deluxe Armor Transmog Set
- Original Soundtrack
- Digital Artbook
At the moment, we can only confirm this preorder for Steam and Epic Games Store. For those of you excited for Mandragora to arrive on consoles, we know you might feel a little disappointed by the lack of preorder availability. Please rest assured we’ll share more news for you too as soon as we’re able!
If you have any further questions, please let us know here in the comments or over on our Discord[discord.gg]! We can’t guarantee we’ll be able to provide you with a detailed answer at this time, but we’ll do our best to be as helpful as we can in answering any questions you may have.
"side-scroller" part is a huge turn off for me. But I'll await for 'dex opinions. I hope someone here tries the demo and writes their impressions.


