RPG Codex Review: Neverwinter Nights – Tyrants of the Moonsea
RPG Codex Review: Neverwinter Nights – Tyrants of the Moonsea
Codex Review - posted by Infinitron on Sat 16 March 2024, 00:02:55
Tags: Beamdog; BioWare; Luke Scull; Neverwinter Nights; Neverwinter Nights: Tyrants of the Moonsea; Ossian Studios[Review by Gargaune]

I’ve got places to be, levels to gain!
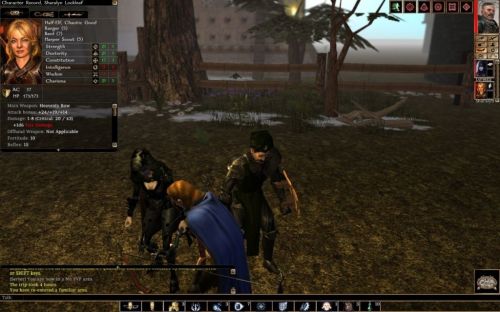
Some investigations are more tactful than others.

Luke Scull, you have my permission to use this on the box.
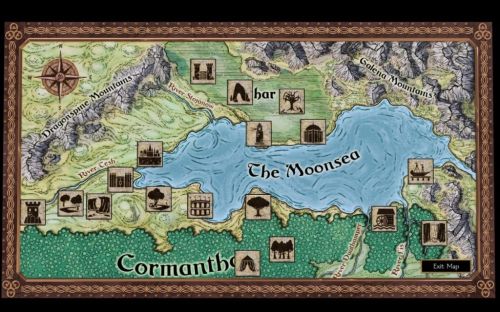
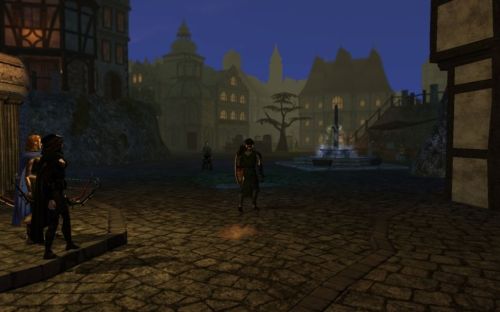
“It’s a dangerous business, Frodo, going out into the Moonsea.”

“The dark be nice but blast this damp!”
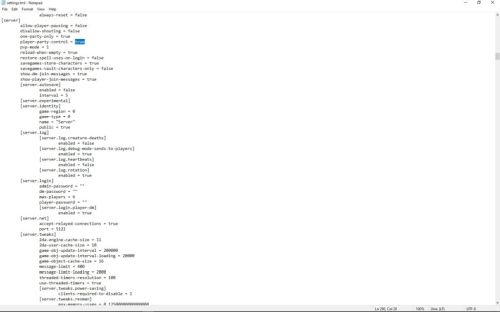

Enabling party controls will improve your gaming experience and your love life.
Moonsea tourist attractions include getting tired, making friends and hardcore gambling.
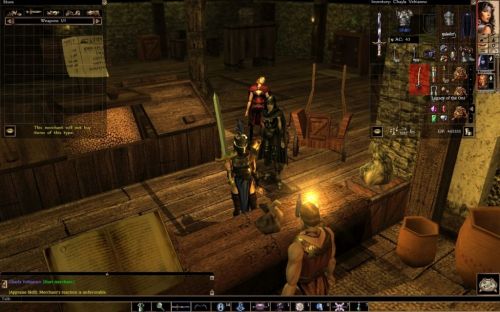
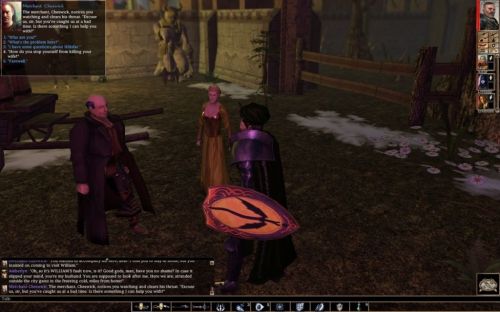
Sheesh, lady, I just asked to see your goods…

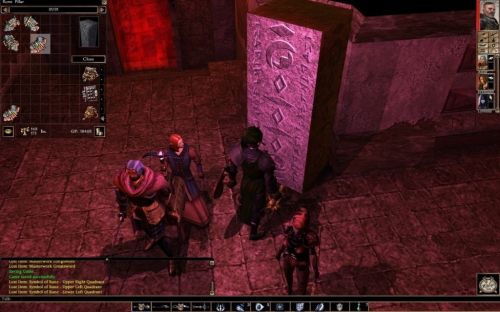
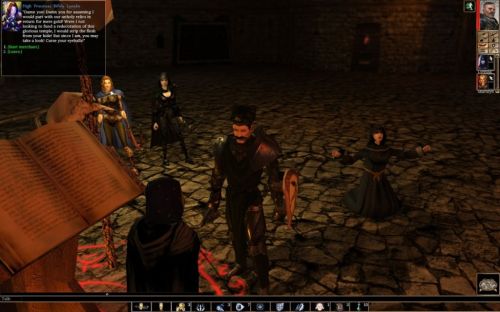
Ominous Zhentarim tomes always make a good first impression!
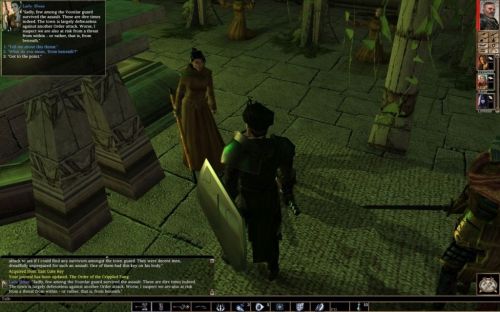
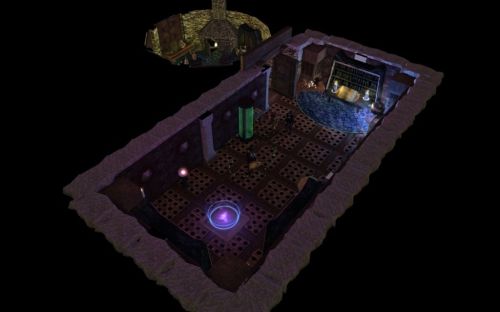
Gloomy… Just the way I like it!
Something tells me rent varies a bit between these places.
A couple of parting shots…

For a couple of years now, I've been plugging Tyrants of the Moonsea as the best piece of official content for Neverwinter Nights, and yet I've begun to suspect few of you have hearkened to my sage advice. So I thought to myself, this one's never had a proper official review around here, why not put that front page to good use?
Authored by Luke Scull under Ossian Studios, 2019’s Tyrants of the Moonsea is arguably the flagship expansion pack for Beamdog’s Neverwinter Nights: Enhanced Edition 2018 re-release. Like the first NWN:EE expansion, Darkness over Daggerford (Enhanced Edition), it was born of Atari’s Premium Modules program for the original BioWare release of Neverwinter Nights and similarly scuttled when the publisher suddenly cancelled that initiative, but DoD was nearing completion and Alan Miranda’s Ossian decided to share it on the Neverwinter Vault, whereas TotM was still in the early stages of development. When Beamdog acquired the NWN license, Ossian finally got the opportunity to polish up and make DoD:EE available as paid DLC, but the adventure's content is still the same that was (and continues to be) available for free on the Vault. The Vault version of TotM, however, was just a demo and the module was only completed for the EE, pretty much tripling the content and taking the plot to its conclusion.
TotM is also the third instalment in the "Alazander" series (Scull's moniker in the NWN scene), continuing the story of the Siege of Shadowdale and Crimson Tides of Tethyr community modules, both of which have recently been retooled for Beamdog's Enhanced Edition. The three modules centre themselves around standalone events - unrest in Shadowdale, a monstrous invasion in Tethyr, demonic raids in the Western Moonsea – unconnected to one another at first glance, but unravelling their plots begins to paint the picture of a common, underlying conspiracy, and they can be played with the same PC or a new one for each episode. Indeed, TotM presents itself as a soft sequel to either CtoT or DoD (which also ends in a similar level range) when, halfway through the game, the PC has an opportunity to reference the events of these adventures as canon, though it's purely a matter of flavour and the protagonist is also afforded the option of denying any connection to either.
Separately, Scull's been working on a new Blades of Netheril series of community modules, the first of which, Doom of Icewind Dale, has recently entered Closed Beta and I suspect may release to the public this coming April or May. Ostensibly, this new epic-range series is intended to continue the story of the Hero of Neverwinter, the discarded protagonist of NWN's original campaign, but will also serve to resolve the common plot of the Alazander series by its finale, tying the two together.
“Dare and beware!”
But enough about history and continuity, let's have a look at TotM itself. The year is 1373 DR and your PC, already an adventurer of wide repute, is hired to escort the merchant caravan of a dwarf by the name of Madoc. Your destination is the town of Voonlar and the region would be rather perilous on the best of days, but ominous rumours of demonic incursions have driven the old dwarf to pay through the nose to hire the very best of heroes – the kind that strut around with a camera floating in their wake. The walls of Voonlar are within sight when your otherwise mercifully uneventful trip is interrupted by a broken wagon wheel, giving you a chance to set up your character and have a chinwag with Madoc while a hired hand tends to the repairs. I won’t go any further because I don’t want to spoil the story at all for you, but rest assured that the main quest will follow in short order and Voonlar is not about to give you Hommlet flashbacks.
I’ve got places to be, levels to gain!
Right off the bat, you’ll know you’re not on the Sword Coast anymore, Toto. Returning to the Moonsea should be a treat in and of itself to D&D grognards and novel enthusiasts, harking back to a time when the Eastern Heartlands of Faerun were the setting of choice for the Forgotten Realms, before 3E moved the focus to the now more familiar Western Heartlands and the Sword Coast. For those new to the region, TotM offers you ample opportunity to take in the local colour not just through dialogue and environmental storytelling, which do an excellent job already, but also through a sizeable number of in-game books littered about, covering everything from places to power players to Zhentish jargon in bite-sized formats. Suffice it to say, however, that you’re far from the nicer parts of the Sword Coast or places like the Dalelands or Cormyr, ruled by enlightened, independent folk or wise, benevolent lords… No, much of the Moonsea coastline is a dangerous and oftentimes oppressive place, a field contested by bloodthirsty autocrats, where war, purges and slavery are commonplace. Not to say that the Sword Coast’s all idyllic or that no corner of the Moonsea is safe from evil, not at all, but here the titular “tyrants” hold a bigger slice of the geographic pie.
In a setting dominated by villainy and high stakes political manoeuvring, TotM will let you visit a number of famous locales, including the dreaded Zhentil Keep, and go rubbing shoulders with infamous characters you’ve read about, the module’s like a love letter to this corner of the Forgotten Realms. Naturally, the notorious Black Network are present in full force, but unlike in more recent adventures you’re used to, you’re playing on their home turf now, theirs and that of their rivals. That said, don’t go in expecting to redraw lines on the map by the end, this is a story that has to be woven into already established lore regarding the history of the region, and at the end of the day, you’re just one pawn on a very large chessboard.
In a setting dominated by villainy and high stakes political manoeuvring, TotM will let you visit a number of famous locales, including the dreaded Zhentil Keep, and go rubbing shoulders with infamous characters you’ve read about, the module’s like a love letter to this corner of the Forgotten Realms. Naturally, the notorious Black Network are present in full force, but unlike in more recent adventures you’re used to, you’re playing on their home turf now, theirs and that of their rivals. That said, don’t go in expecting to redraw lines on the map by the end, this is a story that has to be woven into already established lore regarding the history of the region, and at the end of the day, you’re just one pawn on a very large chessboard.
Some investigations are more tactful than others.
Assisting you in your travails is a cast of six companions falling into the standard warrior/mage/thief schema, of which you’ll be able to have up to three at a time beside you. If you’re tempted to use a mod like the OHS Henchman System to roll your own full party on this module, I’d recommend you don’t, at least not on your first playthrough, because your supporting cast are interesting enough and they have their own parts to play in the adventure. We’re not talking about Mask of the Betrayer-level engagement or complexity, but it’s worthwhile – some will have a role to play in the main events, some have their own, separate content to delve into, but most have something to offer. Ironically, I actually appreciate that asymmetry in their writing because it makes them feel more believable as a group that have their own drives, but you also didn’t accidentally stumble upon a collection of people who all just “happen” to be super important to what you’re doing. The one thing I’d ding TotM on here is their initial introductions, since their motivations for hooking up with you came across as arbitrary fiat but, without getting into spoilers, their progression thereafter felt quite natural and organic to the events unfolding.
To balance out the praise here, I believe there was an opportunity to have a couple more henchmen in the adventure, and I’m thinking of a pair of characters in particular. The setup was there and I actually thought they were potential henchmen gated by some specific quest choices and was looking forward to picking them up on my third go, but it turned out that they can only be recruited for a specific plot event and won’t join as full henchmen for the rest of the adventure. The companion cast is sufficient as-is and I’m well aware that writing such characters isn’t a trivial effort, but much of the groundwork was already in place and having a bit of extra redundancy could’ve certainly added to TotM’s replay value.
While the main plot’s development is fairly linear, dialogue provides enough room to act out different character alignments and personalities, and you get a good bit of agency in resolving individual quests and stages. Sometimes the reactivity presents hard, mechanical and narrative outcomes, others it’s purely flavour, but you consistently feel like you’re playing a character of your making rather than superficially clicking along with a preset protagonist. I’ll also praise the narrative design for giving Evil PCs a fair shake – the general moral agency still works on the good/neutral/evil format, but unlike many other modules, TotM’s writing more adequately translates that last one to “villain” than merely “jerk”… most of the time! Again with the MotB parallel, it’s not on that level, but fun enough that it spurred me to commemorate my second playthrough with this sophisticated piece of fan art:
Luke Scull, you have my permission to use this on the box.
Spreadsheet Codex
Now that we’ve dealt with why you do things, let’s move on to how. As I’ve mentioned, the sequence with the broken wagon wheel is just a diegetic staging area allowing you to get your character ready for the coming adventure, which you’ll come into with either a fresh-rolled PC or by importing an existing one. The formal starting level for TotM is 15, but the functional minimum is actually 13, meaning a character of at least level 13 won’t get any level boost, whereas anything under that will get a free XP grant up to 15. If you’ve come in with a greenhorn PC, the game will also spawn some class-appropriate levelled gear into the chest inside the wagon to save you going in with your Studded Leather Armour and sad little Short Sword, though a new protagonist will still get more challenge from combat and the economy. After that, you’re free to take a quick rest to refresh your abilities before continuing to Voonlar and a roughly 25-hour (single-player only!) romp. Across three fairly thorough playthroughs, I ended once at level 21 and twice at level 22.
“It’s a dangerous business, Frodo, going out into the Moonsea.”
Structurally, the module can be split into three main segments. The sequence that takes you from Voonlar through Hillsfar and two major locations after that is a fairly linear progression despite already presenting you with a beautiful world map, a feature that Ossian first brought to NWN with the original release of DoD. You’ll have a good supply of optional side content to engage with but, by and large, you’re on a straight path taking you from one place to the next, Icewind Dale-style. Once you’re through with that, however, and have experienced a couple of plot twists to boot, you get access to a ship that puts you within striking distance of the four other major destinations you get in the Moonsea – Mulmaster, Thentia, Melvaunt and Zhentil Keep. At this point you’re told to tackle them in whichever order you like, digging up leads on your quarry, picking up side quests and, naturally, hitting the shops. Each one of the Moonsea’s urban centres will have a couple of quests to be started in them, some resolved locally, others requiring travelling to other places, and an optional dungeon of some manner. Aside from this, there’s nothing wrong with a little bit of serendipitous exploration, as the odd unmarked location can turn up questless combat encounters and, naturally, loot! The format here is similar to Baldur’s Gate 2’s non-Athkatlan locales (think Trademeet or the Umar Hills), each city has one or two main areas and a tidy amount of content but none of them are massive mainstays to explore nor does TotM ever set you loose on a contiguous countryside, like Darkness over Daggerford or the original Baldur’s Gate. Once you’ve had your fill of the open world and turned up some key leads for your main plot, you can chase up those directions and get nudged (albeit not exactly shoved) into the adventure’s climax, and I can honestly say it’s a pretty epic affair!
But if the plot demands you visit all city hubs, is it a TRÜE open world? Sort of... Per the old BioWare formula, you'll find yourself strung along to all the major locations at some point or other, but the game won't force your nose into every nook and cranny and some significant things can change depending on how you prioritise certain steps. In other words, there is a point of no return which can lock off an amount of side content, a point which may be intuited but isn't necessarily signposted. I'm being coy because I don't want to spoil stuff for you, and if you want to experience TotM completely blind, you should stop reading this paragraph right here and move on to the one below (seriously, right here!). If, however, you want to be sure you maximise content on your first playthrough, I'll give you the slightest hint - make sure you wrap up all your sightseeing before you go galloping across any wilderness, you'll know when you get to it.
But if the plot demands you visit all city hubs, is it a TRÜE open world? Sort of... Per the old BioWare formula, you'll find yourself strung along to all the major locations at some point or other, but the game won't force your nose into every nook and cranny and some significant things can change depending on how you prioritise certain steps. In other words, there is a point of no return which can lock off an amount of side content, a point which may be intuited but isn't necessarily signposted. I'm being coy because I don't want to spoil stuff for you, and if you want to experience TotM completely blind, you should stop reading this paragraph right here and move on to the one below (seriously, right here!). If, however, you want to be sure you maximise content on your first playthrough, I'll give you the slightest hint - make sure you wrap up all your sightseeing before you go galloping across any wilderness, you'll know when you get to it.
“The dark be nice but blast this damp!”
I’ve mentioned dungeons and TotM has a healthy supply of them. Ossian’s other NWN entry, DoD, was quite lacklustre in this department, so it’s a relief that this module alternates open wilderness and proper dungeon areas regularly, with the usual variety of traps and bespoke encounters. The biggest criticism I can level at them is that they don’t tend to be particularly labyrinthine – some are large enough to accommodate a couple of forks and traversal loops, though quite a few come down on the smaller and more linear side. But while none of them could make a claim to being branching “mega-dungeons” filled to the brim with secrets and puzzles, and you’ll find much more impressive constructions in other modules, TotM’s spelunking sessions aren’t five-minute affairs either, they’re well-paced and well-stocked and should be able to hold your interest for the duration. Puzzles aren't all that plentiful or memorable, either the dungeon or quest sorts, but they are present and range from rote "find the four thingamajigs to slot in here" to more organic affairs, e.g. some players will know what's up when told they're to fight a Magic Golem, the rest had better explore available dialogue or they're in for a nasty surprise.
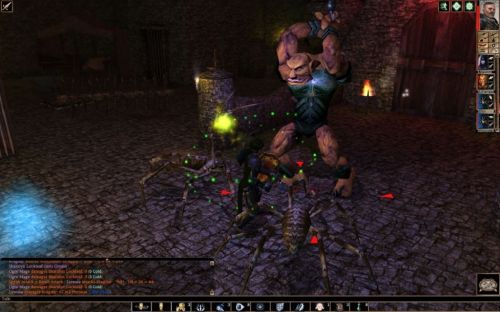
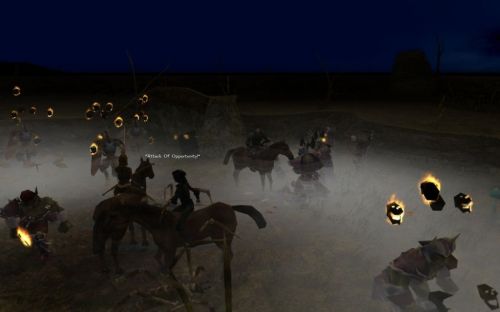
Difficulty-wise, TotM is pretty much along the lines of vanilla NWN content like Hordes of the Underdark, which is to say it isn’t especially hard while also not a walk in the park. Grizzled Swordflight veterans are unlikely to find anything particularly challenging, but regular gamers can be well served by playing on D&D Hardcore Rules, meaning the steady string of trashmobs will be effective as a source of progressive attrition, softening you up for some boss encounters which can genuinely put you through your paces, and controlling for disabling factors like Fear or save-or-die abilities is meaningful. The game swaps enemy palettes regularly and with wide variety, you'll fight undead in one place, cultists and demons in another, goblinoids over there or even hostile adventuring parties and so on. There's enough variety that you could make good use of all the different specific enhancement bonuses offered by the Altar of Blessings if you cared to, but most trashmobs aren't difficult enough to warrant it. This is common for Epic-range 3E D&D, as the power curve past level 15 tends to favour the player and it becomes challenging for designers to guard against all moving parts while also not making the game impenetrable to the average consumer, and I probably wouldn’t advise playing on low difficulty levels unless you’re new or really struggling for some reason. The module’s generous with special utility loot, trinkets like Gems of Seeing, Ioun Stones or magical rods, which will expand a given character’s abilities beyond their natural competencies and provide that additional versatility in tackling various battlefield situations. Personally, this is more up my alley and I found TotM to be gratifying in terms of general challenge, but hardcore min-maxers aren’t likely to break a sweat.
Difficulty-wise, TotM is pretty much along the lines of vanilla NWN content like Hordes of the Underdark, which is to say it isn’t especially hard while also not a walk in the park. Grizzled Swordflight veterans are unlikely to find anything particularly challenging, but regular gamers can be well served by playing on D&D Hardcore Rules, meaning the steady string of trashmobs will be effective as a source of progressive attrition, softening you up for some boss encounters which can genuinely put you through your paces, and controlling for disabling factors like Fear or save-or-die abilities is meaningful. The game swaps enemy palettes regularly and with wide variety, you'll fight undead in one place, cultists and demons in another, goblinoids over there or even hostile adventuring parties and so on. There's enough variety that you could make good use of all the different specific enhancement bonuses offered by the Altar of Blessings if you cared to, but most trashmobs aren't difficult enough to warrant it. This is common for Epic-range 3E D&D, as the power curve past level 15 tends to favour the player and it becomes challenging for designers to guard against all moving parts while also not making the game impenetrable to the average consumer, and I probably wouldn’t advise playing on low difficulty levels unless you’re new or really struggling for some reason. The module’s generous with special utility loot, trinkets like Gems of Seeing, Ioun Stones or magical rods, which will expand a given character’s abilities beyond their natural competencies and provide that additional versatility in tackling various battlefield situations. Personally, this is more up my alley and I found TotM to be gratifying in terms of general challenge, but hardcore min-maxers aren’t likely to break a sweat.
Enabling party controls will improve your gaming experience and your love life.
I suppose this would also be the appropriate time to remind people of Beamdog’s upgraded Party Control feature – this isn’t a TotM system, it’s an (unfortunately hidden) engine-level option that was added to NWN:EE, but it can make a big impact on the quality of your gameplay. Basically, these new controls allow you to manually select one or more party members (including your own PC) and issue precise instructions to “move there” or “attack that.” To enable it, go into \Documents\Neverwinter Nights\settings.tml and change the value of player-party-control to true. Then, in-game, you can select one or more party members by holding down Ctrl while left-clicking them or their portraits (or you can even hold down Ctrl and click-drag a marquee selection) for a blue circle highlight, then hold down Shift while left-clicking a target location or enemy. Note that a single click is “walk to” while double-clicking is “run to”, and you may want to issue a Stand Your Ground order beforehand if you don’t want henchmen to come right back. Restricting it to movement and combat might seem short of modded solutions (e.g. Balkoth’s Minion Control) but it also means it’s applicable to all NWN content, limiting the potential to break properly-scripted modules, and while it’s not a panacea for the game’s obstinate AI, it’s more than enough to make a huge difference in play. All classes will benefit tactically, but especially ranged and mage types (also endowed with spellcasting AoE indicators in the EE), who can now enjoy more build variety safe behind a leading warrior.
Travelling across the world map doesn’t involve random encounters like in the first Baldur’s Gate, but it does provide a few setpiece ones as we saw in Siege of Dragonspear, with a couple of them being overland and the rest at sea. An exception to this rule are the ruins of old Zhentil Keep, comprised of a collection of respawning areas explored in random order, which will also have a random chance of spawning a specific quest target, and there’s another single-fire quest encounter at sea which also occurs randomly. Technically, the aforementioned area in Zhentil Keep could affect the level range as you can keep farming mobs for XP, but in a practical sense it’s unlikely since the random spawns are scaled on the low side and it would take a very… “determined” player to significantly upset the levelling curve.
Travelling across the world map doesn’t involve random encounters like in the first Baldur’s Gate, but it does provide a few setpiece ones as we saw in Siege of Dragonspear, with a couple of them being overland and the rest at sea. An exception to this rule are the ruins of old Zhentil Keep, comprised of a collection of respawning areas explored in random order, which will also have a random chance of spawning a specific quest target, and there’s another single-fire quest encounter at sea which also occurs randomly. Technically, the aforementioned area in Zhentil Keep could affect the level range as you can keep farming mobs for XP, but in a practical sense it’s unlikely since the random spawns are scaled on the low side and it would take a very… “determined” player to significantly upset the levelling curve.
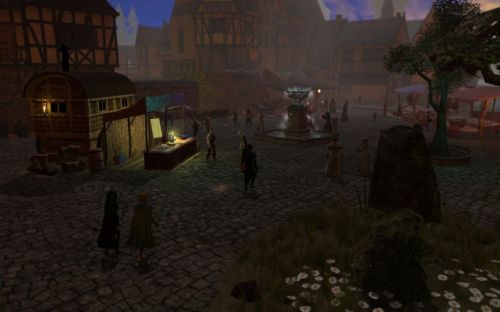
Moonsea tourist attractions include getting tired, making friends and hardcore gambling.
Related to travelling, you should also be aware that TotM implements a fatigue system similar to DoD where going more than 36 in-game hours without resting will have your party members take a general debuff of -1 to all Abilities and having them yawn and play a tired animation. While it’s a nice feature, it does have the same minor annoyance that DoD did where swapping equipment in the inventory will be delayed while that animation plays out, and it’s less relevant in actuality because of how the world map is structured – some travel distances are measured in just a couple of hours and will contribute to your fatigue ticker, but many take more than the minimum 8 hours which triggers a free, automatic rest, resetting your fatigue and sparing you the chance of a hostile spawn (because yes, resting in dangerous areas may spawn a random encounter on top of you). It’s also worth pointing out that standard Immunity to Level/Ability Drain will prevent the debuffs, though the visuals still play.
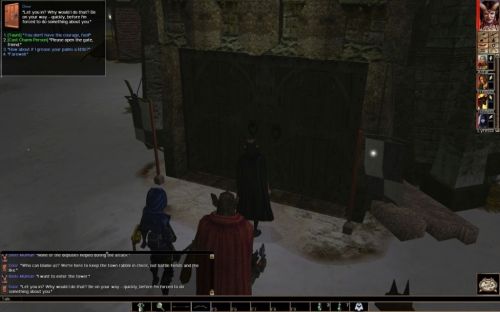
Another design distinction that’s worth bringing up (which should delight spellcaster enthusiasts) is that some dialogue interactions might feature special alternatives to getting your way. Playing a Wizard on my first go, I was quite chuffed to find I could gain access to the Bron’s tower in Voonlar by casting Charm Person while conversing with the guard. In fact, subsequent inspection in the Toolset revealed it to be one among several possibilities, alongside Charm Person or Animal, Dominate Person, Taunt, Dirty Fighting and Wounding Whispers. Yes, I suppose I’ve robbed you of the surprise here, but it felt remiss not to highlight this excellent little bit of quest work. Obviously, this is a design setpiece, not a systemic implementation, but it’s indicative of the elaborate thought and care that went into the game’s making. Counterintuitively, the traditional Persuade/Bluff/Indimidate options aren’t present here, and I really think they should’ve been albeit with punishing DCs, but I can understand that the featured options of “talking” your way past the obstacle in this scenario were offered as special shortcuts over the other regular methods of progress.
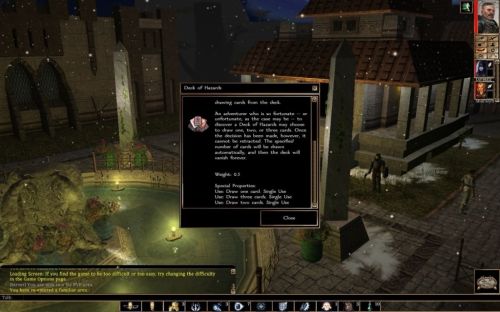
Also, this game possesses a Deck of Hazards. This item is like a little brother to the infamous Deck of Many Things, single-use and more limited in its potential effects, but every bit as capable of making your day or utterly ruining it – you might draw two cards and jump for joy as the first gives you a free level-up, only to then despair as the second sticks you with an incurable illness or turns a companion permanently hostile. You’ve been warned. Oh, and since we’ve touched on special loot, there’s another very interesting item I’d love to discuss, but since I don’t want to ruin the surprise, all I’m going to say is (no need to scroll past this one) that it doesn’t look like what you’d expect, but Baldur’s Gate 2 fans, trust your shopping instincts!
Another design distinction that’s worth bringing up (which should delight spellcaster enthusiasts) is that some dialogue interactions might feature special alternatives to getting your way. Playing a Wizard on my first go, I was quite chuffed to find I could gain access to the Bron’s tower in Voonlar by casting Charm Person while conversing with the guard. In fact, subsequent inspection in the Toolset revealed it to be one among several possibilities, alongside Charm Person or Animal, Dominate Person, Taunt, Dirty Fighting and Wounding Whispers. Yes, I suppose I’ve robbed you of the surprise here, but it felt remiss not to highlight this excellent little bit of quest work. Obviously, this is a design setpiece, not a systemic implementation, but it’s indicative of the elaborate thought and care that went into the game’s making. Counterintuitively, the traditional Persuade/Bluff/Indimidate options aren’t present here, and I really think they should’ve been albeit with punishing DCs, but I can understand that the featured options of “talking” your way past the obstacle in this scenario were offered as special shortcuts over the other regular methods of progress.
Also, this game possesses a Deck of Hazards. This item is like a little brother to the infamous Deck of Many Things, single-use and more limited in its potential effects, but every bit as capable of making your day or utterly ruining it – you might draw two cards and jump for joy as the first gives you a free level-up, only to then despair as the second sticks you with an incurable illness or turns a companion permanently hostile. You’ve been warned. Oh, and since we’ve touched on special loot, there’s another very interesting item I’d love to discuss, but since I don’t want to ruin the surprise, all I’m going to say is (no need to scroll past this one) that it doesn’t look like what you’d expect, but Baldur’s Gate 2 fans, trust your shopping instincts!
Sheesh, lady, I just asked to see your goods…
Getting into more minutiae, one gameplay aspect that's critical to RPGs but often gets overlooked in reviews is the economy, and TotM's bears inspection in particular. As a relatively high-level campaign, it's quite vulnerable to Monty Haul itemisation breaking the bank, but Scull's approach to restricting the traders' end keeps it viable throughout most of the adventure. First, every merchant has limited funds that only get replenished with your purchases; second, they have their own buy/sell markups which can make a big difference; and third, they also have their own buy caps, ranging from 5000 to 25000 gold. Additionally, some merchants are only interested in certain item types, e.g. an apothecary won't take that shiny full plate of your hands. Technically, there's one instance where you can sell with unlimited funds, though I'm reluctant to mention it because I'm not sure whether it was intentional or an oversight on Luke's part and it doesn't change too much in the grand scheme of things.
You'll have seen this sort of "market regulations" in various other modules and they're often effective but also quite frustrating in making your development seem boxed-in and hamstringing the pleasure of adventuring for loot, but what makes it work so much better in TotM is the distribution of available merchants. This is an open world adventure and each of the major locations will usually have three or four traders, plus a couple others in random places, each with their own benefits and limitations, and that means the game affords another mechanical dimension where a shrewd player can plan their mercantile travels, whom to buy from and whom to sell to, in order to maximise profits! Because, yes, yes, archmages and demons and bears, oh my, but did you know that lady in Zhentil Keep will give me an extra 200gp per Longsword +2? While you can more than get by with just what you loot from treasure and fallen foes, merchants also have various shinies at exorbitant prices, from generics like top-tier Rings of Protection to unique weapons and armour, such as the Iron Skeleton, so churning some extra gold is worthwhile if you intend to deck your party out in the Realms' fineries.
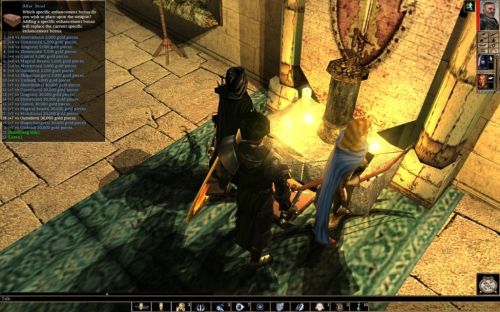
Aside from traders' goods, another business you'll want to save some coin for is the aforementioned Altar of Blessings at the Temple of Tempus in Hillsfar. In exchange for some hefty donations, Tempus will bestow up to three magical properties onto any melee weapon of your choosing – a general enhancement bonus, a specific bonus against an enemy type, and an additional damage bonus. These blessings come in different magnitudes commensurate to yourbribes faith and note that they will replace any magical property of a similar type (e.g. adding +1d8 Fire damage will replace a +3 Negative damage bonus) but other types of enchantments stay. Also note that this only applies to melee weapons because "Tempus does not bestow favour on those who kill from a distance" (mages and pointy-ears get out). This isn't just a convenient money sink but also an apt solution to an issue with weapon specialisation in 3E – while it's easy enough to provide an adequate selection across the various kinds of ranged weapons, a designer can only plan ahead for so many crazy kukri/dwarven axe dual-wield melee combinations, so TotM gives the player some leeway for whatever munchkin build they come up with.
You'll have seen this sort of "market regulations" in various other modules and they're often effective but also quite frustrating in making your development seem boxed-in and hamstringing the pleasure of adventuring for loot, but what makes it work so much better in TotM is the distribution of available merchants. This is an open world adventure and each of the major locations will usually have three or four traders, plus a couple others in random places, each with their own benefits and limitations, and that means the game affords another mechanical dimension where a shrewd player can plan their mercantile travels, whom to buy from and whom to sell to, in order to maximise profits! Because, yes, yes, archmages and demons and bears, oh my, but did you know that lady in Zhentil Keep will give me an extra 200gp per Longsword +2? While you can more than get by with just what you loot from treasure and fallen foes, merchants also have various shinies at exorbitant prices, from generics like top-tier Rings of Protection to unique weapons and armour, such as the Iron Skeleton, so churning some extra gold is worthwhile if you intend to deck your party out in the Realms' fineries.
Aside from traders' goods, another business you'll want to save some coin for is the aforementioned Altar of Blessings at the Temple of Tempus in Hillsfar. In exchange for some hefty donations, Tempus will bestow up to three magical properties onto any melee weapon of your choosing – a general enhancement bonus, a specific bonus against an enemy type, and an additional damage bonus. These blessings come in different magnitudes commensurate to your
In the eye of the beholder
Perhaps another aspect that TotM stands out with is its presentation, which is impeccable. Although Beamdog’s new shaders and renderer pump some most welcome vibrance into NWN’s ancient bones, the foundation is still a twenty year-old videogame, so you really need to leverage everything you’ve got to please the eye. And this module is very much a reminder that a little finesse in art direction goes a long way on any technical platform.
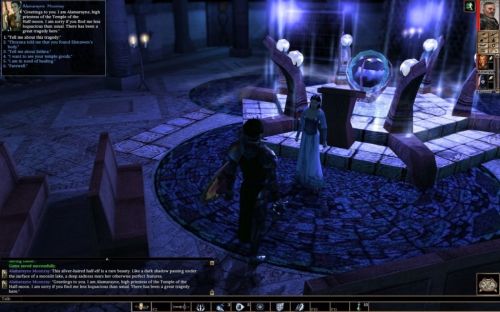
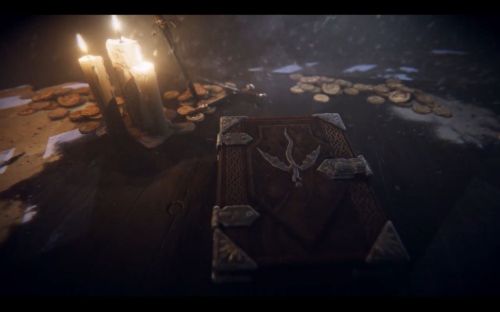
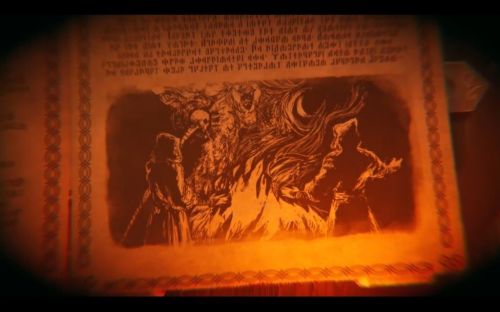
Ominous Zhentarim tomes always make a good first impression!
Right from the start, we’re hit with a beautiful pre-rendered cinematic that blends 3D animation and classic 2D illustrations. The artwork is sparing but well crafted and, together with the narration, clues us in immediately as to the tone of the adventure ahead of us. And when you’re done playing, there’ll be a matching outro with minor variations depending on your denouement. All of this would be meaningless to the rest of the game, sure, but it already shows us that Beamdog didn’t go for cheap on this thing. As you’d expect, a handful of new portraits for key characters are also part of the package, all consistent with the original’s art style, and you’ve got some bespoke loading screens as well.
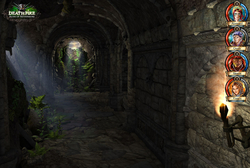
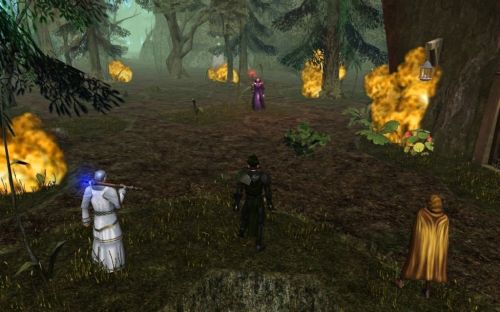
Gloomy… Just the way I like it!
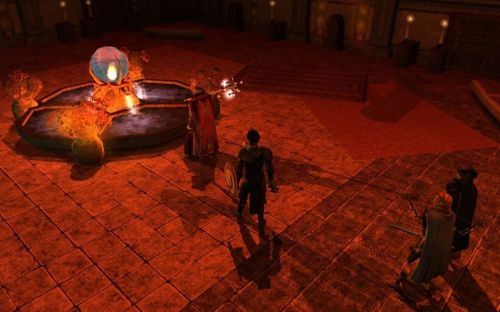
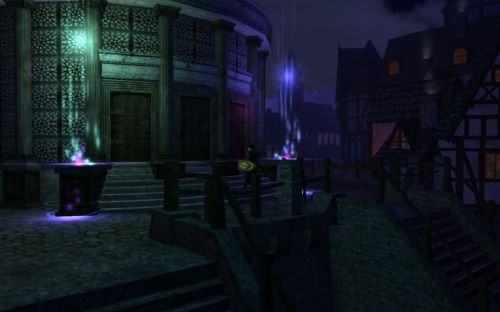
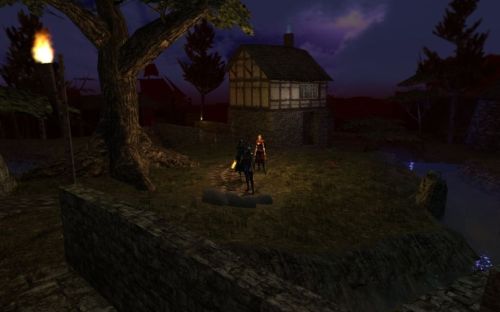
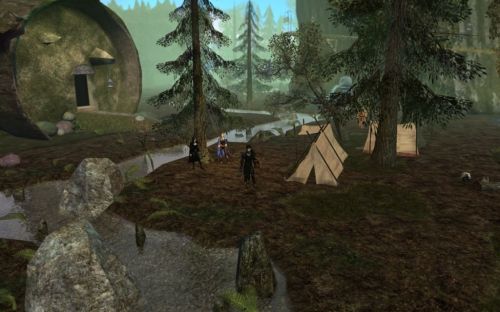
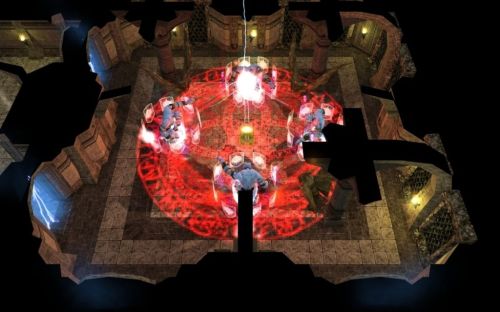
What I’m most happy about, however, is the environmental art direction. If you just hate NWN’s blocky aesthetics, this expansion isn’t going to magically change that, but I’ve long maintained that careful image composition can still keep this game visually enjoyable and TotM hits that mark. Areas are well structured, cities in particular are encapsulated with ample borders in such a way that creates an illusion of scope beyond the immediate map, and placeables are aptly used to decorate levels. Special care was given to the lighting configuration, subtly setting the mood with flattering contrasts and colour compositions. You’ll find an archmage’s tower drenched in red glow, arcane violet fires scintillating in a gnomish laboratory, twilight over Elmwood fading into an eerie scarlet haze, none of this is accidental and it shows the area designer has a flair for lighting the stage. There is a trade-off that, in pursuing those rich hues, the ambient lighting has to be dimmed and some areas can appear a bit murky even in the daylight, but the overall effect through the campaign is a solid win. The game also has quite a few in-engine cinematic sequences which are nice to punctuate the plot, but obviously won’t do much for close-ups.
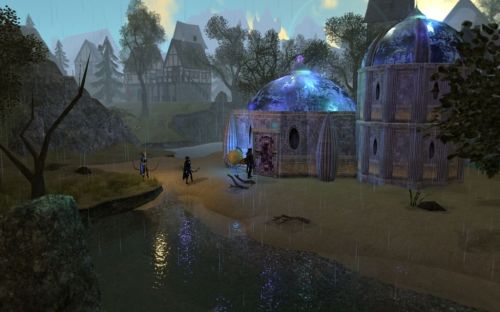
And, of course, another key benefit is the inclusion of yet more community-made assets, particularly the work of prolific tileset creator Zwerkules. These are higher-fidelity than the original tilesets of the 2002 BioWare release but still fit within that polygonal aesthetic such that they don’t jar with any of the vanilla content, and they offer an immense amount of customisation that allows places like Mulmaster and Melvaunt to feel distinct despite sharing the same tileset. The impressive number of area types now available in the Toolset, coupled with various decorations and lighting setups, means no two main locales look the same, and it gives the adventure a very good sense of place and scale.
And, of course, another key benefit is the inclusion of yet more community-made assets, particularly the work of prolific tileset creator Zwerkules. These are higher-fidelity than the original tilesets of the 2002 BioWare release but still fit within that polygonal aesthetic such that they don’t jar with any of the vanilla content, and they offer an immense amount of customisation that allows places like Mulmaster and Melvaunt to feel distinct despite sharing the same tileset. The impressive number of area types now available in the Toolset, coupled with various decorations and lighting setups, means no two main locales look the same, and it gives the adventure a very good sense of place and scale.
Something tells me rent varies a bit between these places.
The audio side got a similarly loving treatment, with an appropriate complement of professional voiceovers – good recordings and good performances – as well as its own OST, featuring moody ambients by Mark Braga, minstrel tunes by Kalen Smith and combat tracks by Will Musser. All of it is well in tune (how often do you get to say that literally?) with the original Jeremy Soule NWN soundtrack, but I’d like to give Musser’s pieces a shoutout in particular, because they’re clicking with me a lot more than the original combat music ever did. And these new tracks have also been included in the Toolset for modders to build with.
In terms of technical polish, the module’s been quite stable and reliable for me. I encountered a rare crash when exiting a store in Elventree and I’m pretty sure I ran into a bug once where a plot boss got stuck with an invulnerability flag the one time (fixed on reload), but other than that I’d struggle to think of anything. I guess I could point to an oversight in dialogue design where companions keep referencing the last major plot even instead of marking it done and moving on to a generic dialogue greeting, but we’d have to really start scraping the bottom of the barrel to find any more complaints.
In terms of technical polish, the module’s been quite stable and reliable for me. I encountered a rare crash when exiting a store in Elventree and I’m pretty sure I ran into a bug once where a plot boss got stuck with an invulnerability flag the one time (fixed on reload), but other than that I’d struggle to think of anything. I guess I could point to an oversight in dialogue design where companions keep referencing the last major plot even instead of marking it done and moving on to a generic dialogue greeting, but we’d have to really start scraping the bottom of the barrel to find any more complaints.
A couple of parting shots…
“Cast off your old beliefs and be saved!”
Looking back to the Infinity Engine and even many of its contemporary peers, Baldur’s Gate 2 is king (no matter how much that might make some of the local fauna seethe), but why? Icewind Dale had better combat, the first Baldur’s Gate had better exploration, Planescape: Torment had better writing etc. – all of that is true, but Baldur’s Gate 2 was pretty darn good at all of it. That's what gets it top billing and the same qualities apply to Tyrants of the Moonsea for NWN – you should easily find other modules, official or fan-made, that do better in various individual respects, but Ossian's title scores high on all counts and if you enjoy NWN at all (if you don't, you should never admit it!), passing on TotM would be a big mistake.
Now, if the byzantine brandings and histories have left you confused, allow me to make it simple – Tyrants of the Moonsea is for sale on GOG, Steam and the Beamdog Client. If you also want to check out its prior episodes in the Alazander series, they're free on the Neverwinter Vault as Siege of Shadowdale Enhanced Edition and Crimson Tides of Tethyr Enhanced Edition or in NWN:EE's integrated content browser. For historic purposes, links to the Diamond Edition distributions of those two modules are on their respective Vault pages under Related Projects.
So there you have it, I've led you to the water, I've even forced your snout in, the rest is up to you. Drink and you'll get the full flavour of competent writing and design, solid production values and artistic direction, fun combat and exploration… To put it simply, Tyrants of the Moonsea is, at this time, the definitive single-player NWN experience.
There are 74 comments on RPG Codex Review: Neverwinter Nights – Tyrants of the Moonsea