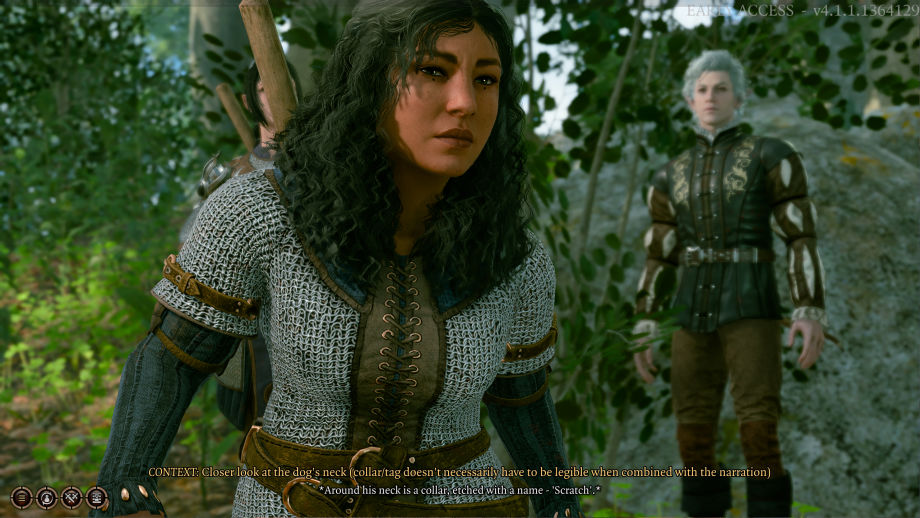
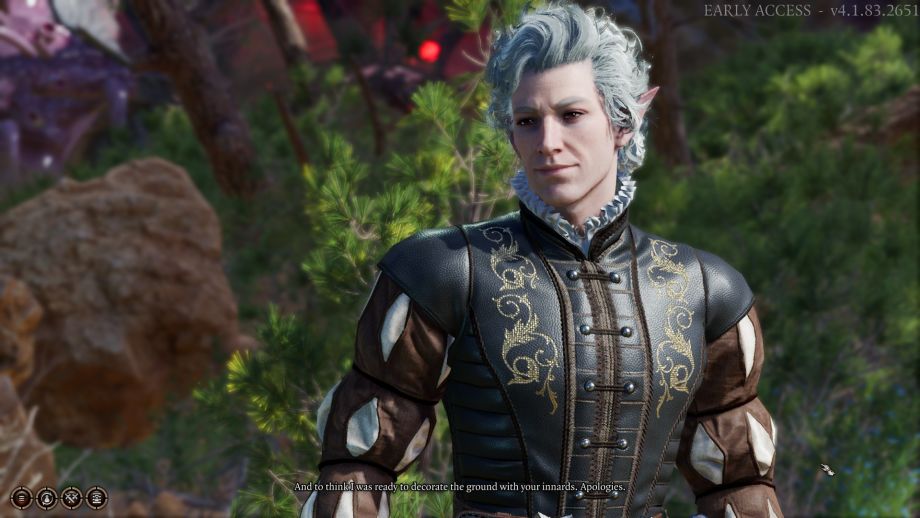
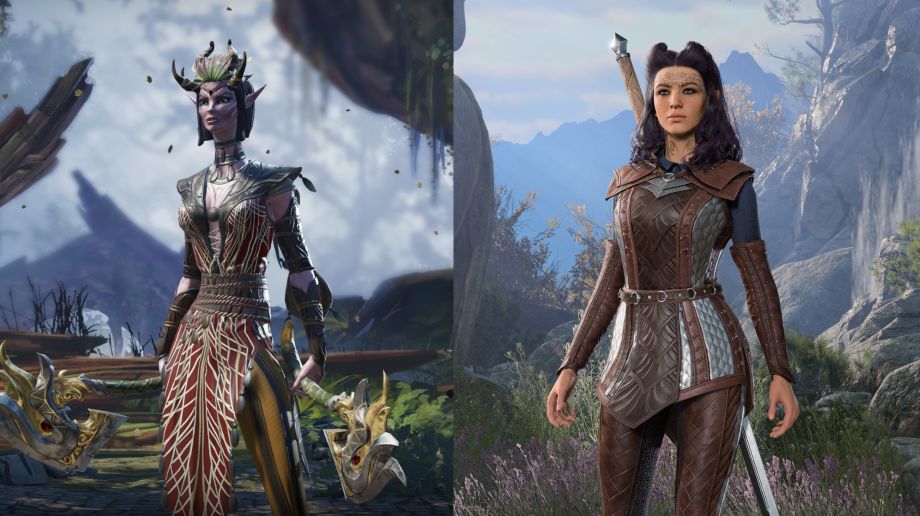
Designing a New Character
The first step is getting as much information from all the departments involved. It usually starts from the writing team and design team, since we need to know where in the game a creature or an NPC will be used and what is their story. There are usually a lot of requirements on the look of the character from the combat and systems design teams, and lots of rules and restrictions from tech animation. When all the limits and goals are established, the next step is visual direction. Direction defines the general tone and some specific visual features that should be present, and provides some reference material that would guide the Concept Artist.
After the concept is done, the modeler can start with the blockout. While blocking out a character we usually communicate with tech animation, animation, and combat design and test our blockout in the game so that everyone can agree on practical details.
At Larian we believe in the freedom of artistic expression, so the modeler is allowed to change things from the concept if need be, and in most cases, there are opportunities for modelers to come up with the design elements themselves.
Changes in the Character Art Pipeline
After Divinity: Original Sin 2, we made quite a big leap in model quality. It involved improving the character art tools, picking up new pipelines, and getting a lot of support from our graphics programming team. Roughly I can divide these changes into 4 categories:
- Heads photogrammetry
- New hair pipeline
- New graphics features and shaders
- New Character Editor tools
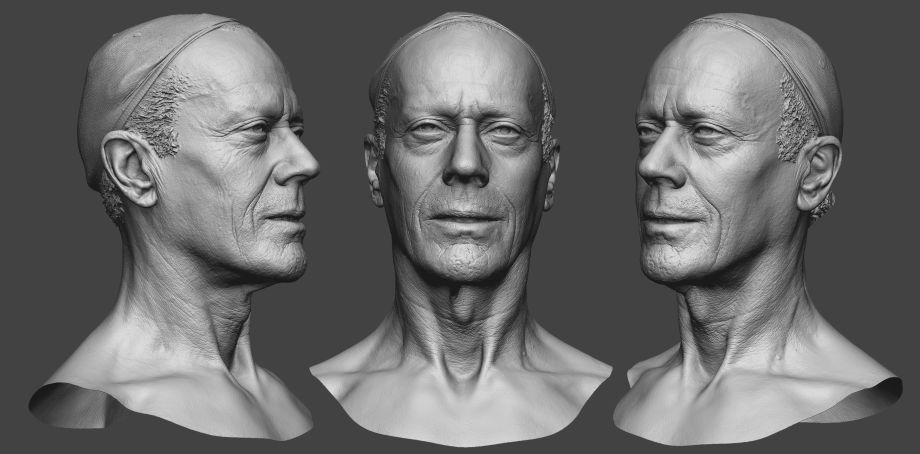
We wanted to improve our head models since we now have cinematic dialogues. So adapting the photogrammetry pipeline for our character modeling was the most natural thing for us. We partnered with the
Ten24 team and scanned 36 photo models that we used as a base for our in-game models. Head scans can not only serve as a base but also can be a great source of reference and knowledge for artists. It helps you grasp the anatomy and natural shapes of the face much better than if you would try to study it yourself only from the photo refs. In ZBrush, things look a bit different than in real life so by just looking at your sculpt and the scanned head, you can spot anatomy errors much easier.

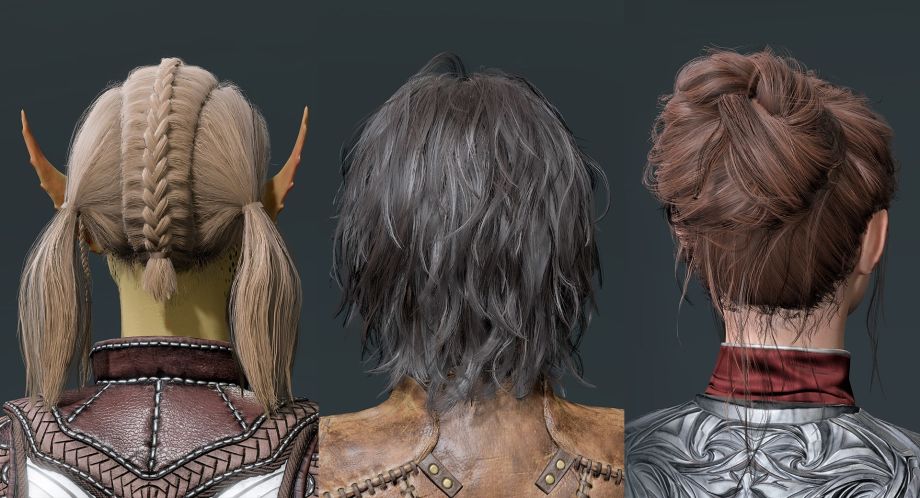
In terms of the hair, we went from full-clay-sculpted hair to the next-gen strand approach which required whole new skill sets from artists and a new hair shading model from our graphics programmers. At the beginning of the project, most of the hairstyles' designs were outsourced which helped us set the quality bar and develop the pipeline and tools we needed for the hairstyles. Our tech art team has developed a hair tool for Maya that helps us with aligning the strands and controlling the vertex colors to achieve believable results, not only for hairstyles but also for fur and feathers.
Graphics programmers also helped us push our work forward with new skin and hair shading models, improved lighting and shadow quality on characters. Volumetric Fog, SSS, automated LODs system through Houdini, and more things are yet to come.
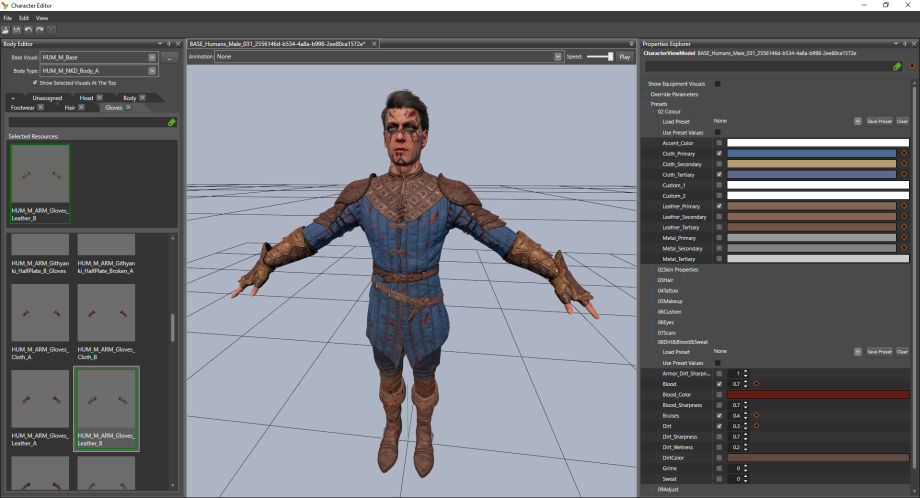
We realized that the scope of this project is going to be huge and with the quality bar we wanted to achieve we needed to focus on modularity and establish a system that would allow us to build unique NPCs from parts right in the game engine. We called this tool Character Editor, it allows you to assign meshes that are grouped by related categories to your character and exposes every parameter that is available in their shader in the right menu.
This tool allows us for quick iterations and customization for hundreds of characters and creatures in BG3.
Left Panel – one of multiple meshes could be assigned on the character from this menu. Right Panel – all the parameters that are present on the character are available here.
Since a lot of our internal tools are developed for Maya we don’t really use Blender in our production. However, a lot of artists at Larian are big fans of Blender and its rendering engine.
For BG3 we started using the Houdini engine as well on a number of things. Our tech art department uses it for automatic LOD generation, water flow generation, and destructible pipeline via the Maya plugin. Our VFX department also uses Houdini to generate vertex animation textures, for fluid simulations, RDB destruction, and complex particle simulations.
Sculpting and Modeling Workflow Changes
We certainly started to pay more attention to details. The scale of details has also changed and became much smaller since our style is more realistic now than it was in DOS2. Photogrammetry that I mentioned above helped us speed up head production and we managed to average it to 6-7 days per head instead of 11-12 days which was our estimate prior to using scans in the pipeline.
Since DOS2, using Marvelous Designer has become an essential part of our pipeline. Anything that has cloth and folds we try to simulate in MD and give it a good base before applying final details in ZBrush.
In terms of ZBrush updates and tips & tricks, I think there wasn’t anything that would noticeably influence our production timings but we really appreciate the adding so many small useful features that make artists' life a bit easier every year.
Retopology and Unwrapping
We allow artists to use any tools that they personally prefer for retopology and UVs. At Larian we use Maya, 3DCoat, Topogun, and RizomUV. For organic stuff, I personally also like to use ZBrush together with Maya for my UVs. When I was working on the common head UVs for all races some areas like the nose and eyes needed to be stretched to allow more texture resolution so UVs can hold up on faces of any race like Dwarves or Githyanki. So ZBrush tools usually come up very handy for things like that and allow for quick iterations.
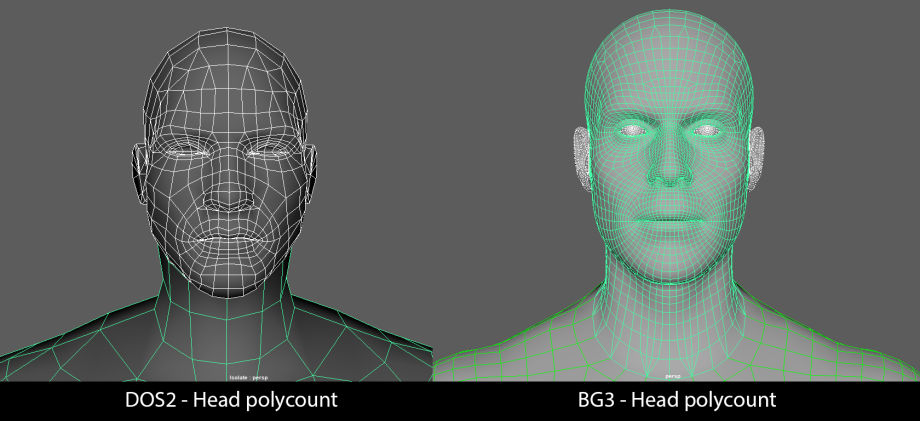
Higher polycount is actually another key in terms of how to improve your model quality. If I compare polycounts of DOS2 vs BG3, I’d say they almost doubled for characters. Most of the mid-size and even smaller details like buttons and claps are now modeled which allows the lighting to do its job so your model looks higher quality than the one with flat-baked details.
This is also one of the common things that I usually advise on most portfolio reviews – up your polycounts. I see this issue in lots of junior artists' portfolios: they tend to over-optimize their personal projects to a point that it eats up the quality of their mesh. My advice would be to always go a bit higher than needed for personal things to make sure the render looks its best.
Texturing and Shaders
One of our core requirements for most of the character shaders is customizability. The most basic customization that we have in our character shaders is color customization. So far we have 4 different types of color customization in our character shader: ID mask color customization, RGB mask color customization, skin color customization, and Gradient Map customization.
The first two use a simple system of multiplying the masked area with a custom color but the difference between them is that an ID map allows us to have 11 color parameters for each color on the ID mask vs RGB mask only allows 3, but allows blending between the masked areas.
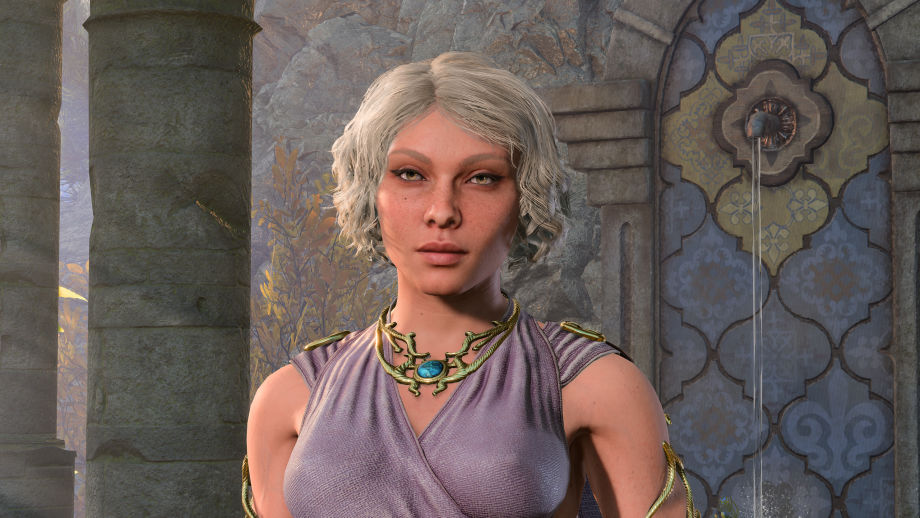
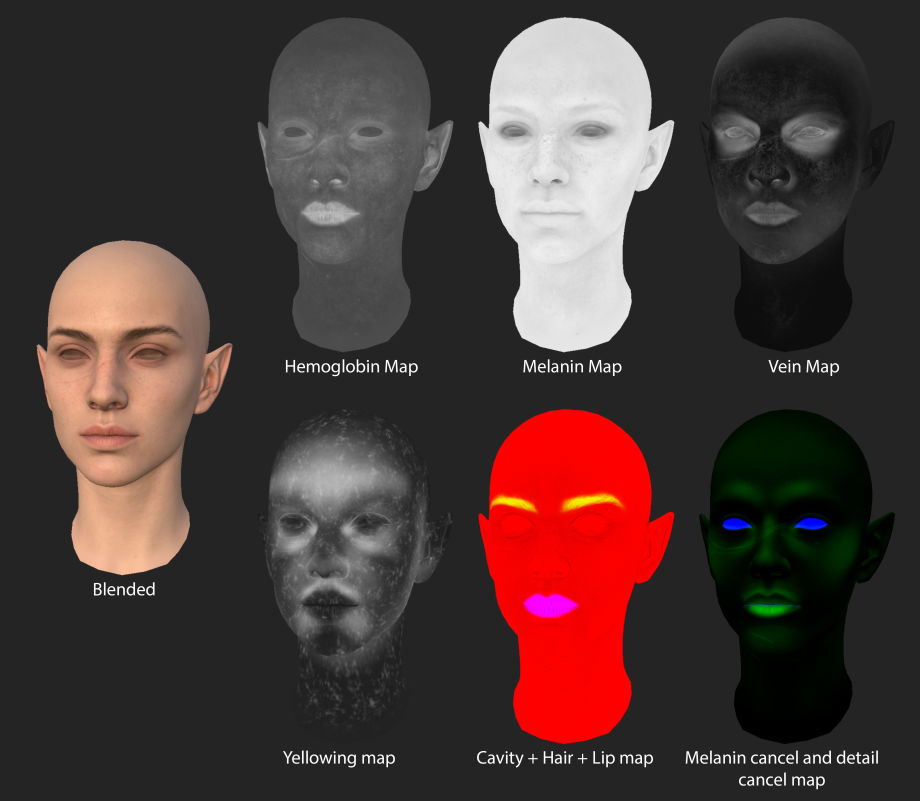
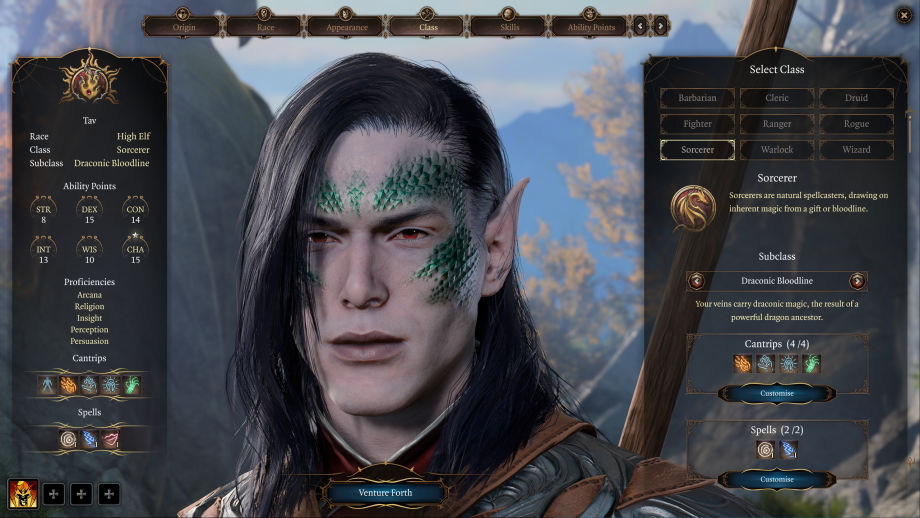
Skin is one of the most advanced and tech-heavy shaders we now have in-game. Color customization happens here by combining 4 maps: Hemoglobin, Melanin, Vein Map, and Yellowing Map. This way we can control the color details and manually adjust them to fair and deeper skin tones, which previously was a huge problem with the “multiply color” approach. On top of color customization, we have bruises, blood, sweat dirt that we can add, we can add makeup, tattoos, and scars. In our recent patch, we also added the functionality of having Draconic Bloodline scales that can appear on any head if you pick a Sorcerer subclass for your player.
Conclusion
I think the key to leveling up is looking critically at your own work and setting up some goals for yourself to improve. Try to define as well as you could what exactly you want to achieve and then research what could be helpful for you to learn or try to reach your goal. Compare your work to somebody else's work of a similar style and quality and check what your work is still missing to reach the quality bar you desire. One of the things that I personally find very helpful is looking at our competition and AAA games to understand how they did certain things.
Playing games and noticing some visual bugs or just paying close attention to how NPCs and characters look might give you some useful information on how they are made. Reading up articles and tutorials, checking out new tools that become available for character artists – all that can bring your work to the next level.
And lastly, to level up any skill, you will need to put in some hours, however, these hours might not always grow your skills if you’re just doing the same thing over and over again. If you want to learn, your work needs to meaningfully push your boundaries. Try new pipelines, experiment with your work, explore new software, and have fun with your art!




![Glory to Codexia! [2012] Codex 2012](/forums/smiles/campaign_tags/campaign_slushfund2012.png)


